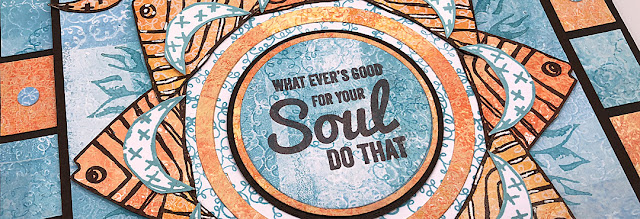
Hi everyone, it's Nikki from Addicted to Art with you today, and I'm here to share with you a Mash Up of three PaperArtsy designers - Kay Carley, Hot Picks and Zinski Art. Three very different styles, floral, vintage and quirky!
I always say I love a Mash Up - but this one was a challenge! I try to feature all the designers in a mash up rather than using one (or two!) for backgrounds only - this time it wasn't easy. Anyone who follows me may have noticed I am stuck in a geometric phase at the moment - so I decided to stick with this style to construct my piece of wall art.
I began with some gel prints using the flower imagery from PaperArtsy Stamp Set EKC44 by Kay Carley. For some of my prints I stamped off the gel plate, for some I stamped onto it. As I used groups of colours of Fresco Chalk Acrylic paints for each colour this gave some subtle contrast and texture.
For most of the prints I used a small gel plate and built up my backgrounds in blocks. For the blue prints I used Fresco Chalk Acrylics - Cerulean, Blue Moon and A Bit Fishy.
For the orange prints I chose Firebird, Persimmon and Butter. I have learned to always create more backgrounds than I think I need, as ideas develop (and things don't work!), there is nothing worse than running out of coordinating prints!
I mostly used the large flower stamp from Kay Carley Set 44 (EKC44) for my prints, but the smaller stamps were used later!
This was originally going to be my base layer until I decided on the additional square frames. I took one of the gel prints and marked some faint pencil lines through the middle to divide into 8. I then stamped part of the large stamp from Hot Picks Set HP1507.
You can see my stamp positioning was not perfect, but good enough as the central area was going to be covered. I used Ranger Archival ink (Aquamarine) to stamp the image. Look closely and you can see my pencil marks - which I erased later.
You might have noticed I cut into the stamp, rather than use it all. I do this sometimes when I know I want to use part of a stamp on their own rather than as the whole.
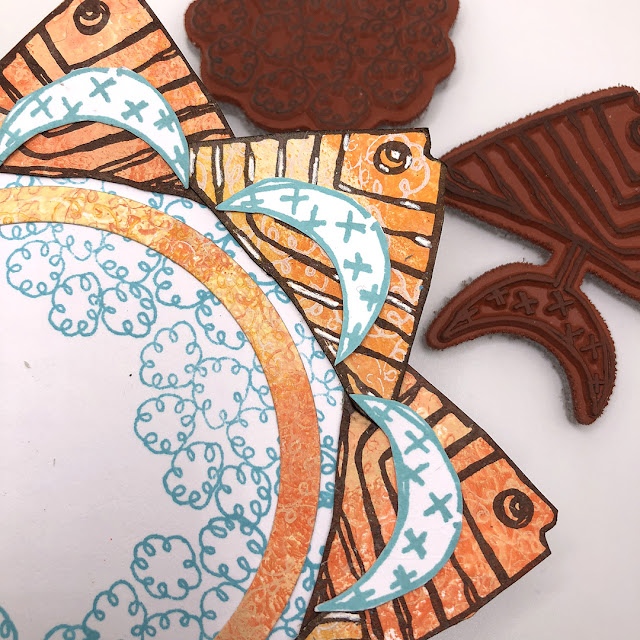
Next layer - my fish! I fussy cut the stamped fish (keeping the moon shaped tail for later) from Zinski Art Set 29 (ZA29).
These were layered onto a circle cut from white card and stamped with one of the flower stamps from Kay Carley. I also stamped some extra tails to add to this little collage.
I had stamped my fish onto two different background pieces which were slightly different, I added highlights with a white gel pen onto some of them to add to the contrast.
While positioning everything I decided I needed another layer so punched (or you could easily cut) some 1 inch squares which I mounted onto some greyboard that I had painted with PaperArtsy Fresco Acrylics.
Good job I had spare gel prints! Also used my hole punch to add a few mini circles.
There was always going to be one of the word stamps in the centre - but I could not decide which. I still haven't decided, and haven't adhered it! Any thoughts which looks best?
Mash-up's really challenge your creativity! I probably haven't used any of these stamp sets as the Designers intended them to be used - but that's ok. I have said this before, but I do find limiting myself to restricted supplies forces me to think 'outside the box'.
It's our final post from PaperArtsy HQ for 2020 and what a year it was,
Time for some thank-you-s from us !
To
our designers, who battled through to find ways to continue to bring
new classes all year long instead of teaching in stores, they partnered
with our stockists, and also offered independent content, both free and
paid-for classes, to inspire, distract, encourage and share their ideas
with all their newest products worldwide. Initially they were all very
worried this would be a tricky path to navigate, but in the end, their
willingness to shift to teaching online really fast was the right move
and well received! Families at home, people struggling with day to day
life, or those who had hours to fill all have joined with our designers
as and when they could, and learned a lot along the way. We thank YOU!
January 2020 - Build up of the PaperArtsy Booth at CreativeWorld, Frankfurt.
To
our bloggers who kept inspiration flowing when we moved from the UK to
France. Without their flexibility to create, often at short notice in
the void of an unexpected no-freight situation while we established new
contracts here, and who came up with non stop amazing content week
after week. We thank YOU!
To
all the independent retailers out there who carry our brand, thank you
for your advance planning as we closed in the UK, and for your
understanding when it took us a month longer than we anticipated to
re-open in France. Your warm emails of support, your encouraging
comments on our Instagram and for your unfailing loyalty to our
designers and
the wonderful ideas you and your teachers share with your customers.
Your loyalty to the brand and our values is amazing. We thank YOU!
Squiggly Ink Christmas Post by Keren Baker
To
Keren who has carried almost all the blog admin before, during and
since our move, who is always cheerful, happy, funny and passionate
about doing the best job she can. She has that innate ability to always
do what is right or necessary at the right time!
And
to Mr PaperArtsy, you are a forward thinker and awesome researcher.
Were it not for all the information gathering you did and continue to
do, we would not be here today starting this new phase. I love that we
get to do this together. Thank YOU! To our 4 now-adult kids. I know I
have been a stressed, menopausal moody cow at times over the last few
years, but you guys have all played your very important part to keep the
show on the road. We did not expect to move to France with all of you
in tow, but Covid had other plans. Your lives, studies and plans have
been willingly put on hold, until travel is possible, but the way you
have all stepped in to keep the PaperArtsy show on the road over the
past 2 difficult years has been amazing. You have trusted in us and
fully supported and helped, and there is nothing more fulfilling then
having you be a huge part of this journey, making our new house your
home too while at the same time also learning a new language and
culture. This is not how we expected it to be, but I am so glad that you
have all been a big part of this new journey.
Our final Christmas in the UK, Dec 2019 (minus Courtney!)
To
all our followers, customers, friends, family far and wide. Thank-you
for your support, words of encouragement and positive thinking when
things looked like the dream was not going to come together in the
necessary time frame. We hope you get to come and visit in the years to
come!
So for our final post of the year, we look back on the more recent highlights from Topics 16-20: Hinged, Day and Night, Geometric, Words of Wisdom and Icy Christmas. Read on to see just a sampling of the fantastic ideas from our superb blogging team!
Happy New Year and much love to you all! Here's to your good health and we wish you every good thing for 2021 and beyond!
Cheers!
Leandra
Topic16:Hinged
I
guess we were all feeling a bit un-hinged by this point in the year,
but the bloggers held it together, and came up with some fun projects
for this topic!
My first pick is this amazing beauty by
Ellie. She bound watercolour paper into a fantastic journal/ book and
decorated the cover. What a beautiful idea. See more here fromEllie Knol (link)
Do
we call this a hinged head? Perhaps unhinged? We love this new stamp
from France Papillon, and Keren does such imaginative things with
stamps, every time!Keren Baker (link)
Got
to love a rustic hinge! and Nikki nailed it with her well executed
rusty treatment of shiny metal to make it look perfectly aged! Nikki Acton (link)
I
did not know washi tapes hinges were possible, but with Jennie all
things are possible! A beautiful book, books really are great fun to
create, and she has several delicately decorated pages within to enjoy Jennie Atkinson (link)
Topic17:Day and Night
My first pick is this sliding beauty by Jo Firth-Young(link).
Interactive projects are really satisfying to create, and Jo has plenty
of these ideas within her classes or on her blog with her gorgeous
stamps!
And I hope you didn't missClaire Snowdon (link) and her contrasting Night-Day journal spread, what a great colour contrast with Tracy's stamps in B&W.
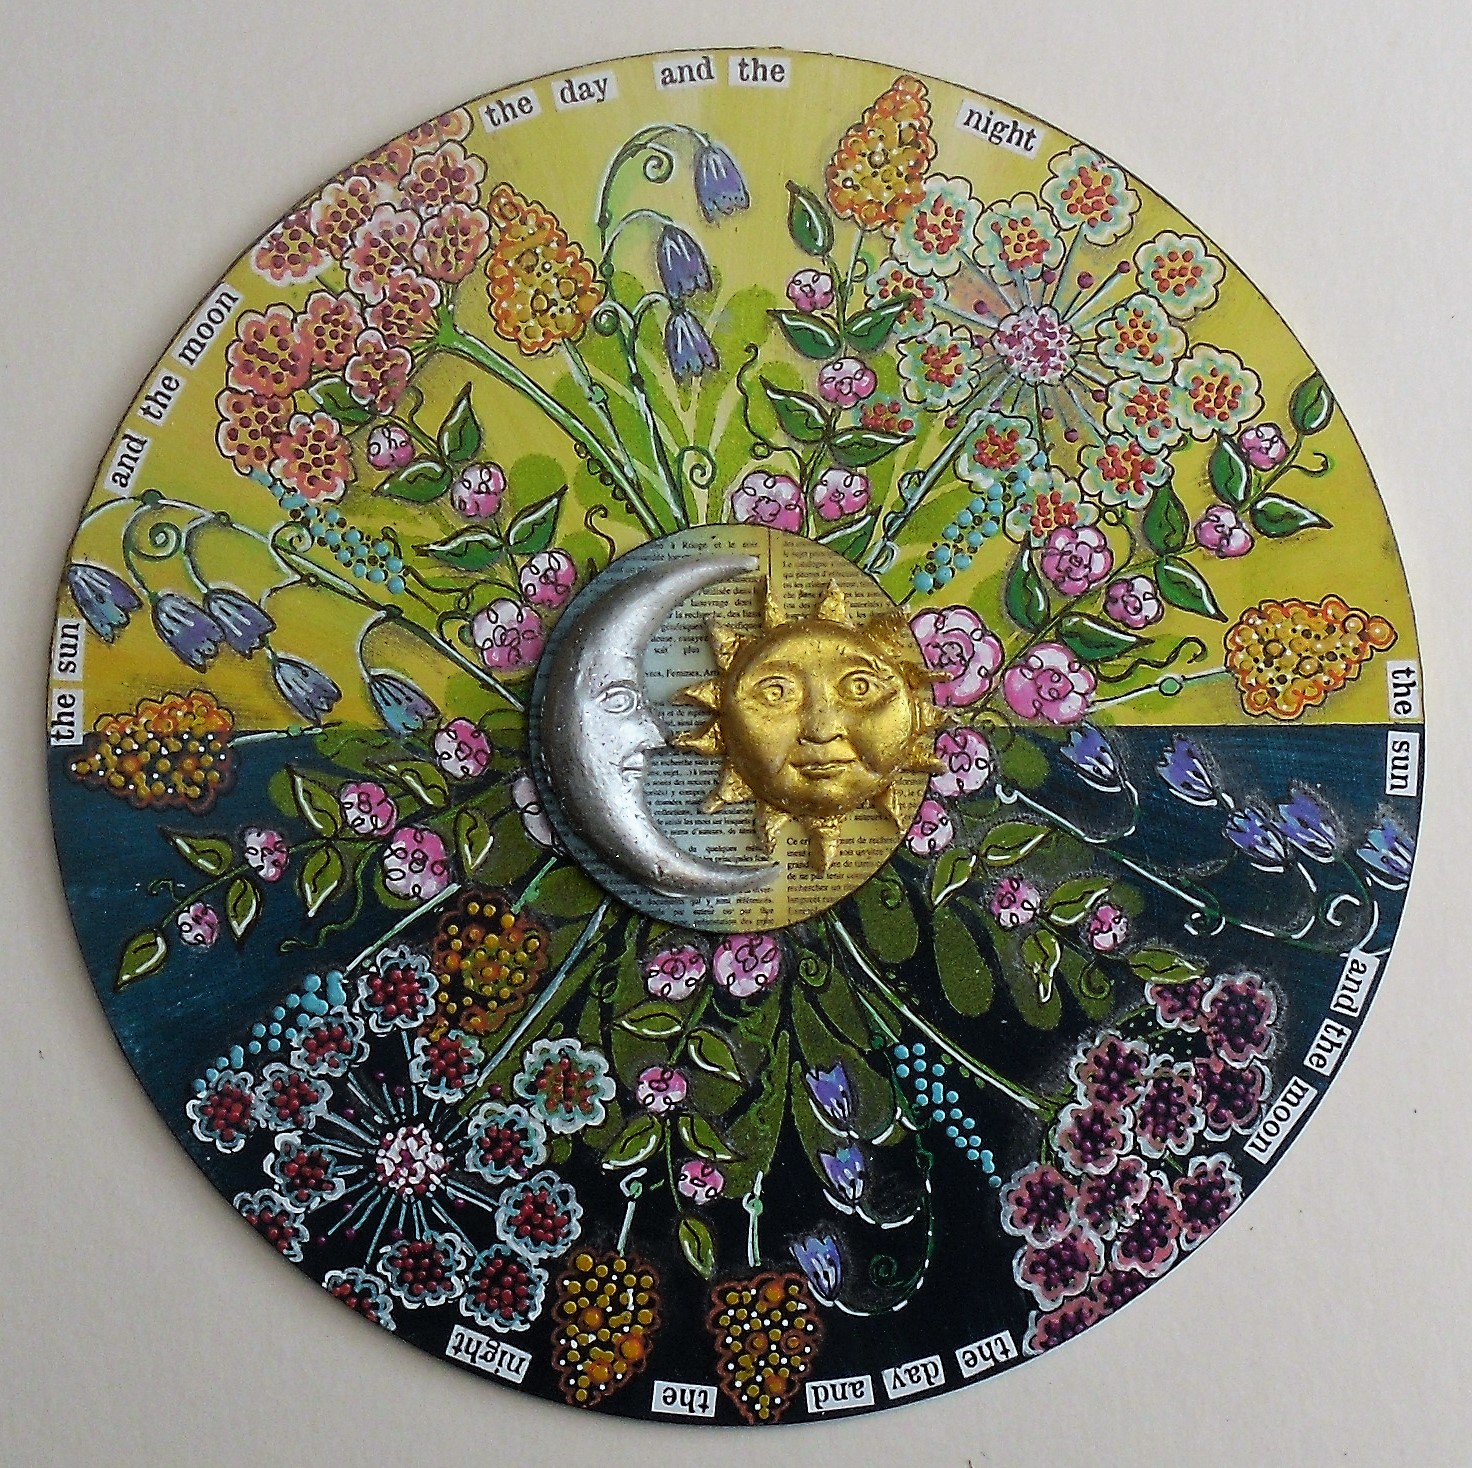
I adored howHelen Chilton (link)'s flower wheel really caught the day to night vibes, this would work so well for a seasonal wheel too!
Jenny Marples (link)
has some many great projects using Sizzix (Eileen Hull) dies, and the
way she pulled together Zinski houses with Kay Carley trees for the
cover of this booklet was fabulous!
Topic 18 :Geometric
We
have seen a lot of Geometric influences within interior decor trends in
the past year of 2, and for this topic, I knew our designers would pull
some gems out of their hats! I really loved this simple background Miriam Grazier (link) used to set off the Ellen Vargo flower.
I hope you didn't miss the amazing paper piecing Etsuko (link) did for this little booklet!
I was wowwed byKeren Baker (link)'s
layer of geometry over this vellum, you can still see the Lynne
Perrella stamp beneath, and the shapes linked to points on the stamps
below!
Topic 19:Words of Wisdom
We were all desperate for some wise words as the year came to a close! Jenny Atkinson (link) used lots of ephemera from the Ink and the Dog collection for her project.
Ellie Knol (link) filled tins with words of encouragement for her post! What a lovely and truly uplifting idea!
Miriam Grazier (link) is our biggest fan of Sara Naumann stamps, and she pulled out a beautiful sentiment for her contribution.
I
really love how Amanda Pink pulls a project together. Lots of scripts,
numbers are softly in the background, but her sentiment is perfect! Amanda Pink (link)
Topic 20:An Icy Christmas
Christmas
and cooler weather seemed a long time coming this yeaar, so perhaps it
was not so Icy as we anticipated, but the blog was dripping with icicles
and glitter!
Nikki Acton used painterly textures to great effect in this post with Seth Apter stamps and a handy palette knife to make some scratchy effects!
And I hope you didn't miss this stunning wreath by Helen Chilton with Tracy Scott stamps and Flower Foam!! (link) The technique to bring these to life is stunning so do check it out!
Kate Yetter made the cutest decorations with Gwen Lafleur stamps! I love how the composition was just idea for both gift tags and christmas tree ornaments!
And Jennie created this very Icy looking Christmas decoration, would be perfect on a mantlepiece, in soft shades of blue.
v
Once again, we wish you all the best for 2021, take good care Leandra and all of us here at team PaperArtsy
Hi everyone, it's Kerenwith you today, and I'd like to share with you a project trying to add a little geometric style into a Lynne Perrella stamp or two. I chose Lynne's stamps as they are real favourites of mine but I hadn't really planned how the topic would fit into the style of stamps. After a bit of brain fog, I decided to add an opaque layer that still showed the image, but allowed me to do a little doodling.
One of my favourite substrates (after acetate) is Duralar Matte film. I love the way you can add alcohol markers, pencils, gel pen and other markers onto it.
I trimmed out a piece of Matte film and secured it over the stamped image. I had chosen this image because of the grid - making it look more geometric than some of the other images in her stamp collection. Whilst looking at it through the overlaid film, I thought that by using the dots on the grid I could create a series of geometric shapes (mostly triangular.) I used a fine marker by Copic that I knew would dry well on the film.
Using alcohol markers, I coloured the reverse of the film. You need to use darker colours for the colours to show, but I didn't want to use too dark a colour, as I wanted to be able to see glimpses of the beautiful image showing through. The triangular shapes seemed flat, so I added highlights with a white gel pen (that surprisingly dried perfectly) and some doodled dots. It still needed extra so I added some shadow using Prismacolors.
For this project I was trying to get over my aversion to purple! I don't think I'm quite there yet but the blues and aquas helped! It definitely needed a sentiment so I added in one from JOFY72.
To keep the film and cardstock together, I sewed 3 lines of stitching in blue, purple and white.
I coloured in small sections of the stamped image with Prismacolor pencils and added a few stamped circles from LPC024.
There were just some little details to add; using the stacked squares on the image and a little strip of the main image. A simple enough card that was very therapeutic to create.
Although this ended up as a card, I wish I'd been more ambitious in planning a more complex project. I'll have to find someone 'worthy' (haha!) to send this to. Maybe I'll cut the back off the card and create a journal cover with it instead.
I hope you get the chance to have a doodle or sketch today, it's a wonderful panacea for the stresses of the day and the climate we find ourselves in.




















 v


