Saturday, 29 February 2020

2020 #4 Mighty Mica: Lynne Perrella Pendants {by Cat Kerr}

2020 Topic 4: Mighty Mica


Introduction:
We have another new face to the blog today, but I'm sure she is known to many of you. It's Cat Kerr, and she is a whizz with jewelry ideas, and for this post, she has come up with a fantastic pendant using the new Lynne Perrella stamps.
~ Leandra

Hi everyone, 

Cat Kerr here and I am thrilled to be sharing my new Multi-Layered Pendants with you today! 

As curiosity-driven artist, I am always on the hunt for new material combinations. There's nothing I love more than having the opportunity to take non-related materials and figure out how to marry them together to create one piece of jewelry, with one voice. 

Figuring out the layers is the fun part and in today's project, I do exactly that by combining materials such as Paper Artsy Stamps, Metal, Leather, Mica and so much more! Plus I share all the steps with you so that you too can create multi-layered pendants! 

Check out the video I've made of the process below...


The beauty of creativity is that there are no limits. When it comes to creating layers, everything and anything can be incorporated into your project. 

As I type this now I have a sheet of Clear Craft Plastic on my work table, I have Seth Apter's Embossing Powders, and a pile of monoprints I created...all of which would make interesting layers in my next project. 

What about you, what do you see in front of you that can be incorporated into your next Multi-Layered Pendants?! 

Happy Creating friends, 
Cat 
          
Website: https://www.catkerr.com/  
Facebook: https://www.facebook.com/cat.kerr2  
Instagram: https://www.instagram.com/catkerr92/  
Pinterest: https://www.pinterest.com/catkerr/ 

Be sure to sign up for my newsletter here for upcoming workshops and product release dates.

Friday, 28 February 2020

2020 #4 Mighty Mica: Beautiful moments with EGL {by Corrie Herriman}

2020 Topic 4: Mighty Mica


Introduction:
The composition of this canvas has so many delicate details to be appreciated - tone on tone stamping, using white or light paints to knock back a darker paint colour, using a stamping platform to great effect, coloured pencils, and of course, mica! Corrie shares each step so well, I'm sure by the end you will see how all those steps make a difference!
~ Leandra

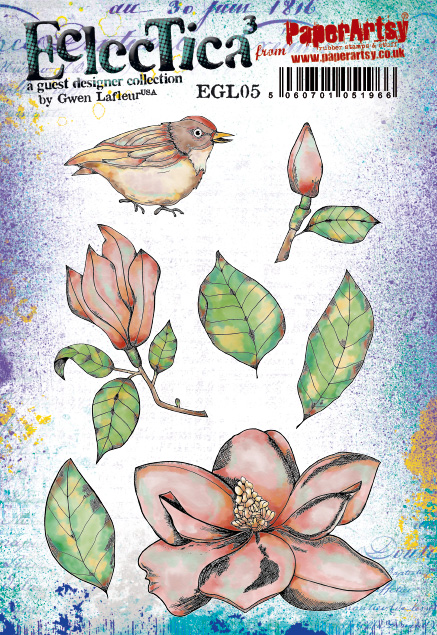
Hi everyone, it's Corrie with you today, and I'd like to share with you a 20 x 20 cm canvas that I made with the beautiful new stamps by Gwen Lafleur. 

I was so excited when I received this gorgeous stamp set {EGL05} which is one of my favourites from the new release. I had never worked with mica, apart from with mica powder, so I went in search of some sheets it as I really wanted to try it. Unfortunately I could only find one pack and it was dark brown; not what I wanted so it was back to the drawing board to come up with another idea. When I found some mica flakes in the back of the cupboard that I had never used, I decided to use those instead.


This is what I came up with. It is a 20 x 20 cm (about 8" x 8") canvas. It was fun to make and putting the pieces of mica on the flowers was a labour of love. Here's how it came together:


I really enjoy colouring with Copic Markers but for this project I thought I would do something different. I stamped the whole set onto some {Smoothy Card} and left all the stamps in the stamping tool so I could re-stamp them later in the exact same spots. 


I used PaperArtsy Fresco Finish Chalk Acrylics to paint all the stamped images. Looks a mess like that but wait and see ! I used these colours : {Snowflake}, {Nougat}, {Gold Rush}, {Tinned Peas} and {Blue Bayou}. I used these same colours throughout the project. 


Remember I left all the stamps in the stamping tool. Here's why: all the stamp lines were gone because I painted over them, I just had to put it back into the stamping tool and re-stamp. I used Archival Ink in {Jet Black} to stamp before and after painting.


I then added a little bit of shading on all the images using coloured pencils. This worked a treat ! I then cut all the images out and went around the cut lines with a black marker to make it look like I cute them out perfectly!


Next I sat down with a cup of tea and added mica flakes, one by one to the flowers and the buds, so all the blue paint is covered in mica. It is such a shame that you can't really capture the shimmer/glitter in a photograph very well. Believe me though, it is very pretty and sparkly ! Next I turned my attention to the canvas.


I decided to keep the background really simple because I wanted those beautiful images to be the stars of the show. I painted the canvas with some Fresco Finish Chalk Acrylic in the colour {Nougat} and then added some stencilling with mask {PM008} By Emma Godfrey using the {Blue Bayou} Fresco Finish Chalk Acrylic. 


Because I wanted the images to shine I knocked the stencilling back with more Fresco Finish Chalk Acrylic, using the {Nougat} again and also the {Gold Rush}. I mainly used my fingers to do this. I also decided to add some dictionary words because I thought it would go well with my canvas. They are the words: Flora, Natural and Fauna.  After this I added the images together with a part of a word chip by Tim Holtz which I coloured with a Copic Marker to get it rid of the stark white.

When the images were adhered, I used some dimensional tape as well here and there, I thought it needed something else so I added a tiny bit of stamping. I used some Ink & the dog minis for this. They were {MN56} and {MN75}. 


As I said I really love this stamp set by Gwen Lafleur and I really enjoyed using it. I can see lots of other uses for it, including birthday cards, art journal pages (my next project) and even tags and ATC's. I really like how my canvas turned out and wonder how it would have looked in different colours and with maybe just a background made with mica powders or mica sprays. I hope I gave you some ideas to have a go yourself. 

Thank you very much for being here today and I hope you'll visit me at my other locations too : 

Thursday, 27 February 2020

2020 #4 Mighty Mica: Art Journal Page with JOFY {by Lynn Good}

2020 Topic 4: Mighty Mica


Using mica subtly can really lift your art. This fabulous floaty floral art journal page is adding a real zing to our Mighty Mica topic. Love all the doodled details to the JoFY images.

Hi everyone, it's Lynn from Memories On The Page with you today, and I'd like to share with you an art journal page that I have created this month using the awesome JOFY91 stamp.

As soon as I saw this stamp I knew it was one that I had to have in my collection and couldn't wait to create with it for the Mica theme. What a great stamp to use with Spectrum Noir Sparkle Pens that contain Mica.


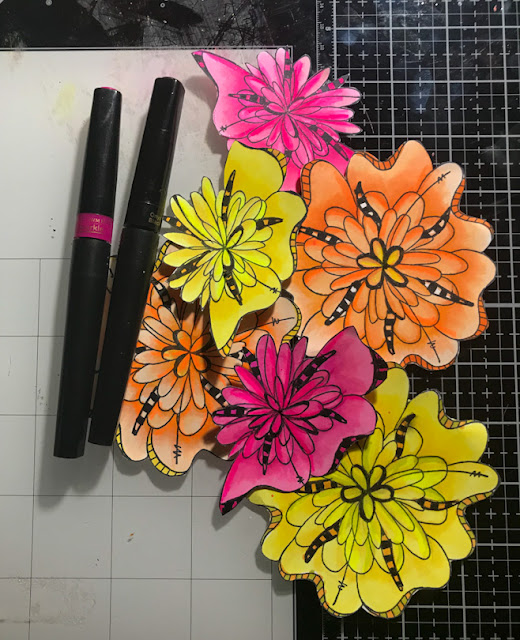
I began by stamping out the flowers onto Paper Artsy Smoothy Card then colouring them.  I have used Copic Markers to colour and Spectrum Noir Sparkle pens to highlight.  I haven't worried about the edges as I am going to fussy cut them out.


Once I have stamped and coloured enough - the fussy cutting begins.


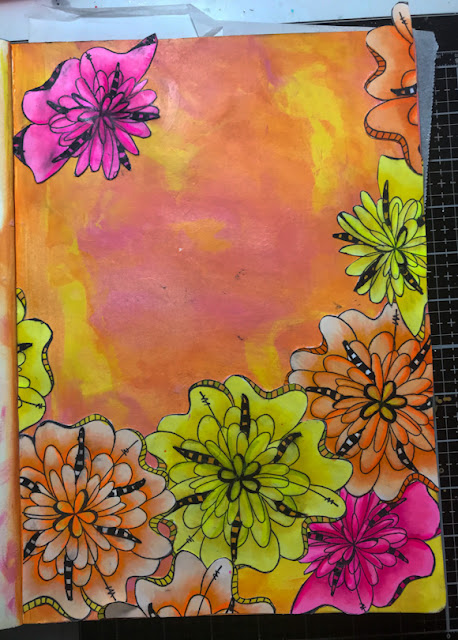
I then coloured the background of my art journal page using Paper Artsy Fresco Finish Paints - Zesty Zing, Bubble Gum and Tango.


I then put the fussy cut flowers in place and adhered with Matte Medium.


Next, I stamped around the background with mini stamp MN22, then used black ink through stencil PS135


It is hard to photograph the mica in the flowers, but where the dull look is - that's actually mica and looks awesome in real life.


I have then added the title which is from JM40.  I stamped this onto plain orange cardstock and coloured using the Spectrum Noir Sparkle Pens.


I have then added some white marks around the layout by colouring in some of the petals and scribbling around the stencilled flowers. A black edge completes the layout.


This was so much fun that I would love you to have a go yourself.  Find your favourite stamp and let loose with the colour - just remember the colour wheel rules; choose colours next to each other or opposite.

Thanks for stopping by and don't forget if you are going to create a page, we would love to see it, so upload it to the Paper Artsy People page on Facebook.

Til next time - happy crafting!

Lynn.

Blog:  memoriesonthepage.blogspot.com.au

Wednesday, 26 February 2020

2020 #4 Mighty Mica: Vintage Gelli Print Journal with ESC {by Autumn Clark}

2020 Topic 4: Mighty Mica


Introduction:
Autumn has a gorgeous in-depth project tonight, you can see how she totally got caught up in the making of this! What a delight!
~ Leandra

Hi everyone, it's Autumn Clark from SewPaperPaint with you today, and I'd like to share my latest journal/mini album featuring the glorious newly released PaperArtsy Eclectica {Scrapcosy} Collection.  

When I saw Raquel's new stamps and stencils my heart melted and I really wanted to create a soft, vintage book to showcase them.  For days I couldn't stop adding more and more layers and bits to my pages and even now as I see the final photos, I am beckoned to go back and play in it yet again... (so forgive me for such a long post please :))


Having been a stamper for some 20 years I have quite the collection of odds and ends from trends that have come and gone, sheet mica being among the others.  I knew it would be beautiful with these stamps and a palette of Fresco Chalk Acrylic Paints in: Blue Oyster, Waterfall, Toad Hall, Sage, Hint of Mint, Taupe, Concrete, Cloud 9 and Chalk.  

Eclectica {by Scrapcosy} Sets 19 & 20: ESC19 & ESC20

PA Stencil 191 {by Scrapcosy}: PS191

PA Stencil 108 {by Scrapcosy}: PS108


I used the bird image from ESC19 on my opening spread, but also wanted to use it on my cover; what a beauty he is!  First I stamped him directly onto my gel-printed papers using a stamp platform, then painted him with the above mentioned Frescos and overstamped him again for definition.   

To make the images stand apart from one another, next I stamped him onto vellum with black Archival ink and then painted the top of the vellum so I could flip him over and use the image in reverse.  The result was so soft and much more delicate.  


By starting with simple color printed pages, I was able to add stamping, stenciling, and layers wherever I wished and built my composition in reverse around the focal elements.  


For my foreground stamping, I used scraps of gelli printed pages and stamp platform as described above.  When I felt like the images needed a little more shading, I did so with watercolors.  This is why I love working with Fresco paints so much, because the matte finish allows for such dynamic layering.  Here I mixed stamps from ESC18 with one of the new stencils, PS191.  They all work so beautifully together.  

Eclectica³ {Scrapcosy} Set 18: ESC18

PA Stencil 191 {by Scrapcosy}: PS191

This stamping/painting/repeat stamping technique with the platform allowed me to paint over the words in the circle frame stamp and I covered the circles with die cut letters.  I used the excess paper in my book construction to make little flaps and belly bands to store ephemera.  I love using embossing folders with my prints for adding additional texture.  A gentle sanding reveals the pattern.


I added some Distress Oxide stamping here and used the coordinating Distress Oxide Spray over PA106 stencil.  All of my mica was stitched in place, though it doesn't show well in the photos.  The subtle shimmer works perfectly with these soft colors.  Flowers and birds and tea, of course!  I had to mix in ESC16, but used the dotty image in ESC19 to give the teacup a pattern.  

Eclectica³ {Scrapcosy} Set 16: ESC16

PA Stencil 106 {by Scrapcosy}: PS106


Because my gel-prints were done on both sides of the paper to make this book, I accidentally tore one of my beloved stamped dogwoods in half.  Upon realizing this, I used them on opposite sides of one spread, but painted them differently so that they seem to be different flowers all together.


So many details...


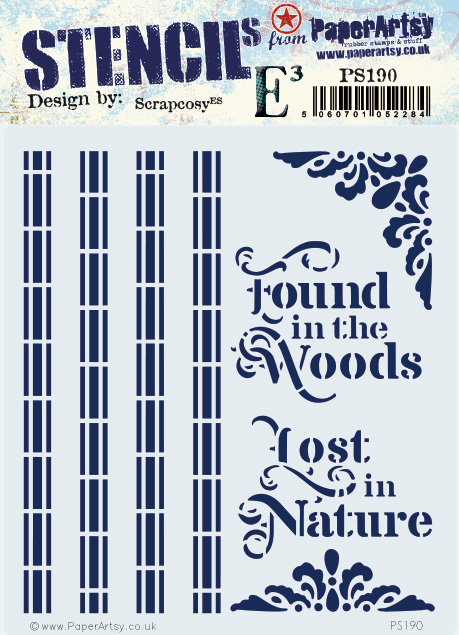
I love that Raquel included a corner motif in her stencils and a corner flower stamp.  These will be showing up in many a future project.

PA Stencil 190 {Scrapcosy}: PS190


I had so much fun adding ephemera to my pages and journaling out my thoughts here and there.  


Again, I used the same images in different colors and orientations, highlighting favorite details with mica.  


I am really happy to discover how wonderfully PaperArtsy Fresco Finish Chalk Acrylic make double sided prints.  There are so many times when a double sided patterned paper is just what you need, especially with book making.  I would love to share how I constructed this book, but fear this post would be far too long.  If you're up for it, head on over to my blog post HERE for the specifics.  

Though projects of this size can seem daunting, you can certainly try some of these techniques in a smaller format.  But if you are up for it, make plenty of paper so you can stamp your heart out and have a wide array to work with in your own book.  What colors are calling to you when you see these nature inspired stamps?  Hmm?

It has been a pleasure, Autumn

Blog:  SewPaperPaint
Facebook: Autumn Clark
Instagram: @sewpaperpaint
Pinterest: Autumn S Clark