2015 Theme 4: Miniature Art
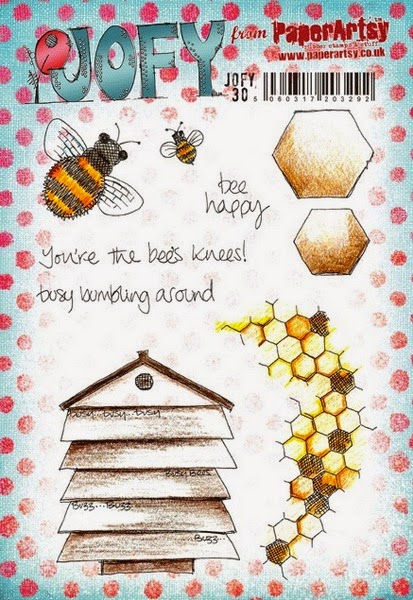
Hi everyone Emma here, joining you this evening with a post about shrink plastic. As soon as I heard the theme was miniature art, that is what I thought of. I love using shrink plastic, as it can give your stamps a new lease of life by changing the size of the finished image. I also like the way that when you shrink the plastic, the colours become so much more vibrant, and the pieces add lots of dimension to a card. My finished piece is a small card using the JOFY30 stamp set.
Step One: I stamped my images from the new JOFY30 stamp set (available from your local PaperArtsy stockist) onto translucent shrink plastic using black Stazon ink.
Step Two: I then painted them with Fresco Finish paints Pumpkin Soup, Toffee, French Roast and Metallic Glaze. I kept the paints watery, but not too wet, as I knew the colours would be darker when the pieces were shrunk.
Step Three: I cut out all the shapes, and then used a heat gun to shrink them. Note: don't panic as they will curl up whilst being heated, but they will flatten out. When they've shrunk as much as they will, press down on top of them with an acrylic block.
 |
| JOFY030 |
Step Two: I then painted them with Fresco Finish paints Pumpkin Soup, Toffee, French Roast and Metallic Glaze. I kept the paints watery, but not too wet, as I knew the colours would be darker when the pieces were shrunk.
Step Three: I cut out all the shapes, and then used a heat gun to shrink them. Note: don't panic as they will curl up whilst being heated, but they will flatten out. When they've shrunk as much as they will, press down on top of them with an acrylic block.
Step Four: My first plan was to use a card that was 5.5" square. I cut card mats in black and white card, and embossed the greeting in gold on the front. I also stamped the honeycomb stamp around the edge using Versafine Smokey Gray ink, and edged the black card mat with Brass Treasure Gold. I then stuck the shrink plastic pieces on with Glossy Accents. Once it was finished I decided that it wasn't "miniature" enough...
Step Five: ... so I peeled all the shrink plastic pieces off of the big card, and decided to use a much smaller card (9cm x 9cm). I had to plan where I was going to place the pieces and the greeting, as there wasn't nearly as much room this time. I repeated everything that I had done for the large card, just a condensed version.
So do you prefer the larger card, or the smaller one? I think the shrink plastic images work rather nicely on both, but the smaller card is definitely my favourite. I've never used paint on shrink plastic before, and I was really pleased with the result. I'm thinking that it could be fun to make a small co-ordinating present to go with the card ... maybe a pair of bee earrings? Just remember to punch a hole big enough before you shrink (as that will shrink too!).
Thanks Emma, this is a fabby little card. I definitely prefer the smaller version, so dinky. Shrink plastic does scare people because of its unpredictable curling but you have flattened yours beautifully. I love the Metallic Glaze on the wings, perfect finishing touch. ~Darcy
We would love you to join in with challenge #4: Miniature Art. If you are inspired by any of our guests who blog with us over the fortnight, then please join in and link up your creativity HERE.
All links go in the draw to win a voucher to spend on products of your choice from the PaperArtsy online store. The Fresco Paints link will close 17:00 (London Time) Sunday, March 8th, winner will be announced 2 hours later at 19:00.


