Thursday, 24 June 2010

WWOMWW what {was} on my workdesk on Wednesday!

Missed out getting to the computer yesterday, you'll see why in a sec!


Wednesday morning Courtney's friend Ellie came over bravely trusting me to do her nails for the prom which is Friday evening. No I am not a beautician as well as a stamper, administrator, rubber-presser, mother, wife, teacher and all the other hats I wear...I just figured after more than 20 years of getting my nails done...well how hard can it be, so decided to give it a go!! And after practising for a few weeks on various teenage daughters, a few hints from Jo F-Y who IS trained at this lark...I think I am getting the hang of it.

This is what my desk looked like ready for Ellie's arrival. (Well acutuals its the outside garden table in the heat but under the shade of the brolley!)
Now you are going to be miffed cos I forgot to take a piccie of the finished result which we all thought was pretty good. In short French Manicure, pinkie nail art in blue to match her dress and small blue bling with clear coat on top. Very simple but nice for prom. (you'll have to picture that yourselves!)

So far so good.Off to work I plan to go.

Then Miss Corky decides she want "more" for her nails. So suddenly my fingers become the guinea pigs...initially x 5....
We mix clear or White acrylic powder with fine glitter, chunky glitter, and brainiac moment...mica powders!!! to make custom batches of acrylic for funky tips.{Remember we are in Essex, so this level of bling is totally acceptable, just probably not on a mother of 42!} 
So by 10.30pm my hands looked even more ridiculous with 10 potential options on offer! Remember I did do my right hand with my non dominant left hand, so not so bad for a beginner working with her left hand!
So now I have a pair of hands like this and a BBQ to go to tonight. And Corky still hasn't decided which blingy nails to go for!!

Today she gets the spray tan. Tomorrow Amy's mum Michelle drops of the hairclip to tuck into the back of the quiff(sp?)and we still have to practise the quiff and makeup and actually do those nails. Decided it's worse than a wedding - well worse than ours which was a very simple wedding on the beach in New Zealand.

Anyway. Mark was not overly impressed with my unscheduled 'pampering??' day off so I shall have to make up for it today! Drop by Julia's to see what everyone else got up to yesterday. Soz for being late!

Will blog prom pics on Saturday!

Wednesday, 16 June 2010

WOYWW {Busy Busy Busy Bees}

Today we have been crazy busy getting all kinds of stamps pressed for all kinds of people. We were a hive of activity. So I have a few shots of the main workdesk at PaperArtsy World HQ in various states throughout the day. Its all about making stamps today TBH.
 Stamps waiting for EZ mount foam
Stamps being trimmed
Stamps waiting to be trimmed.
Stamps being bagged....and after 11 hours of this repetitive activity.....we saw a thingie on the wall...to open particular bottles we are oft partial to on a hot summer eve.....
So as the long day finally comes to an end at 7.45pm....surely it's beer o'clock? 
Today we deserve it for sure!
Nice clean desk ready for the same again tomorrow!
So what was on your desk today, pop over to our leader extraordinaire, Queen Julia the Magnificent here, and you too can snoop at other people's Wednesday lives too!

Leandra

Tuesday, 15 June 2010

Inka techniques, a New video, and a {sneek} of a new product!

The Craft Barn Extravaganza events are always really good weekends, the staff and extended helpers, demonstrators are all so warm, friendly and work hard to ensure the event runs smoothly, it makes for a really enjoyable event, and as a crafter you get to learn so many ideas from so many people! Like Suze Weinburg with her stadium seating zone in one of the other halls to where I was!
And here we all were looking pretty snappy for the end of the weekend! Isa Norris, Sandy (Craft Barn owner), Lin (LB Crafts), Leandra (me), Courtney, my 15yr old DD, Beatrice (KatzelCraft), Mark (Mr PaperArtsy), and glamorous Suze from Ranger.

First of all Suze gets the prize for taking a great pic of me, it doesn't happen often, as usually when you are talking the faces that get caught on camera are not the best, so this one I can live with! Thanks Suze...
I was in the Victoria Community Hall again this time, in my usual spot...taking up loads of space, I surrounds myself with supplies on desks and chairs and I still have to get the 'viewers' to help me hunt down scissors and glossy accents! I am just so keen to show you as many ideas as I could with the supplies to hand. Love a challenge!
My focus was the PaperArtsy Hot Pick Stamps and matching dies. My aim with the whole die concept is to die cut the metal-humungo tape-card sandwich, flatten it between acrylic platforms thru the die machine, and then stamp the matching image on top. With your ten seconds studio tools, you can add loads more texture to the stamped image which kind of brings them all to life. 
Ohh look, there are the Hot Picks (and a sneek peek of HP1007 on the right - available July) and PaperArtsy dies, and a stamped spotty dragonfly - great bellie!

We packed up in such a rush, I forgot to take photos of the weekend's samples!! But I am sure they will show up on the Craft Barn Blog at some point.I do have a few I took today of a sample I held onto. I was also showing lots of ways to use the new Inka Gold product... yes rumours are true...I did nickname this product 'goop' because the name Inka Gold infers it only comes in Gold, and there are a whole array of gorgeous colours!


First you can use Inka Gold direct onto wooden frames with Cut and dry foam like this:
I started with Indian Yellow, Cobalt Blue and Lava Green, In the recess I used Graphite. They blend beautifully and dry instantly. This direct to wood idea is what the product is designed to be used for, but of course we (the royal we...Lin and I ...when creating classes for the May 2010 ArtsyCrafts events) have found so many more uses! Here is a project on the small canvas frame.
First I applied Inka onto a canvas base with Cut and dry foam, then used a baby wipe to wet and smooch it about a bit...when you do this the addition of 'damp' from the baby wipe gives a more even coverage as the Inka softens to fill all the texture of the canvas...pretty easy BG technique.
You can also use inka through a stencil. Viva Decor make these great stencils which are adhesive and give a nice pattern to smooch goop through with cut and dry foam, I find that worked better for me that any other brush...and we tried lots! You just want to make sure the colour is different to the dominant colour of the canvas and the stencilling will then pop more. I used (again) 2 colours in the stencil, old gold and Indian Yellow.
But don't stop there, Inka can also be used like a watercolour. Take the tiniest bit out of your pot and loosen with water onto your craft sheet. Then just start colouring in. This is an image from HP1007 (coming soon end of July, but also available NOW from The Craft Barn, LB Crafts, Paddy's Stamping Place and Imagine That PaperCrafts - please support your Local Stamp Store!) Stamp the image onto Pearl metal, make a tape sandwich, colour away, and then add texture with your Ten Seconds Studio Texture wheels. Lightly sand the edge to give a silver sheen to the metal. 

Here's the best bit. You know how metallics can reduce the blackness of the black areas? Well just take a damp, clean brush, and you can remove the Inka from black areas that you might like to have more impact!

I then used the dies cut from copper metal, and over-stamped to embellish the final piece.
This is the open dragonfly die which has an outline matching stamp Squiggly Ink- Tops and Tails Plate 3, and I lightly stamped with the adorable fine script from Mini 61. LOVE that stamp!
Lin was also using Inka on her stunning creations. Here she used it on the Bronze God Metal from Ten Seconds Studio. She has run the metal thru the Big Shot on  Kabuka mould (do you think anyone can actually understand this language we use???), painted lightly and used Inka on top, it can totally change the appearance when used on dark metals. Look at the lovely little trinket box she did the same way except that is black metal. And the flowers as bellies are also given the goop treatment. 
How lucky was I to get one of her gorgeous brooches to wear this weekend from Lin! She has used copper and gold metal (the gold is underneath), cut down the petals, moulded them and set a UTEE charm in the centre. Go on, you know you need to make yourself one of these!!
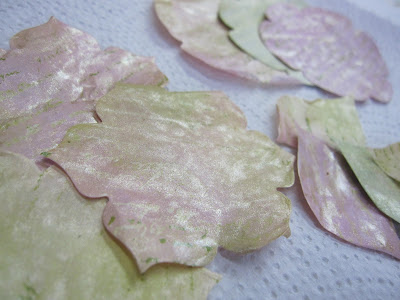
And I also played about with tissue. First I colour it with distress ink (direct to tissue) and spray with a light gold or pearl mica spray. Dry, then spray the back of the tissue with the mica too. Dry thoroughly, don't worry if it crumples- crumpling is GOOD!


Fold the tissue sheet into thirds, then fold the long strip into thirds again - this gives you a square of nine layers. Place the die on top, and run thru you die machine. Over-stamp with either the grunge flowers stamp from HP1004, or you could use any script, texture or other background style stamp on top. You could use a metal flower as the base, and then build up layers of tissue by crumpling and securing each layer with glossy accents. You can put a button in the middle, later I added a copper metal accent on top of the button.


I hadn't planned on demoing the whole metal rose thing, as I kind of feel it has been done to death by so many people, but there were heaps of people stopping by who had never seen or heard of the idea, and many more who had never seen it done with metal, so we went ahead and did a YouTube video. It's so much easier doing this with card-backed metal, the metal is so soft ,and does what it is told! You can watch it here.
I first saw this idea when Wendy Vecchi made some stunning samples for Tim H for his first advantus booth at CHA (the American Craft Trade show for retailers) This was way back before she had her own stamp collection. 

I thought how cool it would be to have a stamp of the flower pattern to save making a template, and we made a stamp for Xmas 2008 that utilised a 6 petal flower.
In the January that followed 2009, Tim released grunge paper, which was a much easier and softer surface to manipulate into a rose than grungeboard, and people really grabbed hold of the idea to make the 'rose'. One of the girls in our design Team, Jacqui Chimes made a lovely box, and linked to this tutorial  which was the first set of instructions I had seen on the idea.

Working with metal, as we tend to do in these parts, Linda Elbourne used the flower to make her famous bean tin decorated in metal into grunge roses and a version of which was later front-page-cover-featured in craft stamper magazine (woop woop), and so it has come to pass that metal roses, have become part of the scenery in LB/ PaperArtsy circles for some time. It that whole magpie thing, the fact that the metal just catches your eye and makes you have to go and make one. 
So don't credit me for the idea! I just make the stamps, and now dies that make the job a whole heap faster, no more cutting out for you guys, and we have not just 1 but 2 dies to choose from, don't forget the scallop die, it has gorgeous decorative edges that look like this (above) just made from cardstock and spritzed with glimmer spray.


Oh yes, there is a lot of fun to be had still with these guys.

Much more of a marathon post than I expected, so please let us know what you have been up to, and don't forget to follow our blog, we only just figured out last week how to add that thingie on the side bar, so give us some lurve! 

Oh and I have some more exciting new this week!! Those of you who are eagle eyed may have already noticed something new in our shopping cart...Oh go on, twist my arm what can you see that is new on this page ??? 


Have a great week


Leandra

Wednesday, 9 June 2010

WOYWW {Don't laugh} Part 1

So Queen Julia as I now think of her as, had this little idea about a year ago to do a blog hop on Wednesday's to be nosey and see what other peeps are up to. 

In readiness for this momentous occasion, I have been a busy little bee today getting all orders done, and now this is what one of the PA world HQ desks looks like! I know amaaaazing.
Now not only does this build on the fallacy that I am supremely organised, but it is in reality my preparation for a very exciting afternoon. Jo Firth-Young is coming over to help me with about 5 projects I have on the go. 

Anyway this is before...I will drop back and give you the edited version of the during and after later today.

Ooo

She's jut got here....gotta fly

Leandra

Edit: 18:40
So first off Helen turned up (Millie's friend Roselle's Mum), then Corky got back from her exam, and we were die cutting fabric tissue and other stuff like mad.
and the desk started to look like this, still kind of tidy!
and then we got this when Millie came home to model
oops bit blury, she wobbled, not me!
We were trying to get a few projects organised for a show later in the year. We loved these little guys made from the grungeflower die and K and Co papers.
Or this one with the scallop flower, pretty with the spray on top.
and then we got out the goop and stuff on top of metal run thru the big shot with a kabuka mould.
and new stamps too....
anyway we are still playing now - just wanted to give you an update!


Laters!


Leandra


Friday, 4 June 2010

ArtsyCrafts October 2010 - Through the Garden Gate - booking info

October ArtsyCrafts Booking forms are on-line!
{Picture: part of the side of the 'Gothic Arch frame from Sept '08 class where the metal has been embossed, distressed with paint and embellished with copper accents}
Details of the Autumn (October 2010) ArtsyCrafts events are ready and waiting for you to download here. The theme for the autumn is a botanical one called "Through the Garden Gate". We are thrilled to bring you another wonderful series of classes laden with techniques and fun creativity in a relaxed spacious environment.
{Picture:Ladies finishing their metal decorated platter in March '09}
This time we are doing one event up North near Manchester, and the other in the Midlands near Milton Keynes. Both have easy motorway, train and airport access. These will be our 10th and 11th ArtsyCrafts events!
{Picture: A piece of copper metal embossed on a mould, and given a patina effect distress this was part of the canvas panel from the Clock we made in Oct '09}
The DeVere Harben House, Newport Pagnell is happening on October 23rd & 24th, 2010.
The DeVere Daresbury Park, Warrington is on 30th & 31st October 2010. 
{picture: Lin demonstrating metal embellishments for the niche cabinet we made in March '09}
Booking commences at 10am on Monday 7th June 2010.  We cannot accept any bookings before this date, it will be strictly first come, first served and bookings are not confirmed until we have both a signed booking form and payment in full. For credit card security reasons we will not take payment over the phone UNLESS your form has already arrived at LB Crafts.
{Picture: Leandra demonstrating how to stamp up acetate with a repeating castle wall, March '09}
If you are booking via snail mail, then we suggest you send your form and we will call you for payment once the form has arrived at LB Crafts . You can book in person by downloading the form, completing it and going to LB Crafts to deliver your form and make payment if you prefer.
 {Picture: a close up of how we decorated the cabinet backgrounds with a mix or papers, stamps and metal.March '09}
{The cutest little niche box from the Clocks theme in Sept '10}
To get an idea of what we have done at ArtsyCrafts events in the past, please take a look here at samples of some of the art that has been made at previous events. ArtsyCrafts is a partnership event between Linda Brown of LB Crafts, and Leandra Franich of PaperArtsy. Consequently the focus is always PaperArtsy stamps and Ten Seconds Studio metal working ideas. We incorporate other products that we love like paint, ink, alcohol ink, dye sprays, wooden items, canvas...well there is quite a lot we like to work with and on! 
{Picture: stamped and coloured fabric (not yet embellished with beads) from the Clock version of the Gothic Arch offered March '10 in Warrington}
Lin and Leandra both have fabulous reputations for teaching beautiful projects with innovative techniques they have developed themselves or have learned from other crafting specialists. This is likely to be an event unlike any other you have been to.We get praised for our smooth and thorough organisation, the perfect working pace, the outstanding and well taught projects, the thorough notes we provide for your own future reference, the great colour-choice options on offer for each session, and the large number of supplies available means you are not waiting to use anything for long. After running this event since 2008, we have figured out what people want and how to deliver just that!
{Picture: March '10 delegate taking the plunge about to add black paint to their metal embossed Gothic Arch - it's nice to have guidance at this point!}
We really hope you can make it to one of these dates.......the botanical-inspired theme is a totally fabulous theme....it's going to be superb!!! We have lots of new colour combos to tempt you:herb garden, Java jade, hardwood floor, cloudy skies, peacock, citrus sorbet, plum crumble, apple blossom and fruit salad!
{Picture: Mel's quirky copper embellishment from the Clock Arch, March '10 was a super addition she dreamed up, she was a first timer who lapped up every second of what she learned over the weekend}

Have a fabulous weekend in this gorgeous weather! I hope you can make it to be with us later on this year at one of the venues!

Leandra

Thursday, 3 June 2010

June means {Craft Barn} Demo weekend

Twitter peeps will know that we had a family trip to the wonderful Craft Barn today to help them get the PaperArtsy section of the store ready for the {BIG} weekend....if you don't know what I'm on about then you need to!!

On the 12 and 13th of June, that's just over a weekend away, is the amazing Craft Barn Extravaganza. This is an brilliant weekend where Sandy (CB owner) gets loads of fantastic demonstrators from all over the UK, and beyond to come and show you guys all the latest products, and all their tips and tricks with those products. They hire 2 local halls that are right across the road from each other, and just down the road from the shop, and you can walk around all three venues to watch, buy, chat and schmooze all day long! It's bliss!

I have demoed for the last couple of years at both extravaganzas, and this year my partner in ArtsyCrafts crime, Lin Brown is also able to come to demo Ten Seconds metal and the hilarious, glamorous and very sparkly Suze Weinburg (who I first met at one of these extravaganzas about 8 years ago) is back from the USA with her wonderful Lenny (DH)  to show you all the amazing stuff she can do with a meltpot! 

I am so looking forward to seeing Isa Norris over from Canada, My 'Craft Sheeeeeeet' buddie Beatrice from Katzelcraft is here again from France. (get her to say Craft Sheet in her accent and you will get it). Jean is also there from Crafty Individuals, and I love to catch up with all the other amazing demonstrators who are regularly there each showing their wonderful talent like Julie Hickey, Paula Pascual, Francosie Read, Kay Carley to see what everyone is making at their station. And Paul from Go Create will be whizzing stuff thru the bug and big shot. You'll learn so much from everyone and all their brilliant ideas. There are heaps more people demoing and of course all the Craft barn Teachers too, so there is probably at least 20 fantastic demos to see! You'll love it so make it a date. 

Oh and we will have some new Hot Pick action for you to check out! Don't miss it!


See you there ...won't I ??

Wednesday, 2 June 2010

WOYWW - Anniversary Special

Well another week has flown and I am proud to say one of my desks was totally covered with loads of creative goodness. And it even looked quite colour coordinated at the same time!
 Now don't go thinking that I am, the tidy organised person you assume I should be...well it's very nice of you if you do think that of me, and far be it from me to shatter your opinion...but i do confess that is the pre-messy shot...the bit where you look and think...before you actually DO IT!!

So, if you were following me on twitter (@paperartsy) you will have noted on Sunday I made it to HobbyCraft on Sunday for a fleeting visit. Paddy at Paddy's stamping Place (Manchester) had been telling me the great success she had die cutting with our flower dies and sheer fabric, and I was itching to have a go. I walk straight in to the fabric to see what colours they had (baby pink, baby blue, cream and black - not what I was hoping for) But, being optimistically optimistic at that particular moment, I decided to see if I could find some papers to match. Headed to the back of the shop, et voilà! Success. A K and Co paper pad thingy with lots of nicely matching papers. Bingo...but which one, the funky cool, shabby chic, heritage Oldfield worldy??? In the end went for a dusky little number and then (result) found some of HC's own branded ribbons in the bargain bin that matched pretty well. Marched up to checkout. Headed home, and 2 hours later realised I forgot the blimmin fabric which I went in there for in the first place! Typical of my highly organised self to not consult the list...I do that all the time, write lists and never check them off when Jonny on the spot....Jonny gets sidetracked...
So I guess you want to see the 'after'..well actually this is during, but you get the idea. Started at one end of the desk, and yes it is a large desk, probably bigger than most dining tables, and did a 12 noon till 12 midnight mega session .And then some more the next day...and it's all still a work in progress. (by the end of today this desk will be in full swing as a rubber pressing/ trimming/bagging station).

It is highly likely that I already have a heap of papers just like this in these colours, and a heap of ribbons, but seeing as my proper work desk in the other shed can't even be seen from the door, then this also means that most of my supplies are also hidden behind boxes, suitcases, and other piles of stuff that prevents me from getting to anything. Well more like I really can't be bothered to look. Fact. And as I don't get out much {being a workaholic without enough hours in the day with 4 kids, 2 cats a DH who needs constant reminding of priorities, and who all need feeding and ironed clothes} well...shopping is a much better option to escape that lot! Relaxing. Quiet. And a little bit exciting.

Yes I do want to try and clean up the shed to be a delightful workspace with good light, vibes, fun colour, modern furniture, everything labelled and boxed filed away, easy to reach, shiny and lovely and perfect......oh sorry ...just slipped off into a dream like trance then....well, the dream is on the list for JULY, I think it's been on the list for the last 2 Julys actually, but this year it WILL happen! Fingers Crossed. {Jo F-Y has promised, almost enthusiastically, to help so we shall she if she's sure once she looks through the door! Can't quite get my head around why she is so keen to get stuck in. Think she just likes tidying up people. lol}

Where were we...on the rest of the desk (over in the little corner to the right from previous shot) are more 'to do' jobs. Such as. Find a shelf for the newest Inka gold (aka Goop) arrivals.
A bunch of Viva goodies waiting to be photographed so they can make their début on-line in the shop.
And some mini sheets waiting for a hot spin through the laminator so they can magic themselves into index labels for stamps. I know genius behind the scenes stuff huh!
And here is one of the items I made with the new papers and ribbon! I painted the box with antique white kaiser paint, covered it with the papers, rand the ribbon around the edge, die cut the dragonflies with our new PaperArtsy dies and stamped over with the matching stamps
Love how the sepia accents match the tone of the brown papers and add another dimension at the same time.


I also made 3 other scrummy projects, but they are for the September issue of Craft Stamper, and if I showed you I would be in the naughty corner...so I can't.


Oooh but I can show you this
suffering from a lack of sheer fabric I opted to make tissue flowers - this is a technique we taught at ArtsyCrafts the other weekend, but then we only sprayed. This little one is painted and sprayed tissue (champagne Crafty Notions spray), then stamped in paint some more, and then stamped in black ink with a delicate script.. And feeling adventurous I decided to make it into a tissue rose...ohhh it wasn't hard at all - you should have a go, and I love how delicate the colour is too. 
So there you have it another big day for my desk, and a big anniversary celebration for WOYWW. Hop over to Julia's blog to see how you can play along too. Look at me sounding all expert and this is only my second week playing! LOL ....{confession ...shhh} I still haven't figured out what WOWWAC means, so I guess it is something I was supposed to do for this week, so now I'm going to feel like a right numpty when I work out what it is and how I have probs done the opposite or something this week!


Happy desk peeking!


Leandra