Tuesday, 29 June 2021

2021 Topic 8: Nature's Treasure with ESN {by Sara Naumann}

  2021 Topic 8: Nature's Treasure


Sara runs you through and easy way to make a small booklet from just one sheet of card, which is a fun project for any abstract background paper you might make. Of course she has used some of her lovely stamps and stencils along the way too!
~ Leandra

Hi everyone, it's Sara Naumann with you today, and I'm here to share a super-simple folded booklet that's perfect for spotlighting quotes, images and all the little treasures we papercrafters love. I'm really inspired by the Nature's Treasure theme, and think this is an ideal surface for exploration, so I got out my leaf stamps to have a play!

Some of you may have made one of these little books at some point. I've spotted lots of different variations online lately, and I taught it to my Grade 5 Art Club this spring. It's a really versatile project and can be personalised in so many ways...the kids covered their books with stickers and drawings and it's safe to say the concept can be adapted to a Spiderman theme as easily as it can to a collage of leafy images.


This little book begins with a sheet of A4 paper. I'm using Smoothy Regular, which is sturdy enough to accept the layers of wet media I'll use but—crucially—will fold nicely too. 


I've started out with a favourite technique for me—brayer-painting. This is an easy way to get some colour down and start building your layers. You can think of the white surface as your first layer if you like, and avoid covering it completely. 

I'm brayering with Sherbet and Lemon Meringue; when those layers were dry, I stippled various portions of PS123 with Weathered Copper. I also added some Grunge Paste stencilling with the circles on the PS100 stencil. 


You only need to focus on one side of the paper since the other side won't show when the book is folded. You might want to just brayer-paint it with one colour so it's not totally white. But don't worry about stencilling or stamping it.

I love how layered stencilling creates depth on a surface—especially when you combine a bolder colour like Weathered Copper with a layer of untinted Grunge Paste. And combining geometric shapes like the wonky harlequins from PS092 with the leaves from PS123 is a good way to create balance.


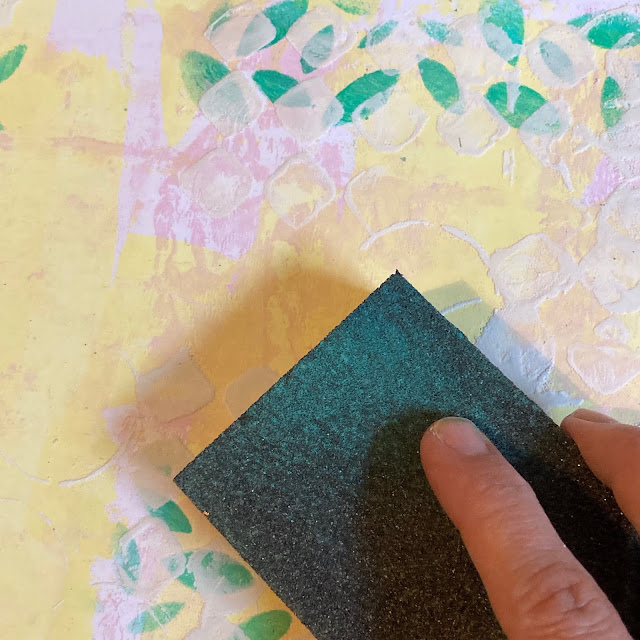
Because the Smoothy sheet will be folded with really crisp creases, I used a sanding block to smooth down the stencilled Grunge Paste. Initially, I did this so it wouldn't crack along the folds of the book....but as I sanded, I discovered that the Grunge Paste stencilling became super-soft to the touch. You still get the shape of the stencilled design, but this new layer of texture feels sooooo nice!
 

A bit of splattering with watery Scottish Salmon....


...and some stippling with Blue Moon and the PS100 circles and splotches stencil. 


Before stamping on my masterboard, I find it's helpful to first make a template of the folded booklet. (I'll share the folding steps with you below.) 

First, I folded a scrap piece of copier paper and labelled the various pages, then I unfolded it so I could use it as a guide—it's a good reminder that the top half of the sheet will be right-side up, but the bottom portion is upside-down! (BC is "back cover" and FC is "front cover".) Note the cut in the centre, separating FC and Page 1 from 4 and 5. 


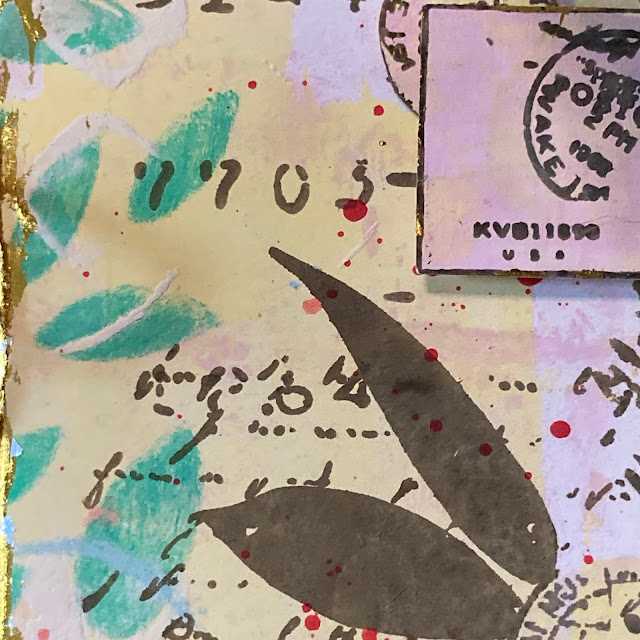
I've stamped my nature-themed images onto the masterboard with brown-gray ink, using postmarks, leaves and number stamps from both Eclectica ESN44 and Eclectica ESN46


I love how images look stamped over the sanded Grunge Paste stencilling!
 

Okay, so let's look at the folding process. It's really easy. I do recommend you grab a bone folder and use it throughout the process to help get those crisp edges, which make the folding easier and your finished booklet will be flatter and tidier. 

First, fold the sheet in half the long way. (This is the "hot dog way" if you're explaining to fifth-graders and is probably familiar to anyone who grew up in America.)


Then unfold the sheet, and fold it in half the short way— or, the "hamburger way". Just a reminder that I've only stamped and stencilled onto one side of my paper... on the other side, I just brayer-painted some Sherbet


Unfold the paper, and then fold in each short side to meet the crease in the middle. 


Then unfold. You'll have 8 sections. These are your pages, with a mountain fold in the centre of the paper and valley folds on either side. Here's the stamped and stencilled side...


...and here's the reverse side.


Flip it so you're working with the stamped/stencilled side facing you, and grab your scissors. 


Fold the piece in half again along that "hamburger" crease. Use scissors to cut through the two layers from the folded edge just to the crease line. When you open it, it will look like this:


Holding your piece in the position you see above, gently push the two short sides in toward the centre to form a plus sign.


 And then you can flatten the piece and you will have a little book! Here's the cover—


Here it is open—


Then, you can decorate the cover and pages!  

I added some gold foiling around the edges for a vintage-y distressed look. I just ran a glue stick along the edge, placed the foil sheet on top and pressed it down firmly. Leave it in place for a minute or so, then remove the foil. 


You can also use an awl or paper piercer to make holes in the centre fold of the book, and thread ribbon or twine through to tie along the spine of the booklet. 


I cut out some additional images from the two stamp sets and glued them onto various pages... of course you could also add your own handwritten messages, notes and ephemera as well. 

(I love this quote and think it's perfect for a nature-themed book!)


Touches of gold foiling on the stamped images gives a bit of shine to the pages.


And don't forget: The stamped leaves can be cut out from the collage images and re-collaged elsewhere too—


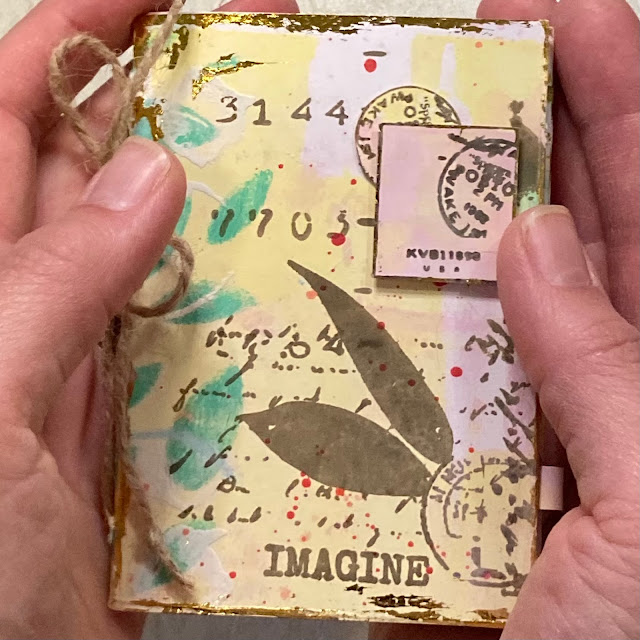
Here's another look at the book cover—


The perfect size for a keepsake or gift!


I love these little books for their sheer creative potential—whether you decide to fill yours with notes and quotes and sentiments, or add small photos or ephemera, they're just the right size as a keepsake or gift. You'll also notice that the pages naturally form pockets, so you can tuck in all kinds of little treasures—nature-themed, or otherwise.

And if you, like me, will be spending some time with kids this summer... well, I can guarantee it's an activity that they'll really enjoy!

Thanks for joining me today!


Monday, 28 June 2021

2021 Topic 8: Nature's Treasure TOPIC INTRO

 2020 Topic  8 - Nature's Treasure


Hi everyone, Keren here, feeling very inspired by the natural and the splendour of the seemingly simple. Our next topic 'Nature's Treasures' is a beauty.

What are Nature's treasures? It could be a superbly long list and it possibly might depend on what sort of a person you are. If you have your head turned by intricate flowers or scent-filled blooms, then coming across a wildflower meadow might seem like you'd found a treasure trove. It might be that your love of colour or graphic style patterns leads you to delighting in a bee's honeycomb or the luminous quality of the colours on the shell of a mint leaf beetle. Grander landscapes might be your thing; watching the myriad of colours as the sun sets or remembering awe-inspiring mountaineous regions. You might be a lover of all things sparkly and love nothing better than seeing crisp snow, unique snowflakes or icicles. Delve further beneath and see the beauty of stalactites and underground lakes or plunge deeper still and find the allure of the diamond 'crushed' into existence.
We haven't mentioned animals, birds, rainforests, tree bark (& maple syrup sap), nor considered the luminance of shells, the perfection of dew soaked lawn nor the power of a thunderstorm. All are nature's treasures, whether grand or microscopic, process or person. The sky being the literal limit, we are going to have a diverse treat of posts and art and let's begin our treasure hunt with some PaperArtsy gems.

I really loved the natural and nature feel to this mini album by Alison Bomber highlighting her new quote sets about nature. The subtle delicate colours and lots of insects and fauna let the eye rest gently around the album's pages leaving you feeling calmed and rested.

This colour themed piece brings in a bolder palette but highlights the tree in gold so beautifully. Autumn Clark's piece has layers of texture separated into physical layers so you are drawn to the delicateness of artistic touch.


Ellie Knol curated her own treasures, packing them into tiny glass jars and securing them to a twig frame with lovely natural elements stamped around the piece.


Capturing the best of nature in resin and preserving it so you can wear it is a lovely idea (assuming that what you take is replenishable and not rare!).


We don't always need to embellish nature, there's really no good reason to gild a lily!!


Nature makes its own fire sometimes, in this beautiful fire opal.


There is often a satisfying symmetry in nature that we can replicate in our art.


Jo Brown illustrates what she finds outside and doesn't she create wonderful journals. Her style makes me think of the beautiful images from Scrapcosy.


Anna Karin created this gorgeous art journal page using Lin Brown stamps and Infusions. Even the hessian styled title creates the feeling of nature.


Adding botanicals and delicate butterflies makes simple tags extraordinary.


Nature's treasures can reside in a singular flower, simply watercoloured and with an added aqua layer that gives the image dimension.


You can paint with thread. Russian artist Vera Shimunia creates miniature art using landscapes and tiny nature scenes capturing the best of nature.


There's something magical seeing water cascade down rocks and the glinting of the water droplets as they catch the sun and bounce off the surfaces. Using pointillism and a beautiful rock and some beautiful paint colours you can create wonders like this.


Using inspiration from nature, Zhaira Dhzaubaeva has painted the beauty of artichokes resting near a glistening spider web. Artichokes might not be the first thing you'd think of painting in bloom, but these are stunning.


Nature can also inspire some unusual art; thinking a little out of the box..


Or using art to enhance nature (if that's even possible).


Nature's treasure is just everywhere around us. What can find in your surroundings to inspire you? You could find street art being inspired by birds like this French street.


We finish with one of Alison Bomber's pieces with a perfect quotation too.

If you want to create along with us while we explore this topic, please share your makes on our social feeds so we can follow along. Instagram @paperartsy or why not join us and post in the PaperArtsy People Group on Facebook. Make sure you tag us in your contributions, we love to see what you get up to in your creative world!