Showing posts with label Shadow. Show all posts

Thursday, 19 June 2025

June 2025 - With 3 Things - Hoop wall hanging {by Robin Riley}


Hi everyone!

This is Robin Riley (Robin Rileywith you tonight. I was invited as a guest blogger by the PaperArtsy team and I am so very excited to take the “With 3 Things” challenge. This is my very first time doing this and I had such a good time creating this project!

For this feature on the PaperArtsy Blog, 3 identical items are sent to 3 members of the PaperArtsy blogging team. Typically, we receive a stamp, a stencil and some paint. We have no clue what PaperArtsy HQ is going to send. The whole idea of this challenge is to do something crafty in our personal style with these 3 items.

Let me share with you what I received. The stamp set is  Allison Bomber’s EAB 30. Wish you could have heard my happy squeal when I first saw this! I also received a package of printed tissue, Backgrounds PT07 and to top this off I received the brand new Mattint color Bellflower. Again, there was a little squeal!


Three were also a few freebies in my package (this was the third squeal!) from other Alison Bomber and JoFY sets, that I decided to include in my project.

 
I really wanted to create something different than my usual cards. I hope you find this unique. So, looking through my craft closet (which would probably make you squeal), I came upon an embroidery hoop and that got my wheels turning! I decided to use it as the base for a framed and layered piece.


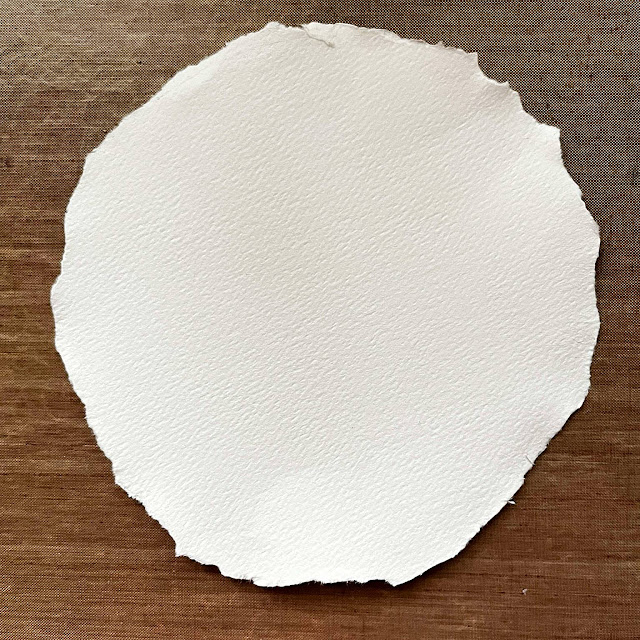
To prepare the main piece of paper that would fill the hoop, I first used the hoop to lightly trace a circle onto a piece of watercolor paper. I then used my water brush to apply water around the circle to softened it. I carefully tore the paper along the waterline, trying to keep close to the drawn outline. I always teared towards me, not away.

I first applied a coat of Mattint Foxglove to the circle. OH no ….too pink for me. I decided the tissue paper was going to rescue me. Quickly I applied a piece from PT07 while the Mattint was still wet.
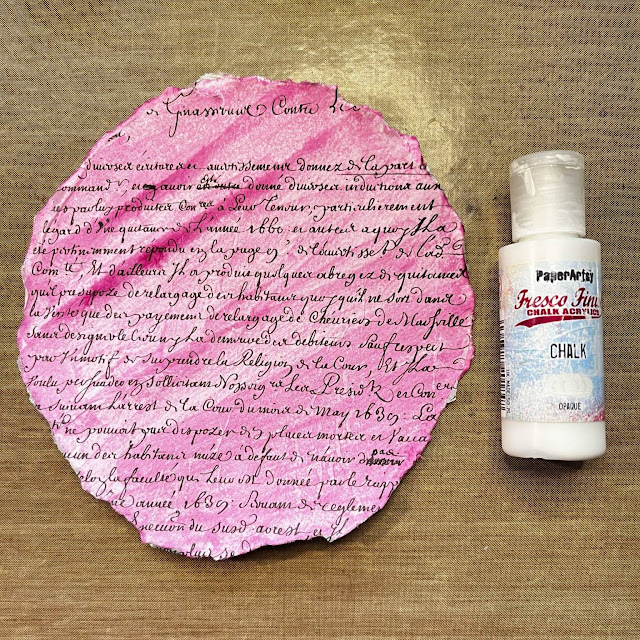

Oh geez, it's still too pink for me! So one more try to save this! I decided to add a layer of Fresco Finish acrylic paint in Chalk, which is opaque to knock down the colour. Finally, a result I was happy with! I let this dry naturally before I moved on to the next step.


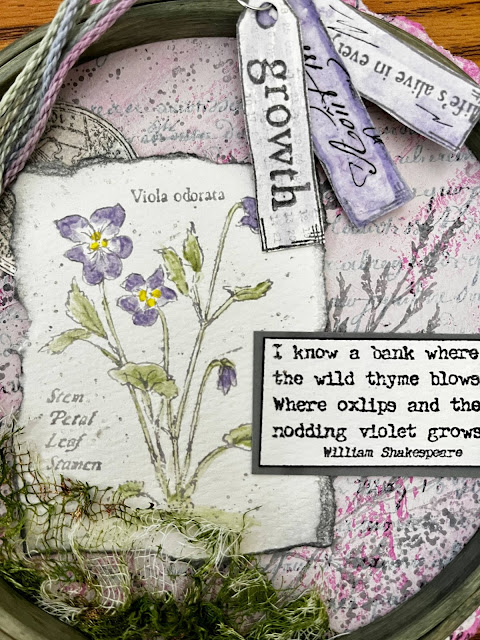
Time to begin the stamping with Alison Bomber's set EAB30I wanted a lighter color for this, something similar to a watercolor effect so the next step was to stamp the beautiful image of the violets onto the smooth side of the watercolor paper in VersaFine Morning Mist. Then another tear around this image. I love doing this to watercolor paper. The results are imperfect, yet so perfect for me!


Using a small scrap piece of watercolor paper, I also used the round ephemera stamp from the set. This time I stamped in VersaFine Clair Morning Mist. I wanted a more detailed image and I wanted to eventually be able to paint over it so I needed an ink that resist water. I made sure to use the smoothest side of the paper for stamping.

I just love the Shakespeare quote from this set (EAB30). To stamp it, I used a combination of inks, VersaFine Clair Nocturne and Morning Mist. I really did not want a full on black, so I thought the Morning Mist would tone it down. I cut around this quote, instead of tearing, to give it a more finished look.

Slowly things started to come together. I laid out the pieces….hmmm this didn’t feel right yet!


Another Alison Bomber set to the rescue! This time EAB40I stamped some solid images of the grass on the background using VersaFine Morning Mist. I also added some splatters of the Distress Oxide Hickory Smoke over all of the pieces. This is now starting to feel right to me!


Now it was time for some real fun. I love using the Mattints to add subtle color. Here I used my water brush to add Bellflower and Fern. Using a dotting tool, I added Acid Mattint dots to the centers of the violets.


The pieces needed to pop more. Using the Distress Oxide Hickory Smoke, I edged the violet piece. I ran a black Sharpie around the edge of the quote. I happened to find a piece of gray scrap to back the quote too. That’s what was needed! Now everything was coming together for me and it was time to assemble.


First I decided to paint the wooden embroidery hoop with the Mattint Shadow. I applied 3 coats, drying in between each coat. To decorate it more, I used a piece of the tissue paper again (Printed Tissue Backgrounds PT07). I took some gray washi tape and adhered it to the back of the tissue to be my guide.


I cut the washi tape from the tissue and glued it to the outer ring of the embroidery hoop.


I really wanted to add another element to this design and I wanted some type of texture, a different material. I felt like the picture needed to be grounded. So what to use? Oh, guess what, recently I made a unique element using cheese cloth and some Fern colored stencil butter from The Crafter’s Workshop. I had also put some PaperArtsy Rusting Powder into the mix.


My go to adhesive for fabrics and heavier elements is Beacon’s 3 in 1 glue. It has never failed me! I used this to attach the cheese cloth along with the hoop. I placed a heavy book on the top and let everything dry. This is exactly what I was hoping for!


I thought another element to finish this project was needed. With the extra stamps I received, I created 3 tags. A little Bellflower Mattint and tissue created the perfect little trio! Finally a little bit of scrap yarn tied around the top of the hoop just seemed to finish this project perfectly.


I really hope you enjoyed seeing me create this fun wall hanging from an embroidery hoop. The products I received sure did make this easier and fun! Thank you PA HQ for giving me this opportunity!

Robin X


Instagram: robin.riley.77
Facebook: Robin Riley
Friday, 9 May 2025

Travel Journal with NEW Mattints {by Jenny Marples}


Hi everyone, Jenny (Pushing The Right Buttons) here with you today; nice to be back with you again.

This year on the blog, we have free reign to do a deep dive into a PaperArtsy product range of our choosing. For this post I have been exploring PaperArtsy's own products, in particular the 'Backgrounds' Printed Tissue and some NEW Mattints colours.


For this post I made a journal, filling the pages with the results of my Mattints experiments, and I'm looking forward to sharing these with you.


The basic supplies used throughout this journal include the new Mattint colours - 'Foxglove', 'Bellflower' and 'Shadow' - and a sheet of PaperArtsy 'Backgrounds' Printed Tissue. I'll show you the other PA Mini Stamps and Masks that were chosen to compliment them as we go.


When playing with a new product I usually go on the hunt for helpful tutorials that will guide and inspire me. So first stop was to a video tutorial from Alison Bomber who showed how she used a brayer, gel plate and Mattints to create beautiful, graduated backgrounds.


Here you can see how 'Foxglove' and 'Bellflower' Mattints combined with 'Ladybug' Mattint on white paper. The 'waste' off-white paper I used to clean off my brayer after each pass also proved invaluable.


Adding the 'Backgrounds' PaperArtsy Printed Tissue over the top of the gel printed paper gives you colourful and interesting backgrounds for journal pages.


Here you can see how more of the tissue over the waste paper creates a focal point. 


Yet more tissue and some stamping with PaperArtsy Minis MN45, MN94 and MN114 starts to tell a story of travels through France.


Keeping things simple on this page I combined some of the images with stamping using PaperArtsy Mini MN29.


I loved the slightly vintage look the off-white waste paper had produced so used more of it for the next experiment. After applying 'Cloud 9' Fresco Finish Chalk Acrylic Paint through PaperArtsy Mini Mask PM023 I brushed and blended the 'Foxglove' and 'Bellflower' Mattints over the paper. The paint acts as a resist.


Adding more PaperArtsy 'Backgrounds' Printed Tissue over the top you can see how another journal page was created.


Here I decided to use 'Bellflower' Mattint to apply more Printed Tissue direct to a journal page. The base colour on the page came from an old gel printed background created with 'Scottish Salmon' Fresco Finish Chalk Acrylic Paint; see how the colour shifts as the Mattint is applied.


Here the same technique has been used with less 'Bellflower' Mattint and more stamping/ephemera. This includes a postage stamp shape from PaperArtsy Mini MN129; these have been added throughout the journal and have been made less stark with smudges of 'Shadow' Mattint.


For me it's always good to include a variety of pages in a journal, providing a visual 'break' between some of the colourful pages. So I kept it simple with this one, using only a small splodge of 'Foxglove' Mattint and a delicate touch of stamping to help elevate a focal point. The stamped car comes from PaperArtsy Mini MN85 and continues the travel theme.


Don't be afraid to partially obscure your colourful backgrounds either, again adding that visual contrast.


With the pages developing I searched for more ideas and found this clever video tutorial from Mags Woodcock who uses recycled cardboard to create grungy layers. Mine are less grungy and I used more of the 'Cloud 9' Fresco Finish Chalk Acrylic Paint to dry brush the surface.


I slightly flattened the cardboard before layering it up with some of the stamped images and Infusions dyed muslin.


Feeling more confident with how these new Mattints colours worked I did some experimenting of my own, introducing the 'Shadow' PaperArtsy Mattint into the mix a lot more.


These small image transfers from photos I'd taken on a trip to France needed finishing. Adding PaperArtsy Grunge Paste around the edges helped to blend them onto the background surface. I then extended the lines on the original photos with a pencil before using delicate touches of 'Nutty' and 'Shadow Mattints to match in the colours, adding shade and depth.


To finish them I stamped over the edges with PaperArtsy Mini MN62 (originally in a pale grey ink as a shadow and then with black ink).


This script stamp also came in handy for another page; the 'Bellflower' Mattint was again used to apply tissue to the background.


Now it was time to try something new with a couple of my favourite architectural PaperArtsy Mini Masks PM017 and PM020. I started by spreading Grunge Paste through the stencils and when dry brushed over with 'Nutty' Mattint, avoiding the central window portions. Those parts needed a blend of the 'Foxglove' and 'Bellflower' Mattints applied over them.


I painted over the window frames with 'Shadow' Mattint and when dry sand over the raised areas to reveal the Grunge Paste surface again, this time with added shadows and extra definition.


To finish, I drew in some basic brick shapes and coloured with the 'Nutty' and 'Shadow' Mattints, re-painting the raised Grunge Paste with the 'Nutty' to help it blend in with the background.


These could then be mounted onto some of those colourful backgrounds created earlier, in this case slightly obscured again with more sheer muslin fabric.


I used what was left from my experiments to decorate the front cover, providing a nod to the overall theme and a suggestion of what lies inside.

So let's take a walk through the finished pages;


I've really enjoyed testing out how these new Mattints work with some of the other colours and with other PaperArtsy products. It's been fun to test out techniques from other designers and try a couple of my own, creating a mix of colourful backgrounds and focal points along the way.