Showing posts with label EAB30. Show all posts

Thursday, 19 June 2025

June 2025 - With 3 Things - Hoop wall hanging {by Robin Riley}


Hi everyone!

This is Robin Riley (Robin Rileywith you tonight. I was invited as a guest blogger by the PaperArtsy team and I am so very excited to take the “With 3 Things” challenge. This is my very first time doing this and I had such a good time creating this project!

For this feature on the PaperArtsy Blog, 3 identical items are sent to 3 members of the PaperArtsy blogging team. Typically, we receive a stamp, a stencil and some paint. We have no clue what PaperArtsy HQ is going to send. The whole idea of this challenge is to do something crafty in our personal style with these 3 items.

Let me share with you what I received. The stamp set is  Allison Bomber’s EAB 30. Wish you could have heard my happy squeal when I first saw this! I also received a package of printed tissue, Backgrounds PT07 and to top this off I received the brand new Mattint color Bellflower. Again, there was a little squeal!


Three were also a few freebies in my package (this was the third squeal!) from other Alison Bomber and JoFY sets, that I decided to include in my project.

 
I really wanted to create something different than my usual cards. I hope you find this unique. So, looking through my craft closet (which would probably make you squeal), I came upon an embroidery hoop and that got my wheels turning! I decided to use it as the base for a framed and layered piece.


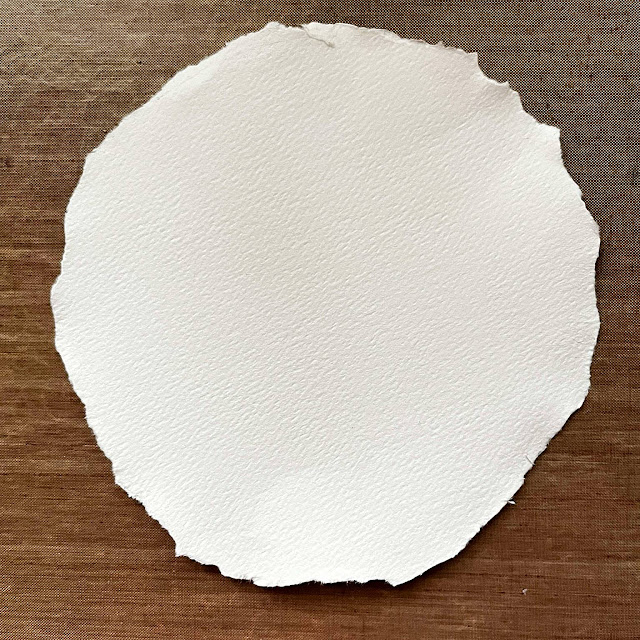
To prepare the main piece of paper that would fill the hoop, I first used the hoop to lightly trace a circle onto a piece of watercolor paper. I then used my water brush to apply water around the circle to softened it. I carefully tore the paper along the waterline, trying to keep close to the drawn outline. I always teared towards me, not away.

I first applied a coat of Mattint Foxglove to the circle. OH no ….too pink for me. I decided the tissue paper was going to rescue me. Quickly I applied a piece from PT07 while the Mattint was still wet.
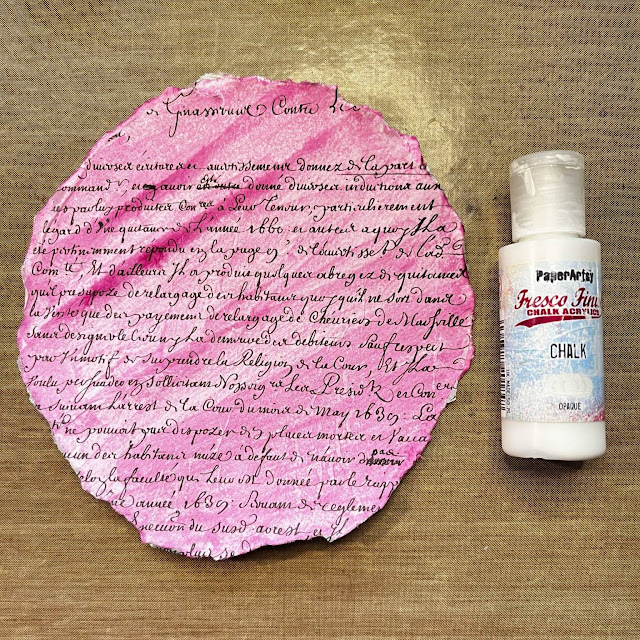

Oh geez, it's still too pink for me! So one more try to save this! I decided to add a layer of Fresco Finish acrylic paint in Chalk, which is opaque to knock down the colour. Finally, a result I was happy with! I let this dry naturally before I moved on to the next step.


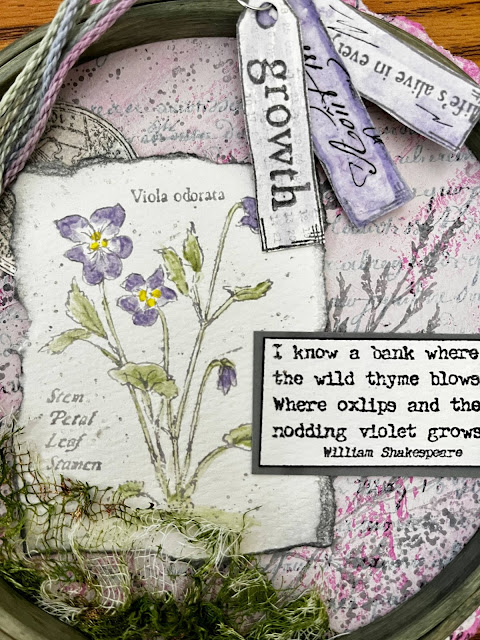
Time to begin the stamping with Alison Bomber's set EAB30I wanted a lighter color for this, something similar to a watercolor effect so the next step was to stamp the beautiful image of the violets onto the smooth side of the watercolor paper in VersaFine Morning Mist. Then another tear around this image. I love doing this to watercolor paper. The results are imperfect, yet so perfect for me!


Using a small scrap piece of watercolor paper, I also used the round ephemera stamp from the set. This time I stamped in VersaFine Clair Morning Mist. I wanted a more detailed image and I wanted to eventually be able to paint over it so I needed an ink that resist water. I made sure to use the smoothest side of the paper for stamping.

I just love the Shakespeare quote from this set (EAB30). To stamp it, I used a combination of inks, VersaFine Clair Nocturne and Morning Mist. I really did not want a full on black, so I thought the Morning Mist would tone it down. I cut around this quote, instead of tearing, to give it a more finished look.

Slowly things started to come together. I laid out the pieces….hmmm this didn’t feel right yet!


Another Alison Bomber set to the rescue! This time EAB40I stamped some solid images of the grass on the background using VersaFine Morning Mist. I also added some splatters of the Distress Oxide Hickory Smoke over all of the pieces. This is now starting to feel right to me!


Now it was time for some real fun. I love using the Mattints to add subtle color. Here I used my water brush to add Bellflower and Fern. Using a dotting tool, I added Acid Mattint dots to the centers of the violets.


The pieces needed to pop more. Using the Distress Oxide Hickory Smoke, I edged the violet piece. I ran a black Sharpie around the edge of the quote. I happened to find a piece of gray scrap to back the quote too. That’s what was needed! Now everything was coming together for me and it was time to assemble.


First I decided to paint the wooden embroidery hoop with the Mattint Shadow. I applied 3 coats, drying in between each coat. To decorate it more, I used a piece of the tissue paper again (Printed Tissue Backgrounds PT07). I took some gray washi tape and adhered it to the back of the tissue to be my guide.


I cut the washi tape from the tissue and glued it to the outer ring of the embroidery hoop.


I really wanted to add another element to this design and I wanted some type of texture, a different material. I felt like the picture needed to be grounded. So what to use? Oh, guess what, recently I made a unique element using cheese cloth and some Fern colored stencil butter from The Crafter’s Workshop. I had also put some PaperArtsy Rusting Powder into the mix.


My go to adhesive for fabrics and heavier elements is Beacon’s 3 in 1 glue. It has never failed me! I used this to attach the cheese cloth along with the hoop. I placed a heavy book on the top and let everything dry. This is exactly what I was hoping for!


I thought another element to finish this project was needed. With the extra stamps I received, I created 3 tags. A little Bellflower Mattint and tissue created the perfect little trio! Finally a little bit of scrap yarn tied around the top of the hoop just seemed to finish this project perfectly.


I really hope you enjoyed seeing me create this fun wall hanging from an embroidery hoop. The products I received sure did make this easier and fun! Thank you PA HQ for giving me this opportunity!

Robin X


Instagram: robin.riley.77
Facebook: Robin Riley
Wednesday, 11 June 2025

June 2025 - With 3 Things - Vintage Frame {by Victoria Wilding}


Hi friends, 
It's Victoria, from VictoriaWildingCreates, with you for another 'With 3 Things' challenge post. 

For this feature on the PaperArtsy Blog 3 identical items are sent to 3 members of the PaperArtsy Blogging team. Typically we will receive a stamp, a stencil and a couple of Fresco Paints.

We have no clue what PaperArtsy HQ is going to send, the whole idea of this challenge is to do something crafty in our personal style with these 3 items. We can incorporate other PA products into the mix if we feel it is necessary.

So let's take a look at what I received from PA HQ ...


I squealed with delight when I saw these goodies! Text, flowers and purple… three of my favourite things. There’s so many creative options with these products, so it was a bit tricky deciding which direction to take, but then I remembered a frame I bought months ago (from a UK shop called The Range), with the intention of framing some art for the house. Needless to say it was still sat in a drawer forgotten, so I decided to make some faux vintage frame art ...... let's take a closer look.

I love relatively clean and simple designs, but you can still pack a punch with lots of visual texture, so that was always the direction I was going to take. I started out with a small rectangle of white cotton fabric and added some text from the Documents Printed Tissue (PT07) using some clear drying glue. I also teased out some threads at the edges of the material for extra interest. 

Next I took a piece of 6x4” Kraft card to use as the main background piece, and added some text stamping using the verse stamp from The Violets Edition set (EAB30) with white embossing powder. I chose the classic look of the white text against the Kraft card to tie in with the white fabric and the text from the printed tissue, 

I then secured the fabric in place using double sided tape, to prevent wet glue soaking through the fabric and creating wrinkles.


I wanted to add one of the violet stamps next, so I stamped out the smaller image onto white card using Black Archival Ink, so I could add colour without the image smudging.


Then I used Mattint in the colour Bellflower to colour the flowers. The transparency of these Fresco Tint’s are perfect for painting over stamped images without obscuring the detail of the stamped image.


Before adding Mattint’s in Greenstone and Fern (MT03) for the stems and leaves. 


I fussy cut the flower and glued it to the bottom right hand corner of the fabric and card


Finally, I wanted one last element to tie everything together and decided on some white splatters using an acrylic paint pen.


I love the simple, elegant look of the finished piece, and whilst I’m using this in a frame, it could easily be used as a card design too.


And the distressed white and brown of the frame, matches the piece perfectly. 


It’s going to look lovely sat on my ladder shelf, together with some candles and dried flowers.


I hope I’ve inspired you to have a go at using your PaperArtsy products to make some art for your home.

Until next time, wishing you a happy, creative week! 

Victoria 


Monday, 9 June 2025

June 2025 - With 3 Things - Shadow box and tags {by Etsuko Noguchi}

Hi friends, 

It's Etsuko from Pixienest with you for another 'With 3 Things' challenge post. 

For this feature on the PaperArtsy Blog 3 identical items are sent to 3 members of the PaperArtsy Blogging team. Typically we will receive a stamp, a stencil and a couple of Fresco Paints.
We have no clue what PaperArtsy HQ is going to send, the whole idea of this challenge is to do something crafty in our personal style with these 3 items. We can incorporate other PA products into the mix if we feel it is necessary.

So let's take a look at what I received.


The lovely and beautiful PaperArtsy Alison Bomber w0rdsandp1ctures stamp set 30 (EAB30) Viola is in season now and blooming in my garden. The other two products are PaperArtsy Mattint Bellflower (MT17) and PaperArtsy Hot Picks Printed Tissue PT01. These three products are a very exciting combination. I immediately had ideas.


And let‘s take a close look of the results of that idea.


In addition to these three, I added a few more items. One of the first PaperArtsy Stencil by Alison Bomber released (PS450). I used PaperArtsy Smoothy (Heavyweight) A4 white stamping card for all the paper used here. Also I used paper cheese box.  And more Mattints


First, I printed all of the EAB30 images onto Smoothy (Heavyweight) A4 white stamping card using Ranger Industries-Archival Ink (Jet Black).


The main color, Mattint Bellflower (MT17), is a pale color so I used Mattint to color the Viola odorants. I used PaperArtsy Mattint Foxglove (MT18), Bellflower (MT17) and Acid (MT14) for the petals, Mojita (MT13), Greenstone (MT09) and River Deep (MT11) for the stems and leaves.


I did fussy cut of all these images.


The cheese box wasn't deep enough so I glued a 1 inch wide piece of paper tape to the inside. I then applied the Hot Picks Printed Tissue PT01 script all over the back of the cheese box with Mod Podge.


I then applied one coat of Mattintt Bellflower (MT17) to the entire back of the box and then applied some Bellflower to a sponge around the edges to darken them a bit.


I'm always trying to figure out how many coats of Mattints I need to apply to get the color I want.


I also tried using white and clear embossing powders with Mattint for various results. The top paper was first stamped with clear embossing powder, heat treated, and then painted with 2-3 coats of Mattintt Bellflower (MT17), which was then lightly wiped off with a wet tissue to bring out the white paper colour underneath.


For the two pieces of paper below, on the left I applied Mattintt and then used regular white embossing powder, and on the right I first applied Mattintt Bellflower (MT17) and then clear embossing powder stamped on the top and heat-treated. Once that had cooled I applied PaperArtsy Fresco Finish Chark Acrylic - Little Black Dress on top and lightly wiped it off, hoping that the Bellflower underneath would stand out, but it didn't turn out very clearly.


Now moving on to the inside of the box, first make a 1 inch wide piece of paper tape to attach to the side of the box. Apply 4 layers of Bellflower (MT17to the paper, then use the EAB30 stamp and white embossing powder to make the tape. And stick it on the inside.


Make a 4 1/2 inch diameter circle of paper and cut out the vintage beehive image from the Printed tissue Hot Picks and glue it on. The top of the box looked bare, so I added some chain stitches using lace yarn.


I prepared the box stuffing: cutting images, the girl was a Tim Holtz Paper Doll and a twig.


I decorated them all inside the box and made the pedestal out of the same paper I used for the inside box.


I thought I'd make it this far and add a little something more. Then I painted book pages with PaperArtsy Mattintts - Greenstone (MT09), Fern (MT03) and Mojito (MT13), then used PaperArtsy Stencil by Alison Bomber (PS450) to cut out shapes and glued them to the outside of the box. Finally I painted pearl rhinestones with Bellflower (MT17) and placed them between the leaves.


While making the above piece I maked these two tags because I thought the image EAB30 of Violas and the color of Mattint Bellflower (MT17were so lovely. I was able to enjoy making lovely tags using these two pieces by embossing them, cutting them, and placing them wherever I wanted without using any difficult techniques.


It was just viola season, so I tried to capture that simple cuteness in my works. What do you think would be lovely to take these parts and make little tags or stickers to attach to gift box or paper bag. Thank you so much for visiting.


Etsuko xxx


Facebook: Etsuko Noguchi
Instagram: Pixinest
Pinterest: Etsuko N