I wanted to store many of my samples inside, so I made the binder pretty thick and I added a couple of rings (the rings defined how thick the binder was). I added a sari ribbon to close it and the spine has a lace although you can't see it on this picture. I think I recorded the process and if so, I'll show you how I did it in my scrapcosy YouTube channel one day. You'll be able to see the inside on some pictures from stencil samples for PS318 and PS317.
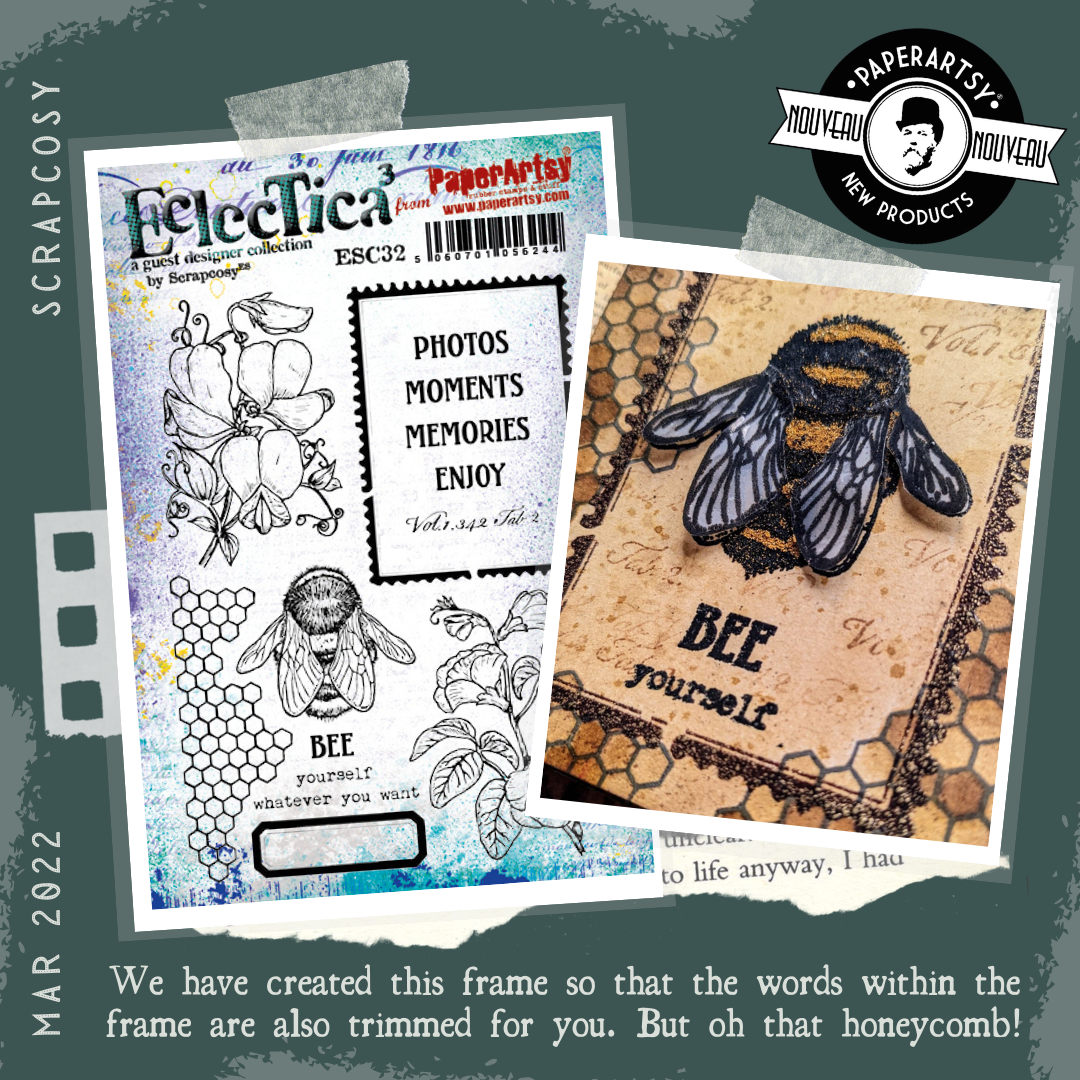
In my next sample I used the Bee and the related sentiment. I also used the honeycomb background and I also used the frame. I really like how striking and powerful it looks.
BEE yourself
I decided to play with texture, so I created some wings out from tracing paper, stamped and embossed in black, adding clear embossing powder on the surface. The wings then became really shiny! And for the bee-body I applied a thick blob of matt medium (one colour at a time, and added 2 colours of dry embossing powder, black and also my Caramel Vanilla WOW embossing powder for the yellow. The effect of the powders used dry in the glue is the bee looks pretty furry!
And my final experiment was creating labels. I added lots of glossy accents again. I think these will embellish a project really nicely. You can create a bunch and save them for a future use.
Vintage Labels
I think I like the finish when glossy accents is applied all over instead of just the middle. And there is also an experiment (on the word Enjoy) where I added Golden Sands to the Glossy accents while wet and stirred it a bit with a needle to create an Amber effect. I did that long time ago in a video, that time on a charm and I wanted to try this now on a label
Large Size: 6.25" x 9.5" (16 x 24cm) Price: RRP €6.28 +VAT
PaperArtsy Stencil 317 (PS317)
This stencil will partner with any of the stamps. The sentiments fit in the frame of ESC32, so if I had to use a stamp set to pair this stencil, I would easily choose that one. It is a bit Art Deco style and it features stylised tulips and a repeatable border type pattern which I always love to have.
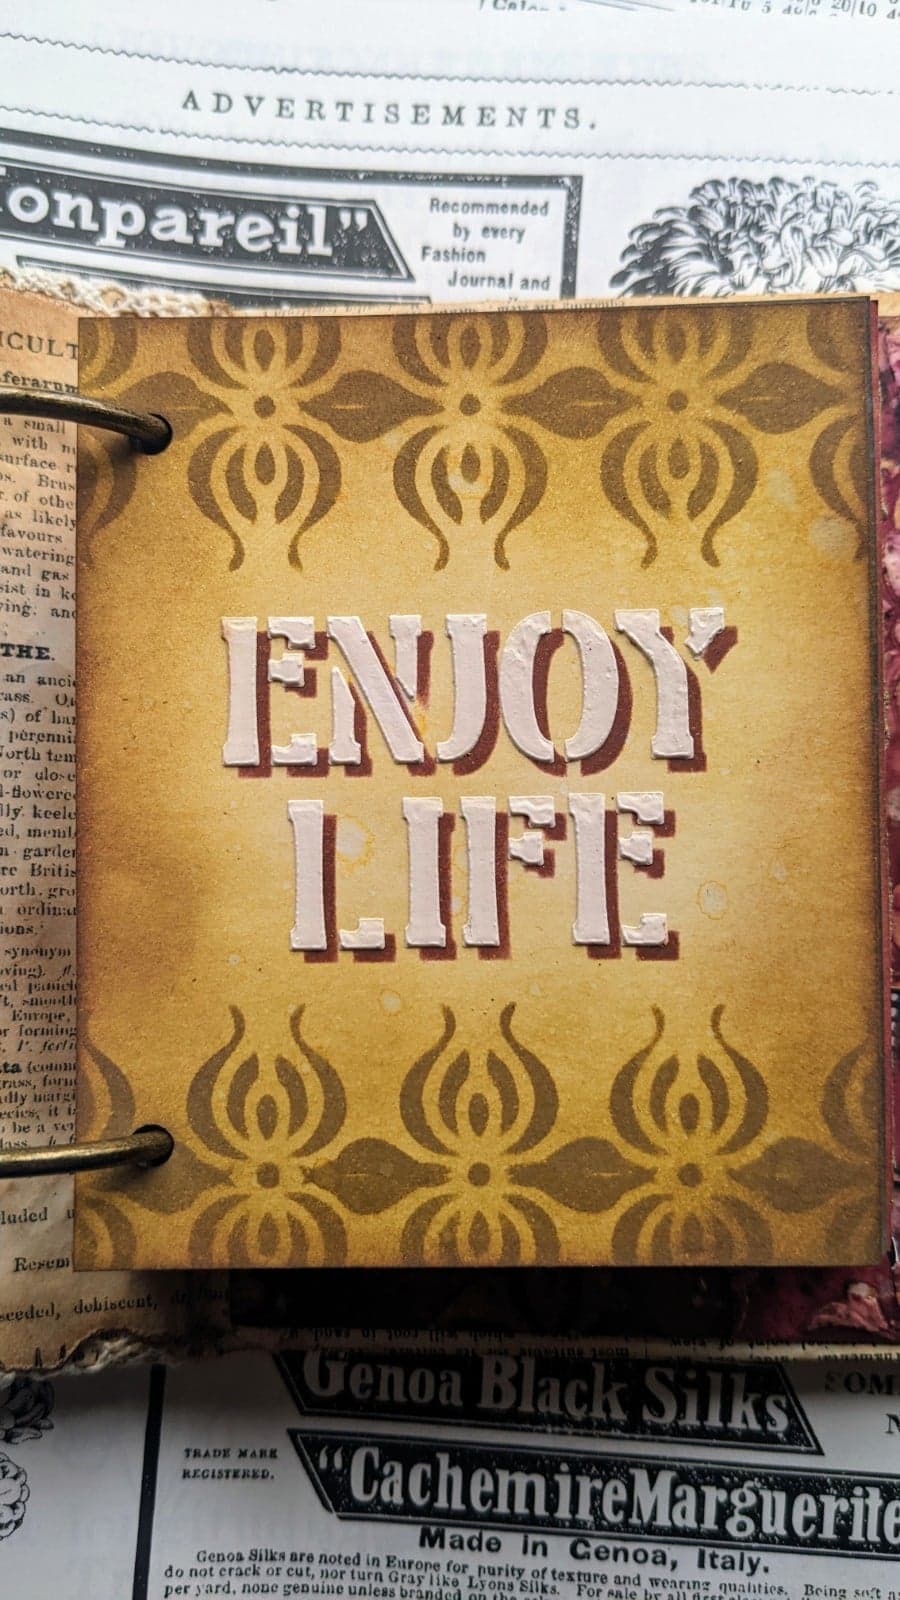
My first set of samples include a technique that I've used in the past that I love. I use distress Oxides to stencil a background and then I add the shadow of the sentiment with dark ink. You then shift the stencil and apply Grunge Paste to create an easy shadow. If you want to learn this technique, you can check this video. It's super easy and fun to do.
Enjoy life - Art deco green
I love this colour combination. I used the top border section of the stencil twice, in the normal position and upside down, using the dots to match the pattern. I left the space in the middle to put the sentiment Enjoy Life.
Same concept, just changing the ink, the sentiment and using the second stripe.
Make art
Again, I positioned the stripe normally and then I turned it upside down and matched the dots.
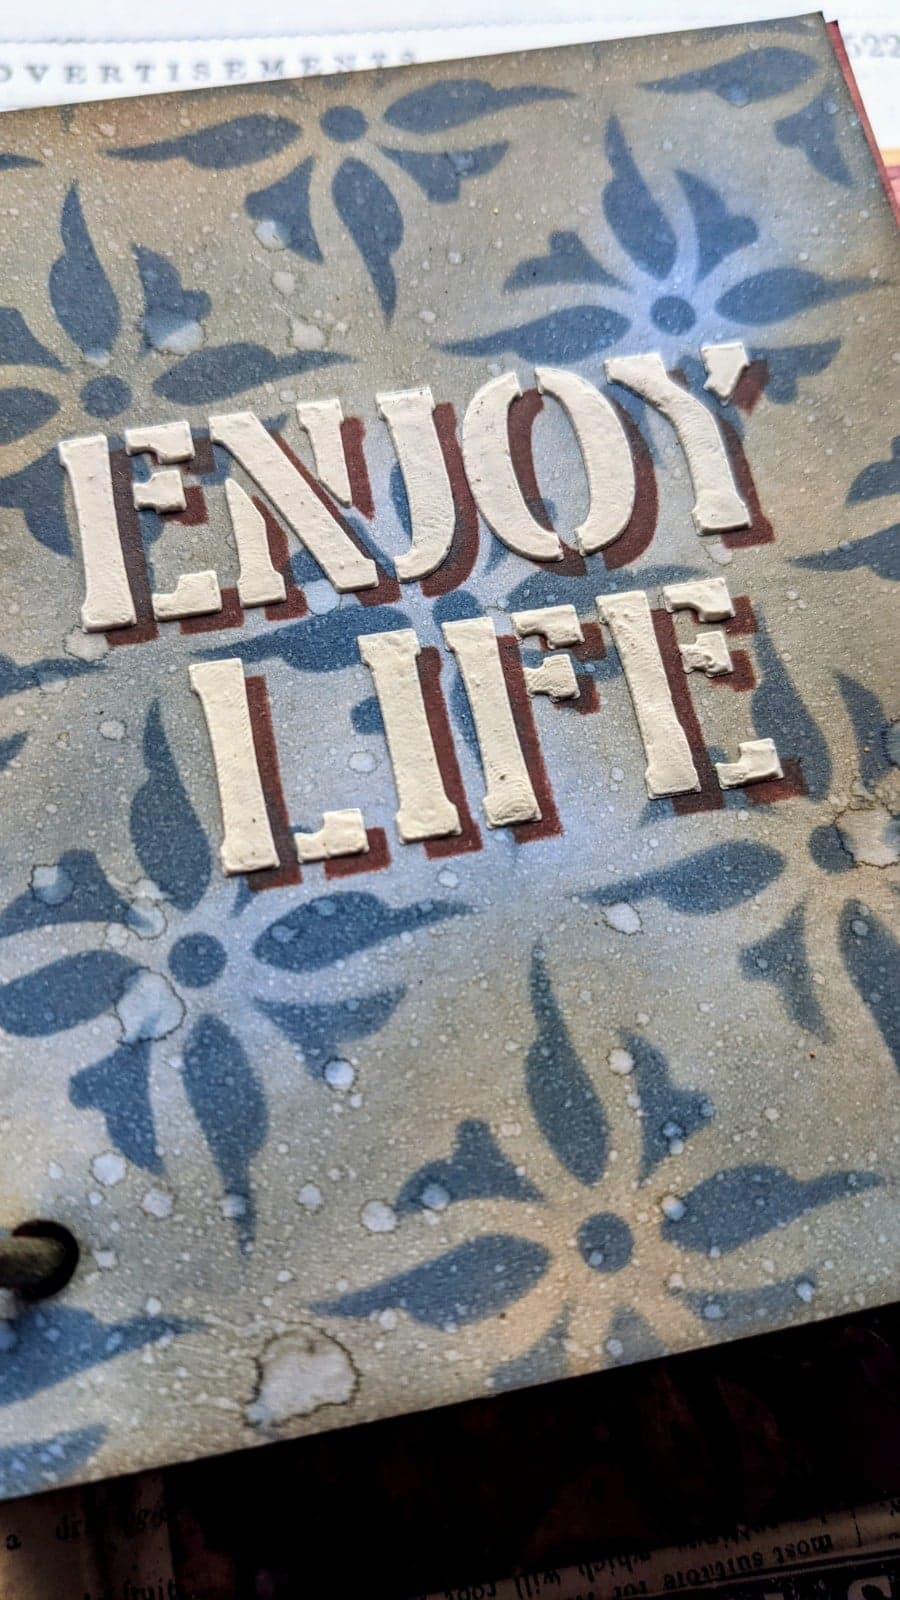
The final sample with this technique is with the background stamp and with a colour ink that I love, Faded Jeans Distress Oxide.
Enjoy Life in blue
I like making the distress oxides react just a bit, with tiny drops of water and I always like to add Vintage Photo Distress (regular) ink on top.
 .
.
And finally, just sharing with you a resist and grunge technique using 2 colours of infusions, Fresco Finish Satin Glaze and Grunge Paste. I did something similar on this video a long, long while ago. This is the inside of the binder, but you'll see it better on the doodled sample for PS318.
PaperArtsy Stencil 318 (PS318)
I find that stencil PS318 is the perfect match for stamp set ESC30. The big flower looks awesome in the double layered stencil vase (I extended the stem a bit with a black pen).
If you look at this stencil you can see it has 2 layers, plus a mask for the shape of the 'jar/vase'. The vertical lines give texture to the jar, so you can create a texture like glass ribbing. For both of these stencilled layers, I applied Distress Embossing glaze (Antique Linen). This is translucent EP with a hint of colour. Since it's not completely clear and it has a subtle tone, the second layer looks much darker. You could also use the same double layered stencil with clear embossing powder but you would need to repeat embossing the second layer a few times to appreciate the dimension.
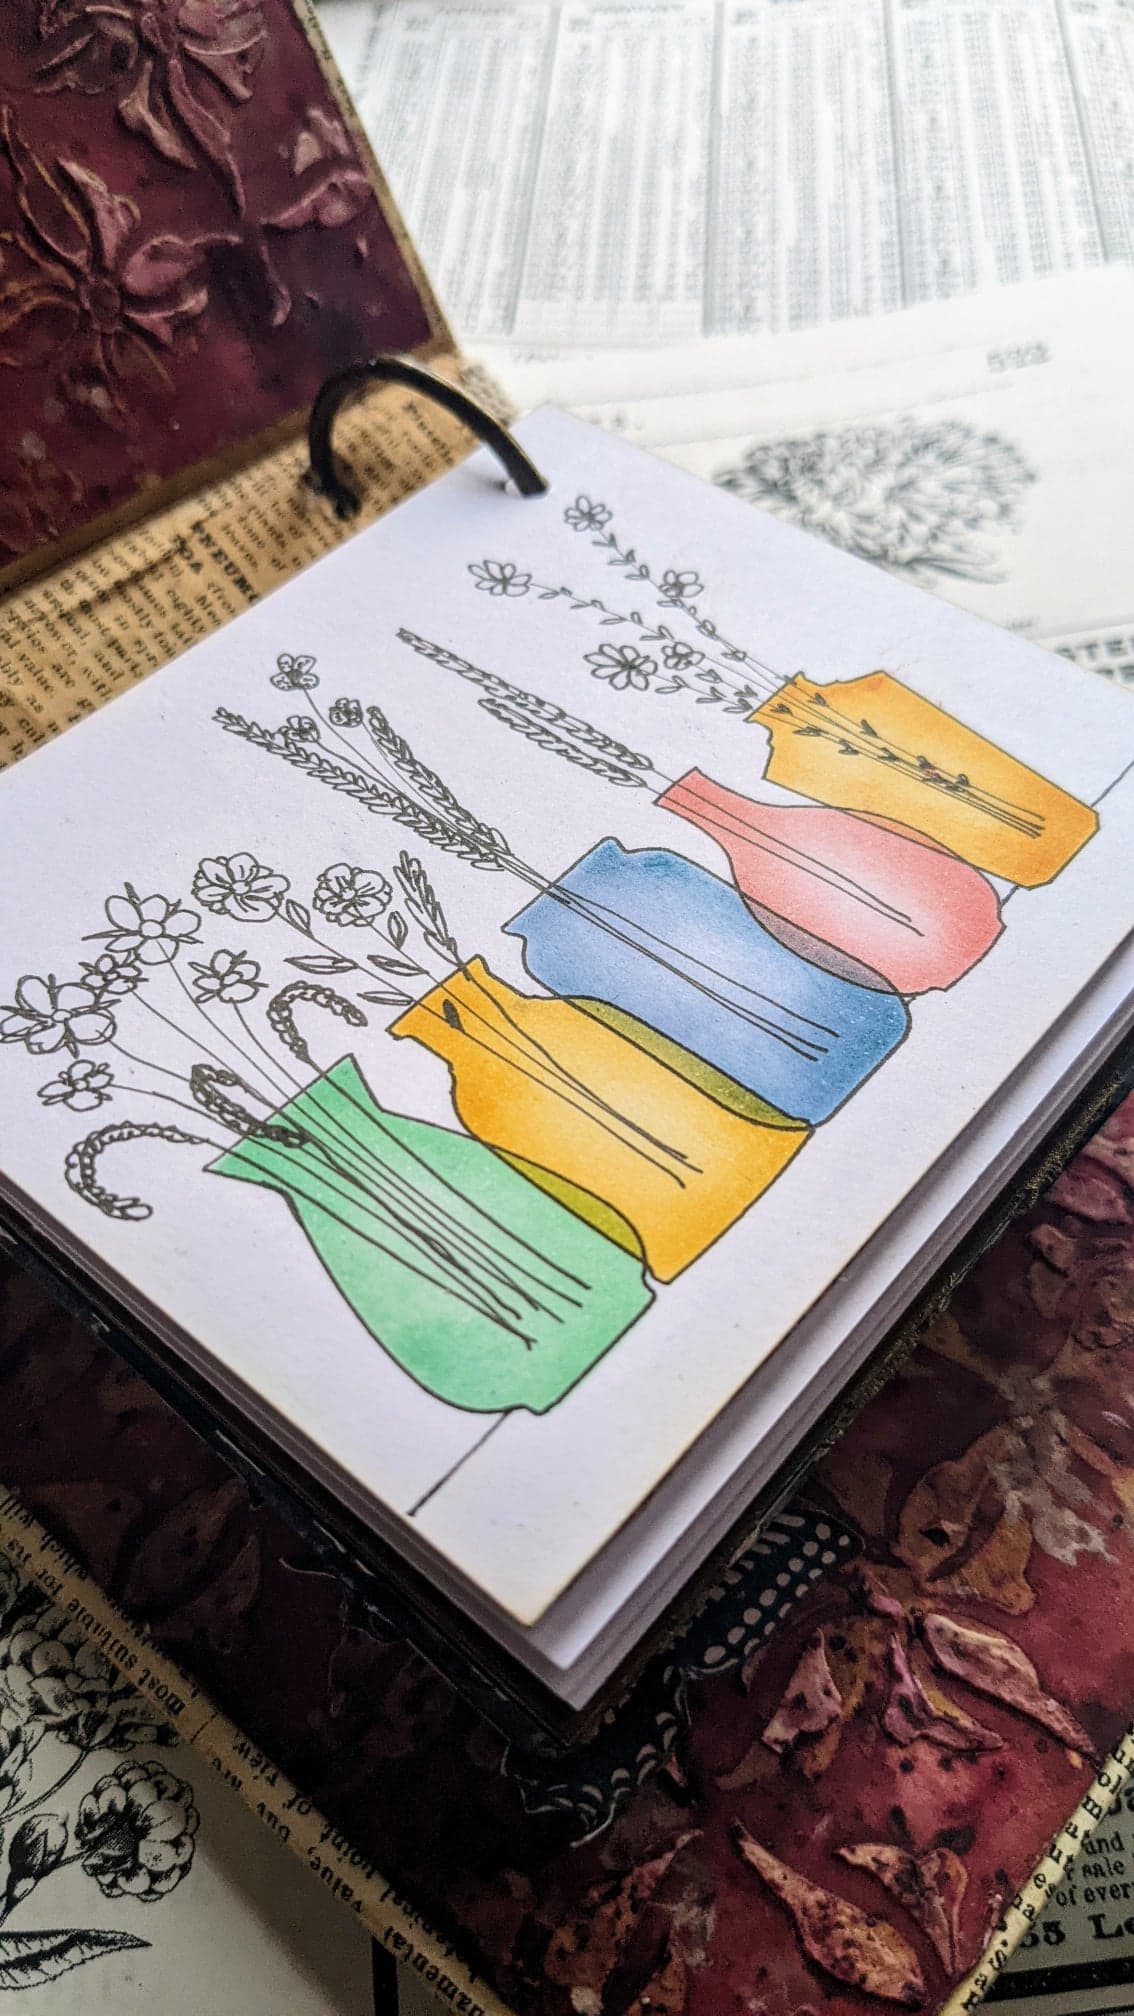
You don’t even need to use a stamp to enjoy this set. Use the stencil as a tracing template, add ink colour to the mini vases and doodle your flowers with a pen. The vases are positioned in a way that you just need to shift them a bit to get this beautiful overlapping pattern. In this photo you can see better the inside of the binder as well.
Doodled flowers in mini-vases
To complete the vases, I doodled some simple flowers and grasses for each vase with a pigment pen.
If you don't dare to doodle yourself, you could add dried flowers to the vases, as I did here. I dabbed some Infusions Sunset Beach with Satin Glaze through the stencil to create some vases and then I cut them and with the glue gun I added some dried flowers.
Dried flowers in mini vases
The dome from the stencil can be used for lots of things, but my initial idea was to recreate the glass dome from the movie 'Beauty and the Beast' where the rose is kept safe while it’s losing its petals. For the base of the dome I added the 2 stencil layers with Grunge Paste.
All the big flowers from the stamp sets of this release will fit inside, including the top part of the tulips. I have used so much glossy accents on this release… I just couldn’t help it! I needed glass-like finish and 3D!
PaperArtsy Stencil 319 (PS319)
I have in my bedroom a wall paper that has a baroque vibe and I love the shape of the repeated pattern. When I was designing the stamp set with the tulip theme, I adapted the idea of a repeated pattern creating one for tulips. And because I’m enjoying a lot these days the idea of double layered stencils, I created an extra top-layer. The middle petal of the tulip design comes from the bottom section of the stencil.
You can use this stencil in many ways and get many different results, as you will see. If you like to work on a flat surface, without dimension, you can just ink up the tulips as I did here. I used a small sponge dauber to create the green side first with Peeled Paint Distress Oxide Ink, but you could use a green Fresco paint for that. Then with another sponge dauber I added Fired Brick Distress Oxide for the petals and I used the bottom of the stencil for the middle petal.
I used a black pen tracing the stencil to define all the elements of the tulip. I love this bold finish, even if it is so different to my usual style! I just added the butterfly and the sentiment with foam adhesive and nothing else was needed.
A similar effect below, but just using the bottom part of the stencil repositioned 4 times, first creating the green bottom part, then the middle petal and then the 2 on each side. Same inks as on previous sample. Then finish by tracing with pen to define the pattern.
Bloom where you're planted
I wanted a minimal sentiment because I didn't want to hide that gorgeous background! I stamped in red and then embossed in clear.
And then, if you decide to go for dimension using texture pastes, OMG! This stencil looks gorgeous! Just take a look at a plain Grunge Paste couple of layers on top of white paper!
I love those shadows.
I didn't dare to destroy that beauty, so I repeated it to keep both versions. For this one I added some Infusions Sleight Blue on top of the Grunge Paste.
It is a beautiful and interesting background.
But since I wanted more contrast, then I went for a third version. I added first Infusions Royal Blood to my background, dried that, and then Grunge Paste on top, purely white.
This is much more contrasting.
Finally I wanted to experiment with a different texture paste in gold. It looks amazing against that background painted with Fresco Paint 'Mouse Ears'.
It seems a background for the Royalty! I love it!
And this paste can also be heat set, it's an expanding mousse and if you heat it enough it gets this look.
I liked it much better without making it react this way, but I thought I would share it in case you are on the very grungy side, because this could totally be right up your street. This one is too grungy for me.


.png)

