
Hi everyone, it's Victoria with you today and I'm here to share with you a journal page I made using just stencils. Stencils are such an important part of my creative stash. I love their versatility and how they can be the star of the show or simply chill out in the background. They just offer so many options when I'm creating and there are so many different techniques you can use with them, it's easy to keep things looking fresh and new. Today I'm sharing some of my favourite stencil techniques with you, combined with my favourite shape, circles, so let's get started.
I decided to work in my Dina Wakley Blue Media Journal as I wanted to create a larger page and needed a sturdy paper weight to take all the layers I knew I wanted to throw at it. My plan was to use Scrapcosy stencils to make circular focal points which I could then arrange on the page to create a spotty pattern. I also decided to keep the overall look fresh by working in a blue and white colour palette, selecting a range of different blue Fresco Chalk Acrylics to work with.
I love the Scrapcosy stencil patterns, as the small repeats make it really easy to create textures in your art, especially when used with Grunge Paste and embossing powders. I picked out the following stencils to use: PS108, PS293, PS317, PS319
With all my supplies ready, it was time to crack open the paint. I started off by applying a wash of colour all over my page. I wanted a slightly darker blue and am a lazy colour mixer, so I squeezed out a large blob of Fresco Chalk Acrylic (Twilight) and a small blob of Fresco Chalk Acrylic (Little Black Dress) onto my page, spreading them together with a wet brush until I had an even(ish!) coat all over. I set my journal aside to dry and got to work on the best bit; creating all the stencilled papers for the focal points.

For the first paper I used a brayer technique to layer four different blues and create a textured background to work on. I started with a light layer of Fresco Chalk Acrylic (Summer Sky) on three sides, before adding Fresco Chalk Acrylic (Smurf) on the next three sides (yep, I know, there's only four sides to a sheet of paper 😆 I was turning the page each time 👍). I continued in this pattern with Fresco Chalk Acrylic (Azure) and Fresco Chalk Acrylic (Iceberg), until I had a layer of colour I was happy with.
Once dry I applied Grunge Paste through PS293 with a palette knife and once agin, set aside to dry.
Next up were some gel prints using a round gel plate and PS319. I applied a coat of Fresco Chalk Acrylic (Twilight) to the gel plate with a brayer and place the stencil on top, rubbing a piece of paper over the open area to transfer the pattern (I actually ended up liking this bonus print so much, I used it on the final page!). I then removed the stencil and applied a thin coat of Fresco Chalk Acrylic (Iceberg) to pull the print.
Paper number three was created by applying two different blues (Fresco Chalk Acrylics Twilight and Smurf) randomly through PS317 with a sponge.
The final patterned paper I made used ink and embossing powder. I started by applying a layer of VersaMagic (Night Sky) with a brayer to my gel plate and pulling a print to create a soft blue background colour to the paper. I then used an embossing dabber to apply embossing ink through PS108 before covering with WOW embossing powder (Midnight Dream) and heat setting. To stop the glitter blasting everywhere with the force of the heat gun, I heated through the back of the paper. Note to self: Next time use an anti static bag before applying the embossing ink and powder. The final pattern is a bit messy because I missed this step and the powder stuck everywhere!

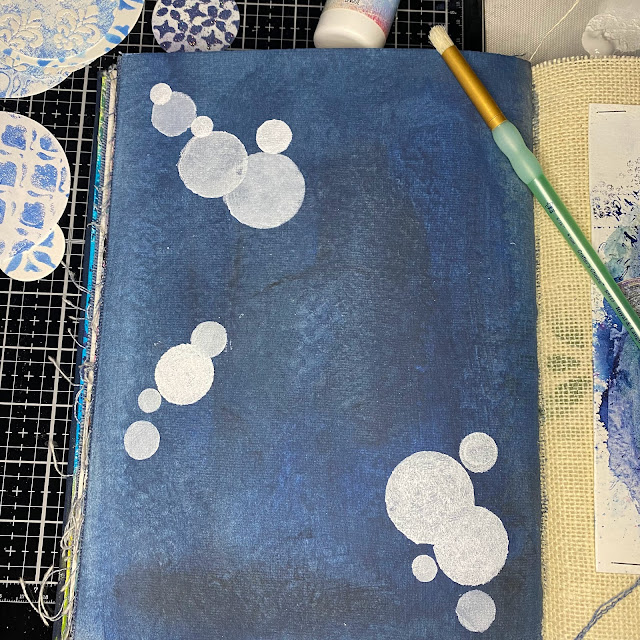
With all the papers made it was time to pull it all together. I started off by die cutting the papers into a range of different sized circles and placed these to the side. I wanted to create some extra interest in the background of the journal page, to tackle the slightly patchy colour application, so using the negative paper offcuts from the dies, I added some Fresco Chalk Acrylic Snowflake with a stippling brush to create white circles.
Once dry I arranged the circular papers across the page, spacing out the different sizes and patterns to lead the viewers eye around the page. For another hit of dimension, some of the circles were glued straight to the page and others were adhered with foam tape. For a final flourish I then filled in the remaining gaps with more circles, using a Posca Paint Pen (white) to draw on some dash circles, before getting out the silver embossing powder and PS145 to create some small silver circles. I finished off by stippling Fresco Chalk Acrylic (Azure) through PS317 to create the Make Art sentiment. I love the classic blue and white combo and lets face it, circles make everything look good! The white paper really pops against the dark blue background and shows that you don't always have to overcook things. Keeping it simple not only saves yourself some work but it adds to the overall finished effect.
I really enjoyed all the little steps to put this page together and it could be done over several creative sittings if you're short on time. You could even raid your stash of printed papers if you wanted to add an extra bit of variety and speed things up a little.
Wishing you a happy, creative week.
Victoria


1 comment:
Layers of bubbly stencilled beauty - a treat.
Alison x
Post a Comment