Showing posts with label 2020 Topic 8. Show all posts

Saturday, 9 May 2020

2020 #8 Popping Pink: Bloom like a Rose with EEB {by Jennie Atkinson}

2020 Topic 8: Popping Pink


Subtle doesn't mean that there is no complexity. A detailed look at Jennie's beautiful pages shows intricate details thanks to stencils and gel plates. It's also a good study in white space for those of us that sometimes struggle with 'less is more'.
~ Keren

Hi everyone, it's Jennie (Live The Dream) with you today, and I'd like to share with you a journal page pulled together using some of my favourite pink Frescos and a paper piecing technique using a lovely stamp design from Elizabeth Borer.

I have been sharing a few crafting techniques with my grandchildren through linkups over the internet in the last few weeks and got them started on layered paper piecing with paper dolls (most of us will remember that from days gone by!). This got me thinking that this would be a lovely way of showcasing these lovely stamps as I really am not a great painter! Whilst I love pink sometimes it does need the addition of a crisp clear contrasting colour and I think the use of parts of the stamp using white paper achieves a less cluttered look but still suits my vintage style.


I have used this lovely stamp set from Elizabeth Borer and combined it with a stencil from Scrapcosy for the background papers.


But first a little about my background paper. I have used three great pink Fresco colours Taro Milk Tea, Byzantium and Vintage Lace.


Combining these on the gelli plate gave me three pieces of coloured card stock to create with which should be complementary. I made one dark sheet, one lighter and one which has been patterned with stencils.


Unfortunately these colours look a little different having been taken in my craft room on a darkish day, but at least you can see what I was trying to achieve.


Pushing the stencils into the paints here and there gives a lovely ghostly feel .........


...... and flipping the stencil ensures the text is printed on the paper the right way!


The blooms were then stamped onto the darker printed cardstock and again on white cardstock. These blooms really lend themselves to isolating smaller layers. I chose not to layer them with foam pads as I felt it lost the dynamic contrast.


I also stamped the image onto the journal pages in order not to lose some of the smaller details.


As I really loved the background I kept the decoration to a minimum and completed the page with this lovely sentiment from Alison's 'Magic and Wonder' set.


I really love how all these colours work together and using the Gelli Plate has allowed me to have three different colours of paper to work with. Either of these panels would make an occasion card and would be flat for posting too. The paper piecing technique using a good contrast colour, in this case white, has really popped these blooms and it is worth looking at PaperArtsy stamps within your collection which might really benefit from being used in such a way as it is a technique which can be used with all genres.


My grandchildren (aged six and nine) have already found a few of their larger stamps to cut and layer now that they understand the paper layering technique (what crafting Nana would not give them stamps for birthdays and Christmas !) and I am looking forward to seeing their creations sometime soon. And you don't need gelli plate papers - I have encouraged them to look at their patterned paper to see what they can stamp on.


What could be better than a paper technique which can be enjoyed across all ages and abilities and a means of using up some of our stash! 

Jennie x

Thursday, 7 May 2020

2020 #8 Popping Pink: You are Unique with JOFY {by Lynn Good}

2020 Topic 8: Popping Pink


I've seen a few people using the reductive painting technique recently, and it's wonderfully effective and simple. Lynn has embellished the white further with gorgeous almost neon splatters of pink to create a piece as unique as the sentiment suggests.
~ Keren

Hi everyone, it's Lynn Good (Memories on the Page) with you today, and I'd like to share with you an art journal page that I have created for this challenge - Popping Pink!

I absolutely love bright colours and pinks and purples are to me like chocolate is to others!! Combine this with JOFY stamps and we have the perfect combination.  I had planned on using another stamp set and technique but with the corona virus affecting our mail system and being in Australia they didn't arrive in time so I have used this wonderful stamp set JOFY90 and a technique that I love and learned - after attending a Tracy Scott class here in Australia.


I find this technique is very rewarding - you start by painting the whole page putting colour where ever you want on the page - and by the end of it you think " oh no this is not good!"  Then you stamp directly onto the page and using Paper Artsy Fresco Finish Chalk Paint - Snowflake, white out the areas around the stamps - it is like watching a creation bloom!  Unfortunately the first photos I took did not save to my phone so I can only tell you that I painted the entire background of the art journal page in a myriad of colours, and then stamped the JOFY90 stamp around the page in black ink.


This is the stage that I would call "blooming".  You can see where you are going but know all the small details you are about to add are going to make it shine!


Here I have added some background stamping using JOFY89 stamp as well as stamping the centre piece of the flowers on Paper Artsy Smoothy Cardstock that I had painted with Paper Artsy Fresco Finish Chalk Paint - Bubblegum.


I have used the phrase from the JOFY72 stamp on the same paper that I had prepared for the centre of the flowers. Final touches include colouring some of the finer details on the flowers with paint pens and colouring the black of the flowers as I wanted them to stand out more.


I would definitely say to have a go this technique, it is so addictive once you start!!  

I cant wait to see what you create :)

Lynn Good
http://memoriesonthepage.blogspot.com/

Tuesday, 5 May 2020

2020 #8 Popping Pink: Trio of Cards with EKD {by Claire Snowdon}

2020 Topic 8: Popping Pink


It's easy to assume that you need lots of colours to make impactful art but here, using a plethora of pinks in this beautiful trio of cards, Claire has woven them together to create a gorgeous masterboard. The gold splatters are the perfect finishing touch!
~ Keren

Hi everyone, it's Claire Snowdon with you today, and I'd like to share with you a trio of Popping Pink birthday cards I made.  Of course these cards could be used for any occasion - but it's always handy to have a few birthday cards prepped and ready to go!

I chose to create some masterboards as the basis for my cards - masterboards are great as I have loads remaining to create more cards or to use in collages or art journalling.....the options are endless.


I started by creating some backgrounds on a couple of pieces of white A4.  I did this by blending lots of Fresco Finish paints in various shades of pink with a paintbrush until I was happy with how they looked.  I probably spent more time playing at this stage of the project, adding and covering sections,  more and more paint layers than I did on the rest of the cards put together! 


These are all the shades of pink I had in my Fresco Finish collection.....and I used every single one somewhere in these cards!  :)


The next stage of the masterboards was to add stamping and stenciling.  I used some of the lighter pink shades to do the stenciling with a The Crafters Workshop stencil and PS015.  Then used elements from EKD01, EKD03, EKD05 and EKD06 to add background stamping with a few different pink inks I found in my stash - Distress Oxide (Picked Raspberry), Archival (Pink Peony) and Archival (Cactus Flower).


Once I was happy with the masterboards I cut them up and added stamping using Black Versafine ink and stamps from EKD05 and EKD06.


I tried to play around with the placement of the stamps and also varied the stamps for each card so that each of them are unique.  Then I added some paint splatters in white and gold....I love the combo of pink and gold together. 


I layered up the stamped pieces onto kraft card, added to a card blank and added the happy birthday sentiment from JOFY14 - it's an oldie but a goodie!!


These cards are pretty easy to make - the fun part is creating the masterboards.  There are no rules to creating masterboards so just have a go and let your imagination run wild!!

Thanks for joining me here today,
Claire x

Blog
Instagram
Pinterest

Sunday, 3 May 2020

2020 #8 Popping Pink: A Trio of Wishes with ESN {by Miriam Grazier}

2020 Topic 8: Popping Pink


Intro
Both paint and infusions are popping for this pretty trio of cards by Miriam. It's nice to have stripped back ideas: simple stencilling, white space, black ink and careful use of one colour is all the is necessary. Sometimes we just make things more complicated that they need to be!
~ Leandra

Hi everyone, it's Miriam with you today, and I'd like to share with you a trio of cards that I have created to send to friends and family that I cannot see at the moment due to the travel restrictions in the UK.  

I felt, in these unprecedented times, that I wanted to let people know that I am thinking of them even though I cannot physically see them just yet.  For me, craft is also great for my well-being.  I find it relaxing and it takes my mind off my worries, even if it's for a short time.  

I kept my cards easy to make for beginners, whereas a more experienced crafter could advance my instructions very easily.  


What I really enjoyed was creating cards with very few materials that were quite striking once complete.  I have also ensured that, even though there is some dimension, they can be posted using a normal first class stamp.


This card was super simple and you can adapt using the stamps that you have in your stash.  I kept the colour scheme very clean in order to allow the Bougainvillea to really 'pop', after all, that's the theme this fortnight.


I simply loved the black solid bird and branch image against this background.  Sara's images often lend themselves to being able to cut parts out and layer them up, which is what I did here with the bird, simply to give a bit of dimension.


I also wanted to show how a stencil used alone can create a striking background.  


This time I chose this beautiful quote stamp.  You can use any stamps that you want here, including images if you did not want to use a quote, but I simply love this quote and know that the recipient will too.

If you wanted, you could tidy the lines up slightly by using a white gel pen, but I loved the imperfect look that I created.


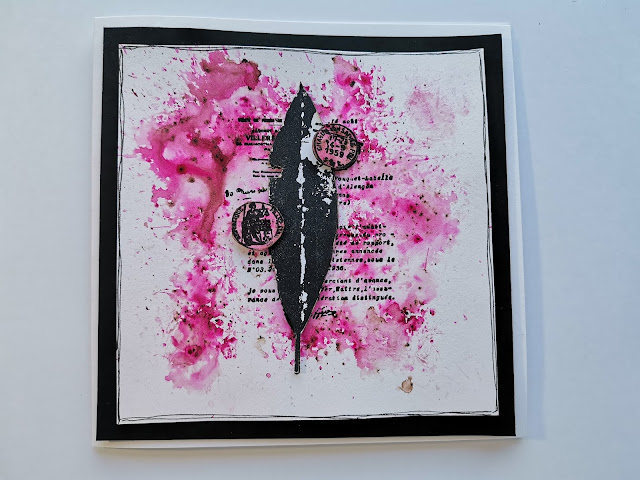
Again, this is a very simple card, and very quick to make too.  Here I created a very quick background colour using Magenta Infusions.  You could do the same with paint or ink just by pressing them onto a craft mat, adding water then swooshing your card panel through.


The main image was stamped onto the card and then separately onto another panel of card so that it could be cut and mounted.  I also followed something that I have seen Sara do many times, which is to cut and colour parts of the collage image and layer them up.  I have done this with the stamps on the collage.


I also stepped this card up to see how it would look.


This time I used a thin layer of Grunge Paste onto the card panel first.


I loved how the Infusions caught each peak and texture of the paste, however, the pink didn't 'pop' as much when I used it on top of the Grunge Paste.  I thought about this and concluded that If I wanted to do this again I could paint over the panel using Snowflake Fresco Acrylic chalk paint before I added the Infusions, which would make it 'pop' again.


Here are the two Infusions cards together.  You can see how brighter the pink looks on the card without the Grunge Paste.


I loved how I could create simple, but striking, cards using not many materials.  


I also love how you could step each of the cards up by using more layers and gems, to name only two things.  The ideas could be endless.

More importantly, creating these came me a moment of calm in what is currently a crazy world.  And I know that the recipients will love receiving them too.

I really hope that I have encouraged you to create cards yourself.  Whether you are a beginner or whether you are more experienced but want to lose yourself in the joy of creating, I know that you will be delighted with your simple makes.  If you want to make them more detailed, that would be fabulous.  Whether you plan to keep them or give them to those that you love, the joy of creating will satisfy you.  I would love to see what you create.

Thank you for joining me this evening.  
Happy Crafting!
Miriam

Blog:  Miriam's Creative Dreams