


Hi everyone
Nikki (@a2a.craft) here with you today.
It's always fun to do one of our colour wheel themes - it often encourages me work in colours or combinations of colours I wouldn't naturally chose . It was a double challenge for me this time, using France Papillon stamps - again not my natural style. As her stamps lend themselves well to collage I decided to create a mini book incorporating a translucent window.

It's not easy to take a photo capturing the whole book - but this gives you an idea. The front cover includes the translucent window - I have stamped on a single layer of kitchen roll and added wax to create this.... more on this later.

I decided to use a combination of 2 stamp sets and one stencil from designer France Papillon - to build my 4 double pages and front and back cover. I wasn't sure at the beginning how this would look - there was no plan - except to build up the colours and elements as I went and see what happened.

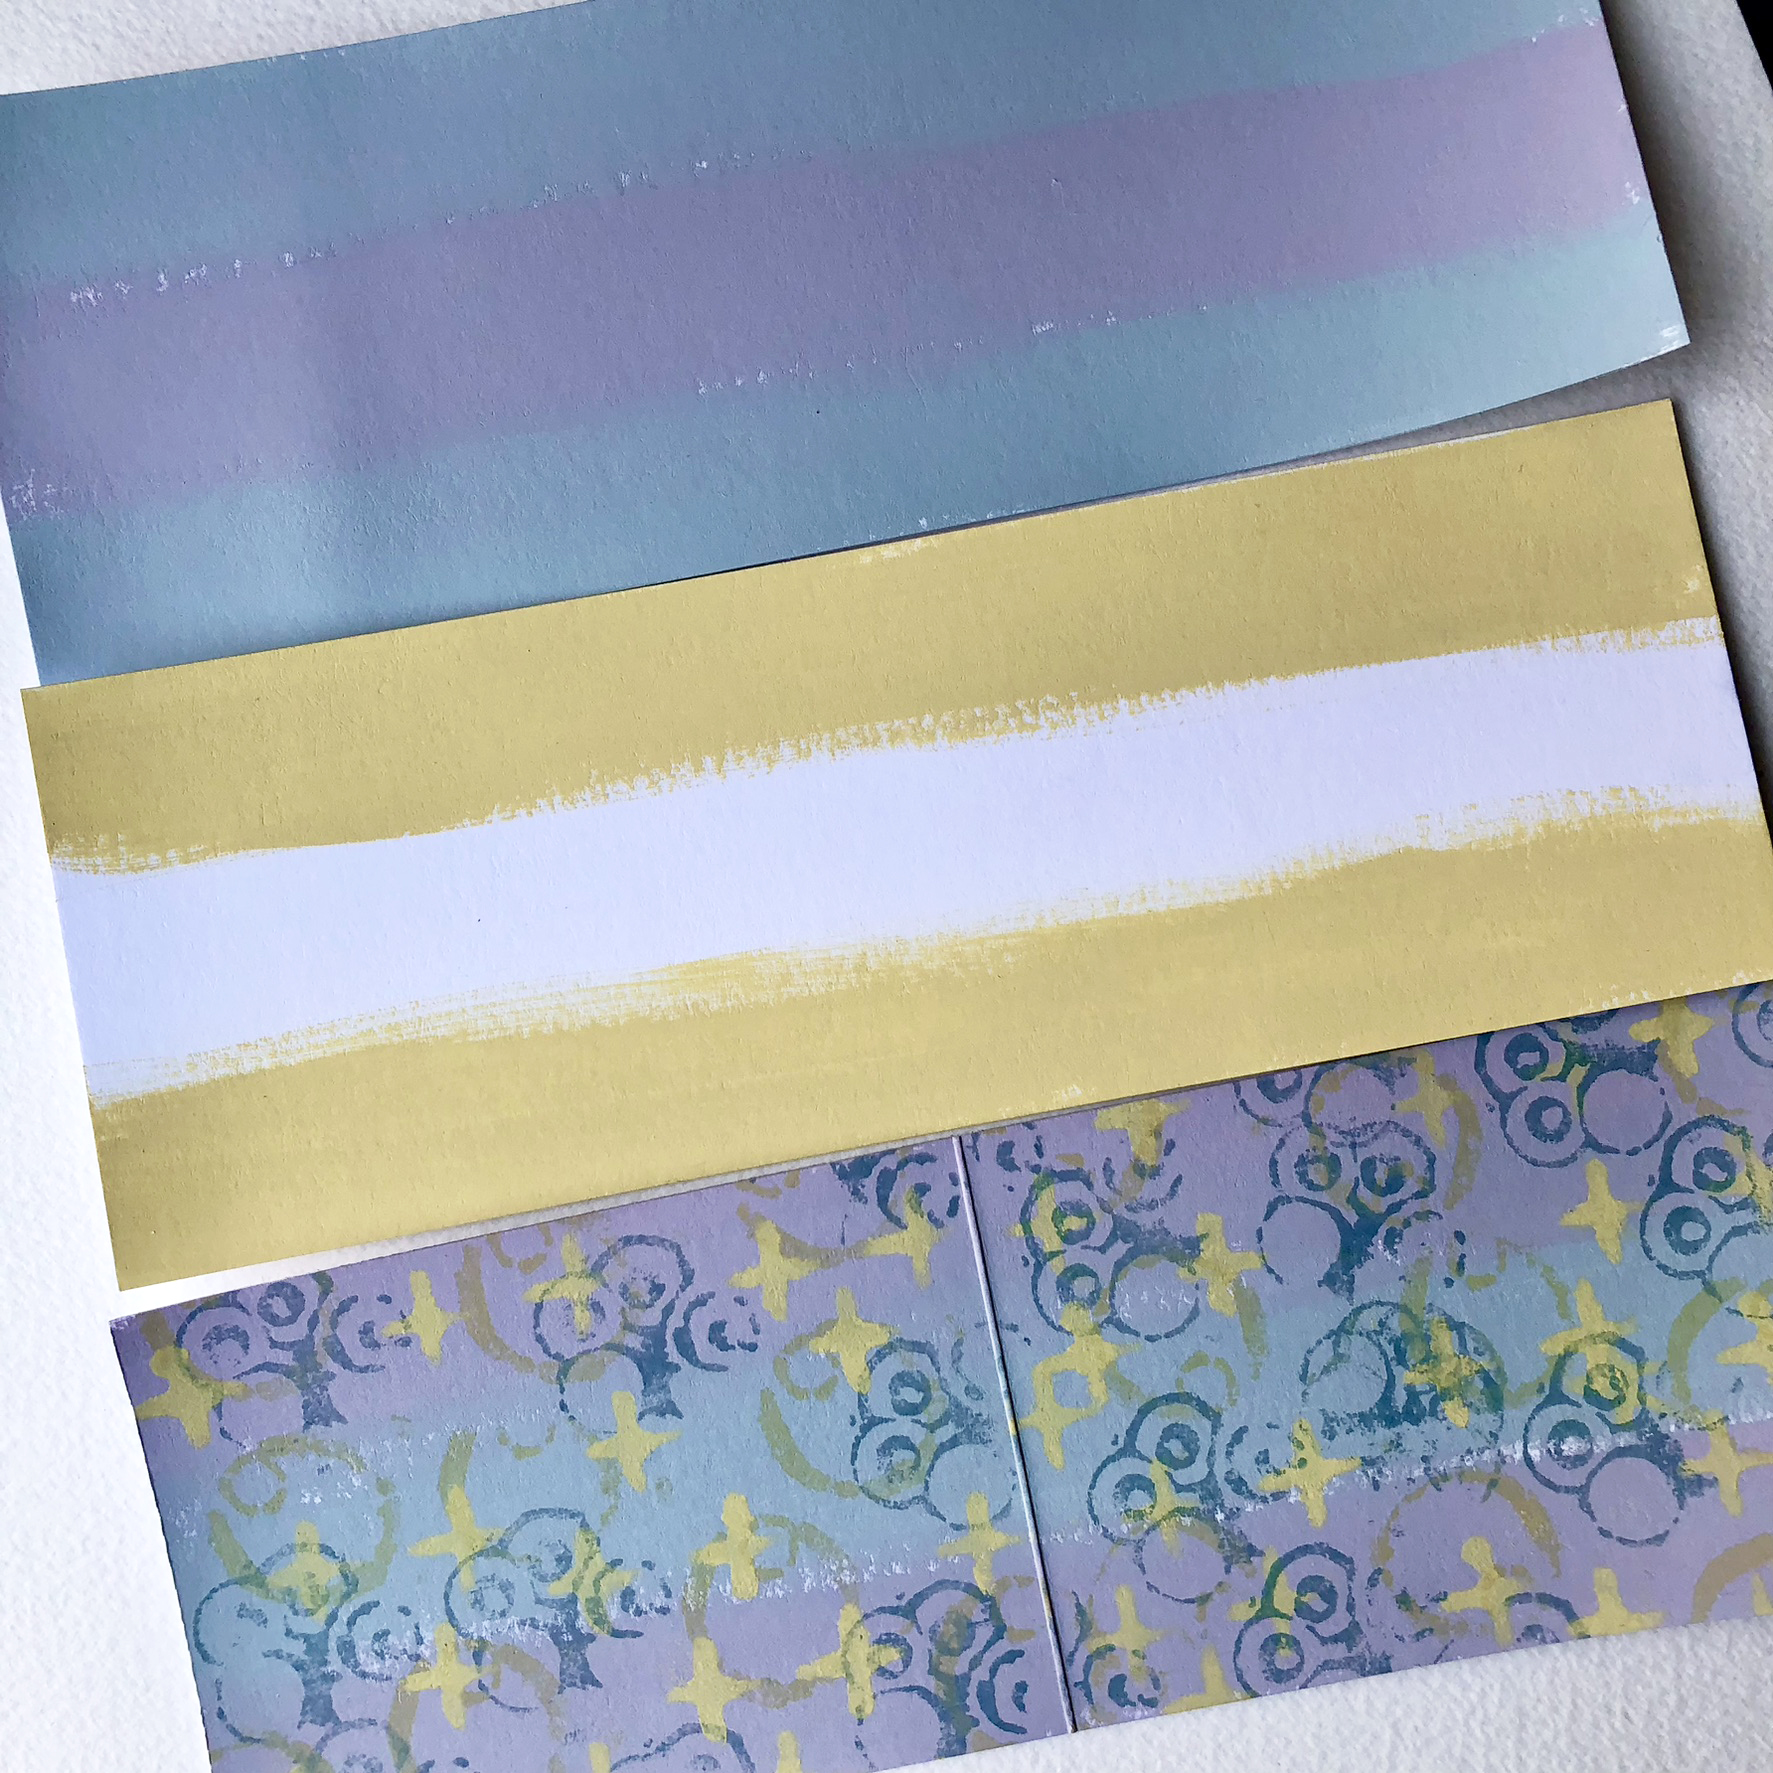
All bloggers for the current topic are using the same 3 colours to create the masterwheel shown below: PaperArtsy Fresco Finish Chalk Acrylics - Aqua Duck Egg (FF199), Butter (FF129) and Candy Floss (FF70). They are all quite subtle with no one colour too vibrant or bold - but the more I worked, the more I enjoyed this combination.
I decided to select one (of the 12 standard Split Complementary colourways. I used Butter contrasted with the tertiary colours created from Candy Floss and Aqua Duck Egg.
The 'blue' colour you can see is two thirds Aqua Duck Egg and one third Candy Floss.
The 'lilac' colour is made with two thirds Candy Floss and one third Aqua Duck Egg.

When you use a viewfinder like this, it is so much easier to see how the colours will look as a combination.

This is such a useful tool ... creating a colour wheel. When you look at those 3 bottles of paint, you may not be able to visualise the colours that will emerge, so to keep a colour wheel handy also means you know how to get back to those colours again in the future.
Understanding colour mixing really offers the opportunity to get more value out of your paints.


These are all the different Split Complementary colour options possible from the 3 Fresco paints above ... which would you choose?


When I am not sure where to start I do two things - create some backgrounds and stamp the images. Seeing them on paper and maybe a bit of fussy cutting often generates ideas for me. I started with some backgrounds - simple painted layers - with a brush, a sponge and a brayer. I did these on photocopy paper as I wanted the paper to be thin for collage.

As you can see these are very quick and easy but gave me some coloured paper to stamp my images on. I cut some of these out and started layering them - and ideas started flowing.....
.jpg)
With some collage elements created, I then began my book pages. The book is around 10.5cm x 7.4cm so I cut lengths of card 21cm x 7.4cm and scored.
For some contrast I also stamped, using Ranger Archival ink in black, on white copy paper. I used the tiny circle cluster from France Papillon stamp set 31 (FP031) and the long incomplete circle stamp from France Papillon stamp set 36 (FP036).


There are 4 double pages in my mini book, plus the front and back. Each started with a painted background, in 2 or 3 of my colours. I then added some stamping and/or stencilling. Here you can see I used the large stamp from FP036.

In this one I started with some stamping and stencilling with more colour. I used PaperArtsy stencil by France Papillon (PS377).


Sometimes an area can look wrong - so I add a little white paint with my finger. I used PaperArtsy Fresco Finish Chalk Acrylic - Chalk (FF83). I can then stamp over it.

Finally I added the stamped collage elements I had fussy cut earlier, to add focus and design to each page.


I stamped many of the words and phrases from the two stamp sets by France Papillon and also some quotes from Alison Bomber stamp set 13 (EAB13) on a single layer of kitchen roll.

I placed this on some baking/parchment paper, added a little wax (I used Beewax but you could use candle wax), another layer of parchment and ironed the surface allowing the wax to melt over the stamped words and the surrounding tissue.
This not only makes the tissue firmer but is also translucent. I was inspired to try this having seen an Instagram reel by @junkjournaljoy that you can hopefully see here.


At this stage I put my book together - simply by adhering the reverse of the pages together.

Before attaching the front cover - I took one of the waxy quotes and cut to slightly larger than the aperture. This allowed me to stick it to the cover before adhering that page to the rest of the book. (So it is sandwiched between the 2 pieces of card).

I added the waxed quotes and words to other pages too.


I added some extra pen work and dots of paint on some pages....

and of course some paint splatters!


As I mentioned earlier, I used a standard Split Complementary colourway, but did you realise there are also Double Split complementary combinations too. We we want this post to be a comprehensive record of this concept, below you will find all those possible 12 options. Again, a viewfinder is such a helpful tool to identify these different combinations clearly.


I really enjoyed making this mini book for you! The France Papillon stamps are fabulous for collage either as the entire stamp or just using parts of them.

I shall be using the wax again too - as not only does it have the translucent effect but it also adds wonderful texture. Perhaps that is a new technique you might like to give a try too!
Thanks for reading!
Nikki


1 comment:
Thankyou so much for this Nikki. I'm happily making this colour wheel and viewfinders for myself. Great project.
Post a Comment