Hi everyone
Ellie Knol from PAPER-STAMPS-COLOR here with you today.
Colour mixing again this time. Mixing colors create so many variations of color, and the sky is the limit in this. Mixing can sometimes create muddy colors, but when you don't try you will never know what you'll get.
I decided to alter a thrifted heart with a cushion on top, both in a heart shape.
I decided to alter a thrifted heart with a cushion on top, both in a heart shape.
In the end it turned out quite different as to what I envisioned, but I normally go with the flow. Read on to find out how I also added the overall theme, transparency throughout the project, especially when doing finishing touches, but also in the mixes of paints.

I chose to use these two complementary colors below from the Masterwheel colour mix created from Fresco Finish Chalk Acrylic Aqua Duck Egg (FF199) and Butter (FF129), and Fresco Finish Chalk Acrylic Candy Floss (FF70) pink.
The mix of blue and yellow gives a nice warm green!
I LOVE thrift stores. I pick up items that can be altered for crafting purposes quite easily, and it often leads to inspiration for a project as well. This happened to me a few weeks ago when I picked up this heart with a cushion on top, both in a heart shape. A pin cushion, yes!
At this stage I knew I would need a darker color to add some depth and contrast to the project. You'll see my choice of darker color soon.
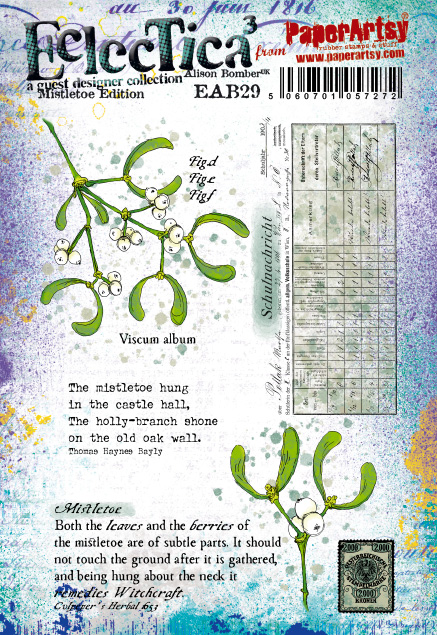
I chose to use two beautiful botanical themed stamp sets: Alison Bomber stamp set 24 (EAB24) and 29 (EAB29)
Here you see my darker color; leftover gelliprints from a previous post, also a mix! BUT, which of the prints one will I use? I like both, so decided to do the one on the front, and the other one on the back to be able to choose in a later stage. I adhered them and sanded the edges when dry to get it right up to the edges.
Oops, the cushion would cover up the images too much, so I decided to make a new and smaller base for a smaller cushion and use the bigger cushion as a second project. This was twist number one.
The 'cloth' on the cushions was created by adhering leftovers of the same prints to a thin white cotton, and making it stronger with a thin layer of bookbinding glue on top. My hot glue gun came into play here to attach the cotton to the base; also to attach the cushions to the base.
.jpg)
The above project made for the second twist. I decided to use the smaller cushion for needles, and the bigger for pins.
I changed plans : I could hang both on the wall in my sewing room, but wanted to be able to detach the lower cushion with the pins to use on my workspace. Some paper strips were pulled out...
How do I decorate with that?
YES, beads! I still had some small leftover pieces from the same gelli prints and covered some wooden beads.
After the beads had dried, I covered them with several layers of a gloss medium, PaperArtsy Fresco Finish Chalk Acrylic (Gloss Glaze, FF51) to make them glossy and protect them of course.
Starting to tick off a few transparent ideas already - part of the brief for the current quarter here on the PaperArtsy blog.
.jpg)
Mixing in a bit of PaperArtsy Fresco Finish Chalk Acrylic (Metallic Glaze, FF24) to all the colour mixes, made the colours more transparent. Adding a thin layer to the stamped mistletoe image gives a transparent and lighter color to the leaves and berries.
.jpg)
I used these PaperArtsy Fresco Finish Chalk Acrylics in my project:
From left to right : Aqua Duck Egg, FF199, Butter, FF129), Gloss Glaze, FF51, Metallic Glaze, FF24), and Candy Floss, FF70.Enjoy all the pictures of the finished project!
I liked it how this project kept me on my toes all the time. I love that it took me on a creative journey.
I now wish I made the cushions from gel-printed cotton; it's a bit stiff, but that might be a task for the future.
I learned a lot by experimenting, get through the twists and turns and in the process used up some of my stash of printed papers and the complementary colour combination of pink and green works so well for these botanical stamps.
Have fun creating, and I hope you are inspired to mix paints and experiment with techniques within your crafting projects too!
Facebook: https://www.facebook.com/EllieKnolCrea/
Instagram: https://www.instagram.com/ellie.knol/
Pinterest: https://nl.pinterest.com/ellieknol/

.jpg)


.jpg)

.jpg)
.jpg)


.jpg)
.jpg)

.jpg)
.jpg)
.jpg)
.jpg)


.jpg)
.jpg)
.jpg)
.jpg)
.jpg)
.jpg)


4 comments:
the hearts are beautiful! gorgeous project.
Thanks Helen.. It was fun to make..
Absolutely stunning project, love the soft colours ♥
Thank you so much Christine!
Post a Comment