Tuesday 11 July 2023

2023 Topic 7 : Art Dolls {by Floss Nicholls} with Sara Naumann stamps


Hi everyone

It's Floss Nicholls: flossWORKSHOPart here with you today with the Art Dolls project that was incorporated into this quarters transparent theme for PaperArtsy.


I loved the idea of working with see through aspects and so I went straight to my recycling to find some clear plastic packaging to paint and scrape and then to find some tissue papers to print and emboss onto.


I wanted to use a translucent embossing powder, so I chose Wow embossing powder in Oyster Glintz and my good old favourite Opaque Vanilla White embossing powder too. I grabbed one of my sketch books to work into...I chose a spiral bound one as I knew I wanted to attach a doll by the spine...and a few other supplies as seen below.


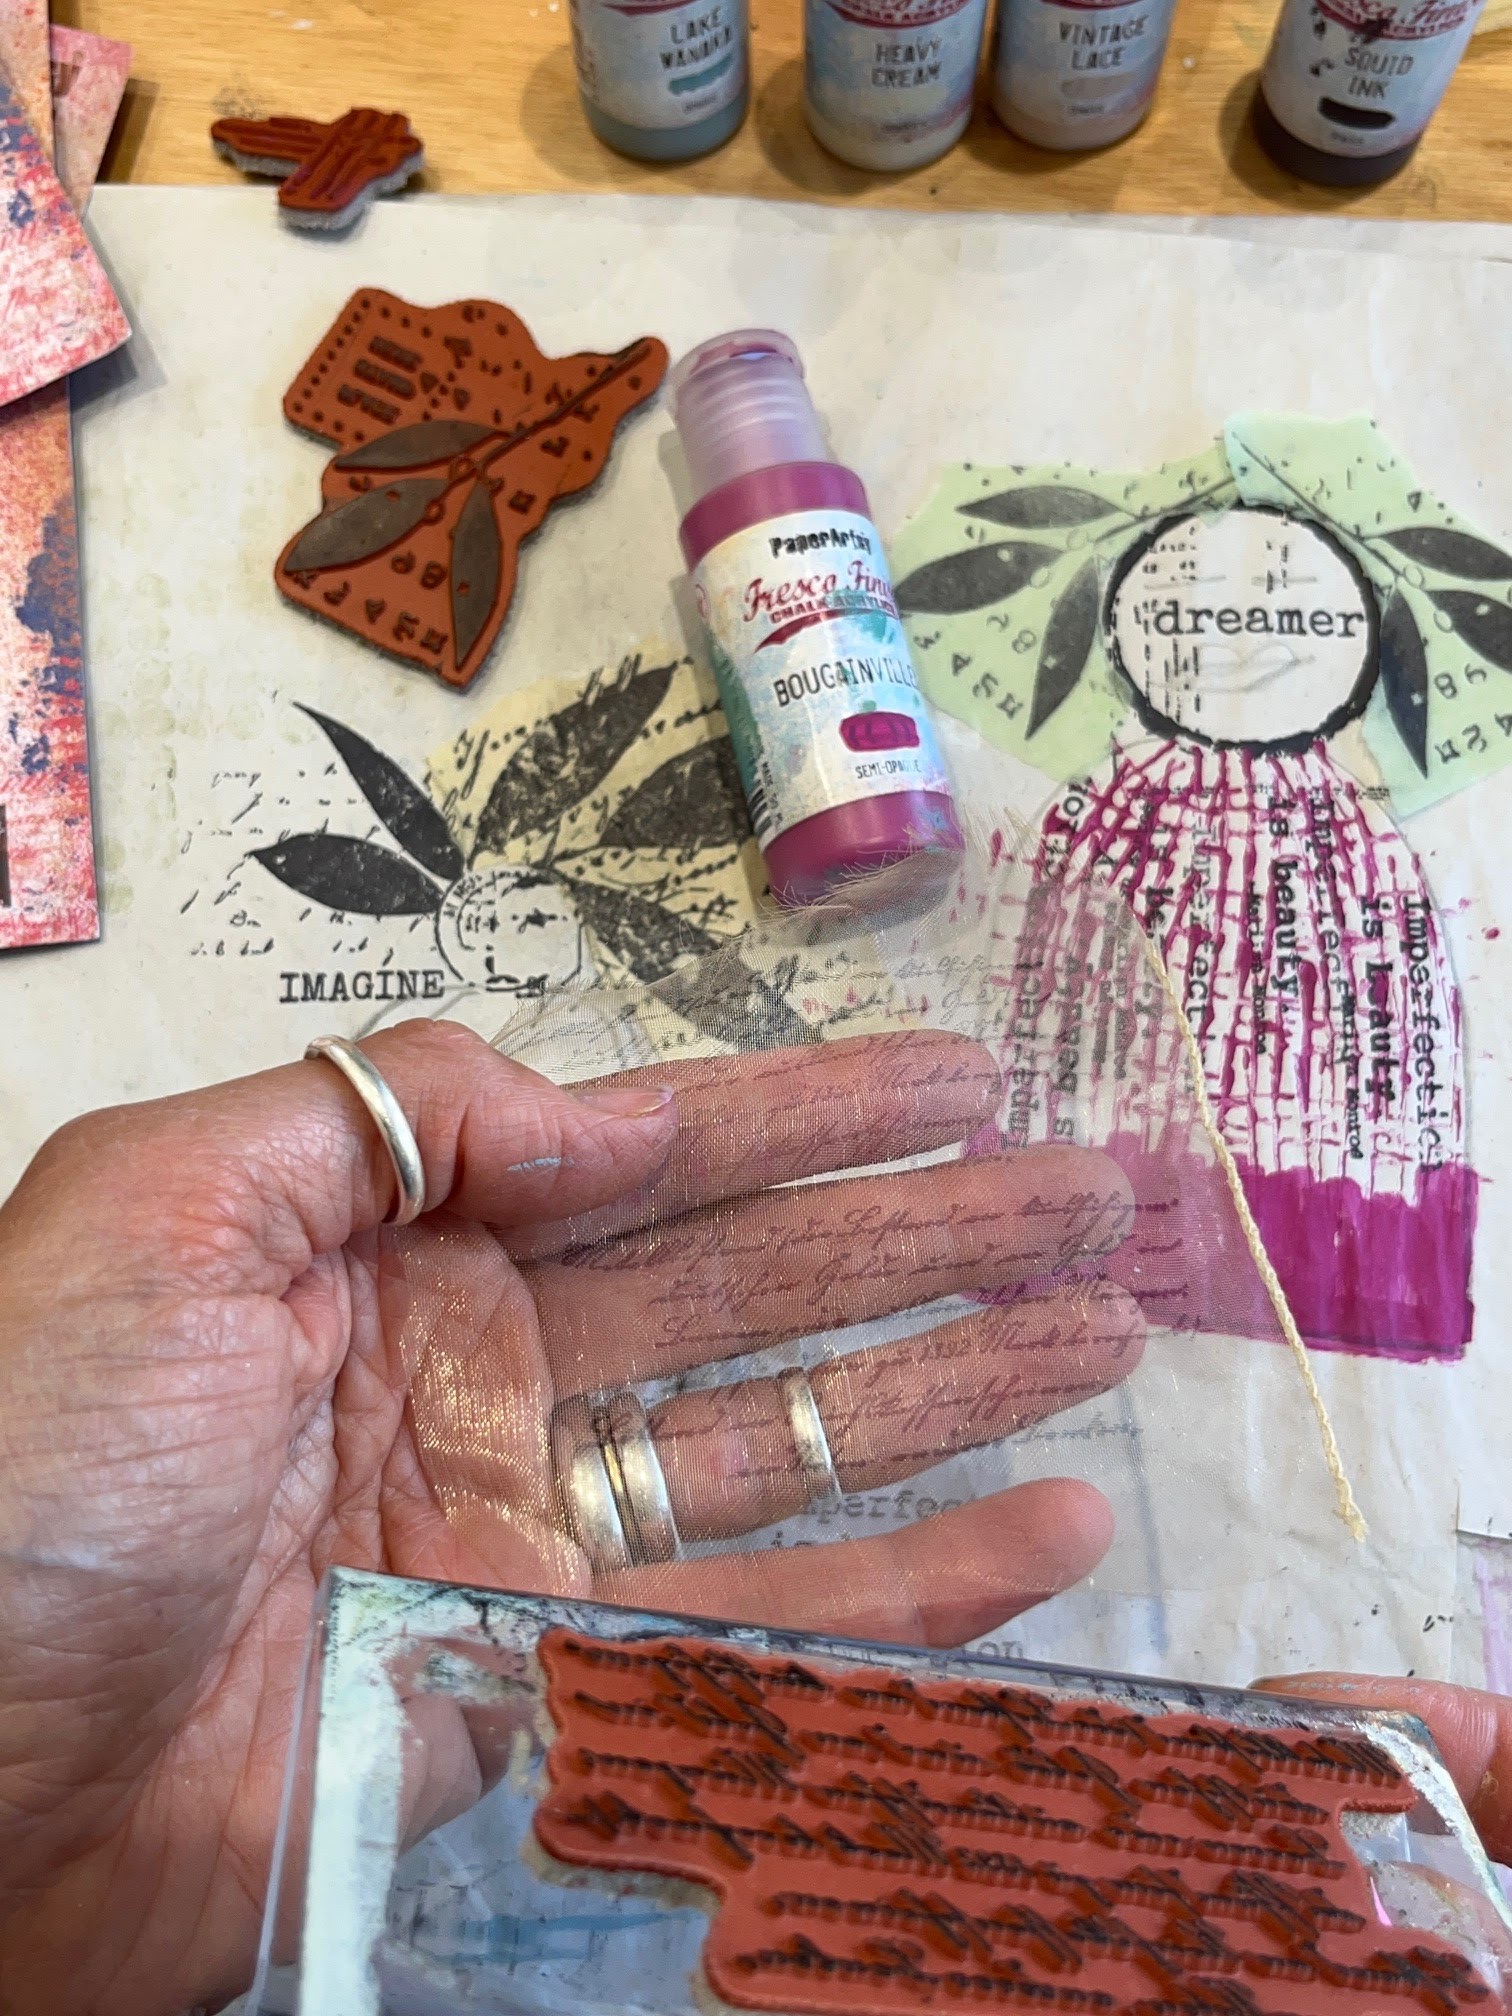
Whilst looking at the Sara Naumann stamp sets ESN11 and ESN44 I immediately saw faces in the postage stamp wave print and a possibility in the circle with dreamer printed inside as a face too.  I wanted to get away from a standard face and then thought that the leaves would be great for the hair.


I started playing around with over printing to create a texture for the body and potential 'hair styles'.


I painted one side of a packaging plastic tray and scraped into that using an embossing stylus...you could also use a cocktail stick or the end of a small paintbrush to get the same result...I then printed details onto the unpainted side and then when it had completely dried I painted over that with a matt Mod Podge to get rid of the very shiny plastic surface..


I found that the acrylic paint 'clumped' more when scraping it when it had fully dried or if it was painted on too thick. I did the scraping through the paint when it was a little damp and made sure it was a thin layer of paint to prevent it from 'over peeling' off when scraping it.


I then started looking at what I could do for the body designs. I adore text and typography and so I knew that ESN11 was going to give me some tough decisions to make for this!


I printed text onto a very lightweight fabric called organza using Ranger Archival Jet Black Ink. By doing this it softened the black ink as it broke the text slightly because of the fabric weave.


I really like the way the text just looked like a slightly darker shade of the Bougainvillea by using this technique.


I like using the over stamping technique to bring texture as well as design to a piece.  I decided to do the same with the 'Imperfection is beauty' stamp over the little grids design printed in PaperArtsys Bougainvillea chalk paint acrylic.


Because I really liked the sample/test images I created, I decided to cut them out and find a page in my spiral bound sketchbook to use them onto.  I think most of us have those kind of pages that already have colour on them using up squeezed out paints and/or random collage papers with a view to using them as a background at some point! I chose this one...


I used the Sara Naumann ESN11 text stamp with Wow embossing ink and Wow embossing powder in Oyster Glintz to texturize the black areas behind the art doll before it was glued into place.  

I liked how the little scraped flowers allowed the colour to poke through on the top plastic piece and so before I stuck and stitched those into place I positioned them in such a way the pink shades would show through both attachments. 


This photo shows how the scraped 'flower' is not a flat colour which it would be if it were just painted on.
 

The page seemed like it needed more and so I printed the Sara Naumann ESN11 hearts stamp onto pale pink tissue paper using Ranger jet black Archival Ink and tore some paper to stick to the back of it in a lose form so it did not become a block of single colour within the heart.
 

To add further interest to the doll's dress I tore some pale cream tissue paper and used the same over stamping technique and embossed this with the WOW opaque vanilla embossing powder. 


If you've not embossed tissue paper before make sure you don't let it dry/set in the same place as you heated it.  Because the paper is so thin, heating the embossing powder will stick it to whatever is behind it and rip when you lift it up...


I started looking at how I could create the face on the little art doll and did not like the pencil designs I started with.


So whilst I was thinking about that I stuck the doll down onto a piece of scrap cardboard, embossed some leaves using ESN44 and WOW Embossing opaque vanilla embossing powder onto some pale pink tissue paper and stuck them into a hair design using Mod Podge.


I really enjoyed scraping the paint off the plastic and so I thought I'd have a quick play with a bit of stencil packaging and see what the outcome for scraping that was like...I stamped into the painted surface and then scratched into it again using my embossing stylus...it worked well and surprisingly it didn't 'pickle off' at all.  I thought this might make a cool little pocket to pop the art doll into on a page. I used double sided tape on the edges as that was more secure than a glue stick on the plastic film when sticking it into the journal page.


I liked the squareness of the doll but I wanted to use a traditional stretched bell jar shape so I cut her out. As she had a back and a front I thought it'd be pretty cool to do a black face on the other side as the leaf hair design would work in reverse. I embossed the Sara Naumann ESN44 dreamer stamp onto black tissue paper and pasted that over the dolls head and leaf hair; I wet the edges with a thin paint brush and tore the black 'hair to match the reverse of the embossed 'leaf' white hair on the other side.


It was time to make some more decisions and add the final details to the Art Doll

I liked the idea of having two types of eyes so I used an eyelet and a flower brad.  I painted some more Bougainvillea onto some packaging plastic with a view to scraping a mouth but I thought it was too clumsy and looked like she'd had a bad experience with lipstick so quickly discarded that idea!


I thought I'd keep the mouth much more simple and so scraped away the Bougainvillea paint to leave a basic oval and added a staple for detail.  I thought this matched the look much better as it was all turning out to be quite a 'grungy' style.
 

 I thought the same colour worked well on the black face too!
 

So here I got into the zone so much that I did not photograph all the stages... I used PaperArtsy Heavy Cream acrylic over the cardboard using a dry brush (I know no gesso! what is happening to me??!!) I over stamped the top half of her dress in the same way as the reverse side using the Heavy Cream acrylic paint, stamped and added the text onto soft cream tissue paper, and a heart to soft pink tissue paper. I added the embossed black mottled strip that came from the bottom of the dreamer stamped image, added the trial lips as detail to the lower part of the dress so that no waste was left over and then hand stitched some organza and ribbon at the base.  I threaded the jute string through the spiral spine and stapled the ends onto the hair parting to make a hairclip feature for both sides.


Here she is among her fun pages...You can also see some more scraped plastic on the left page. I used heavy cream for this and glued some dark pink tissue behind the scraped flower to add contrast.


And of course her other side...


Do you have a preference of which side of the Art Doll you prefer?


I think I prefer this side with the black dreamer...


Scraping the plastic packaging has got so much more design scope than I explored...I think I literally just 'scraped the surface' with its possibilities lol. 

I really can see that there are so so many more art doll design options possible from these resources and techniques that I think I should've started a brand new journal that I could completely designate just to art dolls!!  

I hope this has inspired you to try something I have explored in this project and I look forward to hearing your views and/or seeing what you create.

Until next time,
Enjoy creating
Love Floss x x x


I teach a range of in-person Mixed Media classes from my workshop in East Sussex UK. 

For further details visit https://www.flossworkshopart.com/

I will be exhibiting my work in The Old Chapel Centre in Alfriston, East Sussex UK with a few other Artists on July 22-23 2023. Look out on my social media pages for more information. 

No comments: