

Have you seen the new release of stamps and stencils by JOFY? I’ve fallen in love with them, those little monsters are adorable, and the Minis are each more beautiful than the last.
If you want to purchase any of these beauties, you can find a PaperArtsy Stockist here.

Since there are some birthday-themed stamps, I thought I’d create a tunnel box card, which gave me the opportunity to use several elements. Choosing from all these stamps wasn’t easy at all :) - since it’s structured on multiple layers.


I got a bit carried away, taking stamps from one set and some from another, and also using different Minis and stencils... I really loved the new release! :)
I couldn’t resist using a lot of different colours of Fresco Chalk Acrylics for the backgrounds and going on you'll see also several Mattints used to colour the elements, both stamped on PaperArtsy Cardstock and... you’ll see later.
I couldn’t resist using a lot of different colours of Fresco Chalk Acrylics for the backgrounds and going on you'll see also several Mattints used to colour the elements, both stamped on PaperArtsy Cardstock and... you’ll see later.

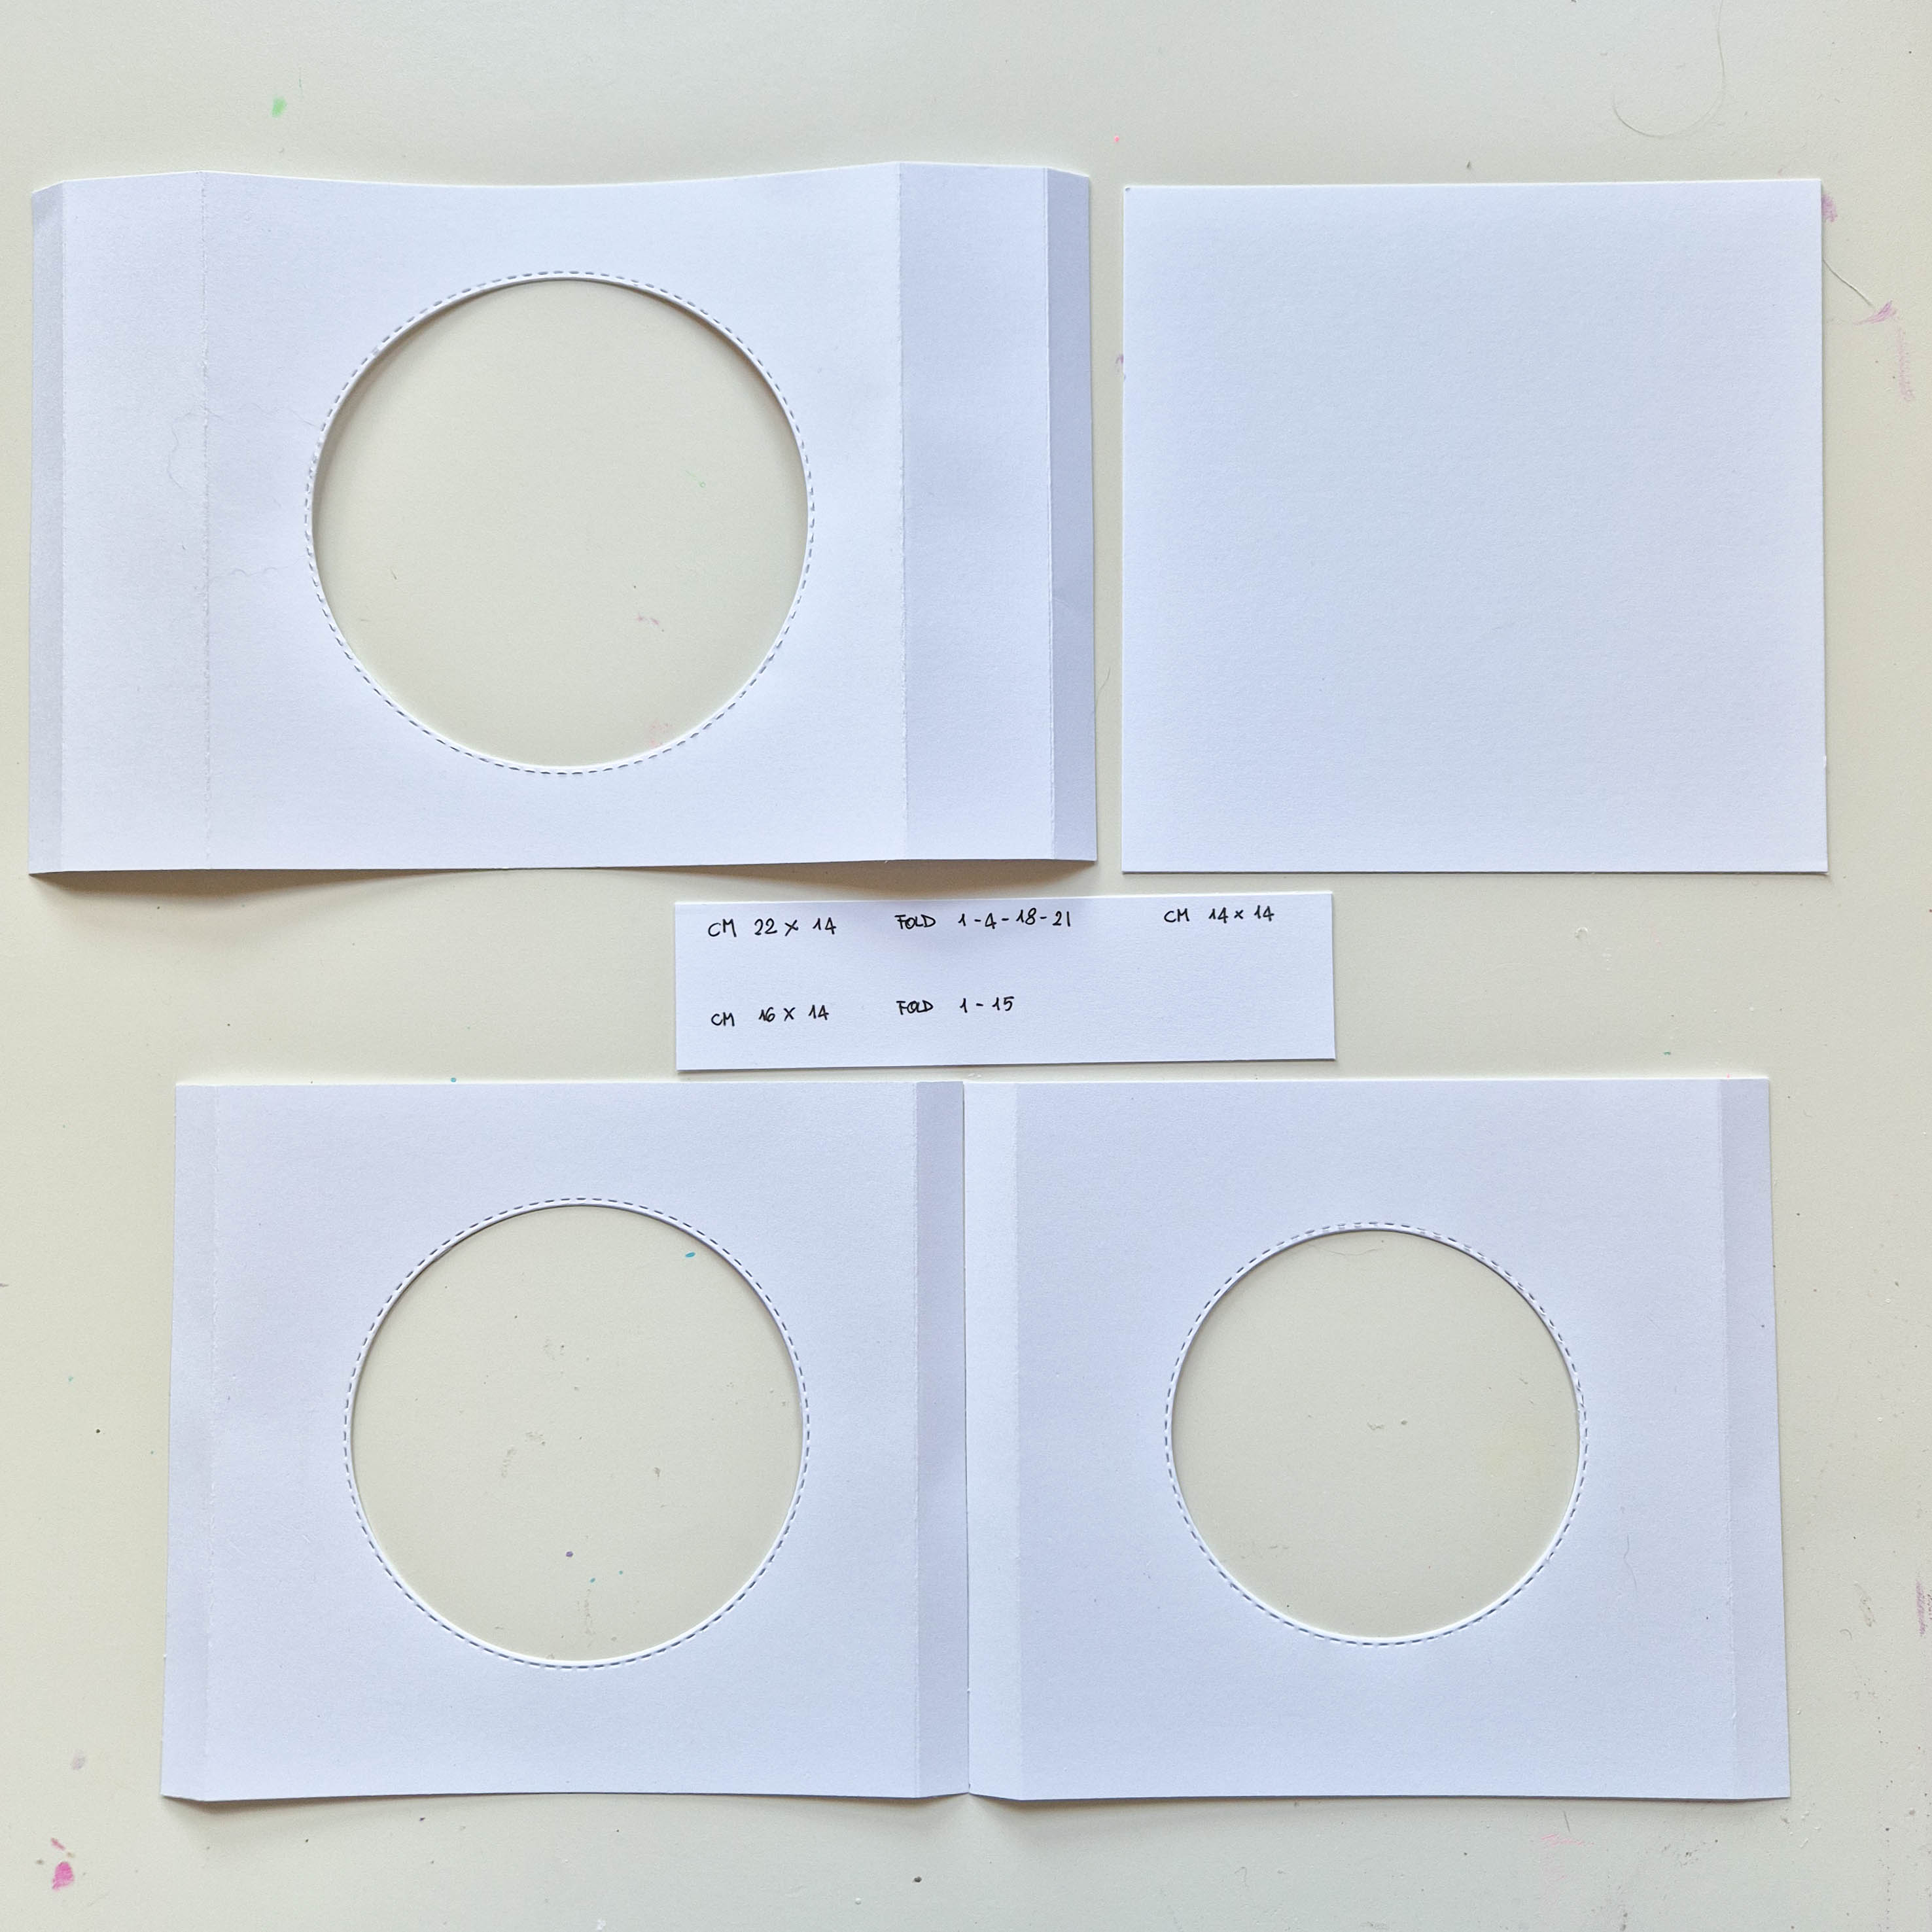
First, I cut 4 pieces from PaperArtsy Smoothy Card (SCA4) with the following measurements:
1pc 22 x 14 cm, 2pcs 16 x 14 cm, and 1pc 14 x 14 cm.
In the photo, you can also see where to make the folds. I then die-cut three concentric circles.
In the photo, you can also see where to make the folds. I then die-cut three concentric circles.

On each of the three cardstock pieces with the round opening, I blended a couple of Fresco Finish paints through the Stencils. For the first one (with the smallest hole) I blended with a sponge Fresco Chalk Acrylics in Parakeet (FF225) and South Pacific (FF45) through Stencil (PS461).

For the second one, I used Fresco Chalk Acrylics in Mustard Pickle (FF148) and Scottish Salmon (FF158) through Stencil (PS459).

For the last one, I used Fresco Chalk Acrylics in Berry Nice (FF216), Bubble Gum (FF116) and Ice Berg (FF165) through Stencils (PS459) and (PS461).


Now that I have decorated the structure, I can assemble the various pieces to create my tunnel box card and focus on the embellishments.


To assemble the card, you simply need to glue the flaps onto the inner spine as shown in the pictures.

Now it's time to "populate" these layers with some monsters :).

First I stamped these delicious little monsters on some scraps of PaperArtsy Smoothy Card and embossed with Clear Embossing Powder...

...and then I roughly coloured with a little brush and some Mattints in Glow (MT01), Jam (MT05), Dragonfly (MT07), The Pink (MT08), Ladybug (MT12), Mojito (MT13), Acid (MT14), High Viz (MT15). I like using Mattints because, even though I'm not very skilled at coloring, when I use them, the results I achieve are satisfying to me.

However, my preferred colouring technique remains applying the cardstock directly onto the drops of colour: easy and always quite unpredictable :).

JOFY's monsters in the regular stamping set are quite big, so I was inspired to use one of them with Polyshrink.


I blended some Mattints with a sponge over the stamped image, and set aside to dry. The colours looks very pale, but when it gets shrinked, they'll look more vibrant.

I cut it with scissors, living space to make a little hole and transform it into a charm.

Using the embosser to create a charm with polyshrink is always a lot of fun.

I had tried coloring Polyshrink with Fresco Finish Acrylics too, which provide more coverage compared to Mattints. However, in this case, I preferred using the little monster colored with Mattints.

Now that I have enough cardstock and polyshrink embellishments, I can complete my card.


Here is the finished card, with all the layers, monsters and colours.


These adorable monsters along with the sentiments, other coordinated elements and stencils are the perfect companions if you are in the mood to party.
Maybe I'll try to make an happy birthday banner in the same mood of the card.
Maybe I'll try to make an happy birthday banner in the same mood of the card.
Have fun.
Martha xxx

Instagram:craftingmartha
Facebook:Crafting Martha
YouTube:Crafting Martha
Blog:alazyscrapper
Pinterest:alazyscrapper


