Showing posts with label Resists. Show all posts

Saturday, 21 March 2020

2020 #5 Mark Making: Dream with ELB {by Chris Dark}

2020 Topic 5: Mark Making

Sometimes the simplest techniques are the best, and Chris has gone old school..literally, using an item we often associate with school; the wax crayon. She has made beautiful marks in so many different ways - it's like a mark making reference book!
~ Keren 

Hi everyone, it's Chris here with you today sharing a card for the mark making topic but what is mark making? I think I've always thought of it as any kind of marks put down on a surface to make art which of course includes stamping. There are so many ways to make them too using a myriad of tools, mediums, patterns or textures. Mark making is the descriptive term for all of these and you only have to look at prehistoric cave paintings to see our long history of enjoying it.

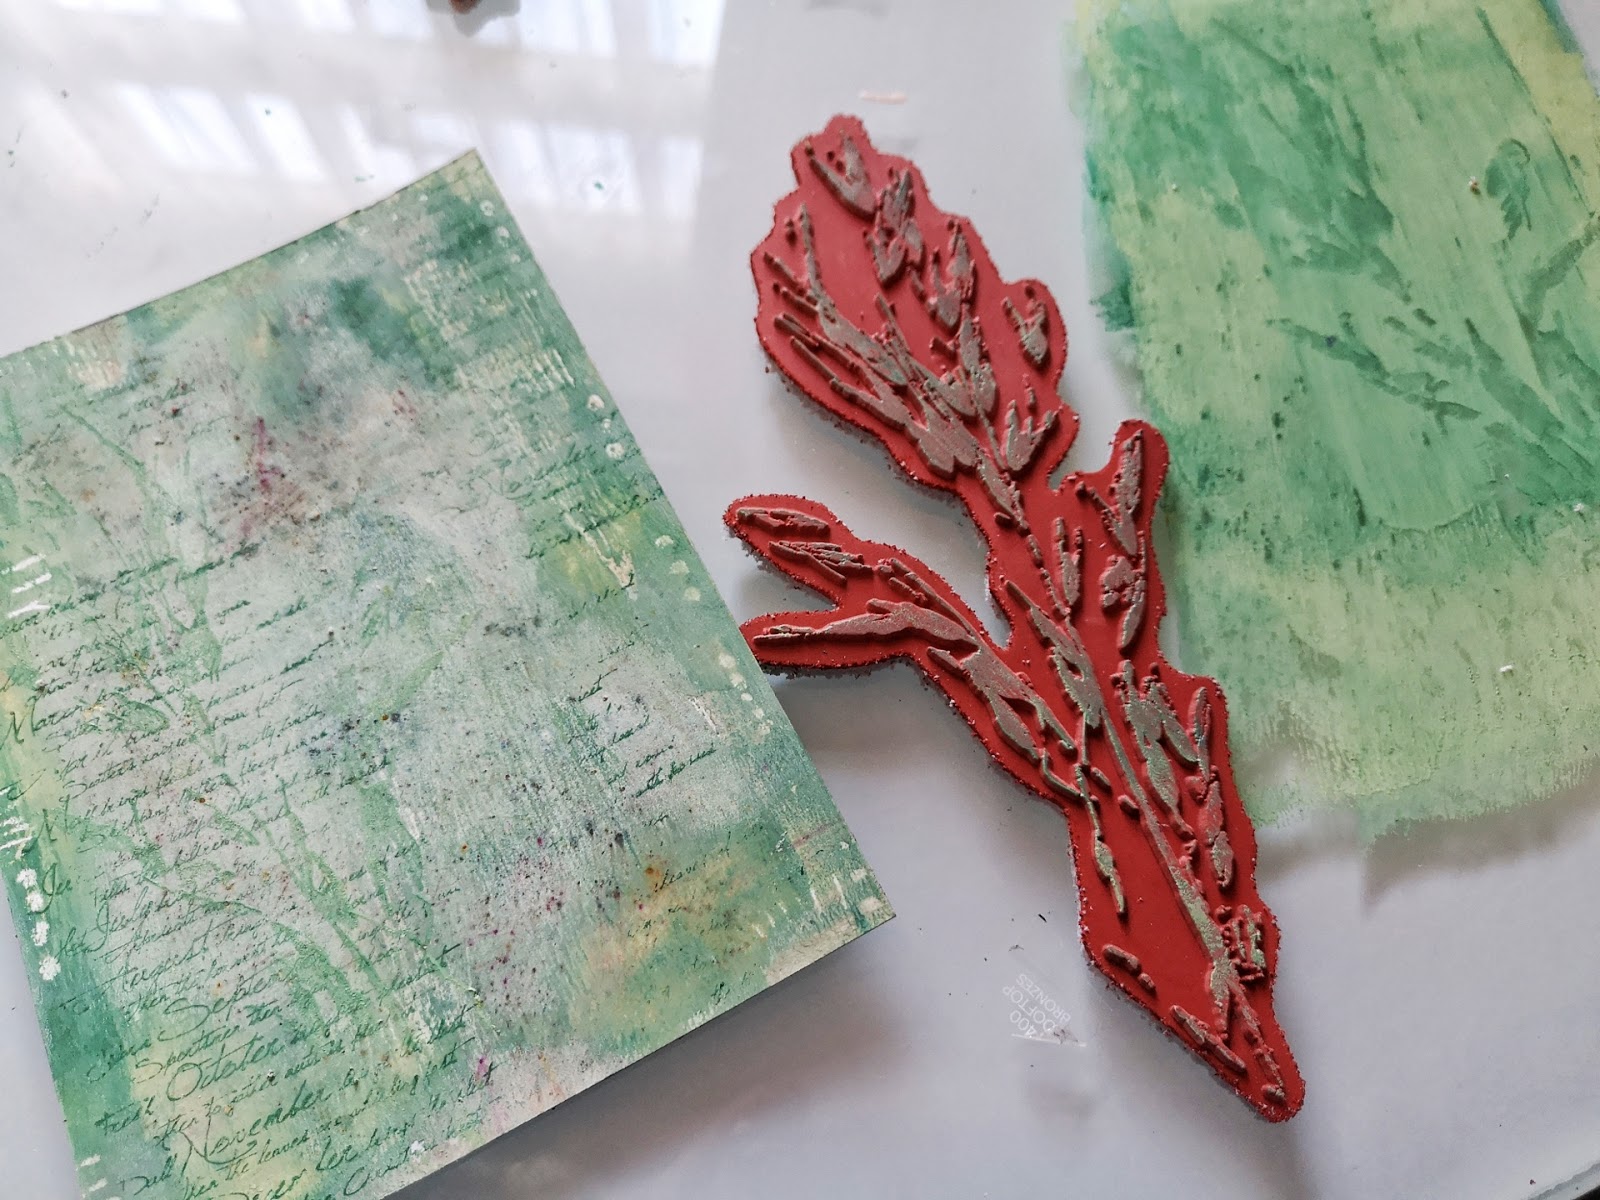
I've built my card front with layers of mark making using brayering, paint splattering, infusions sprinklings, babywipe wiping and wax crayon resist ​incorporating stamping with ELB30 by Lin Brown which has some beautiful accent stamps.


I've also incorporated some of the gorgeous new green Fresco Finish Chalk acrylics in Willow, Spring, Beanstalk and Gumboots which work so well together. For a bit of contrast I also added in some hints of Mustard Pickle Bubble Gum and Sherbet.


The wax crayon created a resist, I doodled lines and dots around the edges of my piece of Smoothy (heavyweight) cardstock.


The next layer is a mix of all the green paints with Olive Tree and Rusty Car Infusions on top which I also brayered into the still damp paint. I allowed the paint to dry a bit more before rubbing back a bit at the edges to reveal the white marks from the wax crayon.


A layer of stamping in paint with the beautiful text stamp from the set.


Another layer of paint stamping. 


Some of the accent stamps with the darkest paint which give a glass-like effect due to the transparency.


More layers.


At this point I prepped another piece of card to stamp the leaves to cut them out. 


The leaves are glued over the stamping underneath. I added more accent stamping in pinks, splatters of paint and more mark making using paint pens.


Sentiments are cut out and added with extra marking around them.


The skeleton leaves are beautiful and although associated with autumn, stamped in pink they remind me of my Acer which has pink edged leaves in spring. 


I love splatters and the random effect of them.


I hope you'll join us in this topic, I spent a very enjoyable time creating my layers and love the depth I got from the different kinds of marks, stamping and the different tools I used to make them.  

Thanks for joining me today, I hope you have some creative time yourself.

Chris x

Blog: www.sketchingstamper.blogspot.co.uk
Facebook: https://www.facebook.com/christine.dark.7
Instgram: @chrisd999
Pinterest: https://uk.pinterest.com/cdark4163/

Tuesday, 27 December 2016

PaperArtsy Blog Summary of Topics 7-9 {Curated by Emma Godfrey)

Blog Summary: Resists, White Space, Mono-Printing

As Spring brings warmth, so did the creativity heat up on the PaperArtsy Blog too. Tempered with a touch of white space minimalism, we soon found more to challenge us from week to week.
Tonight's curator is Emma Godfrey and she is looking back on Topics 7-9: Resists, White Space, Mono Printing.

Leandra

Hi everyone, Emma here, and I'm so excited that Leandra asked me to do a summary showing you some of the fabulous projects from Topics 7-9 on the PaperArtsy blog this year.

Where has 2016 gone? This year has been pretty busy for me ... I've been teaching a lot and of course designing stamps. This summary in particular caught my interest as when I have had time to create just for fun, then I've turned to my Gelli Plate. To be honest I wasn't really sure what to do with it at first, but with some help (thank you Jo Firth-Young!) and of course the inspiration on the PaperArtsy blog, I've really loved creating pages and pages of backgrounds. Most of these have now been turned into cards, with lots of white space around the printed pieces ... which again ties in nicely with this summary!

I'm hoping that with a couple of changes that I have planned for next year I'll have a lot more time to just play and experiment (isn't that want we all want in an ideal world?) ... there are just so many techniques and ideas I want to try out ... some of which are in the projects below...

Topic 7: Resists

From the obvious to the unusual ... resists are something that I use a lot of the time, often without even conciously thinking about it. Wax, embossing powder, masking fluid, stencils, stickers to name but a few ... all of them can be used to block off or reveal negative space or a wonderful patterned layer underneath. My personal favourite is embossing powder, but I definitely need to try some of these other ideas...

My first pick is Box Of Sunshine by Paula Pascual. You can see the gorgeous finished project in the main photo above - and the reason I chose this project is that I thought it was fabulous how she incorporated three different types of resist into this "clean and simple" project.


And I hope you didn't miss Alison Bomber and her Fossil Resist ATC's. I love the aged and distressed look of these cards over the top of the crisp clear embossing powder.


I also loved Gabrielle Price's Grow With Me post. I would never have thought about using Glossy Accents as a resist (genius idea!) and the flowers stamped on book text are just beautiful.


Lastly, I loved the soft colours that Seth Apter used in his Spring Wings piece. He used wax crayon to highlight areas of the stamped images - which of course resisted his pretty watercolours.


Topic 8 : White Space

White space (or negative space as it is also known - after all it doesn't have to always be white) is a fabulous way of balancing a composition. Sometimes less is indeed more. Plain areas allow you to draw attention to the main focus (or extremely busy areas) of your projects. I personally love using "white space", especially in clean & simple cards and scrapbook layouts.

My first pick is Wonderful White Space by Keren Baker. We don't often see projects using the Cats Meow range of stamps, but this little boat is the perfect centrepiece, and the heavy typeface of the word "sea" helps balance and anchor it (excuse the pun!).


Next on my list is this Notebook from Anneke De Clerck. Anneke uses white space a lot in here projects to fabulous effect. This project goes to show that white space doesn't have to be a huge expanse - even smaller areas can still make all the other elements "pop".


This is Pretty Awesome (and it really is!) by Karen Hayselden. Adding some texture to the white space adds so much more interest without detracting from the focal point ... and I {love} how she coloured in the face and hair.


Last, but definitely not least is Wanda Hentges and her Sizzling Summer Cards. Wow! What a pop of bright colour, and how wonderful do those Ellen Vargo flowers look against that white space background. Using just a bit of colour in one corner on the background just ties them all together beautifully.


Topic 9 : Mono Printing

Perfect for creating one-off and unique prints, mono printing is a fantastic way of experimenting with layers. Altering colours, patterns, products, substrates and how much pressure you apply will give you wildly different results. I've always found this technique to be quite unpredictable, but if you're open to that then it can be so much fun! All my picks below have used a Gelli Plate, but there are lots of other options if you look at the Topic intro post.

First up is Marta Lapkowska and her Gelli Doodling. I adore how Marta has stamped these Lynne Perrella stamps on top of here Gelli Plate printed background, and then doodled the quirky hats and feet, before cutting them out to create little paper dolls. Genius!


My second pick is Tags & Dominoes by Alison Hall. What a riot of colour ... and right up my street! Alison used a Gelli Plate and Ellen Vargo stamps (in a resist effect) to create these fabulous backgrounds. Touches of black and white balance everything out.


Next up is Jo Firth-Young and It's In The Bag. This project also ties in beautifully with the White Space Topic above! By using one of the small shaped Gelli Plates, Jo has stamped a calico bag with a lovely pattern - and each hexagon is a mini and unique work of art.


My final link is another fabric inspired project by Sue Carrington. This is her Daisy Journal Cover. How gorgeous is this? The background is built up using layers of prints with stencils (first prints and ghost prints). Adding some stamps to the background, and then the stamped focal images, just pulls it all together into a beautiful finished piece.


So what did you think? Weren't they all fabulous? I have to say, it was incredibly hard to pick just a few to highlight, as every single post in all of these topics were amazing. 

I do hope they've inspired you to go and play and try out some of the ideas. If you want more details on how the projects were made, just click on the designers name above the photos. And of course you can find all of the other posts for these three Topics under April & May 2016 in the side bar.

Happy explorations!
Emma

Saturday, 16 April 2016

2016 #7 Fossil Resist ATCs {by Alison Bomber}

 2016 Topic 7: Resists


Hello all, it's Alison here from Words and Pictures. I've not been around much lately but I couldn't resist joining in with the Resists theme, and it gave me the excuse to get two of the PaperArtsy Minis I've coveted for ages - finally giving in to temptation (like Oscar Wilde, I can resist everything but temptation!). Regular followers of mine will know that clear embossing is a favourite thing of mine - I love its glossy dimensionality - and it works brilliantly as a resist for the inkiness to follow.

I ended up creating a quartet of ATCs with these fabulously detailed stamps... one pair with the fossils lying in state in a fusty wooden drawer in some zoologist's collection...

... and one pair where they are in a kind of dream of the world they used to inhabit.
I started by cutting ATCs from some off-white card and stamping the fish fossils - Ink & The Dog Mini 100 and Ink & The Dog Mini 101 - in Versamark before embossing with clear embossing powder.

ID Mini 100
ID Mini 101
(You'll see I created a spare pair in case of problems or other ideas!)


For the zoologist's pair, I applied Distress Inks to the ATCs with a blending tool - Antique Linen followed by Vintage Photo and some Black Soot around the edges - keeping some damp paper towel nearby so that I could buff away any excess ink from the bones as I went. Then I did some spritzing and flicking, and also sprayed some Distress Marker splatter to add to the aged look.

I added some vintage script - the zoologist's notes, taken from the Ink & The Dog Words Plate 4 - stamped in Distress Ink so that it could also easily be wiped away from the bones. And finally I added the rub-ons to label the collected specimens, as well as the word stickers which I shaded around with more ink.

Ink & The Dog Words Plate 4

For the underwater pair, I applied my ink differently - pressing the chosen colours - my usual blue/green suspects, Broken China, Salty Ocean, Mowed Lawn, Peacock Feathers, I think - onto the craft mat, spritzing with some water, and then dipping and smooshing my ATCs until I liked the look of them.

I used the branches from Hot Picks HP1008 as seaweed, again stamped in Distress Ink so that the paper towel could spring into action to remove any excess from the embossed fossil.

HP1008

I painted some Snowflake Fresco paint on to my craft mat and then used the top of a paintbrush cover and the other end of the paintbrush..


...to "stamp" my columns of bubbles.


I always enjoy the gleam of the clear embossing in sunlight...
... and it gave me great pleasure to fit in just a little bit of Resistance in my brief few days at home recently. Heat embossing and inks are my favourite, but there are so many ways to create a resist, so I hope you'll be inspired to play with some Resists too. Thanks so much for stopping by today.
Alison x
Words and Pictures


Great smooshing Alison, a fabulous way to blend colours. The embossing resist is so magical, appearing all glossy and bright from under the ink. Great to see both colour options too, showing that these stamps work equally well in a vintage or a bright project. ~Darcy

We would love to see how you interpret this Resists topic by linking what you make to our 2016 Challenge #7: Resists, on this page HERE.
All of our bloggers love to see your twist on their ideas,  particularly if you were inspired directly by their post. 
All links go in the draw to win a £50 voucher to spend on products of your choice from the PaperArtsy online store. The Resists link will close 17:00 (London Time) Sunday, April 17th 2016. The winner will be announced 2 hours later at 19:00.

Friday, 15 April 2016

2016 #7 Blooming CD Art {by Alison Hall}

 2016 Topic 7: Resists 

Hi everyone Alison (Craftytrog) here. Tonight I'd like to share with you a post about using vaseline to create a resist with PaperArtsy Fresco Finish Paint.
I love using this technique for making backgrounds, as you can build up many layers, each time leaving some of the lower layers visible, and you get a lovely, random finished effect. I used an old CD as my base for a piece of hanging art, together with Emma Godfrey's beautiful floral stamp set EEG14 and some of my favourite bright Fresco paints.

Step One: I Began by priming my CD with some Chalk Fresco Finish paint, then I used Ranger Jet Black ink to stamp a background with the phrases from EEG14.

EEG14.
Step Two: I added a thin layer of Bora Bora Fresco paint, watering it down so that the stamping shows through. Then I used my finger to add some vaseline in a few places, where I wanted the next layer of paint to resist.


Step Three: I carefully painted the CD with some Zucchini Fresco, taking care not to spread the vaseline. After drying the paint with my heat gun, I used some kitchen towel to remove the paint where the vaseline had been. Oops...rubbed a bit too hard bottom right! But that's fine!


Step Four: I added some more vaseline, making sure that I wasn't covering too much of the lower layers, then painted a layer of Lavender Fresco, drying and wiping away the resisted paint as before.


Step Five: My final layer was some South Pacific Fresco. I wanted the top layer to be a bit darker.


Step Six: To make my embellishments, I painted some book paper with Bougainvillea and Tango Fresco, and stamped and cut out the two flowers from EEG14. I also stamped the phrase from EEG14 onto some unpainted book paper edge, and cut out each line and two of the words. I stamped the large flower onto the CD, just to check that it would cover the centre hole, then inked the edges of the CD, using Black Archival Ink and Ink Blending Foam.


Step Seven: I used Glossy Accents to layer the flowers and adhere them to the CD. I adhered the phrase, adding some Glossy Accents on top of the words. I then glued a small metal book plate and some buttons to the flower. At this point I decided to stamp another small Bougainvillea flower, and glued this just below the larger one. I decided to add some more tiny buttons next to the phrase, to add a bit more balance to my piece. I finished it off by punching two holes at the top with a Crop-A-Dile, and adding some eyelets and chain.


I hope I've inspired you to try out the vaseline/paint resist technique. It's messy and fun, and gives you a lovely random, layered background. It would be fantastic as a journal page, canvas, or card background. You could used unpainted stamped embellishments instead, as a great pop against a colourful background.

I look forward to seeing your resist projects for the challenge.
Alison x
Blog: Craftytrog's Inky Adventures
Facebook: Alison Hall
Twitter: @craftytrog

Thanks Alison, not only is this a great bit of upcycling but what a brilliantly effective technique. The effect is just like peeled paint, and can be easily controlled to be as subtle or as dramatic as you want. A really nice cheery piece of art. ~Darcy 


We would love to see how you interpret this Resists topic by linking what you make to our 2016 Challenge #7: Resists, on this page HERE.
All of our bloggers love to see your twist on their ideas,  particularly if you were inspired directly by their post. 
All links go in the draw to win a £50 voucher to spend on products of your choice from the PaperArtsy online store. The Resists link will close 17:00 (London Time) Sunday, April 17th 2016. The winner will be announced 2 hours later at 19:00.