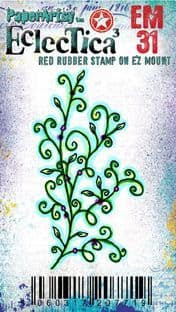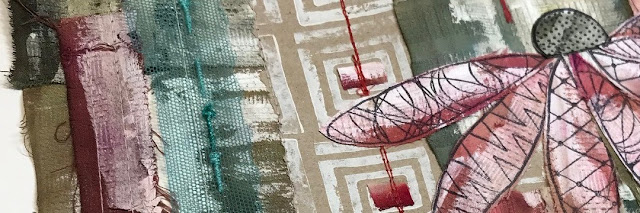
Hi everyone, it's Floss from flossworkshopart with you today, and I'm here to share how you can use up some of your scraps of fabric along with packaging papers to create a stitched collaged piece. I love to use papers and materials together on one piece and delving into both my leftover oddments of small material pieces, remnants of packaging papers and ribbon left overs, it allowed me to use up some bits I already had. By printing some fabulous geometric shapes from Ellen Vargo's stamp sets EEV01 and EEV09 it allowed me not only to add some fun elements and a flower focal point to the piece but to give the leftovers a new lease of life and become something new.

I often use bits of old clothing within my artwork and I particularly liked the way I had used gesso and Infusion dye stains in a previous journal project I made; using an old white shirt of my husbands. The shirt had a fabulous loose woven texture in its weave, so it lent itself perfectly to grabbing gesso at low and high spots on the fabric which added to the textures created. I had some left over scraps of this, that I had already stained individually using Olive Tree, The Sage and Sunset Beach infusions, so I rummaged through my net scrap bag to find a few bits that went well together to use with them.
I use the little net bags (that the supermarkets now provide as an option to use when buying their loose veg) to store my fabric scraps and my sari silks etc...I was so happy when the supermarkets replaced their plastic veg bags with these little net drawstring bags because they suit keeping all manner of material scraps perfectly as you can see through them.
Here I am playing around with positions of how edges and colours work together.
Infusions dye stain tip: Use a paintbrush to even out the dark spots where pigments stick to the wetted material and brush it lightly over the gesso to tint the gesso with the beautiful range of colours found within the Infusions Dye Stain. Naturally the Infusions will soak into the material when you spray it with water but it will sit on top of the gesso giving you such great contrasts.
I like to stitch in the centre of some material collaged pieces to allow for more raw edges or the space to fray some edges. I chose a straight machine stitch throughout this art piece, rather than using any zigzag stitching as I knew this collage was going to be a 'busy' one, and thought that the zigzag might be too distracting from the rest of it. Use a fabric glue or a running hand stitch if you haven't got a sewing machine.
It's tempting to add hand stitched features to add further interest to your sewn pieces at this stage, but I personally would wait until the end to add these details.
It's fun to add separate material pieces on top and stitch in the other direction using uneven lengths of stitching too...
I used these three vibrant
Infusions Dye Stains in a previous project over gesso that had been applied to a white cotton shirt that was never to be worn again.
I used Ellen's
EEV09 stamp set on some of the Sunset Beach dyed fabric scraps using Ranger Archival Black ink and cut them out to arrange as petals for my flower feature. The circle flower centre was printed on a scrap piece of a gel print also using the Archival Ink and the edge was folded over to create the cone flower centre shape. I used the square and the iron shape from
Ellen's EEV09 set using
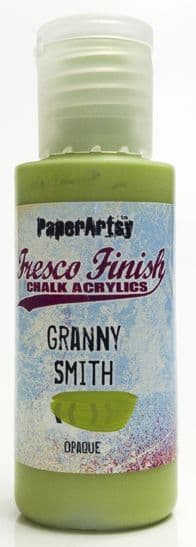
PaperArtsy Heavy Cream Fresco finish chalk paint on some scraps of packaging paper.
I cut some little squares from the remnants left over from the flower petals to add to the centres of the stamped geometric shapes for further interest. Nothing goes to waste here...I do love the small elements of detail.
I started looking at how the shapes from both sets worked together and how different the outcomes were from those printed on scrap pieces of old gel print papers in comparison to those printed onto the fabrics. I much preferred the fabric printed petal shapes because there was more contrast. I also loved the frayed edge elements that were starting to happen just from handling them, so I guess in a way, they could be considered almost organic just in the way they were changing through using them.
A few photos had been previously transferred onto some of the scrap dyed fabrics using gel medium so I thought it might be fun to incorporate them...for those of you who are familiar with my work...did you already spot my Great Auntie Lil making another appearance? I needed to add a smidge more water on her to remove a little more paper backing to reveal her image to make her less grey papery...it's a fine line between rubbing too hard and removing too much image and not taking enough backing away to reveal the image fully. I find it best to do it in small stages.
I started looking at how the collage was going to evolve and which bits I would place where. I find that taking photos of choices are helpful as you can flip back and forth between them to help you decide. I liked both options below, so that made for a difficult choice! In the end I chose the green stamped material on the sunset beach as I liked the little pop of white stitched material against the edges.
Great Auntie Lil was dressed up with a little bit of lace...
Little accents of lace and stitching were added to bring continuity throughout the work...

To add further interest to the collaged piece I added further stitching, sticking to colours of a similar palette, and little snippets of thread that had frayed from the material edges. I also glued the scrap fabric flower stem on.
My final touch was adding a few scraps of the used fabrics to the little box using a bulb pin. I thought the box just cried out for a little fun element.
It makes me happy to give leftovers a second chance at being included in a piece of art.
It was good to have some 'over prepared pieces' from a previous project to work with that were sitting in a pile on the workbench, as well as using up some of my little bitty bits of scraps from my stash...I do find it cathartic having a scrap busting splurge! Grabbing leftovers can feel like some of the hard work is already done and the fun is about to begin when colours and shapes just jump out at you from the piles and work beautifully together. I am, and was, drawn to using colours and shapes that were similar in this project; I now have intentions of applying this collaged stitched piece onto the hard front cover of my large journal.
I particularly enjoyed the 'patchwork' piecing of materials together and the layered fusion of materials and paper; I can definitely see me doing much more of this! I liked the way the seams of the shirt worked on the edges, but cannot believe I didn't free motion embroider the stem as I often do on my flower pieces; I will be heading back out to the workshop later to do just that!
I do think, if I wanted to add more, I would be likely to choose more textiles...using scrap threads mounted on a felt and scrap base to free motion and fuse it all together with free motion embroidery and then apply it to Great Auntie Lil's skirt...that in turn may spark adding the same technique to another area...or maybe some stencilled numbers or a phrase.
Thank you for reading right to the end and I look forward to seeing/hearing about how you use your leftover pieces and if you try the Infusions Dye Stain over gesso to get some deep contrasts.
Happy creating,
Floss x
I am teaching mixed media in-person classes in small groups of up to six in my workshop in East Sussex UK. You can find the class details on the website link above.