
Showing posts with label EKC01. Show all posts

Tuesday, 14 June 2022

2022 Topic 09: Leftovers {by Renata Peley} with Kay Carley stamps


Hi everyone, it's Peley Renata with you today, and I'm here to share with you a rather simple but fun and interesting idea of how to use your paper leftovers.


I suppose, the same as many of you, I don’t like wasting anything while crafting. I might go to some extremes and save the tiniest bits of paper, ribbons and paint. You can never know when those might come in handy. Soon I will show you a photo, so you can see that I even organize my paper strips by size. But I won’t show you a baggie with the tiniest pieces of paper that I have…that might be just a bit embarrassing. 😊

Anyway, my idea was to put some of those paper pieces to good use and make my art journal page paper base out of them. And to be honest, I enjoyed doing this so much that I made multiple paper bases for some future projects as well.


I like to make art journal pages in various sizes and formats. I make my own artist trading card bases and tags as well. Sometimes I even make circle shaped art journal pages. And since I like to use diverse types of papers, that leaves me with a bunch of various paper remains. So, for the start of this project I gathered all of those and laid them out in front of me. I had some cold pressed, rough textured watercolor paper, smooth and textured mixed media paper, canvas grain paper, paper for oil paints, some embossed paper and who knows what else.


For some fun background texture, my goal was to use as many different types of paper as possible. When I had my pick, I took out a sewing machine (even though sewing is not my forte), and sewed my chosen pieces together to make a background for my art journal page.

First, I went simple and just vertically sewed together my papers, but soon I got more brave and spiced it up a bit. For the next three backgrounds, I was sewing in various directions, different paper shapes and I even added some lace pieces for two of them. And I must say, at the end I was quite pleased with my little sewing success.


Since some of the papers I chose don’t handle paint that well, I gave my background a thin layer of clear gesso. I chose clear gesso because I wanted my papers to preserve their original various shades of white, instead of them being uniformly white. When that was dry, I brought in PaperArtsy Fresco Finish Chalk Acrylics in Aqua Duck Egg and Smurf colors. I mixed the colors directly on the paper because I like those brush strokes to be visible. Sadly, this did cover some of the papers’ textures but if you take a closer look, they can still be seen.


While my background was drying, I started to work on my focal images. I chose to work with two gorgeous stamp sets by Kay Carley: EKC01 and EKC36.


This time I decided to color my images with alcohol markers. When choosing this coloring medium, always keep in mind to use alcohol marker-friendly stamping ink and paper for best results. Since my background was made in subtle and mild colors, I chose some bolder ones for my focal images.


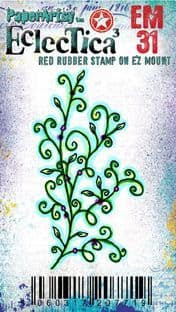
When the images were done, I went back to work some more on my background. I chose stamp EM31 and some stamps from the EKC01 set and stamped them on the page in the ink colors that don’t stand out too much from the background color.


As you might have guessed, I planned to do some paper piecing here. When fussy cutting the images, sometimes we can’t really cut out some little details. The way to remedy that is that we stamp those missing elements on the page and then glue the image over it within the stamped lines. You can see what I mean on the image below. Here I really wanted those pretty flower stems, but they are too delicate to be nicely cut out, so I just stamped them and then later just quickly colored them with an acrylic marker.


After I glued the images to the background, I felt like I needed some more grass, to tuck in my mushrooms and flowers. I went back to my scrap paper collection and chose a few smaller, random pieces with different textures.  I colored them with PaperArtsy Fresco Finish Chalk Acrylics in colors: LimelightGranny Smith and Caribbean Sea. Once again, I mixed the colors directly on the paper and when the paint was dry, I used the mini stamp EM31 in the same ink colors as before for this project.


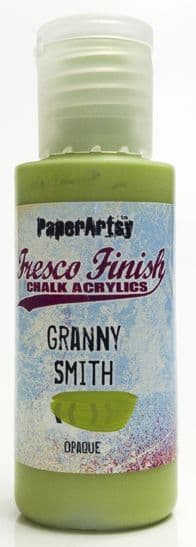

If you read my blog posts before, you will know that my finishing touches would be adding some white or black splatters, darker color frame and adding a quote. Well, for this project I haven’t steered away from my habits either. I did add some splatters (PaperArtsy Fresco Finish Chalk Acrylic paints Snowflake and Little Black Dress), I also added a thin black edged frame (PaperArtsy Fresco Finish Chalk Acrylic paint Little Black Dress) and of course I added a sentiment (from the EKC36 stamp set). This time I also did something I generally hate doing. I chopped my stamp to pieces. Don’t know why I always feel bad doing it, but this time I felt it necessary, so I can more freely place the words where I want them, while avoiding more heavily textured areas. Also, for the same reason I decided to use a stamping platform, to be able to re-stamp the words if they didn’t turn out well in the first try.


With my sentiment stamped, I felt that my art journal page was nearly done. I just added a few highlights with a gel pen and that was it.



This project was really fun for me. It gives me a feeling of satisfaction when I manage to use some leftovers and scraps that I have been keeping forever. Oh, and even though the sewing machine and I did get in a fight for a bit there, I am really happy with how my simple sewing turned out. Besides, I won’t be taking it out for a while now since I made a few more paper bases as well. Also, if you dislike sewing as much as I do, you can always try to glue the paper pieces together.

Anyway, I hope you had fun reading about my crafty process and that you will give your paper scraps a new life as well.

Renata 💜


Facebook: Peley Renata
Instagram: @renata_artjournaling 

Friday, 23 November 2018

2018 #20 Foiling: Adding Subtle Texture with EAB {by Autumn Clark}

 2018 Topic 20: Foiling


Such a beautiful colour palette tonight and i have never seen Sara and Kay's stamps used so perfectly together before! Take all that, add a bit of foilng and you are good to go! Superb from Autumn! ~Leandra

Hi everyone, it's Autumn Clark with you today, and I'd like to share with you some artsy greeting cards featuring gel printed backgrounds with subtle foil textures.

Similar to embossing, foiling offers the opportunity to contrast between glossy and matte I am so very fond of.  When added in moderation, elegant textures can emerge from even the grungiest mixed media.  You'll see just how easy it can be!


I set out to make some lively greetings with a jewel toned palette of PaperArtsy Fresco Chalk Acrylic Paint in Amethyst, Eggplant, Jade and Midnight, thinking it would be the perfect contrast for my silver foil.


After playing with my paints and gel plate until I was happy with my two prints, I cut away a portion of each for the base of my cards and used the scrap for my stamping.  I embossed images from PaperArtsy Eclectica³ {Kay Carley} Collection (EKC01)


... and PaperArtsy Eclectica³ {Sara Naumann} Collection (ESN17) in white, and fussy cut them.


To add my foiling, I rubbed a glue stick through PaperArtsy Stencil 108 {Scrapcosy}.  I lifted as much of the globby glue as possible with a scrap paper, then added my foil.  I turned the stencil over and rubbed the remaining glue over other areas for an opposite pattern.  This created bits of pattern here and there.  I added a couple of foiled flowers by using Ranger Heat and Stick embossing powder and the tiny images in the Sara Naumann set. 


Finally, I tucked my images beneath a band stamped with PaperArtsy Eclectica³ {Alison Bomber} Collection (EAB07) sentiments. 


I was pleased to find the Peacock Feathers Distress Oxide pad and Seedless Preserves Distress Ink pads coordinated perfectly with my beautiful Fresco Chalk layers.  I did a little scratching into the paint with my awl to make "frame" around the panels.


It is truly amazing what a bit of glue and a strip of foil can become.  I hope you'll give it a try and wow yourself today!  Make sure to scroll back through this topic to see the other designers' inspiring ideas...

Happy foiling, Autumn

Facebook: Autumn Clark
Instagram: @sewpaperpaint
Pinterest: Autumn S Clark

To join our challenge and win a PaperArtsy £50 gift voucher:
Simply make something arty relevant to the topic, and link your creation from any social URL (eg. Instagram, Pinterest, Blog Post etc) sharing your original make to this challenge page.

The current topic link Topic 20: Foiling will close 17:00 (London Time) Sunday, 25th November 2018, and the winner will be announced 2 hours later at 19:00.

Please make sure we can contact you as a prize winner - it helps if you share your contact info from the platform you opt to use.

Good Luck! If you have any questions, don't hesitate to ask!

Friday, 1 June 2018

2018 #10 Paper Dolls: 'Dare to Dream' with EKC {by Corrie Herriman}

2018 Topic 10: Paper Dolls


It can be a bit of a challenge to create a 3 Dimensional project, but wow! Corries conjures up a wonderful scene in this wonderful shadowbox using stamps and Advantus PaperDolls.I hope this inspires you to make something perhaps...inside the box too! ~ Leandra

Hi everyone, it's Corrie from MadeByCHook here with you today, and I'd like to share a shadowbox with you. 
As soon as I knew what the topic was going to be, I imagined a paper doll sitting in a flower and that's how this idea was born. I tried to create a dreamworld for these little paper people. I also really loved the topic of neutral colours before this one and decided to go with neutrals and add some blue with a touch of purple. I think this goes really well with the vintage colours of the paper dolls. 


I enjoyed thinking out how this was going to come together. Something I always do; I have an idea but never start on it until I am sure about how to get it done. This is a way of avoiding having to do things twice because you didn't think them through. I suppose that is the control freak in me... Anyway, here is how it came together: 


This box was in my stash for years. I bought it at Ikea years ago and the paper at the back is actually covering up the glass; I glued a piece of grey board on the outside to hide the glass from that side and to be able to decorate the box on all sides. It came without legs and the opening you see at the front is actually the back. I just took out the back panel. To start I glued on the legs and painted a layer of gesso on it. With Fresco's there is really no need to use gesso but that is just how I work. 


As I thought it would be impossible to use a stencil and paste inside the box, so instead I made an insert out of Mixed Media paper. I can just slide this inside the box once I am finished with it. 


This was done with Kay Carley's stencil  PS061


I also used the stencil and the model paste on the outside of the box. It gives it just a little bit more interest.


I wanted to have blue flowers to decorate the box, so instead of using my trusty Copic markers I decided to gel print some paper to stamp on. This worked really well. I used Fresco Finish Chalk Acrylics in the colours {Glacier Ice}, {Venice Blue} and {Purple Rain}. Venice Blue and Glacier Ice are both paints from Seth Apter Set 4


Next I stamped the flowers from Kay Carley's sets {EKC01} and {EKC08} and I like the result. I then cut them all out to use inside my box. 


After the gesso had dried I painted the box and the insert all over with Fresco Finish Chalk Acrylic in the colour {Chalk}. I then used some glazing fluid {Golden Acrylic Glazing Liquid (satin)} mixed with the {Venice Blue} Fresco Finish Chalk Acrylic to add some detail to the stencilling. I really like this effect. 


I did struggle with how to decorate the edges of the box where the backpanel had been because it didn't look very nice. I looked through my stash and found this Sari ribbon. It was grey and brown but I just cut out some of the brown/beige bits and glued them on the edges. I think this looks really neat. The flowers at the top were then added to serve as a place for my sentiment. I also added some book text to the bottom because I just really like using book pages in my projects. Adds instant interest I think.


The nicest bit was arranging everything inside and deciding where to put the people. To make sure everybody stayed upright I used pieces of grey board to prop them up.


In the end I also added some {Vintage Photo} Distress Oxide Ink to the edges and used the same ink to stamp some one of the smaller stamps from set {EKC08} around the stencilling. Again this adds a little more interest. Apart from that I wanted to keep it simple because I think the paper dolls are the stars of the show !

I have really enjoyed making this project and I hope I was able to give you some inspiration too ! I love these paper dolls and I know there are a lot of people like me who love them also!  So play along with us, show us what you do with your paper dolls. We can always use more inspiration ! Thank you so much for stopping by today and I hope you'll visit me at my other locations too :

We always hope that you  learn something interesting from our blog

Our creative team love to read your comments so much, so please take time to let them know you've been inspired!  

You must complete step 1 AND 2 to be entered into the draw. 

To join our challenge:
1. Leave a comment on the Topic Introduction Post and go in the draw to win a PaperArtsy Apron. 
2. Make something arty relevant to the topic, and link your creation from any social URL (eg. Instagram, Pinterest, Blog Post etc) sharing your original make to this challenge page 

The current topic link Topic 10: Paper Dolls will close 17:00 (London Time) Sunday, June 17th 2018, and the winner will be announced 1 hour later at 18:00, because we have some new product announcements starting at 19:00.
