Showing posts with label PS219. Show all posts

Thursday, 21 July 2022

2022 Topic 10 : Up my Street {by Autumn Clark} with Hot Picks stamps


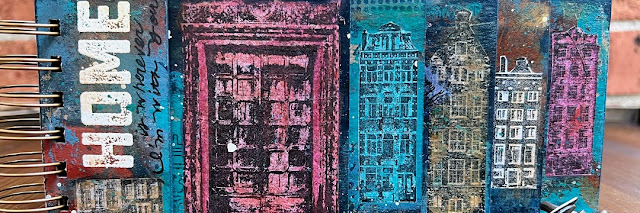
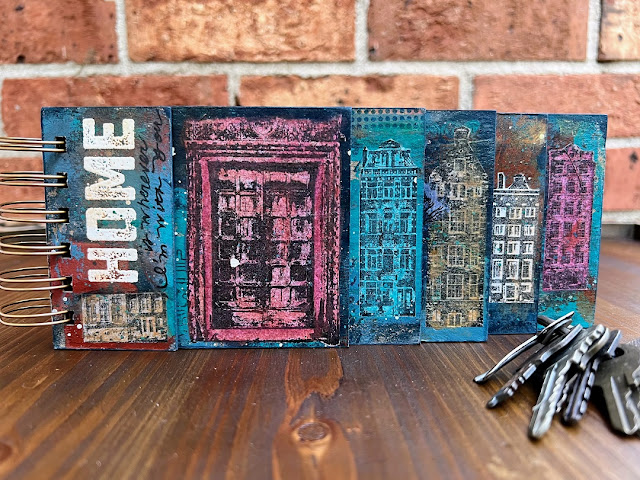
Hi everyone, it's Autumn Clark from SewPaperPaint with you today, and I'm here to share with you a cascading chipboard mini book that started out to be just a fun little artsy book of houses, but ended up as tribute to where I grew up.  The more I thought about the concept of home as I worked, my little art book turned into much more.  I've filled it with historic photos of my very quaint hometown in rural South Carolina.


I chose to work with chipboard and my gel printing plate because I knew it would be loads of fun to have a big printing session and I always love working with upcycled materials. My coworkers save chipboard for me and I try to use it as much as possible! My specific idea for a cascading book was inspired directly from PaperArtsy Hot Picks stamp set 1601 (HP1601) and my wanting to showcase the row of houses individually across the pages.


The first part of my process was choosing a size for my chipboard. One day I came across a Bind It All machine at a second hand store for $4!  Imagine my surprise and giddy smile! I ended up cutting my chipboard pages to be 3.5" tall and 8.5" long. This made it easy for me, as a beginner to the Bind It All machine, so that I could simply punch each page one time without having to repeat punches on each page.


Leandra can attest to my love for choosing a color palette with PaperArtsy Fresco Finish Chalk Acrylics. Not only do I relish the chance to pick a new combo, I also really enjoy photographing them all together! Ha ha! They serve as a great reference point for me to remember how I got the different effects when using my gel plate, as the layers sometimes muddy change the color in the process. I was really in the mood for some rich colors, so this time I chose MidnightBrown ShedChocolate Pudding and Space Cadet. Later I decided to introduce Jade Fresco as well.
 
 
I started printing using my 8x10" gel plate, which was great because I could print two panels at a time. I made sure to lift all of the excess paint around the sides for a layered look. I wanted to try using my stamps on the wet paint on my plate. So I picked up PaperArtsy Hot Picks stamp set 1602 (HP1602). I love the ledger text and cool circles in this set for background work. I found it really helpful to have a soaking wet terrycloth towel in a dish beside me so I could clean my stamps with each print. I also found that the stamping worked best when the paint wasn't too thick on the plate. And the best part, was that whatever mark I made into my wet paint gave me a nice painted stamp that I could use to stamp onto the pieces I had already printed. A two for one effort - yeah!


Here's an example of how I blended my colors on the plate. When working with multiple colors I like to add a dollop of every color all on the plate first. Then I brayer from lightest to darkest, rolling the brayer off onto paper between colors so they don't get muddy.

 

I had all of my chipboard pages printed. Next, I needed to make my colored houses. I stamped them onto thin tissue paper and heat set to dry. Then I gel printed their backs because I thought it would be a lot easier than printing them with a brush, which can be very delicate. If I left a corner free of paint, I could easily pull the tissue without it tearing. Here you can see some fronts and backs of the stamped & printed tissue. In hindsight, I wish I had stamped onto the painted side because the tissue would have been a richer color when adhered, but you live and learn...
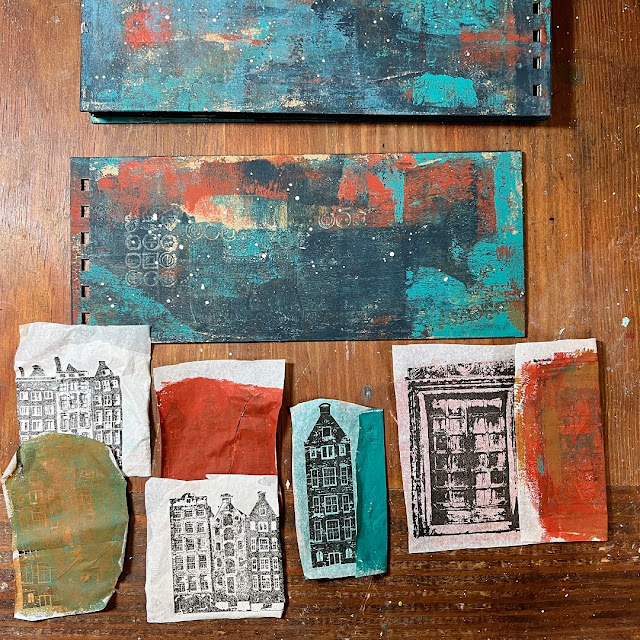
 
I adhered my cut apart houses on to my pages with matte Mod Podge. I started with the last page and used it as a guide to cut the next smallest page, so that the house would be perfectly visible. I tinted some of the houses with Fresco Finish Chalk Acrylics in Claret and Pumpkin Soup since they were a little too subdued against the very dark backgrounds. I bound the book with the metal wire so I could really get the feel of the finished project.
 
 
I wanted even more contrast throughout the pages, so first I splashed the pages with Cloud 9 Fresco, then decided to add in some stencil work with Grunge Paste for even more contrast. I used PaperArtsy stencil PS021 and Sara Naumann's PS219. The alphanumeric stencil was one of those freebies that PaperArtsy puts in with an order.  They are always a fun surprise! 



To add a bit more pattern, I adhered some torn elements from the new PaperArtsy Printed Tissue throughout my book. There are so many designs in the Printed Tissue, giving us such a broad range of uses. I also added some stamping throughout my book with PaperArtsy Ink & The Dog Mini Stamp 18 (MN18).


At this point I loved my book, but wished it could be more somehow, like a real treasure for me. So I decided to add a personal touch and filled my mini book with historic photos of my hometown. I really love the black and white pics against the abstract, richly colored background.
I was finally satisfied with my work and finished everything by adding a little journaling.

I know I say this in almost every post, but I find great satisfaction in turning something that would be discarded into art. This chipboard now has color, life and a story and now will be something I treasure as a result.


Needless to say, you'll be seeing me use my "new" Bind it All a lot in the future! If you already own one of these, I really hope this post encourages you to get out your PaperArtsy Fresco Chalk Acrylics and have a print-making/book-binding session of your own. Also, why not take some time to ponder on the concept of home for our Up My Street topic and see how you can use your stamps and photos to create your own tribute to home.
 
If you get one thing from this post, I hope it's the encouragement to keep going with your projects. If we press ourselves forward with each phase of creation, we are often very happily surprised by creating some of our favorite work. That was the case for me this time. It's been a joy, Autumn.


YouTube: SewPaperPaint
Facebook: Autumn Clark
Instagram: @sewpaperpaint
Pinterest: SewPaperPaint

Tuesday, 21 June 2022

2022 Topic 09: Leftovers {by Jenny Marples} with Urban Snapshots stamps


Hi everyone, it's Jenny (Pushing The Right Buttonswith you today, and I'm here to share a 'paper piecing' technique which allows you to add colour to some intricate stamped images using leftovers.


As the post progresses you'll see how this idea developed from a basic double page spread in one of my art journals, and through another two collage pages, before I finish a more detailed paper pieced postcard. I even use up the leftover paint in a final collage! Here's a couple of the finished pages to whet your appetite; 


I won't be going into too much detail explaining how this first collage came together because it's the lessons learned along the way that are the important bit. The background is just layering of neutral tones and textures (papers, lace, gesso) and some PaperArtsy Grunge Paste applied through the Sara Naumann stencil PS219.


I wanted to use the main window image from the PaperArtsy Urban Snapshots USAA3 stamp set but just wasn't happy with my first painted version. This is where I would highly recommend stamping your images on some clear plastic packaging to test what it will look like on top of different backgrounds - I've found some leftover painted tissue from my Venice book which is much more colourful and better suited to the image.


You'll spot below how in the finished collage I've masked off the border around the window so it blends more with the rest of the spread. It is worth going as far as trimming the border off in one piece if you have the mounted version because they are easily reassembled when stuck on a stamping block. The numbers come from the PaperArtsy Minis MN23 stamp.


I had some leftover gel plate printed tissue in yellow and have used the lamp-post from the PaperArtsy Urban Snapshots USAA2 stamp set on it to balance the composition, adding white highlights to emphasise the shape.


The next journal page starts with the lesson learned - these images work well stamped on multi-coloured backgrounds - so I've pulled out my collection of yellow leftovers and picked a bit that had a combination of 'Lemoncello' PaperArtsy Infusions and 'Toffee' PaperArtsy Fresco Finish Chalk Acrylic Paint on it. The doorway image comes from the PaperArtsy Urban Snapshots USAA2 stamp set mentioned earlier.


To lighten it slightly I've added 'Chalk' PaperArtsy Fresco Finish Chalk Acrylic Paint, applying with a brayer from a small gel plate. My next tip is never clean your gel plate! You'll see why at the end of this post.


To make the door stand out even more I've painted over that part of the stamped image with the 'Chalk' PaperArtsy Fresco Finish Chalk Acrylic Paint before re-stamping it - use a stamping platform to make this process a lot easier.


At this point I wanted to make the door red but rather than risk painting and re-stamping the image again I thought about stamping it on a leftover piece of tissue. Digging out the poly-pocket with red leftovers, you'll see I have any number of gel plate tissue prints pulled to clean off my plate when it gets overloaded.


If the colour isn't quite the right shade adjust it with another thin layer - in this case 'Scottish Salmon' PaperArtsy Fresco Finish Chalk Acrylic Paint warms the look up nicely. Again, don't clean that gel plate just yet!


After stamping the door on this tissue I've cut around it, glued it to the original image and added a little clear embossing powder for good measure. This paper piecing method seems to have worked well and is a touch less fiddly than painting and re-stamping multiple times.


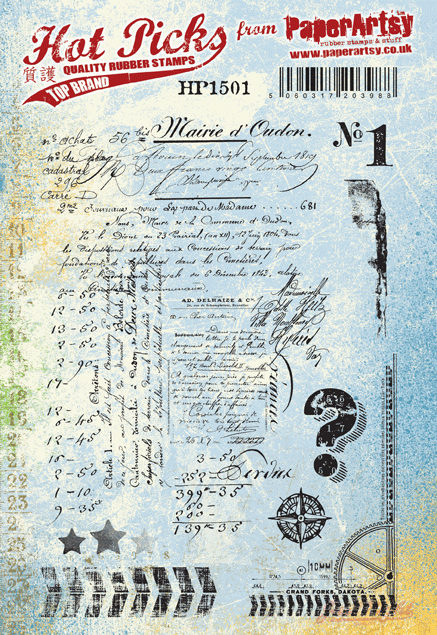
The background include a combination of PaperArtsy Printed Tissue and stamped images from the Hot Picks HP1501 stamp set. I've also found a piece of 'mop up' tissue left over from cleaning up 'Golden Sands' PaperArtsy Infusions.


If you are unsure about where to stamp in the background try stamping your main image in it's final place on the page and then working around/over it safe in the knowledge your cut out doorway will be placed over the top in the end.


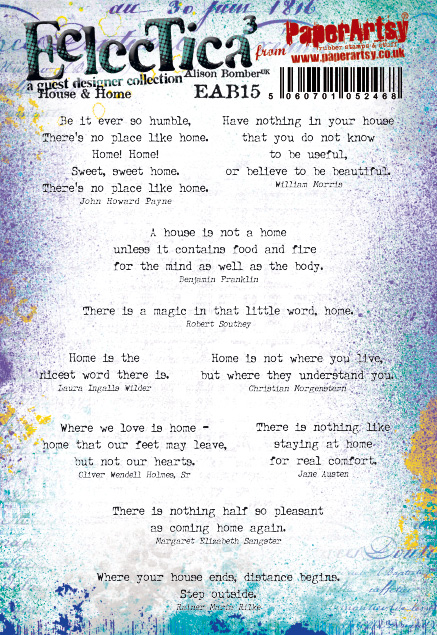
In a change of heart I applied coats of PaperArtsy Fresco Finish Matte Glaze over the image to remove the shine and included words from the Alison Bomber EAB15 'House & Home' stamp set.


Taking paper piecing in a slightly different direction I decided to try stamping the highly detailed gate image from the Urban Snapshots USST2 stamp set onto two slightly different coloured leftover pieces of painted tissue. The top edge of one was torn and layered over the other to create a simple two-toned look.


Of course it needs mounting on something so I've re-purposed a PaperArtsy postcard with more PaperArtsy Fresco Finish Matte Glaze'Chalk' PaperArtsy Fresco Finish Chalk Acrylic Paint and a discarded teabag.


To complete this page I've used a bit more PaperArtsy Printed Tissue, some teabag paper stained with 'Golden Sands' PaperArtsy Infusions and the gate image, glued onto some of the paper left over from making the original journal.


And here's the finished collage, complete with more hand stitching and the words from the Urban Snapshots USST2 stamp set.


Time to get slightly more ambitious with this paper piecing technique! On the left you'll see where some more of that mop up tissue has been added to the back of another postcard and over-stamped with the script image from the Hot Picks 1501 stamp set. The second of the images from the Urban Snapshots USST2 stamp set has been added on top as a guide. On the right I've stamped portions of the image on contrasting leftovers ready for cutting and adding on top.


The extra colour and contrast makes such a difference to the finished look of the balcony especially when highlights and detailing are added with with black and white permanent ink pens. The trailing plants look better with the addition of some colour too, stippled delicately over the top. Remove any unwanted shine with PaperArtsy Fresco Finish Matte Glaze.


I couldn't resist adding a number from the PaperArtsy Printed Tissue on this whilst the words come from the previously mentioned Alison Bomber EAB15 'House & Home' stamp set.


Just time for one final page which you may remember from the beginning of this post - the facing page in the Paris art journal.


To finish I've used up that leftover paint from the gel plate, pulling it on tissue and combining it with more PaperArtsy Printed Tissue and the text and stars stamps from the Hot Picks HP1501 stamp set. 


Going right back to things used in the first collage, the words are from the Alison Bomber EAB20 'Night & Day' stamp set and the PaperArtsy Grunge Paste dots have been applied through the Sara Naumann PS219 stencil.


Hopefully this tutorial has given you some ideas for using up your leftovers to colour in those more detailed images - I know it's something I'll be doing again. And don't forget, if your scraps are not quite the right shade just add a bit of extra colour to make them perfect.

Thank you so much for stopping by.
Jenny