Showing posts with label MN109. Show all posts

Monday, 17 July 2023

2023 Topic 7 : Art Dolls {by Jennie Atkinson} with Lynne Perrella stamps


Hi everyone

Jennie (Live the Dream) here with you today being creative with our current theme of Art Dolls.

My granddaughter and I love to create articulated dolls from scraps and stamps and we always have a lot of fun creating a little art doll with (as Caitlyn says) attitude!  Although my Lynne Perrella doll is quite arty I hope the basic steps will provide you with some ideas and fun which can be shared with younger crafters.


I love her transparent butterfly wings and thought she looked lovely fluttering in the greenhouse! By using eyelets instead of brads I was still able to articulate her arms but this allowed me to add some wire for a hanging so the transparent wings can be seen.

Our theme this quarter is Transparency and so my use of plastic packaging and lace fits the theme. She has also been made from scraps of previously printed gel plate papers and odd little bits of lace that I seem to have lurking in my lace jar, so a sustainable project too.


My starting point for this project was the stamps as I needed a nice looking "face" to be able to isolate from the stamp design and was easy to cut out.  I chose LPM03 as my main character stamp and added MN109 to be able to isolate a word or two and also MN115 for the wings. Being PaperArtsy Minis they were all in scale with each other.


The next job was to find "body parts" ! It is possible to find a number of free templates online and these are usually my go to as I am not that confident at hand drawing them. They can be printed out at different scales to fit your chosen "head" and if I am creating with Caitlyn I often print them directly onto patterned paper so she only has to cut out one set.


Given the vintage look of my lady I knew that lace would be involved and I find these little pearl gems are good for adding little details around the neck and sleeves.


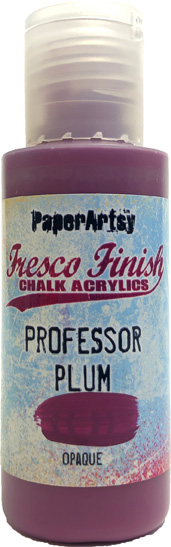
And finally some scraps of paper. When making these small art dolls I try to keep patterns small so that they are in scale with overall doll.  I keep all my little scraps of gel plate prints in a folder as they are generally useful for some smaller projects. I decided on this pink piece which I had created for a PaperArtsy project some time ago. It had some lovey imprints from some stencils and I had thankfully written on the back the paint colours! PaperArtsy Fresco Finish Chalk Acrylic Professor Plum FF109 and Sour Grapes FF115.


The first step was to ensure the head was in scale with the body and I found that a print scale of 75% worked well. I traced my body pieces onto heavyweight cardstock after my attempts at printing them directly ended in a massive printer jam!


I had decided against legs as I wanted to use the stencilled patterns on my papers for a long dress. It was easy enough to hand draw a template for a long skirt.


I now had my basic doll with everything at the right scale.


And now to the fun part! Once all the parts had been covered with the papers I marked the areas where I needed to punch holes to make the arms articulate. I would normally use brads but decided on eyelets instead as this then allowed me to attach some wire so the doll could hang. They make the arms slightly stiffer but they are still able to move.

I decided not to articulate the head, but glued that directly instead so I could get the angle I wanted and the ruff just showing above the neckline.


Before adding the head I had used some inks to add a little colour to her hair and lips and also added a hat band from the left over gel plate papers.


The wings probably caused me the most problems ...... I had a few pieces of plastic packaging in my stash and thought they would be perfect for the transparent element of the project. But .... I struggled to find an ink that would dry on it. There must have been a film of something on the packaging that wouldn't allow the ink to dry. In the end I experimented with different ink pads and then reversed the plastic. Game changer! the ink dried...... eventually !


I now had all my main elements completed and then on to another fun part - adding the final details.

I am a huge hoarder of lace - even the tiniest little scraps! however these are just perfect for a little project like this. The little pearl gems just finish off the sleeves.


The sentiment came from isolating one word from MN109. There were a number of possibilities from this stamp but "thankful" seems to fit nicely.


I did stamp two sets of wings so they could be cut with a small edge to make attaching them a little easier and so they extended wider. They sit just below the wire hanger.


This was such a fun project as at various times the character of my doll peeked through - the tilt of the head, the placement of the arms, the way she turned when hung. And the butterfly wings give her an ethereal feel. My granddaughter is already in love with her.

I hope my project gives you some ideas of how you might be able to create something similar with your own children or grandchildren with just a few scraps or papers and lace. There is so much fun in choosing the face to create different characters and even when finished more fun in placing the arms and legs to create even more character - or attitude!

As always thank you for joining me.

Jennie x


Sunday, 16 October 2022

2022 Topic 14 : Colour Study: Triads {by Jennie Atkinson} with Ink and the Dog Mini stamps


Hi everyone, it's Jennie (Live the Dream) with you today, and I'm here to share with you a small book box using some fiery colours and a selection of stamps from the Ink and Dog Mini Stamps Collection.


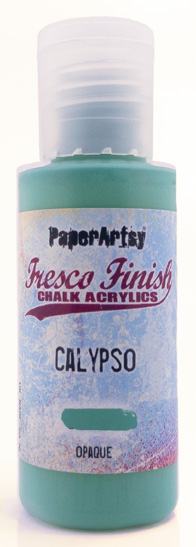
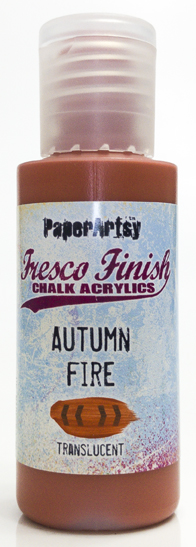
For those of you that know me I am very much a neutrals/pastels creator and so when I was asked to consider taking part in this Triad Challenge I wasn't too sure what I was letting myself in for! I spent ages looking at colour wheels and decided to choose my Triad from colours which were not main primary colours but a "step" away. This gave me the choice of a turquoise (Calypso) instead of blue, plum (Professor Plum) instead of red and an orange (Autumn Fire) for my yellow.

The resulting painted colour wheel was extremely interesting particularly the lilac in section 6 but the green in section 11 seemed very odd ! and in fact I mixed it twice to make sure it was correct. However, Autumn Fire is transluscent and I was mixing this with an opaque so the latter must have "won" the battle of the mix!

I decided that the colours had a real Moroccan Market feel and decided to experiment first with paints on my Gel Plate before deciding how to use them ..... the result was a small book/box which can be used for trinkets or other finds.


Whenever I want to experiment with colours I nearly always turn to the Gel Plate. I love the way colours can be combined but also the way not everything blends together well so there appears to be little spots of lighter/darker mixing and due to the waxiness of the plate the odd little bit of white shows through. This gives a feeling of "texture" without adding anything into the mix at all.


I did try some random mixing of colours which didn't quite have a "feel" to them but once I decided on landscape striped areas of colour the feeling of an early evening Marakesh market square came to life!

I turned next to the stamps and had already fallen in love with the pattern of MN122 which again had a Moroccan carpet feel to it. Random stamping with some matching Archival Ink along with the text of MN124  started to fill in some of the areas.


MN124

However .... I did turn to two favourite Ink and the Dog Mini Stamps which I tend to use in ALL my backgrounds. In fact MN72 never leaves the block and sits on the craft table all the time.

                                                      MN23                           MN72


I didn't have any matching inks for the middle section but decided to go for a turquoise Archival ink which blended well with the Calypso but didn't look out of place on the Autumn Fire. As this was beginning to feel more like "sky" I used only the text and splatter stamps keeping a more open finish.

My main focus of my project had always been the beautiful new Mini Portrait stamp. I had instantly thought she was a "red head" so started by colouring with the hair and kept everything else quite simple.


She needed a frame ...... I tried different ideas from die cuts to wooden frames but then this little mask caught my eye and she fitted the aperture perfectly!


I new from the start that I would have to choose one of the three Triad colours as the main embellishment colour. As the frame would be located on the plum area of the paper I decided to go for the plum rather than adding in another distraction. I tried mixing Professor Plum Fresco with the Grunge Paste but it came out rather pink, so in the end used the Grunge Paste in its natural form on some thickish watercolour paper and once it had dried and was cut out, painted it with the Fresco Paint.


I used Eileen Hull's Skinny Mini Box Die to create the box as it is a good size for utilising an A4 sheet of gel plate print. I cut the paper in sections so it wrapped around the cover. However it would be easy enough to make a book cover in a similar way without the box.

I used one of my other prints to create a similar piece inside the box along with the quote from MN109.

This print was darker in colour and I felt worked better inside the box rather than outside. By this time the colours were really appealing to me and I was on a roll in terms of tying in other embellishments which focused on the Triad colours.... (I never thought I would feel so relaxed about bright colours!).


In keeping with the Moroccan feel I added some gold dry brush work on the frame. I felt the wooden embellishment worked better in the same colours as the frame but the little paper flowers painted in Autumn Fire Frescos added the contrast without being overpowering.


I experimented with other coloured embellishments but went for the contrast ribbon and hanging embellishment which felt more tonal ..... if you can say that with such bright colours!


Without the challenge of using the colour wheel I would not have put these three colours together or felt confident in creating with them. I cannot stress enough how "out" of my comfort zone this was, but being able to rely on a technical means of choosing the colours there was a reasonable acceptance that they should work together.

I am not sure that my random prints would have worked well but by isolating the colours into the three individual strips they combined better and gave me something which I felt I could identify with .... the Moroccan Market by night.

I shall certainly try this again in order to move myself away from my usual colours. It was exciting, terrifying, creative and satisfying all at the same time! I hope you give it a try!

Jennie x

Facebook: Jennie Atkinson
Instagram: @atkinsonjennie