Showing posts with label LPC047. Show all posts

Monday, 15 September 2025

Woodland Wanders with Lynne Perrella stamps {by Mags Woodcock}

Hi everyone, nice to be back with you again

Mags here with you today.

This year on the blog, we have free rein to do a deep dive into a PaperArtsy product ranges of our choosing. For this post I have been exploring two fabulous Lynne Perrella stamp sets

Today I'm looking forward to sharing with you how I use a faux wood slice to create a woodland plaque with lots of texture and dimension within the layers. Lots of PaperArtsy products came out to play and it was fun to use several products to add colour in a variety of ways.


 I used Grunge Paste (GP190) combined with some Fresco Finish Chalk Acrylics and Just Walnut Infusions (CS25) to add texture and vintage colour to my project. I also used quite a few Mattints to colour my stamped image, and I share how I achieved a lovely skin tone. 


 As you can see here, I chose some neutral colours along with a couple of greens to combine with the Lynne Perrella stamp sets.(LPC047 & LPC048) The stencil is by Kay Carly (PS061) and was the obvious choice for a delicate botanical feel. As it turned out, I didn't use the plain tissue or Fresco Finish Chalk Acrylic, Snowflake , but instead stamped directly onto my faux wood slice


I'll take you through the other supplies I used, as I use them.

 
I wanted to add quite a lot of interesting detail to the background of my project. So I started by stamping the lavender foliage from Alison Bomber's Lavender Edition stamp set (EAB47) available from a PaperArtsy stockist. I used Ranger, Archival, English Ivy to achieve a lovely crisp images


The background was a little bright for my liking so I sponged on Nutty (MT02), Fern (MT03) and Ash (MT10) Mattints, available from a PaperArtsy stockist , working in a circular direction to follow the wood grain. Using the Mattints to add colour as well as seal the surface allowed me to colour the leaves with Fern followed by a touch of A Bit Jaded Infusions (CS02), The Mattints stopped any bleeding of the Infusions outside the stamped lines


I wanted to use some Grunge Paste to add texture to the background, so mixing it with some Fresco Finish Chalk Acrylics , Magic Moss (FF130) and Castleton (FF231),available from a PaperArtsy stockists , achieved the colour I wanted.


I applied the coloured grunge Paste through the Kay Carly stencil, working in from the edges of the wood slice, and using various parts of the stencil to add variety. When the Grunge Paste was completely dry I brushed on a coat of diluted Just walnut Infusions (CS25) to add a vintage feel.


Whilst gathering supplies to possibly use on the project, I came across some gorgeous MDF leaves. They were perfect to add some more dimension. I used a sponge to add a base coat of Fresco finish Chalk Acrylic, Buff (FF96), followed by a mixture of Buff and Magic Moss. A touch of Castleton mixed into the mixture created a slightly darker shade, which I added to one edge of the leaves.


Continuing to add colour to nature themed elements, I had some chipboards that I thought would look lovely. There was one large circular piece that I wanted to include, plus some smaller elements. I used A Bit Jaded Infusions mixed with water and decanted into a spray bottle, and randomly spritzed the chipboards. I didn't actually use the large circular element in the project, but it will await it's turn to shine.


I was really pleased with all the elements and background I had created, It was now time to move on to the focal image for the project, and also decide on the colours to use. I had a couple of ideas, but as we all know things can change as we progress with a project.

My initial idea for the focal area of the project was to stamp out the two faces from the stamp sets, fussy cut them out, then layer them up to give the simpler one a "Beehive" hairstyle,  adding in the embellishments I had created. I experimented with this idea, but soon realised it didn't work to my satisfaction. I put my thinking cap on and soon realised that what was needed was a contrast. A contrast to the organic leaves, birds, feathers and other items.

I stamped the image from LPC048 on to Smoothy Card (SCA4) using Ranger Archival, Jet Black and created a panel with the image in the centre. The straight lines of the panel were just the ticket for adding in that much needed contrast.


Just Walnut Infusions came into play once more, to add a vintage vibe to the stamped image. I used a large brush to add a wash and then when it was dry, added a few extra splatters.
I coloured the face with watered down Ladybug Mattint (MT12) available from a PaperArtsy stockist and the cheeks with full strength Ladybug.


Now was the time for a big decision, which other colours to add to the image. I toyed with the idea of yellow, or green, but in the end Dragonfly Mattint (MT07) won the day. It would give the image the much needed pop of colour.


My focal image was taking shape very nicely, but it needed something to lift it from the background. I had always planned to mount it on something, but exactly what took a while to decide. I tried book pages, kraft card, and stamped card, none of which looked right. it was at this point I came across some small panels of wood veneers. They were just right for my purpose, only one problem, they were too small. After a bit of playing around I came up with the idea to layer up two panels to form a solid base for the image. Splitting the two remaining panels and distressing the ends before overlapping them worked perfectly.


It was now time to bring everything together on my wood slice background. I had some mini wood slices in my stash of possibilities, these were perfect to mount the focal panel on.


I used foam tape and Heavy Gel medium to layer up the focal panel on the slatted wood panel. This allowed for embellishments to be tucked in between the layers easily later.


I loved how everything was coming together and couldn't wait to add more. As always, I think it's the little details that make a project

The birds in the stamps were crying out to be used in the layers surrounding the panel. but also featuring on the nest, these were also coloured using Mattints, Glow (MT01), Nutty (MT02) and Dragonfly (MT07). I also added some grey board butterflies which had a base coat of Buff followed by a coat of Dragonfly Mattint, and the eyes from the face on stamp set LPC047 added


Coordinating buttons added some much needed colour to tie in with the Ladybug . A coat of Matte Glaze took away the annoying shine for a more vintage look


As you can see here, layering up the elements made the project multi dimensional and added lots of interest and texture.


The face on the seed packet stamped image was distracting so I covered it with some buttons from another stamp in the set, using Glow and Ladybug Mattint, and Just walnut infusions to add colour.


Colouring the white feathers from my stash was easy , I sprayed with just Walnut infusions and left to dry.


I have loved creating this project with all the little details. I hope you enjoyed seeing how it came together. I can imagine a set of tags or a journal cover using the elements and stamps I used in this project.

Take care and happy crafting................. Mags x 


Facebook: @Mags Woodcock
Instagram: @Mags Woodcock


Thursday, 17 February 2022

2022 Topic 03: Second Life {by Liesbeth Fidder De Vos} with Lynne Perrella stamps


Hi everyone, it's Liesbeth with you today, and I'm here to share with you the second life of a pair of old jeans and an old book! Together they become a (usable) handbag!


I love recycling; giving things a second life so much! I saw the idea of making a purse from an old book in Finland a few years ago. There was lots of sewing there, and I figured out how to avoid sewing by using the fabric of old jeans, so anyone can create this. For the painting and stamping techniques I never have a plan...I always just start and see what happens!

So...what I needed was an old book...not a beautiful one because it was to be overpainted and of course some old worn jeans I didn't wear anymore.


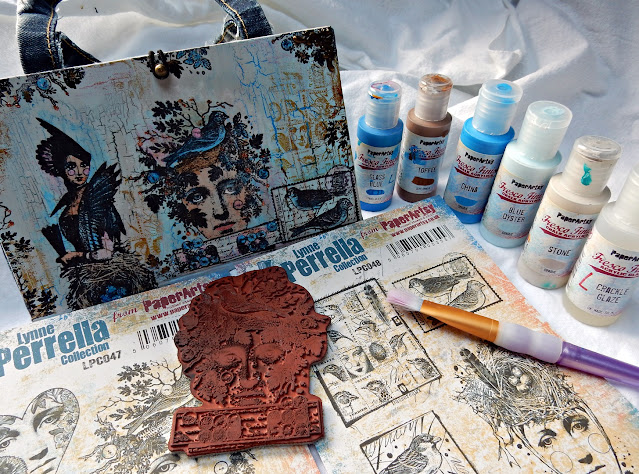
I chose these two wonderful Lynne Perrella stamp sets : LPC047 and LPC048. I also chose the colour combination...that was easy because it's my favourite: blues/turquoises and rust.
 

Let's start to prepare things first. I cut off the trouser legs from the jeans and cut the legs open to create a flat piece of fabric. I cut off the hems (as shown), I'll use them as handles for the bag.


I cut out the pages of the book (use them for your other projects!) Just the cover of the book remains.


To make the fabric inside of the purse, I set up the book sideways onto the denim opened 12.5cm as you can see here below. Using a pencil I traced the triangle shape inside the open cover. I cut it out adding 1,5 cm to all edges of the triangle. I cut this piece two times, for both sides of the purse.


I also cut out the body/lining piece, exactly the same size as the book cover. So no seams needed.


The reason for cutting the fabric now, and not after I painted the book cover is because it's much easier to work with the unfinished piece here. I put aside the fabric pieces for later.

 

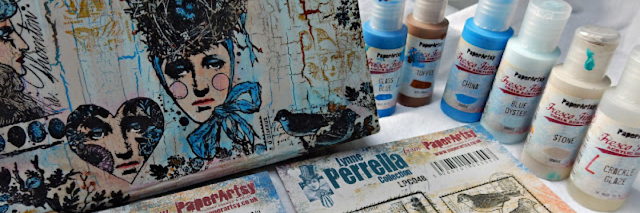
Now the fun part starts! First I covered the book cover with a layer of gesso to be sure the paint doesn't soak in too much. I dried the gesso and painted big parts variably with blue and brown paints. I used PaperArtsy Fresco Finish Chalk Acrylic  China and Toffee. I love them, and I love the combination! I didn't work very elegantly here, but that's not necessary because almost everything will be covered.


As soon as the paint was dry, I covered some big areas with PaperArtsy Fresco Finish Crackle Glaze. Not everywhere...but big parts. I let the glaze dry well.


Now it's the turn of the lighter colours: Fresco Finish Acrylic Paint, Blue Oyster and Stone. I squeezed out lots of both paints onto a craft sheet and made sure both colours were on the brush when I started painting. I covered the entire bookcover with these two paints, I worked quickly and tried not to touch the same spot twice. I used a thick layer of paint...I will get the BIG crackles I need! The crackling starts immediately and it's so nice to see the process; it's always magical!


I let the paints dry very well. Meanwhile I took a Kleenex tissue and took the 3 different layers of it apart. Using Tsukineko StazOn ink - Jet Black, I stamped lots of stamps from the two Lynne Perrella stamp sets onto the tissue paper. I didn't know which ones I needed, so I stamped a lot using LPC047 and LPC048 and some even twice. Instead of StazOn of course, you can use another waterproof ink.


I tore out most of the images, and some I cut out, like the hearts.


With the tissue cut outs, I tried  different compositions on both sides of the book cover. When I was satisfied, I glued all parts onto the surface, and also added some small torn out pieces of images (branches and small birds). Be careful, the tissue paper becomes very weak as soon as it's wet.


When everything was dry I thought  'hmmm, not enough is happening there... more is more!' ;-) So I stamped the wonderful grid stamp (from Stamp Set LPC048) here and there with Tsukineko StazOn ink in Saddle brown. Still...not enough... so I also stamped some leaves and branches on the edges using StazOn Jet Black. The leaves and branches...are from the headdress of the big woman's face! I just used the edges of that stamp.(from Stamp Set LPC047).


Time for the finishing touch of the images, where everything comes together. I coloured the skin (faces, hands) with some Salmon Adirondack ink and a waterbrush. Pink Distress ink also worked perfectly to give a bit of warmth!


Time to add some more colour! I love to colour images with PaperArtsy Fresco Finish Acrylic Paint in Glass Blue, because of its transparency and colour; wonderful! I coloured some details like birds, eggs and buttons using it. After that I watered down some of the Glass Blue paint with quite a lot of water till it was like watercolor paint, and painted some shadows here and there around the images so they would pop out even more.  I repeated this process with the brown paint I used before(Fresco Finish Acrylic Paint - Toffee).


Time for make-up! With blue colour pencil I coloured the eyelids and irises of the women, the cheeks with pink and the lips with red. The white of the eyes I highlighted using a white gel pen. All these details bring the face alive.


I really LOVE glitter, and use too much sometimes... (not this time 😉) Very subtly I added some blue and copper glitter glue (Stickles) on the leaves, branches, eggs and buttons of the images.


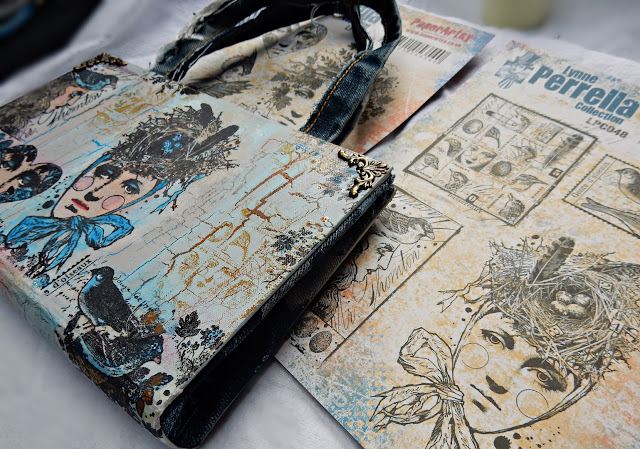
Well...I think the book cover is finished...yes, it is! This is what it looks like now, now it's time to turn it in a nice handbag!


Some details: you can see the shadows I made with the (very) watered down paint next to the faces.



Bringing everything together! But first, while I was poking around in my studio, I found these beautiful metal corner-pieces...perfect for this book-bag! Using tacky glue, I glued them on the upper corners.


I thought the pieces of jeans I cut out before were a little boring...so I decided to stamp onto the fabric. Once I'd seen some pictures of beautiful bleached stamped images on fabric so I thought let's try! So I took a scrap piece and started stamping using pure bleach. Again, I stamped with the haircut, leaves and branches, from the woman's head on Lynne Perrella Stamp Set LPC047
Unfortunately it wasn't a success, the prints were smudged and not detailed at all. Experiment FAILED! ðŸ˜€


So I tried to decorate the fabric with paint, and that worked well! Same colours again : Fresco Finish Acrylic Paint in Blue Oyster and Stone. I added both colours together on the stamp, and stamped randomly, turning the stamp every time in another position. I liked it!


So I stamped it the same way onto the cut out panels.


To create the handles of the bag, I glued down the hems on the inside of the book cover, at the same distance to the centre. Allow to dry well. I used clamps whilst it was drying.


For a closure, I attached a hitch fastener (Tim Holtz) between the handles. On the other side, I glued a rubber (hair) band using tacky tape and tacky glue.


Using tacky glue, I glued the triangle end panels at the inside of the bag (yes, now it's a bag!) You have to be very careful here, use rather a lot of glue on the edges, put the fabric in place, press each time with your fingers, press and smooth the seams till it's fixed.


Using a lot of tacky glue, at the edges and in the middle and onto the spine, I finished the bag by adding the remaining piece of fabric (lining) into the bag. I pressed for a long time with my fingers again until everything was fixed.


And a unique handbag is ready to be used!


This was so much fun to create, I hope you will give it a try yourself! When I started, I didn't know where it should end. I would recommend this way of working to all of you! Just let your inspiration and brainwaves lead you and you will be surprised! 😀 During this creative process I was so surprised and happy with the crackles of the paint shining through the tissue paper; it makes the Lynne Perrella faces so beautiful. And I also love the painted fabric, to me it looks so well in this piece! 
So...grab some old jeans and a book and have fun! I'd love to see your results!

Liesbeth