Showing posts with label FFSA4. Show all posts

Wednesday, 6 June 2018

2018 #10 Paper Dolls: Talking Dolls with EAB {by Alison Bomber}

2018 Topic 10: Paper Dolls


Instead of talking to herself, like most mad crafters, Alison is talking to her paper dolls, and guess what, they are talking back! A lovely post where Alison shares the process so beautifully! Have fun meeting her friends! ~ Leandra

Hi everyone, it's Alison here from Words and Pictures with you today, and I've been talking to my Tim Holtz Paper Dolls again - or at least they've been talking to me.  I usually find, when I'm working with a vintage photo of any sort that my imagination starts to take over and the person in the photo takes on a life and ideas of their own.

As you probably know, I love creating layered backgrounds, and once I'd selected my Paper Dolls, I listened in as I was layering to see which of my Eclectica EAB words they wanted to say, and this is the trio of tags I ended up with.


I love Seth's new paint colours, so they were the other element inspiring me through this creation.  I started with a wash of Glacier Ice over Snowflake in the background, and then enjoyed applying Double Denim with an old credit card.  (Glacier Ice and Double Denim are from the two most recent of Seth's collectionsSet 3 and Set 4 (respectively.)


There's something very satisfying about creating such artsy textures with such a mundane, everyday object.


I like to find out where the dolls want to stand (they're always very certain about which side of a tag they want to go), and once they'd told me, I added some Tim Holtz Design Tape for them to stand on, and an extra bit for the little chap who needs a leaning post.  Once he had an extra bit, both the others wanted more too.


At this point, I added another couple of layers to my background with some Snowflake-stamping of the fabulous alphabet from the Ink & the Dog Words Plate 2, and some brayered Snowflake for texture.


Ink & the Dog: Words Plate 2 (W2)

The real moment of delight, though, came when I added a light brayering of Seth's fabulous new Magic Moss (from paint Set 3) to echo the die-cut wildflowers I'd already made with Magic Moss-painted card.  I just love how those tag rings pop at the top, and how all his colours sing together.


The words being spoken by the dolls are selected from various sets of my quotes...


Trees & Flowers


 Music & Silence and 

Strength and Courage. 

I chose quotes in the first person, spoken with an "I", so that the dolls are speaking very directly to the viewer.  
Sometimes I talk to them with the words, but this time they're definitely doing the talking!


This fellow has always seemed to me to be pretty sure of himself, so these words came loud and clear from his mouth.  (They are Anne Frank's words, and go on to talk about being a strong woman, but I've left that bit off!)


The Magic Moss painted flowers are exactly right for what this girl wants, and echo the flower bouquet she's holding, but I really like them paired with the boys too.  Her words are borrowed from Claude Monet... see, we're gender-blind here!


Because the Design Tape has quite a sheen to it, it was easy to wipe away the brayered paint even after it had dried, so she still has a firm earthy foundation to grow her flowers in.


And, unexpectedly, this third chap has turned out to be my favourite.  I'm not sure whether that's just because he happens to be speaking some of my favourite words of all time (by one of my favourite poets, Rainer Maria Rilke)...


... or maybe it's just the expression of mingled hope and wariness in his eyes.  In either case, he makes me want to reach out and take that hand to reassure him that there are exciting secrets to be shared in this life.


Sometimes in the photographing of odd angles, trying to capture background details, you end up with some accidental poetry as the doll's words bump into one another...
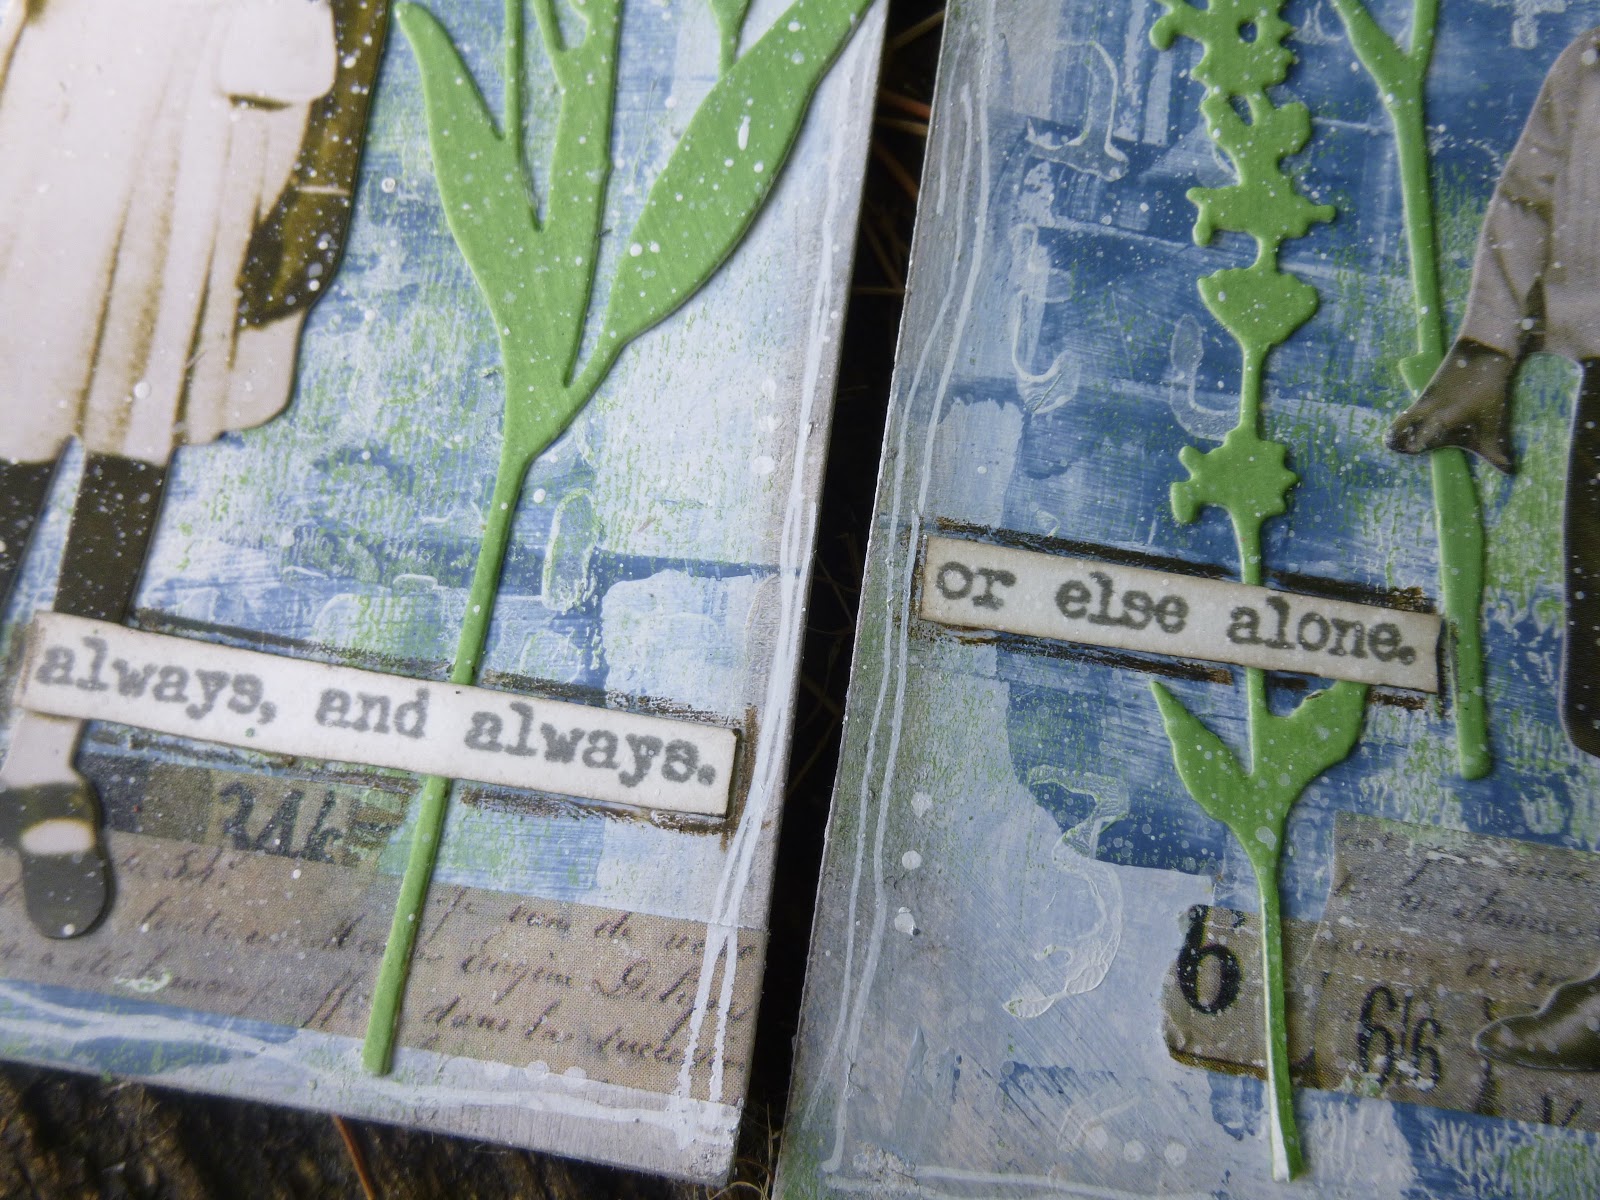


I often talk about not really knowing where I'm going when I start, and letting the ideas arise from the materials I'm playing with, so I hope this post gives you some extra insight into how those imaginative processes play out on the craft table.

I hadn't planned to have a completely matching set with flowers on all three, but the Magic Moss die-cuts sort of spread of their own accord.  The die-cut flowers themselves became necessary in response to the words of the girl, and she's the one who told me which words she wanted to say.  Does that sound a little crazy?  No, I'm guessing most of you know exactly what I mean!

I hope you'll be inspired to play with some paper dolls this fortnight, and talk to them too.  Thanks so much for stopping by today, and I'll see you again soon.
Alison x

Blog: Words and Pictures
Pinterest: butterfly crafter

We always hope that you  learn something interesting from our blog

Our creative team love to read your comments so much, so please take time to let them know you've been inspired!  

You must complete step 1 AND 2 to be entered into the draw. 

To join our challenge:
1. Leave a comment on the Topic Introduction Post and go in the draw to win a PaperArtsy Apron. 
2. Make something arty relevant to the topic, and link your creation from any social URL (eg. Instagram, Pinterest, Blog Post etc) sharing your original make to this challenge page 

The current topic link Topic 10: Paper Dolls will close 17:00 (London Time) Sunday, June 17th 2018, and the winner will be announced 1 hour later at 18:00, because we have some new product announcements starting at 19:00.

Wednesday, 14 February 2018

2018 #2 Seth's NEW Fresco paints: Coaster Stack with I&D {by Helen Chilton}

2018 Topic 2: Seth's NEW Fresco Paints


Ohhh these look just like those lovely tiles you buy in gift shops! Another fun idea from Helen Chilton with Seth's set 4 in gorgeous blues and a splash of pink paints! I love how the Ink and the Dog images look on them! I hope this inspires you to have a go !  ~Leandra

Hi everyone, it's Helen with you today, and I'd like to share with you some coasters that I made using Seth's new Fresco paints. (a list of PaperArtsy Stockists can be found here) I already had the tiles in my stash - they were a sort of matte creamy colour, but matte or glossy, it doesn't matter as the Frescos will create a great surface for stamping on. These new colours are lovely and soft, kind of vintage looking, which work well with the Ink and the Dog stamps I chose: Ancestors 1, Wings plate 2, Wings Plate 4,


I've gone for a sort of family theme, mother, father, sisters, brother. These stamps come into their own here: the focal images are just the right size and then there are lots of extras to make up the backgrounds.


It's easier to paint the whole tile first and then just block out in white where the main image is going to go. 


The background was pretty random and very easy. I matched my ink colours to the paints but you could just as easily stamp in the paint. Look at your main images and see if there's any edge bits you can use.


Stamping the main image doesn't always work first time round as the tiles aren't always completely flat, but it doesn't matter: rub off as much as you can and slap on the white paint again!


Here's a close up so you can see the detail. Note that I added a heart stamp on there - after all, it is Valentine's Day!

I do like stamping on different things - these are relatively quick to make and make a great 
gift. You could try larger tiles - you can buy the bisque 6" x 6" ones but, as I said before, if you pick up a glossy one at a DIY store, just gesso and Fresco it, and you're ready to go. Just imagine some of Tracy Scott's flowers on there in bold, beautiful colours, or a Scrapcosy 'under the sea' one. 

Whatever you make, I would recommend varnishing them when you've finished - I used a glossy spray varnish which is quick and easy to apply. I would also back them with felt or cork so that if you drop them they are less likely to break (I speak from experience!)

Helen

Blog: A Splash of Colour


We always hope that you  learn something interesting from our blog

Our creative team love to read your comments so much, so please take time to let them know you've been inspired!  

You must complete step 1 AND 2 to be entered into the draw. 

To join our challenge:
1. Leave a comment on the Topic Introduction Post and go in the draw to win a PaperArtsy Apron. 
2. Make something arty relevant to the topic, and link your creation from any social URL (eg. Instagram, Pinterest, Blog Post etc) sharing your original make to this challenge page.

The current topic link Topic 2: Seth's Frescos will close 17:00 (London Time) Tuesday Feb 20th 2018, and the winner will be announced 2 hours later at 19:00.


All links go in the draw to win a PaperArtsy creative apron. Please make sure we can contact you as a prize winner - it helps if you share your contact info from the platform you opt to use.

Good Luck! If you have any questions, don't hesitate to ask!