Showing posts with label ETS24. Show all posts

Wednesday, 9 October 2019

2019 #15 Coral: Buzzing Bees with Tracy Scott { By Carol Fox}

2019 Topic 15: Coral


I'm finding the more I see with Coral, the more I like it. Having got truly fed up with salmon tones back in the 1980's, I thought I'd never enjoy the shade again, but it is fast becoming a go-to for me, and you can see how well it works with shades of elephant and mermaid blue from Carol in this lovely post. Again, lots and lots of layers seems to be the trick! ~Leandra 

Hi everyone, it's Carol with you today, and I'd like to share with you a fabric tassel and tag I have made.

I love bees and so Tracy's stamp set has been on my wish list ever since it came out. My brother is a bee keeper and I love to visit him as he has a few Bee hives in his front garden and you can hear the buzz as soon as you approach his house and off course there is all that Honey.

These Peachy colours seemed to me to sing of summer days and warm Terracotta brickwork and therefore seemed perfect to use for this project as they make me think of cottage gardens and the gentle buzz of the bees. Also on the plus side I now have one Christmas Present made.


I love how many different shades I got on my tag with only three colours, it is surprising how far you can go with a small palette of colours.


I coloured my sari ribbon with the above paints. I added a small spot to my craft mat, spritzed it with water and mopped up with the ribbon. 


My ribbons, dried and ironed flat ready for the next step.


Using the same three colour paints and stencil PS124 I added layers. Using the undiluted Scottish Salmon over the same shade gives an amazing contrast.


Lots of pattern and tone added to my ribbons now with Mermaid and Sand Fresco paints along with my previous 3 colours and the stencils PS001 and PS034.


Once they were all dry I scrunched them up,and made them up into my tassel,simply by folding them in half lengthwise, adding a length of thin wire that I then threaded through a bead cap and various other beads before twisting off into a circle at the top.


My Bee charm is made with an image from ETS27 stamped onto shrink plastic, once shrunk I backed it with a piece of scrap paper, added glossy accents and a few beads.


I attached this to the tassel with a jump ring and wrapped a scrap of my coloured ribbon to the larger bead on the tassel.


My tag was cut from White Smoothy Card, coloured with Scottish Salmon, Peachy keen and Elephant Paint.The stencil PS124 was used to add layers in Peachy Keen. Then images from the Stamp set ETS24 and Scottish Salmon were used to add another layer of colour. 

I used Black archival ink  and stamped images from ETS27, smudged Little Black Dress paint around the sides and then ran a line of machine stitching around the edges.


Flourish added using Elephant Fresco paint and Stencil PS156. I meant to do this before the stamping but I forgot, so I had to be very careful to avoid my images and the stitching.


I attached my tassel to the tag and this is now ready to gift to someone.


Before I added the glossy accents I coloured the bee's body yellow with an alcohol pen. As I added the glossy accents It started to bleed into the accents and I did think "wrecked this now", but I was lucky and it stopped and I ended up with a hazy yellow over the body area which I think looks better than I was intending.


This was a fun colour pallet to work with and as I said previously it is amazing how far you can go with just a few different shades of paint.

Thank you for reading my blog post and you can find me at the following places.

Carol Xx

Blog: http://gingernonutsbits.blogspot.com/
Facebook: https://www.facebook.com/GingersAlteredBits
Instagram: https://www.instagram.com/gingernonuts/
Pinterest: https://www.pinterest.co.uk/gingernonuts/

Wednesday, 7 August 2019

2019 #12 Eyes: Eye-catching jewellery with ETS {by Dounia Large}

2019 Topic 12: Eyes


Don't be surprised how Dounia's wonderful imagination with this topic kicks into action!! I love the clever effects and relief she has created to make an 'eye' stamp become the focus for this  3D jewellery! ~ Leandra

Bonjour everyone, it's Dounia from France with you today, and I'd like to share with you a way to exploit the relief of good rubber stamps to make three dimensional pieces, here in the form of jewellery.

Eyes are an instantly recognizable shape with a lot of cultural, mystical and artistic meanings. They can be beautiful, haunting, mesmerising or unsettling. I like to put them where you wouldn't expect them for a slightly jarring effect. I find jewellery perfect for that: maybe an extra pair on earrings will help you keep an eye on things! This topic was therefore a handy excuse to indulge myself...


I love a striking eye image so this stamp set by Tracy Scott immediatly caught mine. I like the other stamps in ETS24 too, both bold and deconstructed, but the stylised eye really left a lasting impression. I immediately thought it is a beautiful 3D object in itself so I decided to reproduce it for jewellery.


I wanted to keep the same reliefs as the stamp so stamping in polymer clay was not the way to go. I therefore used some Mix-and-Mold to make an impression of the stamp after triming it closely. I love playing with molds, I feel liking unwrapping a present each time so this was an other treat!


I only had white and translucent polymer clay on hand but wanted to make blue eyes. I decided to tint it with PaperArtsy's Infusions and the tiniest bit of alcool. The different colours of the powders easily made a subtle marble effect.


Once cooked and cleaned, I painted the outside with Fresco Acrylic paints. I first tried a dark brown but finally decided on black. I think it provides better contrast to make the whites pop, which suits the style better. 


I then found the result a bit dull so I added the gold "eye-liner" and some Metallic Glaze on the irises for extra interest. I think I overdid it a little as you cannot really see the marbling anymore...


For the necklace, I cut off the lashes for a more streamlined silouette that resemble a common pendant shape. I like the constrast between the classical shapes and construction and the hight-impact images and colours. In some pieces I managed to keep the catchlight above the pupil from Tracy's stamp but I don't know if the effect really translate well.

The brooch gets to keep its lashes for a bigger and more dramatic look. I like the boldness of it, it really is a statement piece!

For the pictures in this post I was lucky to be able to use as a staging backdrop a table decorated by my mother. So to give a better idea of her work and also for the fun of it:


Making molds of stamps is a great way to use them differently. It can be an easy introduction to polymer clay but you can also use them with UTEE, resin or Grunge Paste. I would first focus on stamps with rather simple and clear designs to make pieces of jewellery but also embellishments or tokens.

Stay creative!
Dounia

Friday, 5 July 2019

2019 #10 Tiled Patterns: Coasters with ETS {by Anneke de Clerck}

2019 Topic 10: Tiled Patterns


I always love the colours that Anneke chooses. They are bright and fun, and she has the knack of putting colours together that always offer a striking contrast and really appeal in such a fun way. Her use of white to enhance that pop is a really great tip! ~ Leandra 

Hi everyone, it's Anneke with you today, and I'd like to share with you a set of one layer cards I made for the Repeated Patterns/Tiled Patterns topic. For my cards (or should I say tiles?) I was inspired by the patterns on the Marimekko napkins. Marimekko is a Finnish brand known for its original prints and colors. My aim was to design a few patterns using only one single stamp per pattern.


I started by cutting 3 card panels out of Smoothy White Stamping Card 240gsm, size 5 x 5" (12,5 x 12,5 cm). I rounded the corners using my We R Memory Keepers Crop-A-Dile Corner Chomper.


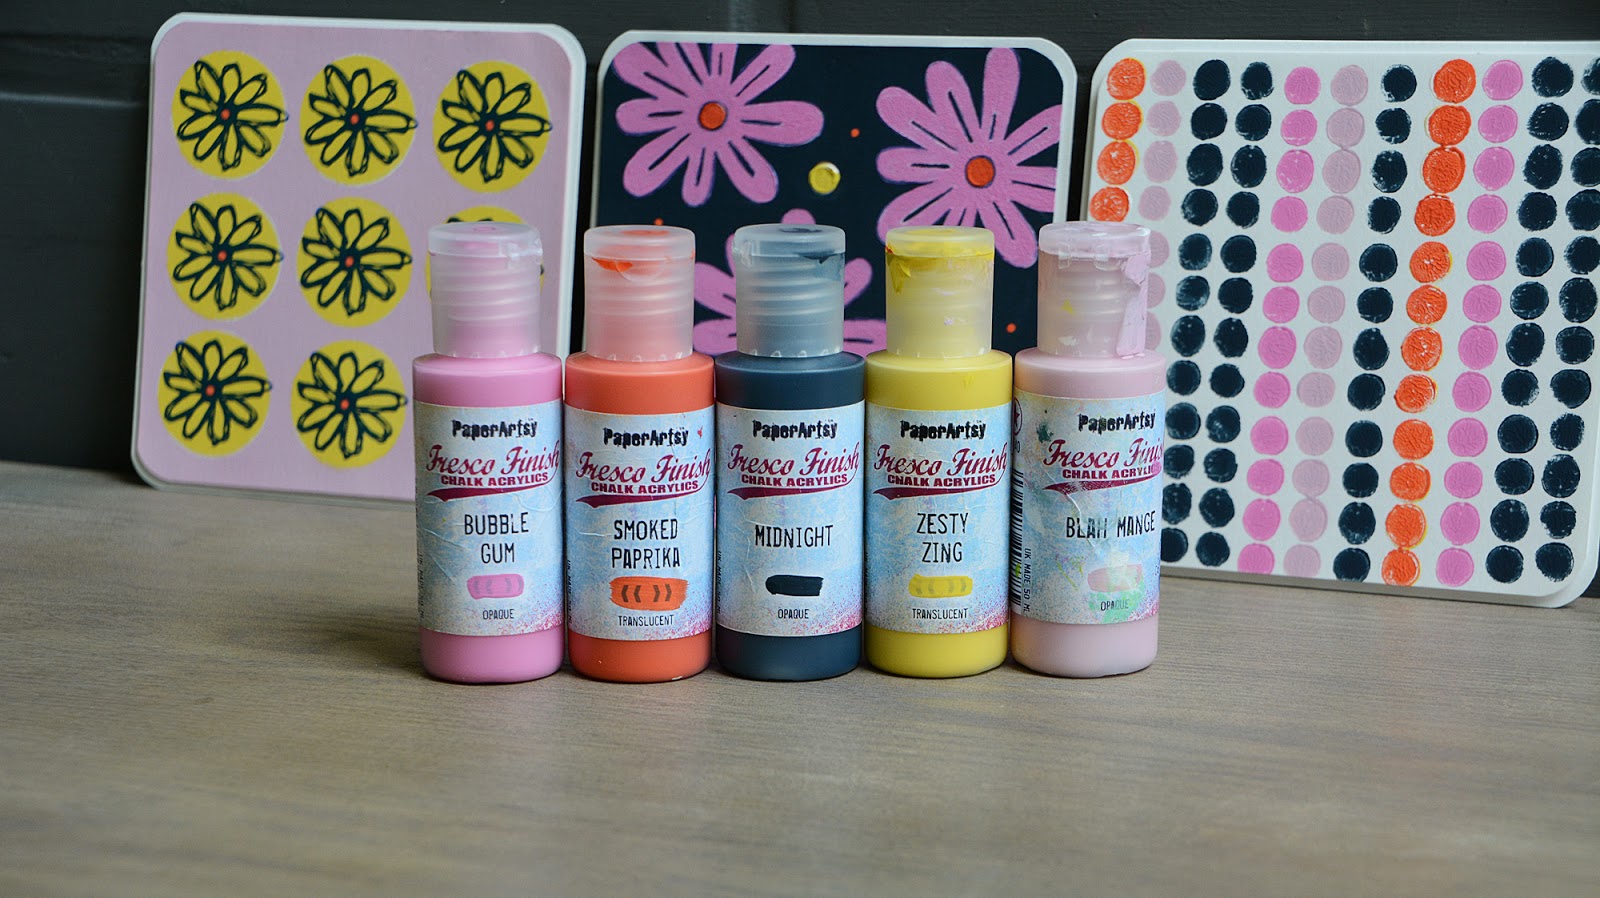
For my project I've chosen Fresco Finish Chalk Acrylics Bubble Gum, Smoked Paprika, Midnight, Zesty Zing and Blah Mange as my main colors.


I used one small stamp on each card, made a repeated pattern with each of the stamps. The stamps are from the ETS 24, ETS 25 and ETS 15 stamp sets.


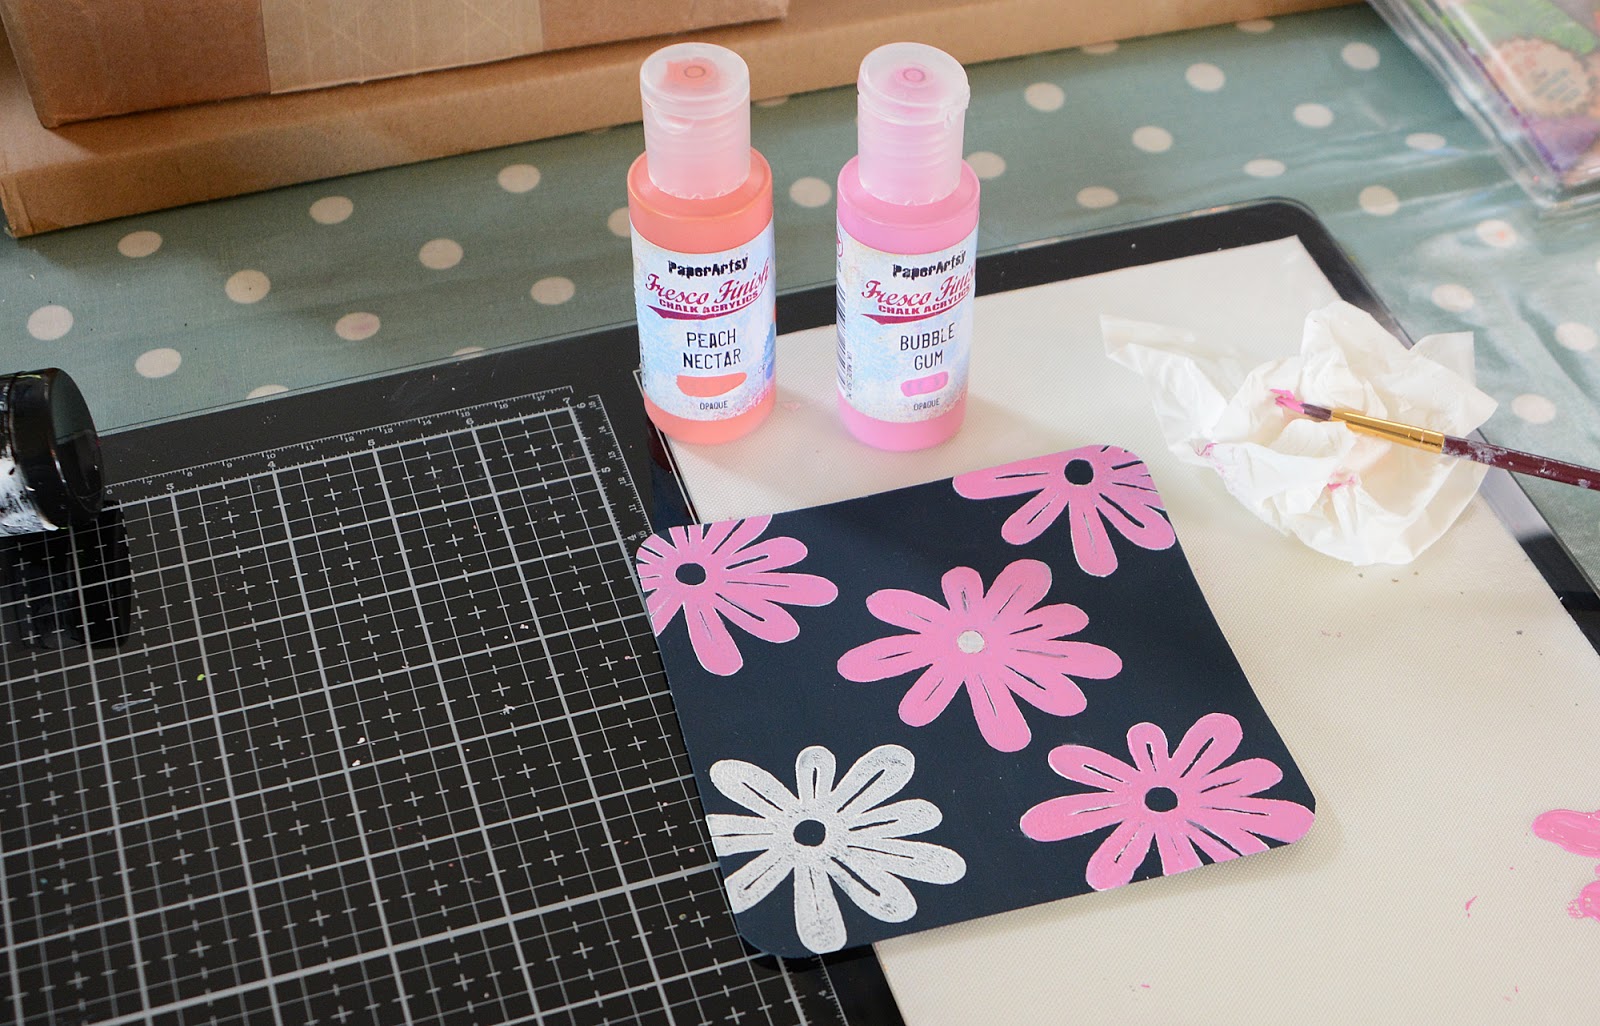
To create the first card I started by painting the background with Fresco Finish Chalk Acrylics Midnight. I stamped the flower from the ETS 24 stamp set randomly on top of the blue background using Fresco Finish Chalk Acrylics Snowflake. I used a small brush to overpaint each flower with Fresco Finish Chalk Acrylics Bubble Gum. Because of the white layer underneath, the pink color looks really pink on the dark background.


I colored the flower centres using Fresco Finish Chalk Acrylics Peach Nectar. I added a touch of Fresco Finish Chalk Acrylics Smoked Paprika to make them pop more. I outlined each flower using a Distress Marker. I finished the card off by adding dots. I 'stamped' the yellow dots with Fresco Finish Chalk Acrylics Snowflake and Zesty Zing using the eraser at the end of a pencil. Did the orange dots with a paint marker.


For the second card I painted the background with Fresco Finish Chalk Acrylics Blah Mange. I created circles using a stencil (TCW Mini Cut Circles). I sponged Fresco Finish Chalk Acrylics Snowflake through the stencil first, continued with Zesty Zing.


I stamped with a flower from the ETS 15 stamp set on each circle using Archival Ink Cobalt. Did the flower centres with Fresco Finish Chalk Acrylics Smoked Paprika.


For the final card I worked on a white card panel. I stamped rows with a stamp from the ETS 25 stamp set and used Fresco Finish Chalk Acrylics Midnight, Bubble Gum, Smoked Paprika and Blah Mange.


I first stamped yellow dots instead of orange ones. I didn't like the outcome so I overstamped the yellow dots with Fresco Finish Chalk Acrylics Snowflake first, then restamped with Fresco Finish Chalk Acrylics Smoked Paprika. Because Smoked Paprika is a translucent paint that white layer was necessary to cover the yellow paint.


If you're familiar with my work you'll know I'm often making grid/tiled backgrounds for my cards (f.i. HERE & HERE) but this time I tried to design my own tiles. I'm happy with the outcome. Playing with pattern, repetition and order is fun and it brings a sense of calm into your work. It's also surprising what you can achieve by using just one stamp.
I hope I could inspire you to take a better look at your small stamps and use them to design a few nice patterns. It's super easy and so fun to do! 
I would love to see what you come up with!

Thanks for joining me today, I hope you have a creative week.


Wednesday, 27 February 2019

2019 #2 Brayers: MYO background papers with ETS24 {by Lotte Kristensen}

2019 Topic 2: Brayers


I can see this inspiring a lot of people to get busy on making these beauties! Not only is the colour scheme amazing,but how wonderful is that stamp set from Tracy! lotte has nailed it, and the inside pages!! Well....Swoon!! ~ Leandra 

Hey everyone, it's Lotte here, hope you're all well and not too inconvenienced by winter - though it's a good excuse for staying in and stamping, right?!  I've been playing with the new Tracy Scott stamps - they are (as you would expect from PaperArtsy) endlessly versatile, and I was hard pushed to decide which project to share with you, but it ended up being this one with a lovely muted palette of pale blue and brown.  I just loved the pattern of these stamps, and decided to make a little notebook covered in the delicious paper I ended up with.  I do like making loads of printed papers - they always come in handy for starting off something else, be it a journal page or a greetings card.  So, let's get started!

The notebook consists of two parts: the cover which will be wrapped on the outside with the stamped paper, and on the inside will be plain; and the pages of notelets which has a stronger piece of paper for the first and last page to attach securely to the inside of the cover.  Let's call these support pages.

First, get a sheet of Heavyweight Smoothy and put a blob of Mermaid Fresco Finish Acrylic Paint in one corner, and a generous spritz of Tea Dye Ranger Distress Spray Stain in the other.


Next, use your brayer to randomly mix the paint all over the surface - don't worry about muddying on this occasion! - and when done, spritz lightly with plain water.  The Spray Stain beneath the Fresco Finish will rise to the surface and give a lovely mottled effect, like old book pages.


Then get the stamps, and randomly stamp all over in Watering Can Ranger Archival Ink - start in the centre of the page, and build around that image, going over the edges of the paper as you fill the entire sheet.


Next, cut two pieces of thin cardboard (cereal box is fine) to measure 6" x 4.5".  Turn the stamped paper face down and use a glue stick to adhere the pieces so that there is 0.25" gap between them - this will be the spine of the booklet. Trim edges to 0.5" all around and carefully cut the spine bit with scissors and glue down the inside of the spine.  Use a bone folder to score along all edges.

(Please don't be confused by the colour of paper showing - thrifty as always, I used an already painted page and painted and stamped on the other side!)


Fold the side flap of the paper first, using a glue stick to secure the edges, pressing down firmly and ensuring a smooth edge.


Next, fold down the top and bottom flaps, likewise using a glue stick.  The cover is now ready!


You will need a ribbon roughly 25" long.  Position this so that it lies on the inside back cover; the ribbon should be folded, not in half, but so that there is 1/3 on the top, and 2/3 on the bottom.  Glue in place.


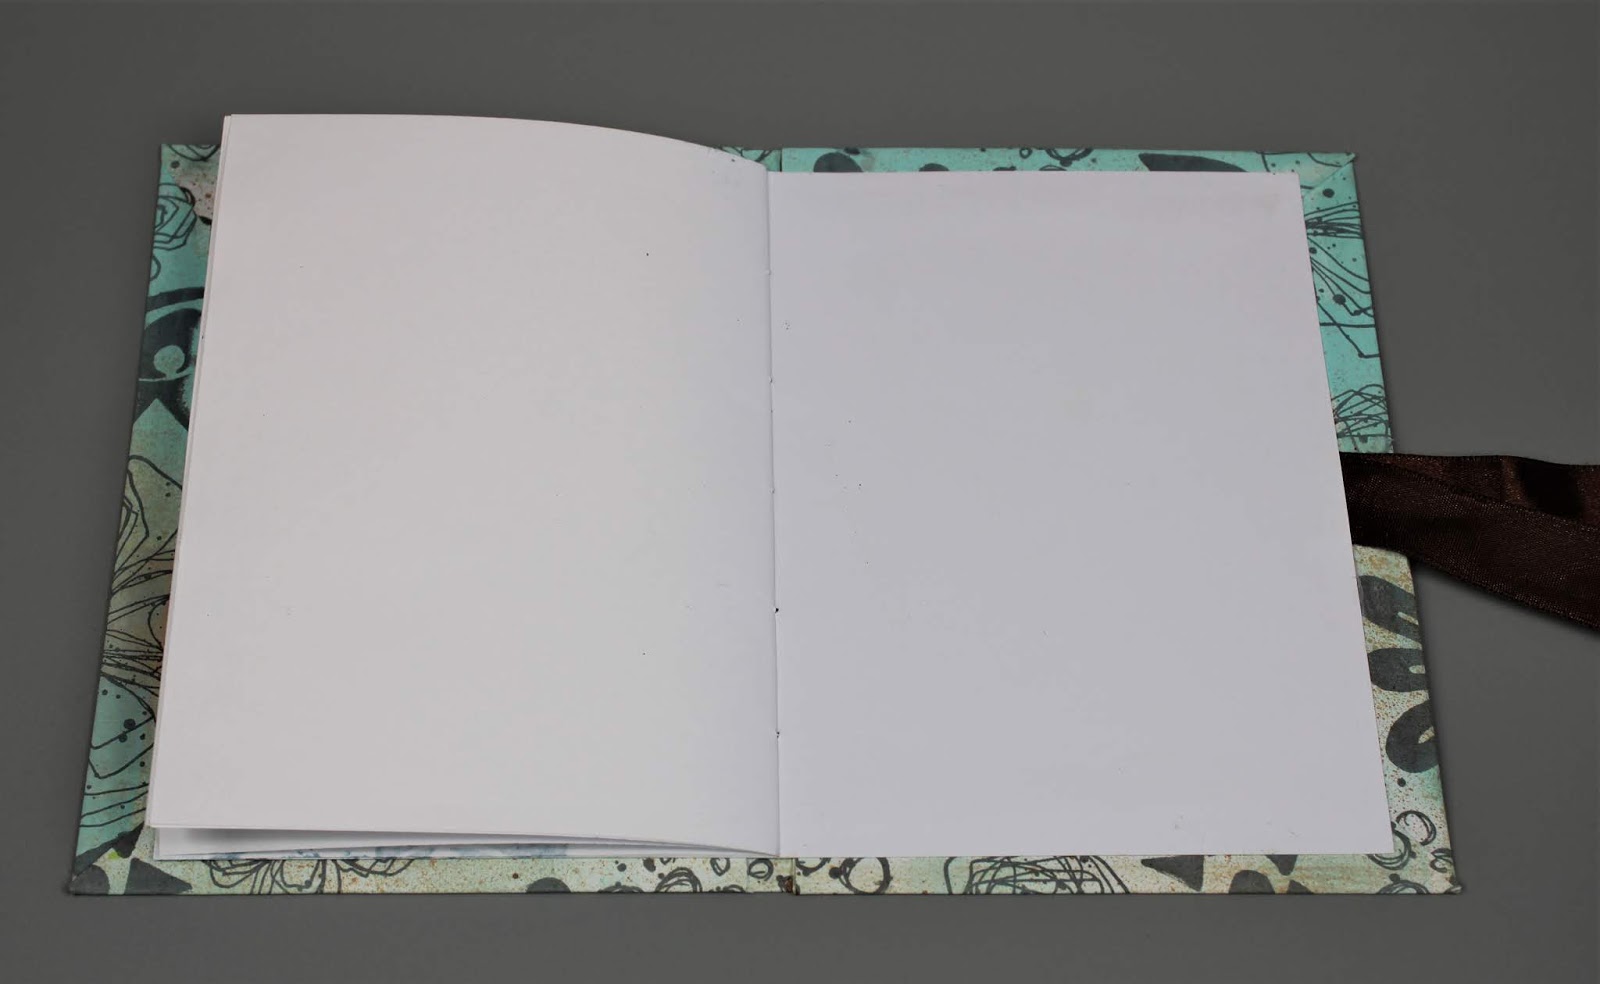
Now to make the inside of the booklet - I promise it's not as scary as it sounds!  Cut 5 pieces of printer paper to measure 6" x 9", and one sheet of Smoothy card the same size which will be the support page.  Use a bone folder to carefully score down the middle.  Fold all pages together with the Smoothy card on the outside (these support pages will be attached to the inside of the cover of the booklet, and therefore needs to be a little stronger).  Use a piercing tool to make holes at 1" intervals, and with white thread stitch the pages together.  Secure the ends with knots on the side that will be glued, and make sure the thread is cut so that no ends are visible over the edge.  Stamp images on the inside pages with Sky Blue Ranger Archival Ink pad.


Next, on the back of the back support page, use a glue stick to cover the entire surface, before attaching to the back inside cover of the booklet.  Burnish down well.  


Position a craft mat so that you can put glue all over the back of the front support page. 


Fold over the front of the cover, ensuring all edges are stuck down firmly, and there is enough 'give' to close the notebook properly (this is why you don't glue the support pages flatly at the same time - doing so usually means there won't enough material for the spine).  Make sure there is no excess glue around the edges, and press the notebook between two heavy books while it's drying.


I've got to admit that I'm more than a little partial to notebooks of all kinds, and I really enjoy making my own - you can personalise everything, as well as making weird sizes and shapes.  I hope you feel inspired to have a go - both at making your own background papers, as well as books. Don't forget to share you makes on the PaperArtsy Facebook group page, I would love to see what you come up with! 😊


Lotte x