Showing posts with label 2017 Topic 7. Show all posts

Tuesday, 26 December 2017

PA 2017: Blog Year in review: Topics 5-8


Good Evening again from PaperArtsy HQ,

Over the next few days we are taking a look back at some of the magnificent posts we featured over the Spring period of 2017 on the PaperArtsy blog. 

Tonight I'm sharing some highlights from Topics 5-8. Grab some Xmas foodie leftovers and a cuppa, and lets take a look!

Leandra 

Topic 5: Blue and Ochre

As I explained yesterday, every round in 2017 we kicked off with a 'colour combo', as featured in Stampington's True Colours publication. Another combo in there which I use time and time again is blue and ochre.  It does take some care, because mix those 2, and you create a lovely green, which is fine if you want green, but if you perfer the contrast these 2 colours offer, then you do need to work with dry layers to maintain each colour's integrity. Let's see what some of the bloggers got up to...

My first pick is this incredibly detailed journal spread by Chris Cresswell. I could stare at it for an absolute age! Interactive doors, beautifully layered flowers, and all the colours pop and contrast so well!. Caramel and Toffee are 2 of our paint colours that often get overlooked, but those with Pumpkin Soup, and tadaaa....Chris has created a range of ochre  tones so perfectly!


And I hope you didn't miss this booklet by Claire Snowdon. She brayered her backgrounds, used masks with Distress Inks for added depth.


You can see the contrasting shades just sit together  so well. At the end of the day we are talking blue and orange, but if you take orange into the rustic ochre direction, you can also change your blues too, creating a softer contrast.


So are you ready for a Lauren doozy? One of her weird and whacky zinski-world creations?
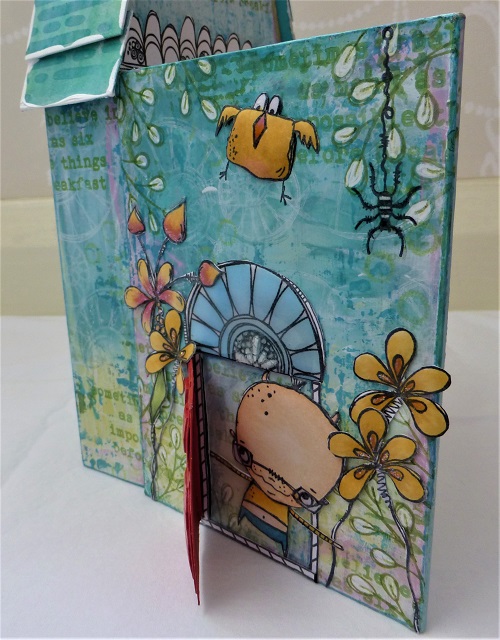

Well we were so busy with Ally Pally when this published, that it really did not get the attention it deserved! A 3 dimensional, interactive Zinski zone!


Her flower-puffing technique fascinated people, but can you see how she does it to the Zinski birds too! She even has roof shingles and stained glass windows!


Topic 6: Resin and UTEE

For many people, melting embossing powders is thier first 'wow' crafty experience. When you see the powder melt, perhaps it's a shiny raised pop, or a molten metallic medallion, but it just is super-cool when you start to learn the myriad of techniques this product offers. Then, when you get hold of the larger UTEE crystals, OMG, the things you can do!!
Resin is a pretty broad term, and at the other end of the scale we have those 2 part mixes that set up hard, and are wonderful for jewellery, small niches, and even seal floors , canvases or tables!

My first pick is this striking panel of tiles by Nikki Acton. Not only is the colour contrasting, but that tile is very clever in the way she floats a stampled image in the top layer so delicately.


Not everything went exactly to plan for Jennie, but she always pulls it together so perfectly, that in the end you can't imagine it any other way. See here for more.


I don't think I have ever seen anyone master UTEE so elegantly as Lin Brown. In this post she shares a few samples, here is just one of those, where she buries embossed metal into her UTEE. Her finishing touches are always so well executed. How dare she retire! We still crave to see more of her creative exploits!


And it must be in the genes of Lin's/ Lynne's - are all L's this good at UTEE exploration! Lynne Moncrieff is well know for her use of resin papers, and here she shares one such trinket composed to perfection!


Topic 7 : Found Objects

Well I'm pretty good at losing things, it has to be said, and how frustrating is that! THe number of times i take off my glasses before after showering, and cannot see them to find them again!! Finding things is so much more fun! This topic sent our designers into a spin of activity.

Kim Dellow contrasted the delicacy of acetate, with some rusty washers in this post
 

And we all loved Ellie's forest walk which turned up a range of items that she re-purposed into a forest floor canvas so beautifully.


And Raquel re-purposed all sorts of items to create this coffee puck dispenser for her kitchen!


Jennie altered a tin to create a new home for a little found boy! He looks very happy! 


Topic 8 : Assemblage
Assemblage. It's an artsy kind of word, but isn't that what we do no matter what we create?? We are basically assembling layers, textures, colours, embellishments until they are arranged in a way to suit our personal taste. I guess 'assemblage' could infer more of a 3D composition, but lets see what everyone got up to for this one!
First up check out this lovely piece that Autumn Clark entered in the challenge for this topic. I love the minimal use of colour, yet there is so much to see. She always gets that light-dark balance just right! Go to her post and check out the textures in her base layer. Beautiful!


And this by Alison took my breath away. 


It has to be one of my favourite pieces of the year! It was this piece that inspired me to make 'shades of white' a colour option later in the year! She started with a base layer of tags!! Just go and look again here, it is beautiful!!


I really liked this from Alison Hall too. Such a great idea to use a piece of slate stone this way as her substrate.


Carol Fox created this Zinski inspired garden sign


And Keren decorated a violin - as you do!! Yes you do get spoiled people!!


I hope you have enjoyed this trip down our memory lane of 2017 with me. I'll be back tomorrow with some more treat and reminders of how clever and creative our talented bloggers are! Don't forget to save the posts that float your boat on pinterest. No excuse now, you'll hit the New Year with a dozen ideas to crack on with!

Leandra 

Saturday, 6 May 2017

2017 #7 Adventure is Worthwhile {by Jennie Atkinson}


2017 Topic 7: Found Objects


Jennie leads us on another trip down memory lane with some Vintage trinkets cleverly curated into a delightful assemblage of goodness! She has such a lovely way with Infusions too! Always a treat to see her in action!

Hi everyone, Jennie here with you tonight and how lovely it is to share a project with you for our fabulous 'Found Objects' theme.  As a crafter it is second nature to be a hoarder, but living here on a small island there are not many opportunities to collect items as islanders are themselves naturally gifted in always finding a use for just about everything and anything!

However, we do have a scrap store in Lerwick where it is possible to pick up bits and pieces and the little "bruck" box in the corner of the shop is my usual stopping off place!


I have combined my Found Objects with the new loves of my crafting life - Infusions and Scrapcosy's stamps and stencils - to make this small assemblage hanging (which is not easy to photograph I might add as it kept swinging around!).


The adventure sentiment from Sara Naumann's last release was also most appropriate.


These were my found objects: a little tin thrown away I imagine as the lid had become detached from the bottom, but just perfect for adding a hanging sentiment as you will see later. I only used the bottom of the tin and kept the decoration simple by painting first with gesso and then two coats of Fresco Nougat, such a wonderfully neutral colour.


And then some rusty wire (well actually a spring mechanism from an old clock), a piece from a broken necklace of mine, some rubber washers (amazing what you can pick up in yacht chandlers) and an old coin.


As I have mentioned before when working with the Infusions I always lay down a coat of Fresco Finish on the cardstock so I can add a lot of water. I have used PaperArtsy Smoothy 240 gsm card for the inside of the tin which I find brilliant for all ink and spray paint work. It really is super happy having a lot thrown at it but it is still thin enough to cut to the right size for the project. I have used Chalk Fresco as my base layer for this project but also find it is a good background colour for most things I create. Sleight Blue Infusions seems to be one of my go to colours! - I love that it blends so well with vintage designs and has a great masculine feel too.

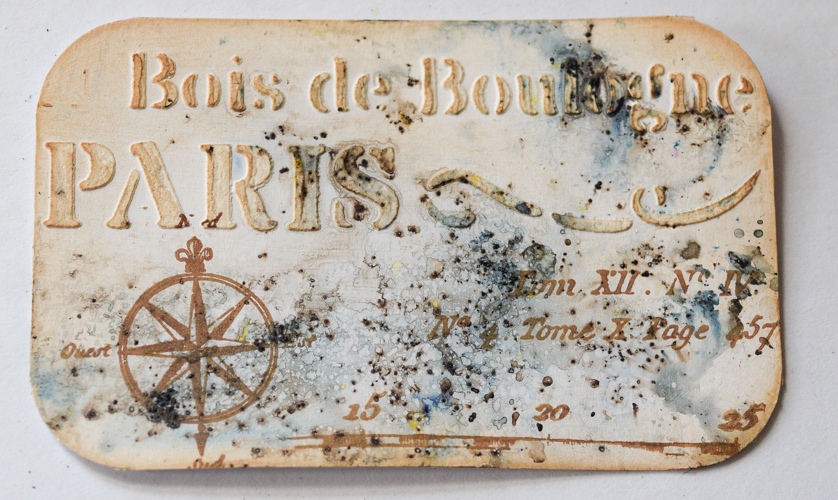
I love Scrapcosy's stencils as you can find lots of little bits to use in a small project - a part of the Paris address fitted the background paper perfectly.


I felt the GrungePaste needed a bit of definition and so blended Sepia Archival Ink around the edges of the card and lightly across the raised texture.


I used the same process for the small hanging but as this was cut from white board it looks slightly different. Don't you just LoVE all those wonderful colours in a one bottle of Infusions! 


I used my rusty wire to create a top hanging - it was very springy and hard to bend being from a clock mechanism but once bent into shape it didn't need glueing in the tin.


The two broken hinges worked perfectly for the little hanging as I was able to hang my rings from them. My sentiment was stamped on some old book paper to retain the vintage feel.


The washer and coin joined a few other embellishments but I couldn't find a use for the old necklace in the end!

Sadly none of my PaperArtsy vintage people stamps fitted this small tin (despite stamping them all and fussy cutting to make them fit!), so I had to resort to a purchased "art doll" but his relaxed air lends itself to these wonderful vintage adventure stamps and stencils.


I really love the versatility of these stamp sets with options for using small parts of the larger stamp to create vintage layers.

I have to admit to having great fun creating this little hanging and without the current theme would probably not have thought to hunt out some of these objects and use them together in a project. I probably need to have a good hunt through most of my drawers here in the craft room to see what else is lurking! 

As always thank you for joining me and happy crafting and creating!

Jennie x
Live The Dream

I adore your gorgeous little lad perched nochalantly on the edge of the tin, almost inviting us to peer in and see all the treasures. His expression is pretty much 'Look what I've found!' Perfect! ~ Leandra


We always hope that you  learn something interesting from our blog. Our bloggers deeply appreciate your comments so much, so please take time to let them know you've been inspired! Why not join our challenge by blogging your interpretation of the current topic and link it here?

The current topic link (Found Objects) will close 17:00 (London Time) Sunday, May 7th 2017, and the winner will be announced 2 hours later at 19:00.

All links go in the draw to win a £50 voucher to spend on products of your choice from the PaperArtsy online store.

Friday, 5 May 2017

2017 #7 Framed Memories {by Miriam Grazier}

2017 Topic 7: Found Objects


Sometimes we just need a nudge to recycle, but Miriam take this to the next level by using a packet of pills as the perfect frame for some vintage ancestors!


Hi everyone Miriam from Miriam's Creative Dreams here.

Lovely to be here on the PA blog tonight . I've chosen to share with you a photo frame created using 'found' objects.  

I've used some of the lovely vintage images from Ink and Dog stamps - I come back to these stamps over and over as they are so versatile.  Before I started my project I gathered some of the 'objects' that I keep thinking that I will one day have a use for them.  This included an old painkiller packet, old train tickets and old theatre tickets.


This is the front of my finished project.  I wasn't really sure how this would turn out in the end but I kept creating until I was happy with the finished project.  I really enjoyed adding layer after layer with paints and stamps.


Before adding washes of paints I added gesso to the inside and outside of the cover.  In hindsight I didn't need to do this as Fresco finish paints have great coverage and once the gesso had dried I added a layer of Chalk Fresco Finish paint.  Once this had dried I added watery layers of Caramel and Baltic Blue.  By adding water to the paint I was able to create a mixed wash of the colours which gave an old and vintage effect.


I added stamping using Man of Numbers plate 6 and Gentleman plate 4 and added classic Treasure gold around the edges and in patches over the entire project.


Images from Man of Numbers plate 6 and School Days plate 1 were stamped onto train tickets and then coloured using Blush, Caramel, Sage, French Roast and London Bus Fresco Finish paints.

Images from Buttons plate 2 and Buttons plate 4 were stamped and then washed with Baltic Blue and Caramel for the front of the frame.


I used scraps of material and lace to finish the project off.


I really like how you can't see that this started it's life as a packet for painkillers!  The Treasure Gold gives it a lovely vintage feel and the stamps are perfect for the vintage piece that I wanted to create.

I hope that you like my project - I'm sure I'm not the only person who collects things like this thinking that they might have a purpose in a later project!  I hope that you are encouraged to join in with this topic - just looking around the house and garden there are so many 'found' objects that you can create with.  Can you imagine finding a flat stone in the garden or on a walk that can be conditioned, stamped and painted.  The possibilities are endless.  

Thanks for joining me tonight.  I shall look forward to seeing what you create as part of the challenge - don't forget there is a gift voucher up for grabs!

Miriam
Blog: http://miriamgrazier.blogspot.co.uk
Twitter: Miriam Grazier
Pinterest: Miriam Grazier

Oh that treasure gold really makes the frame look like the real-deal! Haha this is brilliant! I love that such an ordinary object has been turned into something really special! noone would guess the plastic origin of this item! ~Leandra


We always hope that you  learn something interesting from our blog. Our bloggers deeply appreciate your comments so much, so please take time to let them know you've been inspired! Why not join our challenge by blogging your interpretation of the current topic and link it here?

The current topic link (Found Objects) will close 17:00 (London Time) Sunday, May 7th 2017, and the winner will be announced 2 hours later at 19:00.

All links go in the draw to win a £50 voucher to spend on products of your choice from the PaperArtsy online store.

Monday, 1 May 2017

2017 #7 'A bit of a brainbox' {by Corrie Herriman}

2017 Topic 7: Found Objects


How adorable is this little chap!? This little guy looks like he's jumped right out of the Robots movie! He looks a bit like a hig may result in a sharp poke (a bit like Edward scissor hands!) But I'd definitely risk it! 

Hi everyone, it's Corrie from MadeByCHook here and I am really happy to share my latest project with you here... 

It is always lovely to be here on the PA blog but today I am extra exited as I really like the subject of 'Found Objects' and what I came up with. It is so satisfying to make something out of nothing I think. 

As soon as I saw what the topic was, the idea of building a robot/art doll came to me and I started collecting bits and pieces straight away. I really enjoyed the process from start to finish and cannot wait to share it with you ! 


Meet 'Brainbox' ! He is made of (mostly) things that were found around the house and my and my husband's hobby rooms. I had a ball making him and learned lots along the way. Sit back with a cup of tea and I will tell you all about it !  


This is how he started out. I usually think about my project and only when I have 'made' it in my head do I actually start making it.  That way I already will have thought about all the possible pitfalls and difficulties. 


I made his 'brain' first. This is just a piece of Balsa wood (stolen from my hubbie's room). He is into model flying so has lots of interesting stuff lying around! I painted it with Fresco Finish Chalk Acrylics (Little Black Dress) and used a gel medium to glue the gears onto the wood. 


This is an ATB (I had it on my desk for months) and I thought it would make the perfect 'body' for Brainbox. It was home made by my husband. First I glued white card stock on it and then I painted it with Fresco Finish Chalk Acrylics Caramel, Yellow Submarine, Snowflake (for the Ochre) and Baltic Blue.


Here is the finished ATB. I added Treasure gold (Indigo) on all the edges because I wanted to make him look old and worn.  For even more interest I added some stamping using Eclectica³ stamps {Seth Apter} ESA01 


...and {Everything Art} EEA04.


A sardine tin made a great head for Brainbox, you can see his brain in a photo further down. I used the same Fresco Finish Chalk Acrylics: Caramel, Yellow Submarine and Snowflake to get this light Ochre colour.


I think he turned out really cute. Amazing what you can do with some nuts, beads and an old zipper. His nose is a part of an old mechanical alarm clock. I used the gears from the same clock for his brain.


Here he is seen from the back. You can see his enormous brain, hence the name Brainbox !


And here is the finished project. All made out of rubbish basically apart from the ATB. The 'wheels' are plastic lids from jars, his hands are small forks. I repeated the stamping on all the parts for a more interesting finish. I used Archival Inks: Jet Black, Saffron and Cobalt.


One last picture of him from the side. I added some bolts and washers in the middle of the wheels to make them look more realistic. 

Thank you so much for stopping by today and I hope you enjoyed following my process as much as I enjoyed making him. I really had a ball. Why not give this a go yourself? It is so much fun to see bits and pieces turn into something nice or cute like this robot/art doll. You could decorate a book cover with found objects or make a doll also. I would love to see what you come up with in the next fortnight ! 

Thank you all again for visiting today!  

Please come over to see me at :

Corrie x

Wow Corrie, he is so much fun!! I love the colours and all your attention to the small details, the box was grunged perfectly to make him look a bit battered and well-worn like a very happy little robot! Those cogs look amazing too! Such a cool idea, thanks for sharing ~ Leandra
 

We always hope that you  learn something interesting from our blog. Our bloggers deeply appreciate your comments so much, so please take time to let them know you've been inspired! Why not join our challenge by blogging your interpretation of the current topic and link it here?

The current topic link (Found Objects) will close 17:00 (London Time) Sunday, May 7th 2017, and the winner will be announced 2 hours later at 19:00.

All links go in the draw to win a £50 voucher to spend on products of your choice from the PaperArtsy online store.