Monday, 24 August 2015

2015 #16 Journalling Circles {by Gabrielle Price}

Topic 16: Circles

Hello everyone Gabrielle here. I'm delighted to be joining you tonight sharing a Journal Page I created inspired around the new theme Circles.


I started by making circles in the corners of my page with Grunge Paste and a stencil. When that was dry I began adding lots of colours to a journal page with some Cut N Dry Foam. I usually use the same piece of foam for al of the colours (am I too ‘frugal'?!) I used Banana and then Tangerine Twist. Then I added Bougainvillea around the edges and wiped it off with a baby wipe. I like the unpredictability of this technique as you’re never sure how much of the paint will stay on the page! Then, in a few places, I added Beach Hut for a little definition.
The next stage was to add a visual path for my circles to travel on. I used Snowflake and a stencil  to create the circles. 
I love these new stamps ELB23 and ELB24 and so I stamped a variety of them on tissue paper and then painted the reverse of some. Others I left clear and then just cut them out.


I added a few of Emma’s scribbly line stamps (EEG07) to add a little more interest in the background. You can see I’ve punched out a few circles from an old book and also added a few more of Emma’s circle stamps from the same set (stamped on cream card) to add a little texture.


When it was all in place I glued the circles on the page using Multi Matte Medium. Then I added a Distress Marker shadow to all of the circles and raided my stash of lids to make some painty circles (in Snowflake and Slate).
  
This is closer look at the final pages!


Gabrielle x

Gabriell this is such a fresh fun quirky journal layout.The composition of Circle related designs is wonderful, great depth achieved in the layering of Fresco's. Thank you for sharing your creativity with us.

Did you know that you can play along with us on the PaperArtsy blog to share and explore with us how you interpret the current theme. The current topic is Circles, and if you are inspired by any of our contributors on the blog this fortnight, then please join in and link up your creativity HERE.

All links go in the draw to win a voucher to spend on products of your choice from the PaperArtsy online store. The Circles challenge link will close 17:00 (London Time) Sunday, Sept 6th, and the winner will be announced 2 hours later at 19:00.

Sunday, 23 August 2015

2015 Topic 16: Circles {Challenge}

Topic 16: Circles

Hi Everyone, Leandra here to introduce a new topic on the PaperArtsy Blog: Circles 
The blog challenge for this topic will run for 2 weeks from 23rd August to 6th September.


 Journal page by Tracy Scott

Before we get into the nitty gritty, here is Darcy with the winner for our last challenge which of course was Gels and Mediums, I hope you learned a lot, as I certainly did! I think they are the most exciting products to play with to easily add interest to what you make.

Darcy here...What a fabulous theme we have just had! I think you'll agree we all learnt something new. With so many mediums and gels hidden away in cupboards this was the ideal week to dig them out and experiment. Sticking and glueing, stencilling, dripping and embossing with folders! Wow that last one is a great technique. However the one that captured your imagination the most was Lin's Paua Shell technique, that has inspired so many amazing projects. 
Sooooo, the winning name out of the hat for Topic 15: Gels and Mediums is Emma from Pink Sparkle Days

Please email Darcy to claim your prize darcydotneedles@hotmail.com


It's Leandra back with you to explore  the theme of Circles. I think my obsession with cricles started when the very clever Ellen Vargo made this stamp set for us. EEV06


Since this came out I have used it non stop as I love ALL the spots, and they seem to make any abstract composition better in an instant, especially when stamped in white onto darker backgrounds. 

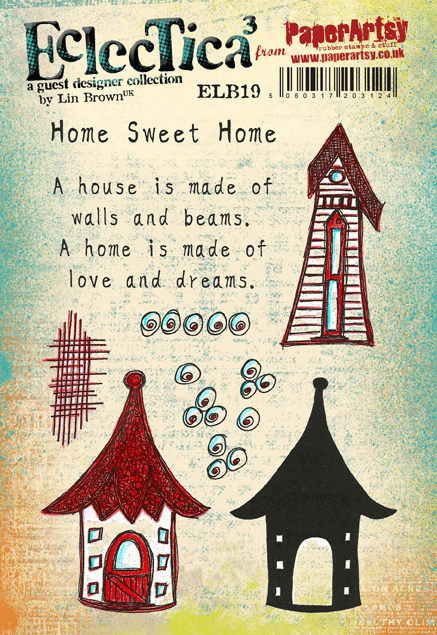
So that is a fairly recent obsession as its not a very old stamp set, but it's not ONLY me with the circle obsession! How many circles can you spy on these stamps by Clare Lloyd: ECL04, Darcy: EDY12, Emma Godfrey: EEG07, Lin Brown: ELB19, Sara Naumann: ESN15, and Mark's hot Picks: HP1504.


It's pretty clear that all our designers seem to be using circle elements regularly in their stamp sets, and I'm like a pig in mud! Cannot get enough of the circles, so I knew back in January this was going to be one of our blog topics this year! Sooo excited!

For me, this topic screams 'journalling'. I'm going to challenge those of you who haven't given it a go to jump in and make something. It doesn't HAVE to be in a journal, why not on canvas, or card or paper that could be used as an abstract piece to go on display.

There is also plenty of inspiration on my Pinterest page .

Here's a good starting point if you are looking for a fun idea. 

This is a painting by Mimi Bondi, but if you go to the site, you can also see there are tutorials, classes etc. I love how this technique evolves depending on the artist doing it. You start with a colourful painted background...for example, you could use my brayer technique (link goes to the video tutorial), or you could just splosh colour about with a credit card. 

Next step is to draw circles randomly over the BG, big and small. Then you block out the background, you could use black with white as above, or you could use any other opaque colours. Then you doodle with your paint pens, Posca or Sharpies are pretty popular. It looks Like the example above also uses layers of different BG's to add more interest.


Here's another example from an Abstract Art Site. Here white is used to block the BG, and white and other bocked colours are added in smaller patches on top too. This sort of thing fascinates me. The very structured concentric circles on the canvas have details hidden within.


Check out the close up. You've just had a lot of inspiration with Gels and Mediums the last 2 weeks on the blog... you can easily see here how they have been used to add texture and interest to the circles, and you can see how there were multiple dark colours under the white areas, and also shadowing has been built up around each circle with colour washes too. Ohhh I'm itching to try this! Tickles of treasure Gold would bring these circles to life too!!


Here is another sample by a French scrapbooker, Isa. Again she has also muted the background with whites, leaving traces of pinks and warm yellows present. Splats, drips, spots all brink bolder colours back on to the softer areas to help link the different zones. Gorgeous!


Tracy Scott also does a lot of Journalling using similar 'blocking' ideas in the background, but look how she takes it a step further, by shading, stamping and stencilling her blocked areas to create new contrasts. This adds another level of complexity to the finished piece, and it becomes bold, striking and loaded with contrasts.


On this piece I love how the exterior is blocked, and some of the internal letters, but the colours of the background are just softened with white, so that there is still plenty of colour to enjoy. Adore the litttle circles around the edge of the frame! And the black pen details on the lettering.


I love how Tracy uses colour, shapes and her easy doodling with pens, both black and white. This example above you can see the entire outline in white paint pen, but also lots of white fine detail doodling when you look much closer too. I love her variation in colour of the blocked shading as much as the focal elements.

There are loads of examples on Tracy's Mixed Media Pinterest page of her art. She is prolific in her output, and seems to post new things almost daily.

Here's a fun video tutorial from Limor Webber, and as the theme is circles, I think it fits our brief perfectly. 


Again the use of gels is great in this background, and I'm sure you are aware you can use all kind of pigment options to tint your gels, for example have you tried using ink pad reinkers, brushos ? Or, as you know from last week, a heavy body gel can easily be tinted with paint too.

On this website, circles are repeatedly explored in minimalist ways. Texture and subtle colour. Stunning simplicity, as seen above.


And on this site too. Simple and very effective use of circles. Love the subtle colours and texture in the background contrasting with the crow.


Maybe you just might prefer to doodle your socks off? As above...


Or maybe in black and white zentangle style?


Anyone can draw a circle, and as you've seen from some of this inspiration, they really don't need to be perfect at all! I hope you find something fun to do with some circles, and we look forward to seeing you share what you make on the blog challenge.  I'll be pinning more over the next 2 weeks while this topic is open. Do join in if you are able!

Leandra


Topic 16:Circles

You are welcome to share your ideas and link up your creativity to this page.


All links go in the draw to win a voucher to spend on products of your choice from the PaperArtsy online store. The Circles link will close 17:00 (London Time) Sunday, Sept 6th , winner will be announced 2 hours later at 19:00.


1. The challenge is a chance for you to show how you have been inspired by a particular technique of the fortnight. Your entry should contain:
- a mention of which post inspired you and why, and 
- a link in your blog post to that original post on the PA blog.


The whole concept of this challenge is 'play along with us'. You are encouraged to put your own twist on ideas you see on our blog. We love to see how you are inspired!


2. The link you put on our linky page must lead directly to the specific post on your blog where you have explored the technique/ idea mentioned in point 1 above. Don't link to the home page of your blog, or we will be unable to find the post to leave you comments.

3. Spam links will be deleted.

4. We prefer your challenge post is created exclusive to our challenge, but if our topic fits perfectly with another challenge, then of course your post may link to both if you feel it is appropriate.


5. You are most welcome to use stamps/ products/ substrates you have to hand from a variety of companies, we do not expect you to exclusively use PA products - it's lovely when you do though!

6. You can enter as many times as you like in the fortnight. We don't want to restrict your creativity or participation! Link closes at 17:00 Sunday Sept 6th   (London Time)

7. The winner of the random draw will receive a £50 credit to be redeemed on the PaperArtsy Website, the credit includes VAT and postage. We request that one of your purchases is an A5 rubber stamp. You can add any other items to your basket, but the final total should not exceed £50


8. Each Sunday fortnight the winner will be announced at 19:00, also, in the same post, the link for the next fortnight will be posted. It's your responsibility to claim your prize coupon from Darcy: email her darcydotneedles@hotmail.com


Good Luck! If you have any questions, don't hesitate to ask!

Saturday, 22 August 2015

2015 #15 Syringed GP Tree {By Debs Wainwright}

Topic 15: Gels and Mediums

Hello everyone, I'm Debs Wainwright.

When I was asked to make something for the theme this fortnight I jumped at the chance, what I didn't  expect was to have so much fun. So I do hope you will play along too.

This is what I created...


For the background, I started building paint on a White/Grey board (size 8x8") from PaperArtsy. 

Step One: I smooched  four colours of Fresco Chalk Acrylic paint on with my fingers until the whole board was covered. The colours were Cherry Red, Turquoise (both Limited Edition JOFY sets from 2014), Lavender and Autumn Fire. I dried the board and applied Petroleum Jelly in places  as I wanted it to look like peeled paint. Next I applied a coat of Crackle Glaze from PA. I let this dry, and then with a palette knife I gently applied Fresco Acrylic paint in Chalk over the background. The chalk layer cracked on top as it dried, and where the vaseline patches were, you could wipe away to see the layers protected beneath.


Step Two: I mixed Grunge Paste with Fresco Acrylic in Holly and filled a syringe. You can see above that I used the syringe to draw a tree, I also drew some flowers. While this was drying I stamped the tulip from ELB23 ...


onto Transluscent shrink plastic 5 times and cut them out. I painted them with  Fresco Acrylic in Claret, then heated them to shrink. I then darkened the tree by painting it with French Roast Fresco and let it dry.


Step Three: While the tulips cooled I gave the board a coat of Modge Podge in Vintage white. It's very translucent but provides a barrier between the layers as next I wanted to spray the tree with Lindy’s Stamp Gang sprays in several colours. I love these sprays as the glimmer looks fabulous. (NB. You could easily tint a PaperArtsy Satin or Gloss Glaze with Nougat or Chalk to achieve the same effect, or use a Gel as a more archival barrier)


Step Four: You will see from the photo that the background is made up of some script text in Watering Can Archival ink as well as some flowers from ELB 22...


...and ELB23 in  Olive Ink. The Lindy's spray from the tree just wiped off  the background because it was sealed. I then sprayed the lighter colours on the background and let them run and drip.


Step Five: Once it was all assembled I felt something was missing so transferred a vintage photo using Heavy Matt Medium from Golden onto the background. I added my sentiment and finishing touches, and then coated the whole background except  the tree in Gloss Gel.

I hope I have inspired you to have a go. You can see more of my work on these sites:
My blog, FaceBook, and  Pinterest. I also teach Journal Pages at Birds In the Barn. Please see my blog for next class. 

Bye for now, Hugs 

Debs xx

Wow, how fantastic that you have explained all the stages so well. I really love the vaseline resist, and the syringed tree is such an awesome texture! Love the metallic Treasure Gold Highlight on that too! Thanks Debs! ~Leandra
We would love you to join in with challenge #15: Gels If you are inspired by any of our guests who blog with us over the fortnight, then please join in and link up your creativity HERE

All links go in the draw to win a voucher to spend on products of your choice from the PaperArtsy online store. The Gels link will close 17:00 (London Time) Sunday, Aug 23rd winner will be announced 2 hours later at 19:00.

Friday, 21 August 2015

2015 #15 Magical Mediums {by Lynn Price}

 2015 Topic 15: Gels and Mediums


Hi, Lynn Price here! I am so honored PaperArtsy has asked me to play around with various mediums for this post. I am a nursing professor here in Connecticut, and have recently discovered mixed media as a fun way to re-charge by creating something unique using an entirely different part of my brain - working with various mediums satisfies all of that!
Today I am playing with a two-page journal layout . 


For this layout, I played with three mediums: Regular gel medium (matte) (familiar to most of us, but used here also as more of a faux encaustic technique), glass bead gel, and Clear Tar Gel (from Golden) – Liquitex calls it's version of this product string gel.

I started with card stock heavily sponged with Distress Ink in warm colors. I die cut dragonflies, butterflies and bees and applied with these gel medium to gessoed pages with a few dry embossed bits which created a light yellow and orange background from the ink reacting to the medium. After stamping with Paper Artsy Mini 44, I then covered most of the plain (non-embossed) die cuts with extra gel medium, to really blend them into the background.
Mini 44

Next I stamped with the end of a beautiful Lynne Perrella stamp from LPC28  in archival ink to create additional detail and added more gel medium.


Then I swiped Golden's Bead Gel with my finger in areas that I thought would pool when I sprayed on the final colors. Because of the gel medium already on the surface, the distress inks on the die cuts no longer react. I love the effects of the beads – so shimmery!


After spraying the two pages with various colors of distress inks, I used the end of a thin paintbrush to write and draw, by dipping into the clear tar gel like a pen. This medium not only dries clear, but is also self-leveling, so small areas originally left open will likely fill in (like the loop in a small “e”, for instance). Here you can see how the clear tar gel indeed dries clear, so that the stamping and colors underneath come straight through - can you see the word “Love” ?


Below is one more close up, showing the beautiful beads after spraying, as well as the phenomenal effect from the Clear Tar Gel on stamping and background color. I have more examples on my blog if you’d like to see more of this finish.


This was such a fun make, that I actually made another one, with clear tar gel which you can see on my blog Experiments in Paper, along with more details of this layout. 
Lynn. 

Welcome Lynn and thankyou for creating such a fun page. You have show just how versatile the gels are, from regular 'sticking' to adding the shimmer and texture of the beads and the dreamy, fluidity of the tar gel. Indeed magical. ~Darcy

We would love you to join in with challenge #15: Gels If you are inspired by any of our guests who blog with us over the fortnight, then please join in and link up your creativity HERE

All links go in the draw to win a voucher to spend on products of your choice from the PaperArtsy online store. The Gels link will close 17:00 (London Time) Sunday, Aug 23rd winner will be announced 2 hours later at 19:00.

Wednesday, 19 August 2015

2015 #15 Acrylic Tag {by Lauren Hatwell}

Topic 15: Gels and Mediums

Hi everyone. Lauren here, joining you this evening with a project using a few of my favourite Gels and Mediums for a JOFY inspired acrylic tag. 


I love working with acrylic as you can build so many layers onto both sides and still see them all at the end. Gels and mediums add some great texture and sparkle for added interest. To me, they are the (non-surgical) enhancers of the art world. Think of an effect you want to create and there will be a raft of great gels and mediums to make it possible.

I've used JOFY37, JOFY38 for my project...


and Stencils PS007 and PS011


NB: Acrylic tags and ATC's usually come with a removable sheet of plastic on one side, which I left in place to protect the front of my tag while I worked on the background (I had my #10 tag cut for me at That's Crafty. They offer a range of acrylic items and will also cut bespoke items to order).

On the back of the tag I stenciled a layer in Snowflake using JOFY stencil 011. I then stencilled a layer in French Roast using JOFY Stencil 07 and 011. When it was dry I brayered over some acrylic gel medium to protect the stencilling before adding the background (because I'm going to move the paint around a bit and I don't want to smudge or remove what I've already done).


When everything was completely dry I mixed a pea sized amount of soft matte gel medium with about a dessert spoon of each Fresco paint colour to extend the drying time a bit and get better movement with the paint. The colours I used were Chalk, Nougat, Antarctic, South Pacific, Space Cadet and Blue Oyster. I dribbled several lines of each colour across my tag before tipping the tag to let the paint lines spread and merge together. I then used a cocktail stick to move the paint about a bit and create some lines. When I was happy with it I laid the tag flat and left it overnight to dry. Pretty cool but it bears no relation to the other side, which is the side you will be able to see...


When the tag was dry I turned it over to reveal the pattern on the reverse side and peeled off the protective sheet. It looks like one of those bottles you fill up with different layers of coloured sand doesn't it.


You can see that the two stenciled layers show through nicely against the backgound paint technique. Now to build up the layers on the front. I've used flock for an interesting but understated layer of texture. I made my own paste by mixing a teaspoon or so of Matte Medium with a half teaspoon of Snowflake Fresco Paint. I stenciled the mixture onto my tag using a palette knife and then sprinkled on the white flock powder (I used Fun Flock by Stampendous. It has a nice fine texture that doesn't clump).


One of my favourite gels is Glass Bead Glitter Gel by Faber Castell. Golden has glass bead gel too here. It adds a really beautiful sparkle and texture to a project. I've used it in its raw state here as I wanted it to dry clear, but as with all gels and mediums, you can add colour to them if you want to.


Last but not least I stamped the Bloom sentiment from JOFY37 and the gorgeous "paving stones" stamp from JOFY38 in white Archival ink and heat embossed using white fine detail embossing powder. It shows up really while still allowing the detail behind to show through.


I really enjoyed this project and I hope you can get a sense of how versatile the many gels and mediums on the market are. Maybe you could try this yourself mixing colour with the different mediums or using stamping rather than stencilling. It doesn't have to be on acrylic. You could easily translate this onto other substrates. Just have fun with it.


Ohhh, that's a really interesting idea Lauren. Funky double sided use of paint that can be awesome from both sides! I love how you don't exactly know what its going to really look like underneath until its dry and you peel back the protector (depending on how opaque the protector is). Thanks for another fascinating post! ~Leandra

We would love you to join in with challenge #15: Gels If you are inspired by any of our guests who blog with us over the fortnight, then please join in and link up your creativity HERE

All links go in the draw to win a voucher to spend on products of your choice from the PaperArtsy online store. The Gels link will close 17:00 (London Time) Sunday, Aug 23rd winner will be announced 2 hours later at 19:00.