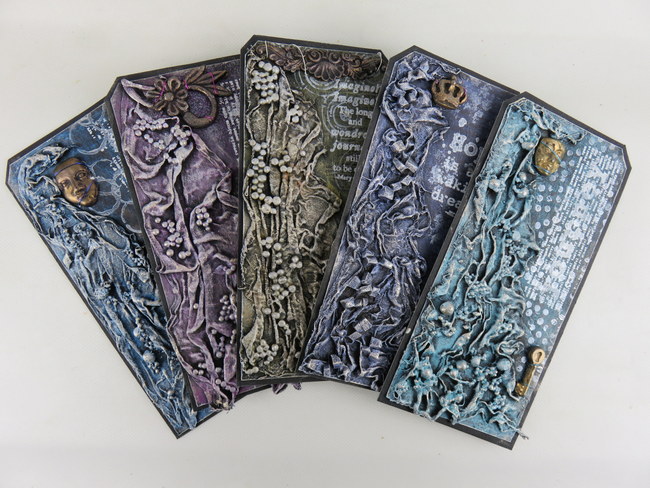
Blog Summary: Image Transfers, Art Dolls, Fabric Stiffeners

Tonight's curator is Lucy Edmondson and she is looking back on Topics 4-6: Image Transfers, Art Dolls and Fabric Stiffeners like Powertex, Paverpol etc.
We are so fortunate here at PaperArtsy to have a wide array of wonderful bloggers who share their stunning ideas with us. I am really looking forward to reflecting on the gorgeous work created earlier in the year.
We are so fortunate here at PaperArtsy to have a wide array of wonderful bloggers who share their stunning ideas with us. I am really looking forward to reflecting on the gorgeous work created earlier in the year.
Leandra
Hello all, Lucy from Lucy's True Colours here,
and it's such a pleasure to be sharing with you some of the pieces of
artwork which most inspired me this past year, from three of my
favourite topics.
My own creativity was dampened down this year by a family loss, and I owe it to PaperArtsy for the massive impetus it gave me to take time to craft, trying out exciting new experiences and products, and sometimes rushing into my craft room as soon as I'd read a blog post, not just on PaperArtsy's blog but by the challenge entrants too. The sense of fun, community, friendship, and at times suspense as we awaited new product releases, and the crafty education brought to us by the blog was a very positive part of my year.
Far and away the most exciting experience for me was that Leandra kindly gave me the opportunity to demo at Ally Pally for a stint in April and September. Here I am!

It
was a huge boost to my confidence to find I could do it, and I
thoroughly enjoyed meeting the customers, who were so interested to find
out more about the PaperArtsy products and to chat about their
favourite types of crafting. I really felt it was a chance to lose
myself and be 'me' for a few hours.
Topic 4: Image Transfers
I
have always had a love-hate relationship with Image Transfers, loving
what others do, and hating my own failed attempts. Oh the frustration of
the perfectly prepared substrate, ruined by a one eyed image transfer
with the cloudy caste of paper pulp, and a sore finger. I've always been
so confused about inkjet images versus laser, the array of expensive
specialist products on offer, and even ones involving getting the iron
out! By the end of this challenge though, I had the satisfaction of
having cracked it, and it is such a worthwhile technique to add to your
portfolio. I love the way it allows you to choose any image and blend
and harmonize it with your artwork

Lesley
created the whole project from first principles, using her own
photograph and cutting the aperture herself to perfectly replicate the
archway in the picture and thus draw the eye in. Putting the transfer
behind an aperture created added depth to the piece. She then created
brickwork around the image with careful use of stencil, grungepaste, and
Frescos which has created such a very realistic textural aspect, and
framed and softened the piece with glorious Morning Glory and trailing
ivy by Liz Borer, coloured in an understated and ethereal way.
What I loved most about this piece is that the image itself has been transferred onto cotton fabric which to my mind is the beauty of image transfer as, arguably, there is no benefit in simply transferring the item from paper to paper. Lesley used Golden Gel Medium and as I had some of this myself, it inspired me to give it a go. Thank you so much Lesley for such a beautiful and inspiring piece, and for enabling me to have successful image transfers for the first time.
And I hope you didn't miss this post by Keren Baker. I love how Keren has such a varied, but always such a professional and well executed style. In this instance she has shown us how to ink an acrylic block to give a reflection of the bird in water, which is such an effective technique and such a great trick to have in your crafting arsenal.
What I loved most about this piece is that the image itself has been transferred onto cotton fabric which to my mind is the beauty of image transfer as, arguably, there is no benefit in simply transferring the item from paper to paper. Lesley used Golden Gel Medium and as I had some of this myself, it inspired me to give it a go. Thank you so much Lesley for such a beautiful and inspiring piece, and for enabling me to have successful image transfers for the first time.
And I hope you didn't miss this post by Keren Baker. I love how Keren has such a varied, but always such a professional and well executed style. In this instance she has shown us how to ink an acrylic block to give a reflection of the bird in water, which is such an effective technique and such a great trick to have in your crafting arsenal.

I adored this post by Kaz Hall of the Little Shabby Shed.
Kaz transferred her image onto grungepaste and I had no idea you could
do this, but it has worked so perfectly. The effect looks like
plasterwork and she has blended and highlighted the edges so
beautifully. To me, it is evocative of seeing a poster left on the wall
of a tumbled down building and I love it. So clever.

Topic 2 : Art Dolls
Art
Dolls was quite simply by favourite theme this year. I particularly
love art dolls when they are three dimensional and self-supporting but
that can be hard to achieve. I love ones that are quirky and made from
found items. I rushed to the computer when each new blog post was due
and checked on all the challenge entries excitedly to see what everyone
was making, and entered a record four times myself! I learnt so much,
and it was the first time I have made a wire hooped skirt, and managed
to make one where the doll stood up on her own! That is quite a feat of
engineering for me! At the end of the two weeks I really wanted the
challenge to run and run, and would love to revisit it using fabric
sculpting mediums.
The
introductions to the challenge themes on PaperArtsy are second to none,
and if you put them together would make a fabulous history of art
coffee table book. So much work must go into bringing them to
us. Contained within the Intro on this occasion were two examples of Art
Dolls by two PaperArtsy regulars. I adored this quirky and original
piece by Lynne Moncrieff of Adorn, made up of Lynne Perrella stamps. Isn't it just perfect, with the pen quill quiff and the monocle!?

And Julie Ann Lee, of Magpie Heaven's,
three dolls, Dream, Reflect, and Flourish, created with her very own
hand drawn faces, so full of expression. I think Reflect is gossiping to
Dream, and Flourish is trying to eavesdrop!

I adored this post by Gabrielle Price. Gabby, from Crafty Thoughts, fashioned her doll, who she named Carmen, completely out of air dry clay, and has given her such movement and charm. Gabby has a wonderful way with Lynne Perrella stamps, which I feel are perfect for the art doll look. She has cleverly used a mixture of hand drawn striped arms and legs, a face stamped directly onto clay, and stamping onto tissue for the dress. Then she made a wire loop so she could be hung on the wall.

The
challenge entrants were quite incredible, and I was so excited each day
to see what had been uploaded. One of my many favourites was this post by Jane Castle of Castle Kelly Crafts.

Do
have a look at the post and the exquisite hand embroidered body of this
dainty doll, and Jane's incredible attention to detail.
I was also inspired by this terrific art doll challenge entry by Sue from Arty Creation Inspiration. She and her friend, Rebecca, obviously had such fun gathering together the pieces to make their dolls. This is so original and well crafted.

I was also inspired by this terrific art doll challenge entry by Sue from Arty Creation Inspiration. She and her friend, Rebecca, obviously had such fun gathering together the pieces to make their dolls. This is so original and well crafted.

Topic 3 : Powertex/ Paverpol
I
was so excited to see the topic of Fabric Sculpting Mediums such as
Powertex, Paverpol, and Modroc pop up. This was a completely new
discovery to me in 2016 when I attended a craft show in February and
there was a make and take style workshop where I decorated a beer bottle
with a scrap of old tee shirt and was hooked! I really felt it filled a
gap for me in mixed media crafting as I love dimensional projects but
have never been good at engineering or construction. Suddenly I had a
product which would glue items together and also create structure,
movement, body, and allow items to stand up on their own, without
recourse to a drill and work bench (it was never going to happen ....!).
I love that you have a bit of open time whilst the fabric starts to
harden and you can manipulate it further. I also love that you can use
up lots of recycled items you would otherwise throw away. But most of
all, it is just so lovely and messy ......!
So what did we all get up to?
Well, I was completely captivated by this post by Helen Chilton. Helen from A Splash of Colour
made this colourful figure from Paverpol using a mixture of Frescos,
Brushos, and Treasure Gold, complete with handmade flowers and a
wonderful parasol with Emma Godfrey stamps! So many techniques, and the
result is stunning!

For a completely different look with fabric sculpting medium, have a look at this post by Ingrid Vichova of Ingrid's Craft Corner.
It's such an elegant and understated piece of wall art which wouldn't
look out of place in any art gallery. It would grace any home and be
such a conversation piece. There are no facial features and yet the pose
manages to convey such expression. This was the first time I had seen
Powertex used with Bister to create crackle, and it was one of those
times when I wanted to rush into my craft room within moments of reading
Ingrid's post, I was so excited to try it.

This Fabric Flower Lady by Liz Borer is
exquisite. Again it is a posed figure without a face, creating a
tremendous sense of expression, but here the similarity ends as Liz has
created a delicately coloured ornamental doll, using the fabric draping
qualities of, in this instance, Powertex. Liz of Decorative Delights
has an incredible talent with colour blending and paint, and an
affinity with flowers, which this project showcases so beautifully. As
with Helen's project, I love that it shows how fabric sculpting mediums
can be painted in many colours, as opposed to one colour with just
highlights, as is often seen.

Every single post on the blog this year was a joy to read, and it's been such a pleasure to pick out just a few from these three topics. I have found the PaperArtsy blog such a genuine source of crafting education and a place of refuge and friendship for which I am truly grateful. Keep joining in the challenges as I know there are some great themes in the year ahead, and 2017 will be just as exciting! Wishing you happiness and good health with your loved ones.
Lucy xx

Every single post on the blog this year was a joy to read, and it's been such a pleasure to pick out just a few from these three topics. I have found the PaperArtsy blog such a genuine source of crafting education and a place of refuge and friendship for which I am truly grateful. Keep joining in the challenges as I know there are some great themes in the year ahead, and 2017 will be just as exciting! Wishing you happiness and good health with your loved ones.
Lucy xx