Showing posts with label Gift Bag. Show all posts

Monday, 13 January 2025

January 2025 - With 3 Things: A recycled paper carrier bag {by Floss Nicholls}


Hi friends, it's (Floss) from floss_workshop.art with you for another 'With 3 Things' challenge post. 

This feature on the PaperArtsy Blog is where 3 bloggers are sent 3 items in the post. Typically we will receive a stamp, a stencil and a couple of Fresco Paints. This year everyone is getting identical products in the post. 

We have no clue what PaperArtsy HQ is going to send, the whole idea of this challenge is to do something crafty in our personal style with these 3 items. We are allowed to bring other PA products into the mix if we feel it is necessary...I didn't this time...

So let's take a look at what I received from PA HQ ...
The blue and white packaging bag on the right is what I grabbed to include in this photo with the supplies as I knew that I was going to use it with these lovely products!


You know I'm a big fan of recycling card, books and papers in my art and so I deconstructed the packaging bag to decorate the inside of it so that I was able to make a gift bag.  Here is one side


...and this is the other side...naturally there are two folded sides to allow it to be a box shape bag...you'll see the details of those as I explain my workings.


I started by playing on my paper sheet that 'protects' my work space...this paper invariably becomes part of my art as it's where I doodle ideas or play with colour when I'm thinking.  So I started stamping the square part clock image and liked the way that if I used it in 'brick' fashion I could create a spiral.

I then tried rotating the same stamp 90* in a square...I liked both ideas and thought they'd look ok as feature designs on the front/back of the bag, so started looking a colourways.


I needed to incorporate the stencil design and so rolled out fresco chalk finish Gold Rush acrylic paint onto the gel plate and rolled Darcy Marshall's lovely tree design over that.  


I took a couple of prints using copy paper and rice paper too.


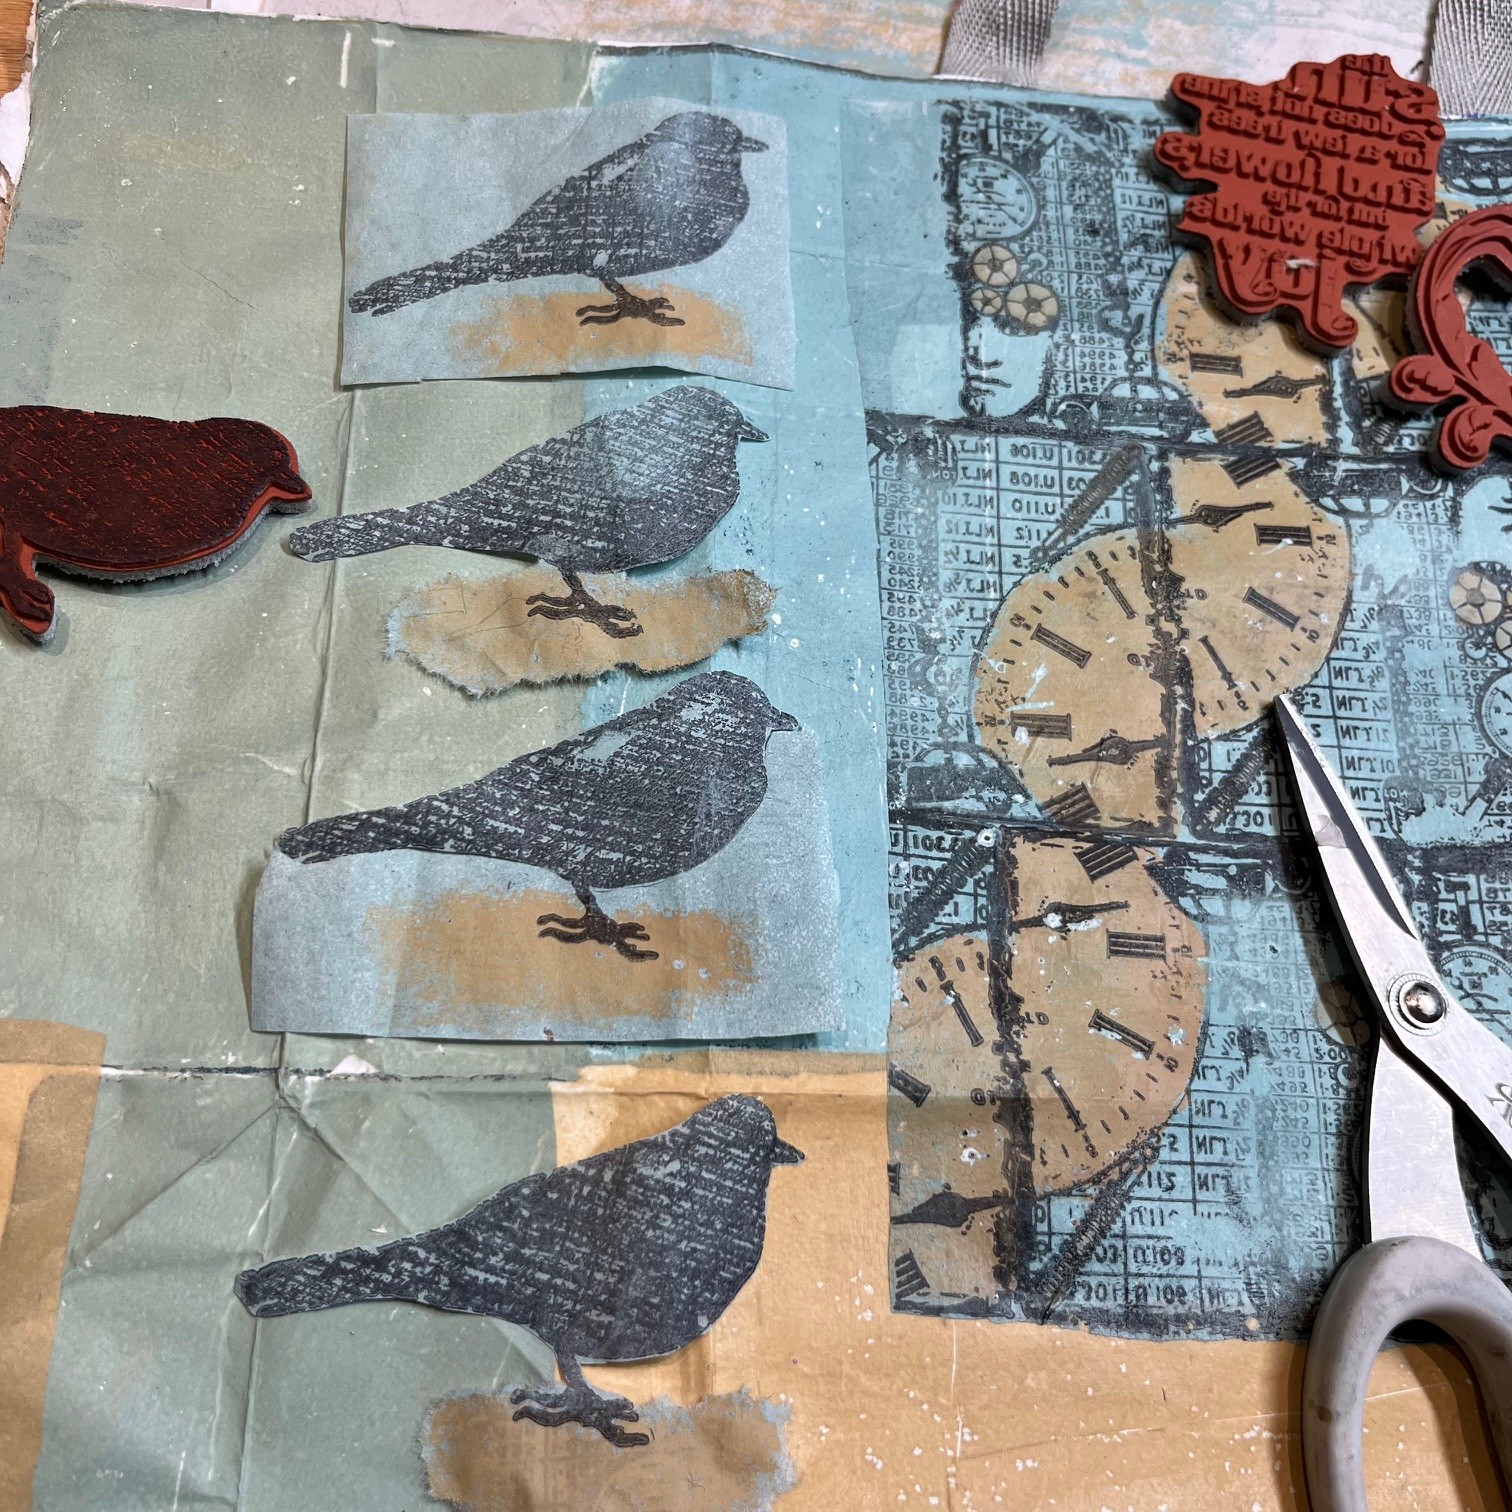
I then inked up the Hot Picks stamps and printed them onto my gel plate using Ranger Archival black ink pad.  After I had waited for that to dry I sponged colour over the designs on the gel plate and let that dry too.  


The beauty of printing the stamps onto the gel plate rather than onto a sheet of paper (or whatever you are working on directly) is that you can add colour behind the image. I added the Gold Rush over the bird legs so that it looked like the birds were standing or dancing on sand.

Naturally I mixed both Gold Rush and Niagara Falls together and created a beautiful creamy green colour.  I made several plain sheets of colour so that I could collage the bag. 


I made quite a few bird images as I thought these would look pretty cool down the sides of the bag.


The next step was to lay the packaging bag out open and start looking at positioning the plain collage papers I had made and the designs that I had printed using the HP1007EZ stamp set


I found that by folding each section before I glued anything down was a good way to check the design for each panel individually.


Rather than putting the large designs central in the front/back area of the bag, I thought it could be fun to have the little birds peeking their little faces round the corners...so I moved the big design over to accommodate that thought.

I originally was going to leave the birds with colour blocks behind them but I decided to fussy cut around the bird shape and then tear around the Gold Rush 'sand'.

I glued the seam after I had folded the bag following the original fold lines so that the bag could fold down flat after it was reconstructed.


It was at this point I decided it would be fun to have the birds opposite each other so that the tails would meet at the inside side area of the bag.


I used the stamping platform to position the birds directly opposite each other.  The stamping platform allowed me to make sure the whole image of the bird was stamped leaving no gaps.  I thought this would be the safest option as the birds were being stamped over the seam of the bag.

I also used the stamping platform to add the feature words.


I printed the block of text onto the plain sheets of Gold Rush and stamped the little cars on the gel plate and pulled the print using a half and half mix of Gold Rush and Niagara Falls onto rice paper.  This created some fun labels to add to the bag.  I toyed with the idea of using them as gift tags for the bag...


I used them on the large faces of t the bag instead...


...they fitted nicely onto the side too... 


The rice paper was not only great for printing onto but it was a good substrate to cover the repurposed packaging bag to give it strength but not be too bulky. 


I particularly like the subtlety of the tree behind the collage design and how I had mirrored the image as a reflection.  I do like how the birds are peeking around the corner of this side too!


This project has made me think of how I could create more of these but also how fun they would be on fabric...I hope this project has sparked some creative thinking for you too and that you've enjoyed what I have come up with using my surprise supplies...until next time...
take care, 

Floss 
x x x

Instagram: flossWORKSHOPart


Oh! I nearly forgot...I created the base for the inside of the bag too...It strengthens the base inside...


Tuesday, 30 July 2024

With 3 things: A decorated gift bag {by Riikka Kovasin}

Hi friends! It's Riikka from Paperiliitin with you for another 'With 3 Things' post. 

This feature on the PaperArtsy Blog is where 3 bloggers are sent 3 items in the post. We have no clue what PaperArtsy HQ is going to send us, there might be a slight variation but generally 2 of the 3 things will be identical.


An upcoming blog topic is the designer focus on Scrapcosy so we were each sent a stamp set and stencil of hers for this feature. I decided to go with a vintage vibe on my make, tying the project to the classical Scrapcosy style. The three items also included a stencil and a jar of Grunge Paste. 

I used the three items to make a decorated gift bag using a recycled brown paper bag as my base. Let's take a closer look how I did that!

Upon receiving the package of these items, my first idea was to make a card. But I wanted to challenge myself a bit further and tried to think outside of my regular card/ATC/art journal realm. The summer with several parties and family get-togethers then inspired me to make a little decorated gift bag. Mind you, you could use the exact same steps to create a junk journal page or a card! 

The monthly theme of "hidden" is present in two ways in my make. I hid the book page, the initial layer of the piece underneath other layers coming on top. You could argue, that I hid several layers underneath others, too, as I love to build clusters. Secondly, you can hide the present inside the bag! Clever, eh? 


I started the make by adding an easy layer to break the blank page, so to say. I added some double sided adhesive to the back of an old book page and then tore a piece of the page. I added this to the bag. The page was actually from the same book I used for my bunny art doll (link).


I then used the Grunge Paste (GP190) and the stencil (PS376) to create a doily of sorts on top of the book page. As I needed to repeat one section, I had to reposition the same portion of the stencil 6 times. I dried some of the segments with a heat tool as I was moving forward, but honestly the project needed me to allow more drying time so each section could dry properly. As you will see, it is just a layer, so perfection was not necessary

I played with the idea of doing the stenciled part on top of a transparency, but I was a bit hesitant how the paste would handle such a sleek surface. If I had been doing an art journal page, that would not have played such a big part, but as the gift bag is a usable item, I didn't want the paste to potentially flake off in use, perhaps if the transprency was sanded a little for tooth .... an experiment for another day perhaps! 

To heighten the grungy look, I added some touches of the paste here and there across the bag.


While the paste was drying, I turned my attention to the stamp set (ESC19). My usual go-to ink is black, but this time it felt too overpowering for the vintage vibe I was going for. So, instead of black I chose a dark brown ink. I stamped the bird and the flowers to pieces of cardstock once but added the postage stamps twice as I realized I couldn't get them all cut out with just one set.


Next it was then coloring time for these images! I opted for two ink colors to be used like watercolors for the coloring. With the two colors I was able to achieve the look I wanted as I could layer and mix them. I added more color to the bird and the flowers but kept the postage stamps in lighter shades.


I just can't help adding some splashes to my projects! They are a marvelous way to add a touch of color to the background and also tie the layers together. For this make I diluted the Grunge Paste to get some white splashes but also introduced another color to the mix. Inspired by the peachy coral red I used to color the stamped images, I used Fresco Finish Peach Nectar (FF144) to add some splashes with a fan brush. If you haven't tried splashing with a fan brush, I highly recommend it! It's such an easy way to get a burst of splashes at once. 


Then it was cutting time! I used plain, normal craft scissors for the bird and the flowers. If you have watched one of my YouTube lives, you know that I prefer to use scissors over a craft knife as I'm way better with the scissors and also way faster. For the stamps, though, I used two different scissors. I own these decorative edge scissors that have like a perforated edge style design. I also saw Megan Quinlan to use thinning shears to make some faux postage so I used those, too. Even in the risk of sounding like Goldilocks, the decorative scissors were a bit too big and the thinning shears too small, I would have needed something in between!


Now that I had my elements cut out, I used the inks I already had in my craft table to ink around the edges of the cut-outs. I also added a bit of stamping to the bag itself as I felt it needed more contrast against the huge white area.


Lastly, it was construction time. I used foam tape to add the bigger elements in and double sided tape for the postal images. I also added a length of ribbon to a piece of hand made paper underneath the focal elements. 

After securing everything in place, the bag was done and ready to be used! 


I really like how the bird and the flowers turned out. I started the coloring with lighter tones as it's always easier to add color and contrast than to take it off. Even if the blooms have brown leaves, they still seem vibrant and alive as the color palette matches the background and the over all aesthetic. 


I also really like the little postage stamps! Inking the edges highlighted the perforated look even further and made the thinning shears ones look better. 


I hope you enjoyed this little project using the three items received and a couple more to top things up. If you want to see the whole process in a video form, stay tuned for a Reel on my Instagram account! 

Thank you for stopping by today! Wishing you an inspiring day! 

Xoxo Riikka

Instagram: Paperiliitin
YouTube: Riikka Kovasin
Facebook: Paperiliitin