Showing posts with label EM73. Show all posts

Thursday, 17 August 2023

2023 Topic 8 : Master Wheel - Double split complementary shade {by Floss Nicholls} with Seth Apter stamps


Hi everyone

It's Floss with you here with you today.

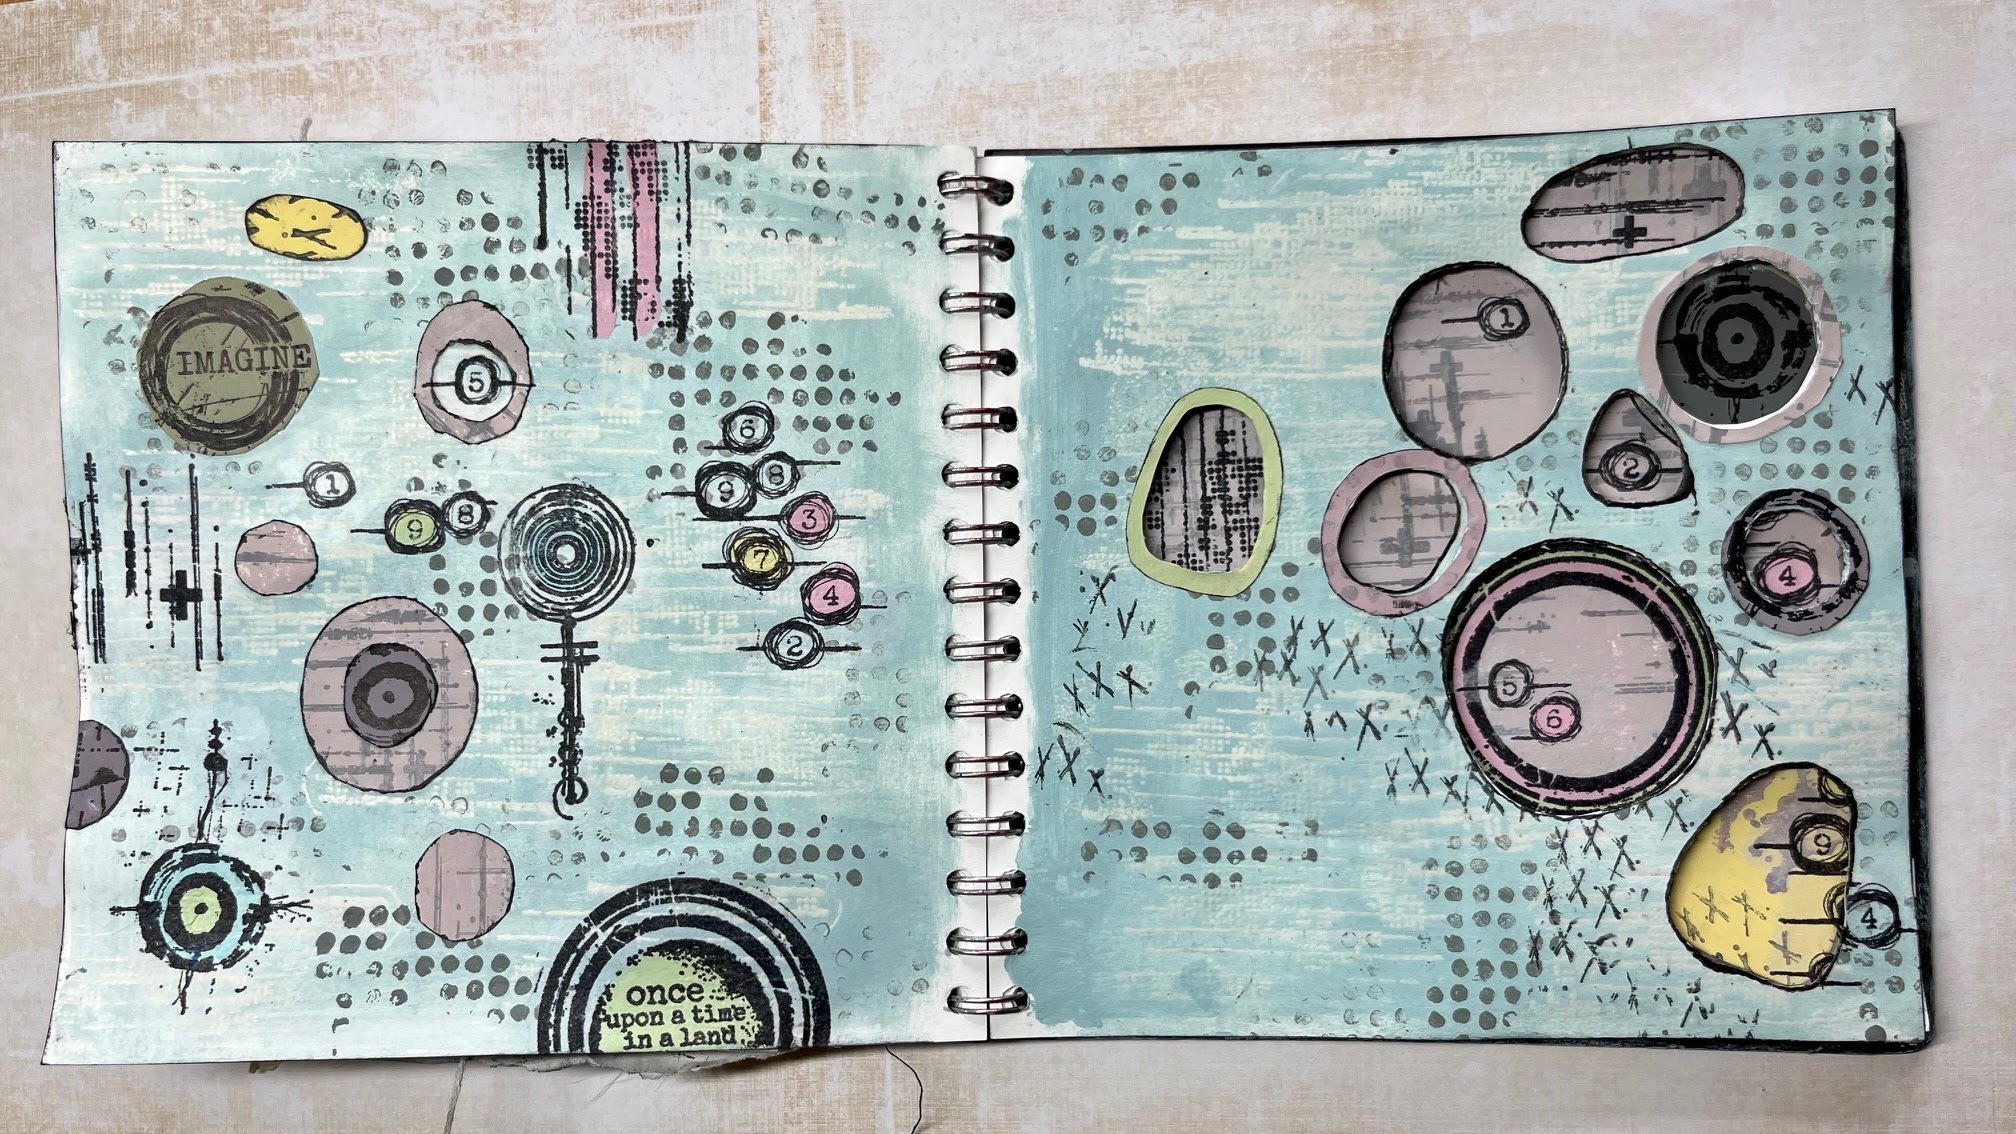
I've been having fun playing in my journal with double split complementary colours this week using the 2023 Topic 8 colour combo: Aqua Duck Egg FF199, Candy Floss FF70, Butter FF129 and adding Little Black Dress FF19 to gain shades of the of the many combinations on the colour wheel.  With this quarter's transparency theme in mind I decided to use apertures through the page as there's nothing more transparent than an open window and so I created lots of holes to peek through. I really had to be mindful where I placed designs so that they'd work over two pages...here's how I got on...


Naturally, it's difficult to show all four of the pages I created in one 'finished project photo' when working in a journal, so let me explain what I did and why I did it, working up to showing you the outcomes over four pages...


I was excited to start using the new Seth Apter mini stamps EM73 and EM79 along with his ESA35 stamp set, EM52 and the EM40 stamps as I knew that I could create some great textures and features with these.


Before I started working in my journal I needed to look at what this topics colours; butter, aqua duck egg and candy floss would make when mixed together to choose which combination I would use.


I liked the option of the double split complimentary selection as I could add more interest by having more colours involved that I knew would work well together having both impact and subtlety. I chose number 6 on my wheel as the base colour and matched it up with the two segments either side of it's direct opposite. The diagram below in the middle picture of the top row will show my choice.


A more detailed explanation of the double-split complementary colour wheel and the benefits of using this selection written by Keren Baker can be seen either here... 2022 Topic #8: Split complementary or also beautifully explained by Dounia Large here 2023 Topic 08: Master Colour Wheel - Topic Introduction. Both are well worth a read.


Having selected my colours from the colour wheel, I then needed to mix them into another wheel using different amounts of little black dress FF19 to create shades of each of the colours.  I found this exercise very therapeutic and would recommend doing this if you ever lose your creative spark and need to get back into your art but don't know what to do. 

I always mix an equal amount of all three colours together when I create my colour wheel to create what can be a more muddy shade. This mix can be seen below on the right hand image with 1+5+9 written inside the box.  I find it useful to do this as I feel that the 'total mixed colour' tends to harmonise a piece of art by pulling all the colours together .


I was choosing between split complementary...


...and double-split complementary, which as you know I went ahead with...


Breaking an empty page is often considered to be one of the hardest thing to do when creating art and so I used ESA35 and a WOW clear matt embossing powder to put some basic transparent texture onto the double page spread.


Then I used a dry sponge to add my first colour onto the double spread; I used the tertiary No8 segment without black for the colour base. I added texture using the dots from stamp set ESA35 using the same colour but with Little Black Dress to add a contrast with it's darker shade. Now the first page was underway...time to turn it over to prepare the other double spread.


I used the section 3 toned mix for the base colour of this double spread.  As you know, I like to add plenty of textures into my art and so I used EM79 and Rangers distress archival ink in Hickory smoke over the other journal spread to add interest to a flat page. Note that I am now going to be working over two spreads simultaneously. 


I started laying out some of the rubber stamps and drew rough circles to mark where I was going to carefully cut my apertures out using a scalpel and a cutting mat between the pages.


Keeping the colour wheel to hand, I stamped a whole batch of tissue papers with a selection of the stamps I was using to give me plenty of choice when it came to adding details. (It also gives me plenty of fodder to play with at a later date too!) I painted the reverse of the tissue paper in some areas making sure that my paint mixes matched those on my wheel.


I also painted some block colours and stamped over them using the same double-split complementary colours and stamp sets.
 

Drawing through the holes onto the printed coloured paper allowed me to get the exact shapes I needed.  I use a Pilot Frixion pen to do this as it can be erased easily by gently heating it gently with a heat gun or hair dryer which is much quicker and less damaging to the surface than an eraser and pencil.


Using the apertures from the page that closes over this place your designs and check to see whether they show what you'd like to see through the holes.  I like to hide some of the designs so that both pages are not in replica. 


Having seen how the colours work together through the holes, I thought that I'd like to bring more detail and colour onto the page and so using the Frixion pen once more I traced through the hole to match the opening of the aperture then rough cut a ring to edge finish the hole in another shade.


Now that I had most of the pieces glued into place I wanted to bring it all together.  At this stage I thought a lot of the designs were just floating on the page and it needed tying together.

Whilst I was deciding what detail to add to the pages, I used a scrap piece of paper between the pages so that I could ink some of the apertures that did not have a coloured ring around them. This gave a little more definition and contrast.


Using the little stitches stamp from ESA35 and Rangers distress archival ink in Hickory smoke I added the little crosses to the first page spread...
 

and to the second page spread along with the dots on line stamp from the same ESA35 set using a darker shade from segment 3 of the colour wheel. These were my final outcomes...


Lifting the page slightly will show any areas that need trimming off to make the apertures neater...


I especially enjoyed the challenge of setting the designs behind the apertures as well as at the same time being able to see elements of it peeking through.  I still have not decided if this is 'done' yet.  I think I may revisit it to add some hand stitching to accentuate some of the little crosses but I would need to be super careful with the reverse of the page with the apertures cut out...


It was a fun project to do and colour mixing is always interesting with the amount of colours you can make using just 3 paints...or in this case four.  I hope this has inspired you to cut holes out of your pages and reach for some of your favourite stamps to peep through them!

Until next time, enjoy your creative time

Love
Floss x x x 


I have several classes going on throughout August and Sept including a mixed media creative wellness tag day on the August bank holiday monday especially for those of you who work hard all week and don't get much time off for weekday classes. (in person in East Sussex UK)

If you need to plan ahead...then I have two full day mixed media classes running back to back on 31.10.23 and 01.11.23...check the website to see the difference between the two days.


Monday, 3 July 2023

NEW PaperArtsy Products: Seth Apter {June 2023}

A note from Leandra:

Seth adds to his fabulous collection of mini designs with this new release. These little guys offer a mix of chunky and fine detail designs, and if you know anything about Seth's style, you will realise that his creativity is rich with contrasts. Be it shifting colour, texture or size, these images can really help you create those all important contrasts in your backgrounds. But don't think that these are just about creating backgrounds.... oh no!!! Often these little designs have within them opportunities to create focal points too. Seth will share within his samples below, various ways you could pick out details to create focal points; stitches and colour pops for example. Mini stamps like these are a fun way to build your stamp collection purposefully, with images that chime with your inner muse.
 
Seth will be along to share with you LIVE his new products and ideas over in our Facebook Group, 'PaperArtsy People' shortly after this post publishes, and ... don't forget
 
These stamps are available EXCLUSIVELY from our approved stockists. Please check the list at the foot of this post to find a retailer online or geographically near you, it makes sense to order within your country where possible. Our retailers also endeavour to join the designer's live to share their direct shopping links - this makes it super easy for you to find a store with product in stock immediately.
 
Hey gang. Seth Apter here. Woo hoo. It is that time again. New release time. No matter how many times this occurs, I am as excited for a new release now as I was for my very first PaperArtsy release back in 2016! So let me jump right in and share what I have in store for you. 
 
Let me introduce you to my 8 all new Mini Stamps. And remind you that they say good things come in small packages.


I am calling this collection Make Your Mark. Those who know me well know that I often say make it your own. I encourage every maker to take any commercial product they have and use it their own way with their own twist. Although I may be the designer of these stamps, your creative imagination can enable you to use them in ways that I hadn't ever thought of. As artists, we not only want to literally make our own marks on our art but we also want to figuratively make  our mark in the world. Hoping that these new stamps inspire you to do just that.


Price: RRP €4.90 +VAT    Size: approx credit card size
All stamps are individually trimmed onto cling foam with a laminated storage/index sheet.
  
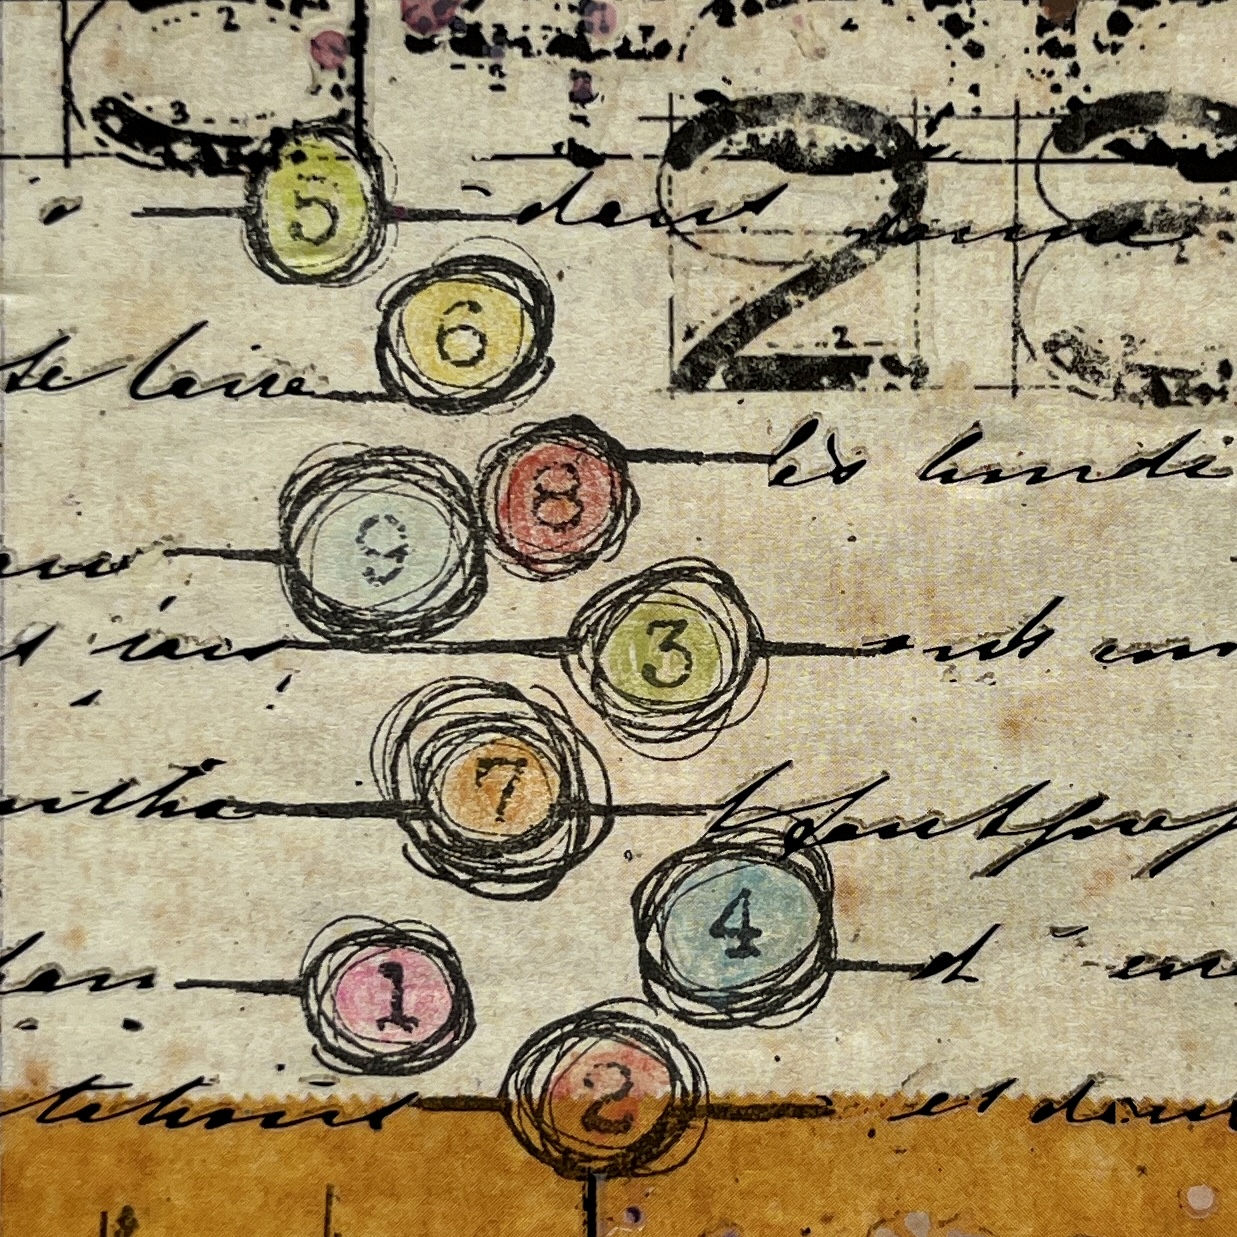
Eclectica³ Mini Seth Apter 73 (EM73)

MAKE IT COUNT

I love to use numbers in my art - as much for the look of them as for the counting component. Most of the number stamps that are available typically place the numbers in order. For this design, I knew I wanted to go random instead. 
 

As I often do, I made sure there was some open space around the elements so that you could either add your own color shades or let your background peek through. And of course those scratchy lines coming from the swirly circles can also serve as a jumping off point for additional details. 


Eclectica³ Mini Seth Apter 74 (EM74)

THERE IS...

Every collection of stamps I have released includes at least one (and usually many more) scratchy, grungy designs that are perfect to add details and dimension to a background. Mini 74 fits that bill. 
 

For this design, I chose to lay out the grungy marks almost as if they were words in paragraph format pulled from a book page. But of course they are abstract and you can choose to have them reflect your own message. 


Eclectica³ Mini Seth Apter 75 (EM75)

WORLD OF WONDER

Mini 75 also highlights a grungy design that can be used as a layer in a background. But this stamp is very versatile and can be used in many other ways as well. 
 

I love using just the edges of the stamps to create my own border. In even calls to mind abstract drips.
 

The design is bold and graphic enough to also stand on its own as a focal element too. And all those breaks in the drawing allow the background to show through.


Eclectica³ Mini Seth Apter 76 (EM76)

CHRONICLES

Most techniques in mixed media are additive, where a new layer is added on top of the old layers. But techniques can be subtractive too, where you actually remove a layer. And what better way to do that than to scratch? Mini 76 captures the beauty of that approach. 
 

Having these strong blocks of brush strokes scratched and distressed enable you to shift the color and have bits of the background show through. 
 

STONEHENGE

And remember to turn your stamps. All different ways. Just because they might be packaged horizontally doesn't mean you cannot think of them vertically. 
 

And just because there might only be 4 elements in the design also doesn't mean that you cannot stamp them multiple times - to create an impression all your own. 


Eclectica³ Mini Seth Apter 77 (EM77)

FIGURES

Mini 77 also has the scratchy, subtractive element that I love so much. For this release, this design is also my nod to circles. As they are abstract, you can think of them as screw heads, wrapped stones, pebbles from the beach, or even small pathways.
 

Adding my own scratchy scribbles - in red - is an example of taking design elements from the stamps and repeating them using the hand of the maker.


Eclectica³ Mini Seth Apter 78 (EM78)

DISCOVER

I love the design of Mini 78 as one can see it as a ladder or train tracks. Either way, both interpretations are symbolic of going places. 
 

In this piece, the gaps enable the very complex background to show through. But they can also be used to add color blocks, numbers, or even tiny text. I can also imagine using this stamp as the basis for a color swatching page in my journal.


Eclectica³ Mini Seth Apter 79 (EM79)

THERE IS...

When I create art for my new releases, I often highlight a single stamp in each sample I create. But most of my art tends to include many (many!) different stamps. So for this release, the sample that I highlighted above for Mini 74 is also my sample for Mini 79. BOTH of these stamps are the stars of this show. 
 

Mini 79 is a series of scratchy and broken lines with added grungy details. You can use it horizontally or vertically and it can serve as the start of your own addition - such as writing or, as seen in There Is..., a loose guide for over-stitching.


Eclectica³ Mini Seth Apter 80 (EM80)

STASHED

Mini 80 adds the shape of degraded and distressed crosses and pluses to the other  abstract shapes in this collection. As in many of the designs, scratches and gaps are evident.
 

Of course when making your mark with a stamp, you also want to remember to make your mark with your own hand. In this pieces I added random pencil lines, drew a loose outline, and filled in gaps with a contacting color. 


I hope you have been inspired to not only use these stamps...but to use them in ways that make them all your own. As always, cannot wait to see the magic that you create.

A HUGE thank you to the PaperArtsy crew for making these stamps and making all this creativity possible! 

You can see more and visit me at... 


 PaperArtsy Stockist List

Our stockists are your go-to  source for all PaperArtsy products, and we suggest that you also use the PaperArtsy People Facebook group to source a retailer in your country. Many are members of our FB group and will happily share links to their online stores.

Australia
Bev's Cross Crafts, Spreyton, Tasmania https://www.bevscrosscrafts.com.au/
Crafters Cupboard, Berwick, Victoria www.crafterscupboard.com.au
Memories on the Murray, Murray Bridge, SA  https://www.memoriesonthemurray.net/
Natalie May Scrapbooking, Dover Gardens, SA https://nataliemay.com.au/
Scrapbook Superstore & More, South Penrith, NSW https://www.scrapbooksuperstore.com.au/
The Scrapbooker's Confetti Box, Swansea, NSW https://thescrapbookersconfettibox.com/
The Scrapbook Store, North Perth,WA http://thescrapbookstore.com.au/ 

Belgium
Cart N Scrap Art, Antwerp, www.cartnscrapart.be
Créatelier Caracolle, Liège, www.createliercaracolle.be

Canada
Paper Art Creations Inc, Leduc, Alberta, www.paperartcreations.com/
Scrapbook Centrale, Dollard Des Ormeaux, Quebec www.scrapbookcentrale.ca
Scrap Addicts, Edmonton, Alberta www.scrapaddicts.ca/
Scrap and Bean, Edmonton, Alberta scrapandbean.com/ 
Scrapbooking Fairies, Drayton Valley, Alberta www.scrapbookingfairies.com/
The Paper & ink Boutique, Calgary, Alberta www.paperandinkboutique.com/
The Scrap Yard, Calgary, Alberta, www.thescrapyardcalgary.com/ 

Denmark
Hobbyboden Scrapworld Samso www.hobbyboden.dk

France
Eirl Bancon Cartoscrap, Midi Pyrenees, www.cartoscrap.com
Fée Du Scrap, Saint Sébastien-Sur-Loire, www.feeduscrap.fr/
Horizon Créatif, Ste Jalle www.horizon-creatif.fr
Instant Créatif, La Possession, La Réunion, www.icreatif.re
Katzelkraft, Ingwiller www.katzelkraft.fr/en/
Kerudoc Creation, St Yvi www.kerudoccreation.com
Le Grenier des filles, Pierre Benite
Page de scrap, Saint Pavace, www.pagedescrap.fr/
Scrap Déco Home, Goutrens, www.scrapdecohome.fr/
Toutencolle, Dun sur Auron www.toutencolle.fr

Germany
Stempeloase Munich, Munich www.stempeloase.de
Stempelfee Shop, Hilden www.stempelfee-shop.de
Stempellaedle, Stuttgart, www.stempellaedle.de/shop

Italy
Immagine SAS di Rapaccini, Rome, www.immaginelab.com
Il Negozio Della Mamma Di Cle, Torino, www.ilnegoziodellamammadicle.com
Marte Savona, Savona, www.martesavona.it
Pezze E Colori, Lissone, www.pezzeecolori.it/ 
Piccole Passioni, Siena, www.piccolepassioni.it

Japan
La Wadao, Odawara, Kanagawa, www.lawadao.com
Tiny Dots, Funabashi-shi, Chiba www.tinydots.shop-pro.jp

Netherlands
De Hobbystudio, Genemuiden, www.dehobbystudio.nl/
Doe@ding,Spijkenisse doeading.nl/
Hobbycompleet de Duif, Leeuwarden www.hobbycompleet.nl
Stampingcorner, Capelle Aan Den Ijssel www.stampingcorner.nl

Spain
Cien por Cien Manualidades, Barcelona,  www.100x100manualidades.es
Ideas 10 Manualidades Y Scrapbook, Bilbao ideas10manualidades.com/
Marakiscrap, Tarragona, www.marakiscrap.com
Scrap & Papers Experiences, Barcelona, www.scrappapersexperiences.com
The Paradise Corner, Barcelona, www.theparadisecorner.com

Taiwan
Mandy's Cards, Taipei www.facebook.com/mandy.card.77

United Kingdom
Amelia's Creative Crafts, Studley, Warwickshire  www.ameliascreativecrafts.co.uk
Art from the Heart, Harrogate, Yorkshire www.afth.co.uk
Crafts at The Malthouse, Herstmonceux,  East Sussex, www.themalthouse.co.uk/
Loobi Crafts, Leighton Buzzard, Bedfordshire, www.loobicrafts.co.uk
Stampers Grove, Springbank, Lilliesleaf, Melrose,Scotland www.stampersgrove.co.uk
The Artistic Stamper Craft Store, Faversham, Kent www.theartisticstamper.com
The Forget me not Kraft Kabin, Rochford, Essex, www.TheForgetMeNotKraftKabin.co.uk

USA
Artistic Artifacts, Alexandria, VA www.artisticartifacts.com/
Artistic Studio Creations, Fayetteville, Georgia www.facebook.com/ASCbyCrystal
Craftiness, Chatsworth, CA, www.craftinessonline.com/
Everything Scrapbook & Stamps, Lake Worth, Florida https://everythingmixedmedia.com/
Frantic Stamper, Oregon www.franticstamper.com
Free Heart LLC, Denver, Colarado, www.freeheartllc.com/
Joggles, Coventry, Rhode Island, www.joggles.com
PaperCraft Clubhouse, Westbrook, Connecticut, papercraftclubhouse.com/
Qingquing's Stamp Shop, Portland, Oregon
Runaway, Art & Craft Studio, NE Salem, Oregon www.runawayart.com/
Simon Says Stamp, Columbus, Ohio www. simonsaysstamp.com
Topflight Stamps, Irmo, South Carolina topflightstamps.com/

If you are interested in becoming a PaperArtsy stockist contact Dounia@paperartsy.com for more information

PaperArtsy Links
Facebook Group PaperArtsy People
Facebook Page PaperArtsy