Showing posts with label EKC58. Show all posts

Sunday, 15 May 2022

2022 Topic 07: Specimen Jar {by Victoria Wilding} with Kay Carley stamps


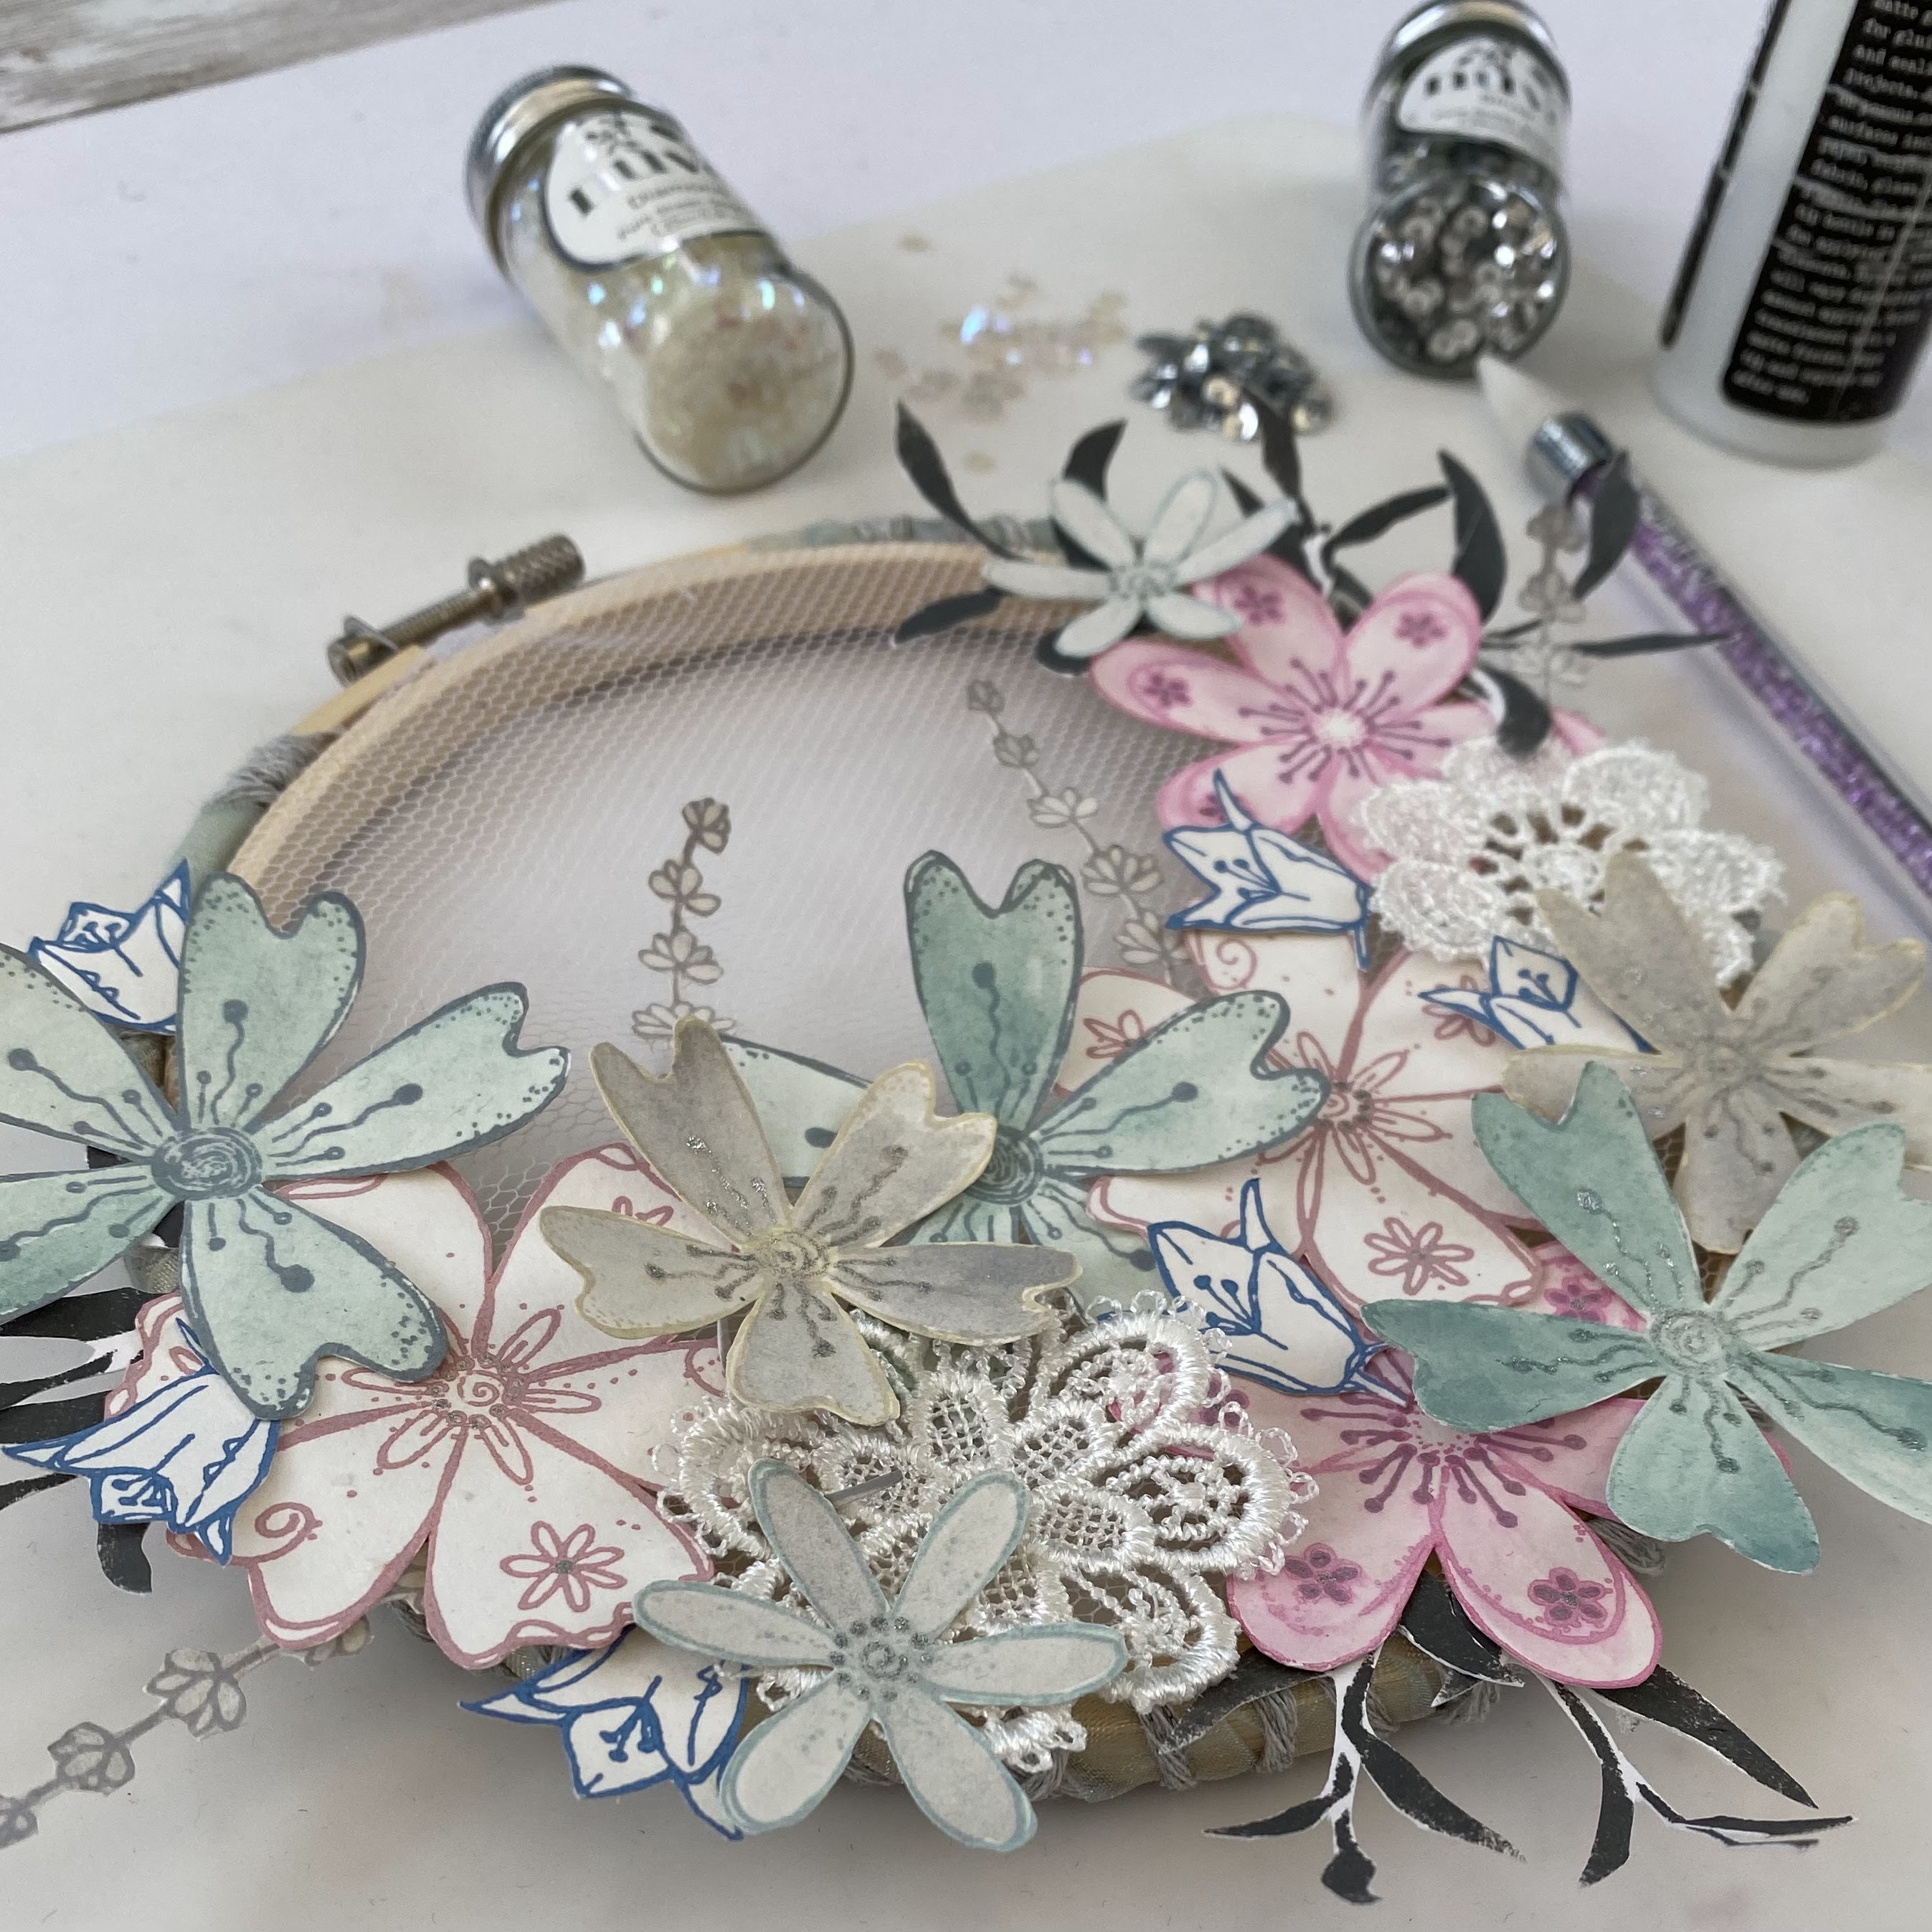
Hi everyone, it's Victoria with you today, and I'm here to share with you my idea for a flower hoop.


As soon as I saw the Specimen Jar topic, I knew I wanted to create a flower hoop. It's something that's been on my creative to-do list for a while and one of those fiddly projects that is right up my street!


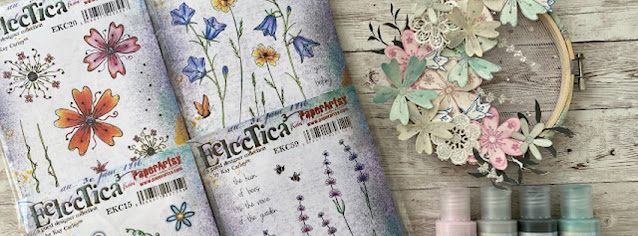
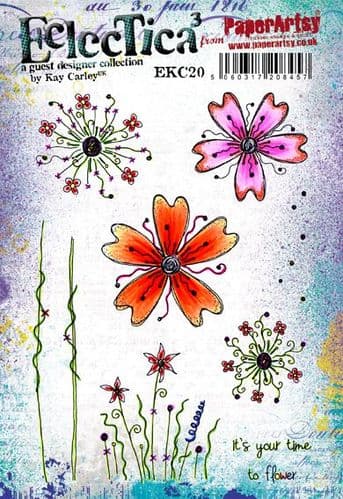
To start off I gathered together the supplies I wanted to use. Kay Carley's flower designs were perfect as there were flowers of all different shapes and sizes which would add variety to the finished project. I selected two of Kay's newest sets, EKC58 and EKC59, and two of Kay's older sets, EKC15 and EKC20. 

 
Initially I thought I would use a neutral colour palette full of creams and browns, however, looking at the different flower stamps I was going to be working with, I thought some soft pastel colours would work really nicely, so I picked out three Fresco Finish Chalk Acrylic Paints (Niagara Falls, Pixie Dust and Koala). I also picked out a 6" embroidery hoop, some wool, ribbon and twine and sequins. With all my supplies picked out, it was time to get started.

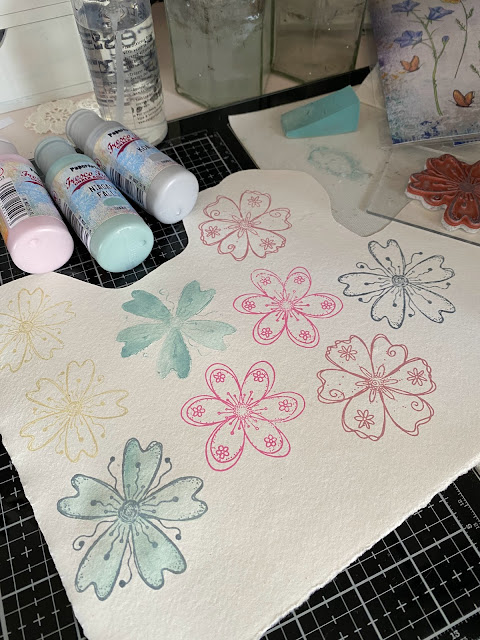
The first step was to make the flowers for the hoop. Initially I thought I would make a selection of paper and material flowers, however, I didn't think that the cotton material I was going to use was stiff enough to hold the flower shape once I got to the stage of assembling the layers. So I chose a heavy weight piece of watercolour paper and started off by stamping out a selection of the different flowers in Distress Oxide. I then squirted a small blob of each paint colour onto my craft mat and added a little water using my paint brush, before colouring the flowers. It's important that you don't add too much water on this step or you will start shifting the ink as it isn't water resistant, but as you can see in the image below, with care and a light hand, the stamped image softens slightly but is still clearly defined.


Once the flowers were all painted, I went back in with glitter gel pens to add some sparkle to the details on each flower. I then fussy cut them all out and set them aside.
 

On looking at the flowers all cut out, I decided I needed some leaves to add more variety to the final design. Using Kay's new stencil PS326 and Fresco Chalk Acrylic (Slate) I stippled the leafy designs onto another piece of watercolour paper. Once dry I fussy cut them and set them aside with the flowers.

 

Before assembling everything together, I needed to prepare the embroidery hoop. As I wasn't sure how much of the hoop would show through the flowers, I decided to wrap the outer hoop with some wool and ribbon to add a pretty finish to the outside of the hoop. 


I then used some fine netting fabric to place between the outer and inner hoop, pulling the material tight before trimming the edges. This would provide a firm base to adhere the flowers to without being really obvious to the eye at a distance, which would be important as I wanted to leave some open space in the final arrangement of the flowers.
 

Next I arranged the paper flowers on top of the netting, leaving a small section of open space. I also included two crochet flowers from my fabric stash, to add a final bit of texture.
 

With all the flowers arranged and glued in place, I added some sequins for a final sparkly touch.


The fussy cutting of all the flowers was the most time consuming bit of this project. The rest of it came together really quickly and is one of those projects that in all its separate parts doesn't look like much, but once assembled it has a definite wow factor.  


I love how it turned out and can think of lots of variations to try the next time I make a project like this. Different flower combinations, colour palettes and materials would give a completely different finish. This would be a great project to make for a gift and you could easily add lettering or numbers to give it a personal touch.


Wishing you a creative, happy week.

Victoria

Thursday, 28 April 2022

NEW PaperArtsy Products: Eclectica³ Kay Carley {April 2022}


A note from Leandra:
I am always in awe of how Kay brings together her layers so beautifully, and she ahs gone to a great deal of care in this post to share with you the ease of how this is possible with paint and not too much thinking is required! They ooze summer, and I am sure these will not just be gorgeous cards, but also amazing wildflower journal pages too!
 
Kay will be along to share with you LIVE her new products and ideas over in our Facebook Group, PaperArtsy People shortly after this post publishes. I hope you can drop by for the live, or try to catch the replay. It's super lovely to see the designer and hear direct about the new release and understand first hand the possibilities!!
 
For the next 3 months, these stamps are only available EXCLUSIVELY from our approved stockists. Please check the list at the foot of this post to find a retailer online or geographically near you, we have also added a tab at the top of the blog page with this list too.
 
Hi everyone, Kay here.

I'm super excited to share with you my newest release for PaperArtsy consisting of 3 stamps and 3 coordinating stencils. 

I have continued with my flower theme for this release and (once again) have used flowers from our garden for inspiration including campanula, poppies and lavender.


Price: RRP €21.92 +VAT    Size:5" x 6" (13 x16.5cm)
All stamps are individually trimmed onto cling foam with a laminated storage/index sheet.


Eclectica³ Kay Carley Set 58 (EKC58)

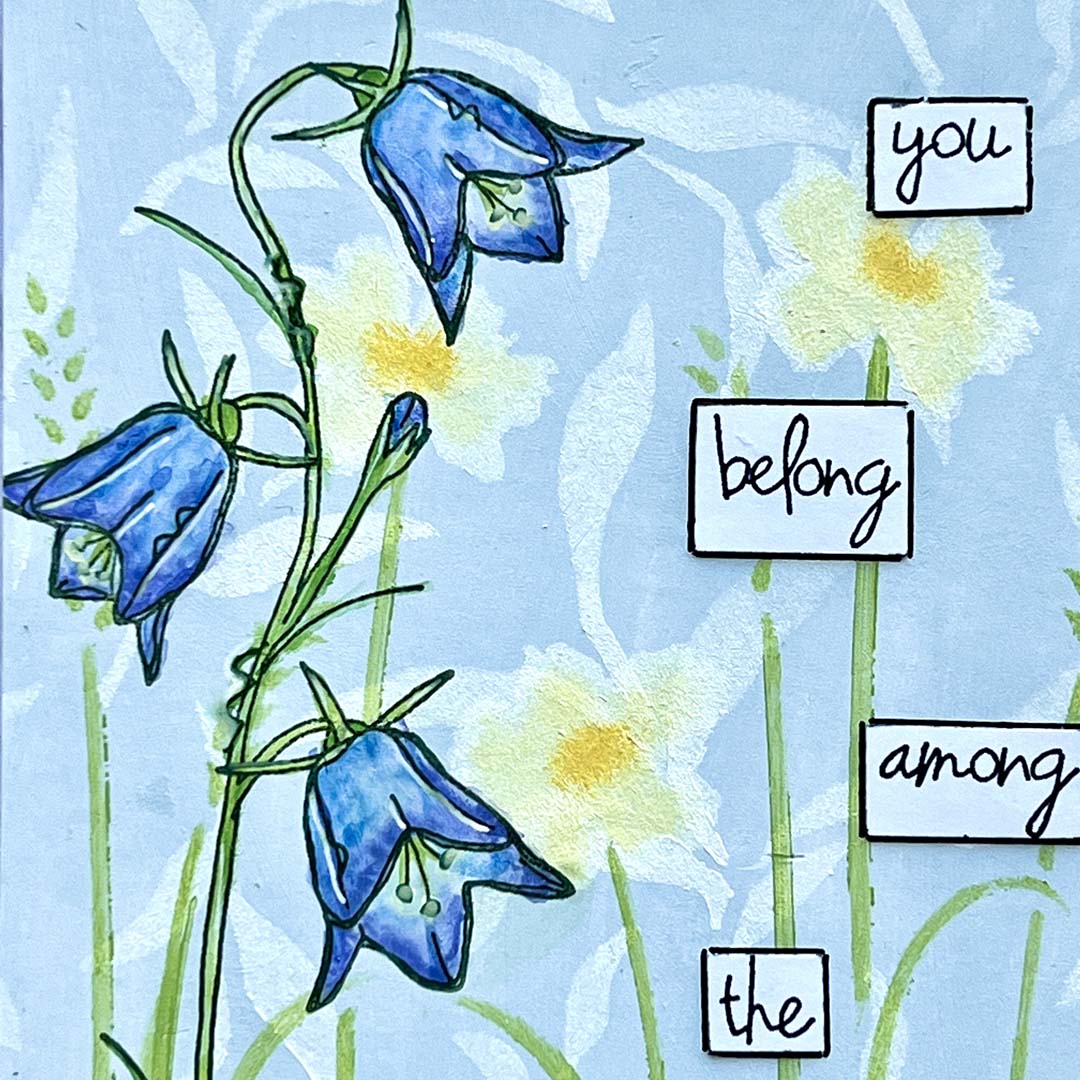
The bell shaped flowers on this stamp set are based on a flower called campanula which was flowering in our front garden last year. 
 

As you can see the 'campanula' flowers make a good stand alone focal point on a card.
 
 
The background flowers were achieved using Stencil PS328 which is coming up a bit later.


This card (below) is of the other 'campanula' flower contained on this stamp set.


To paint the flowers, I stamp them within a stamping platform and leave everything in-situ whilst I apply the paint, then I re-stamp to refresh the detail of the stamped image.


Although these slightly smaller flowers were designed to be used with the campanula flowers they make good foreground flowers in their own right.
 

These flower heads do have a matching component on Stencil PS328 but I chose to hand paint these yellow flowers rather than using the matching 'stencil flower head'. Instead, I created the pink background flowers using the matching flower head components contained on the stencil.


Eclectica³ Kay Carley Set 59 (EKC59)
  
The flower stamps contained on this stamp set are based very loosely on 'lavender'. (The bees on this set are cut as one stamp but simply snip between them to use them individually.)


The card below shows how you can use the two individual flower stems contained in this set, to create a border of lavender flowers.
 
 
The background flowers were achieved using Stencil PS327 which was designed to complement this stamp set.
 

The card below shows how you can create a border of lavender by repeatedly stamping the large lavender stamp. (If you end up with any gaps in your border, these can easily be filled by either stamping the stemmed leaf components contained on this set or with the single stemmed flowers.)


I chose to hand paint my flowers but you could use Stencil PS327 to add colour to the flowers too. (Please note: Stencil PS327 doesn't perfectly match these stamps.)


Eclectica³ Kay Carley Set 60 (EKC60)
 
The stamps contained on this set are based on wild poppies, cornflowers and wheat/or grass. The stamps have been drawn with straight stems to give more versatility to the images as this allows you to bend the flowers etc... (either to the left or right), when placing them onto an acrylic block.
 

The card below is my take on a field of wild poppies. The smaller poppies have been created using elements from Stencil PS328 - this creates a great backdrop for the larger stamped poppies.
 
 
The larger, stamped poppy heads were coloured using the matching 'large poppy head elements' contained on Stencil PS328.
 

There is only one cornflower stamp contained on the stamp set, but by angling and positioning the stamp slightly differently, each time you stamp it, enables a pleasing composition of cornflowers to be achieved easily.


Once again I chose to hand paint these cornflowers but Stencil PS328 does contain a matching 'cornflower element' for anyone who prefers to add colour to these flowers using a stencil.


Large Size: 6.25" x 9.5" (16 x 24cm) Price: RRP €6.28 +VAT
  
PaperArtsy Stencil 326 (PS326)
 
I thought for this release it would be really useful to have a background stencil that would work well with any of the flower stamps.


I have used this background stencil on nearly all of my samples to create subtle interest. You can see below, how using this stencil has allowed me to create 'subtle' but interesting backgrounds by using tone on tone colouring. 
 

For this flower panel I chose to use one of the bigger leaf elements contained on the stencil to create further interest to the top left and bottom right corners. This was done by singling out that bigger leaf element and stencilling it, in a slightly darker colour

 
For this centre flower panel (below), I chose to use a different stencilling technique of applying two colours of paint. First I stencilled with Snowflake Fresco Finish paint. Next, I moved the stencil slightly up, so that it was no longer perfectly aligned with the Snowflake stencilled leaves and then applied Frosty Fresco Finish paint through the stencil in order to create subtle dimension to the background leaves.
 

The picture below shows a closer look at that subtle dimension that is achieved by 'bumping the stencil'.


PaperArtsy Stencil 327 (PS327)

Stencil PS327 has been designed to complement stamp set EKC59. The elements contained on this stencil do not perfectly match the stamps contained on EKC59, but if you occasionally adjust the stencil then it can be used to add colour to the lavender stamps  if you so wish.
 

This shows how effective it can be to create a backdrop of white flowers for the coloured flowers to sit against.
 

To do this, begin by stencilling the stems, then the leaves and then the flowers using Snowflake Fresco Finish paint throughout.


Next repeat this procedure of stems, leaves and flowers using different colours of paint.


The stencilled flowers (below) look equally at home with a background created with stencil PS326.


Once again begin by stencilling the stems.


Then add the leaves.


And finally the flowers.


PaperArtsy Stencil 328 (PS328)

The beauty of this stencil is that it is REALLY versatile. To begin with, it contains elements that match some of the flower stamps that are in stamp sets EKC58 and EKC60, plus these stencil flower elements can be used to create beautiful borders of flowers, simply by stencilling the stems contained on the stencil, (omitting the wheat/grass heads) and adding your chosen flowers to the stems instead!
 

For the card below I stencilled the stems and leaves contained on the wheat/grass border and then stencilled my chosen flower heads onto each of those stems.
 
 
You can just make out that I created a subtle backdrop for the flowers by stencilling the wheat/grass border in Snowflake Fresco Finish paint.


This panel shows how you can mix and match more of those stencil flower elements. This time for the flowers I stencilled the flower heads first and added stencilled stems to them afterwards.


The picture (below) shows how the larger poppy heads contained on this stencil matches the poppy stamps contained on EKC60.


Project: Wooden Poppy Plaque


I thought it would be fun to create a small wooden poppy plaque using elements contained from all of the stamp sets! The poppy stamps and leaves are from EKC60, the bees are from EKC59 and the smaller grasses are from EKC58.


For the background I used the technique of 'bumping' Stencil PS326 using Snowflake Fresco Finish paint first and then Frosty.


Next I added stencilled wheat, poppies and daisies and stamped some grasses.


Then I stamped my main flowers.


Added in more stamped elements.


Then applied some white highlights 'here and there' using a white gel pen.


And finally added some shading around some of the main imagery using grey pencils.

I have really enjoyed playing with this latest release whilst creating these samples.... I sincerely hope that you will enjoy using them as much as I have! If you have any questions about this release please feel free to contact me via Facebook. 
Love Kay  x
Facebook Group: Crafting with Kay Carley
Twitter: @carleycards
Instagram: kay.carley
Pinterest: Kay Carley

At this current time, most of my teaching is being done online. You can find details of all of my past and current online workshops over on my Crafting with Kay Carley Facebook Group.

 PaperArtsy Stockist List

Our stockists are your go-to  source for all PaperArtsy products, and we suggest that you also use the PaperArtsy People Facebook group to source a retailer in your country. Many are members of our FB group and will happily share links to their online stores.

Australia
Bev's Cross Crafts, Spreyton, Tasmania https://www.bevscrosscrafts.com.au/
Crafters Cupboard, Berwick, Victoria www.crafterscupboard.com.au
Memories on the Murray, Murray Bridge, SA  https://www.memoriesonthemurray.net/
Natalie May Scrapbooking, Dover Gardens, SA https://nataliemay.com.au/
Scrapbook Superstore & More, South Penrith, NSW https://www.scrapbooksuperstore.com.au/
The Scrapbooker's Confetti Box, Swansea, NSW https://thescrapbookersconfettibox.com/
The Scrapbook Store, North Perth,WA http://thescrapbookstore.com.au/ 
Time To Create, www.timetocreate.com.au

Belgium
Cart N Scrap Art, Antwerp, www.cartnscrapart.be
Créatelier Caracolle, Liège, www.createliercaracolle.be

Canada
Clipper Street Scrapbook Company, Langley, BC. www.clipperstreet.com
Paper Art Creations Inc, Leduc, Alberta, www.paperartcreations.com/
Scrapbook Centrale, Dollard Des Ormeaux, Quebec www.scrapbookcentrale.ca
Scrap Addicts, Edmonton, Alberta www.scrapaddicts.ca/
Scrap and Bean, Edmonton, Alberta scrapandbean.com/ 
Scrapbooking Fairies, Drayton Valley, Alberta www.scrapbookingfairies.com/
The Paper & ink Boutique, Calgary, Alberta www.paperandinkboutique.com/
The Scrap Yard, Calgary, Alberta, www.thescrapyardcalgary.com/ 

Denmark
Hobbyboden Scrapworld Samso www.hobbyboden.dk

France
Eirl Bancon Cartoscrap, Midi Pyrenees, www.cartoscrap.com
Fée Du Scrap, Saint Sébastien-Sur-Loire, www.feeduscrap.fr/
Horizon Créatif, Ste Jalle www.horizon-creatif.fr
Instant Créatif, La Possession, La Réunion, www.icreatif.re
Katzelkraft, Ingwiller www.katzelkraft.fr/en/
Kerudoc Creation, St Yvi www.kerudoccreation.com
Le Grenier des filles, Pierre Benite
Page de scrap, Saint Pavace, www.pagedescrap.fr/
Scrap Déco Home, Goutrens, www.scrapdecohome.fr/
Toutencolle, Dun sur Avon www.toutencolle.fr

Finland
Heidin Korttipaja, Istunmaki, www.korttipaja.fi/fi
Piia Paper, Kittilä, www.piiapaper.com/fi

Germany
Stempelbar, Berlin, www.stempelbar.de
Stempeloase Munich, Munich www.stempeloase.de
Stempelfee Shop, Hilden www.stempelfee-shop.de
Stempellaedle, Stuttgart, www.stempellaedle.de/shop

Greece
Scraps N Pieces, Kallithea www.scrapsnpieces.gr

Italy
Immagine SAS di Rapaccini, Rome, www.immaginelab.com
Il Negozio Della Mamma Di Cle, Torino, www.ilnegoziodellamammadicle.com
Marte Savona, Savona, www.martesavona.it
Pezze E Colori, Lissone, www.pezzeecolori.it/ 
Piccole Passioni, Siena, www.piccolepassioni.it

Japan
La Wadao, Odawara, Kanagawa, www.lawadao.com
Tiny Dots, Funabashi-shi, Chiba www.tinydots.shop-pro.jp

Netherlands
De Hobbystudio, Genemuiden, www.dehobbystudio.nl/
Doe@ding,Spijkenisse doeading.nl/
Hobbycompleet de Duif, Leeuwarden www.hobbycompleet.nl
Stampingcorner, Capelle Aan Den Ijssel www.stampingcorner.nl

Norway
Hobbygarasjen, Kopervik, www.Hobbygarasjen.no

Spain
Cien por Cien Manualidades, Barcelona,  www.100x100manualidades.es
Ideas 10 Manualidades Y Scrapbook, Bilbao ideas10manualidades.com/
Marakiscrap, Tarragona, www.marakiscrap.com
Scrap & Papers Experiences, Barcelona, www.scrappapersexperiences.com
The Paradise Corner, Barcelona, www.theparadisecorner.com

Sweden
Butik Elva, Staffanstorp, www.butikelva.se

Taiwan
Mandy's Cards, Taipei www.facebook.com/mandy.card.77

United Kingdom
Amelia's Creative Crafts, Studley, Warwickshire  www.ameliascreativecrafts.co.uk
Art from the Heart, Harrogate, Yorkshire www.afth.co.uk
Blade Rubber Stamps, London www.bladerubberstamps.co.uk
Crafts at The Malthouse, Herstmonceux,  East Sussex, www.themalthouse.co.uk/
Fave Rave, Stourbridge, West Midlands www.shabbychicstencils.co.uk
Loobi Crafts, Leighton Buzzard, Bedfordshire, www.loobicrafts.co.uk
Papermaze, Ipswich, Suffolk www.papermaze.co.uk/ 
Stampers Grove, Springbank, Lilliesleaf, Melrose,Scotland www.stampersgrove.co.uk
The Artistic Stamper Craft Store, Faversham, Kent www.theartisticstamper.com
The Forget me not Kraft Kabin, Rochford, Essex, www.TheForgetMeNotKraftKabin.co.uk

USA
Artistic Artifacts, Alexandria, VA www.artisticartifacts.com/
Artistic Studio Creations, Fayetteville, Georgia www.facebook.com/ASCbyCrystal
Craftiness, Chatsworth, CA, www.craftinessonline.com/
Ephemera Paducah, Paducah, Kentucky www.ephemerapaducah.com
Everything Scrapbook & Stamps, Lake Worth, Florida www.everythingscrapbook.com
Frantic Stamper, Oregon www.franticstamper.com
Free Heart LLC, Denver, Colarado, www.freeheartllc.com/
Golden Hills PaperCrafts, Fairfax Station, Virginia, www.goldenshillpapercrafts.com/
Joggles, West Warwick, Rhode Island, www.joggles.com
PaperCraft Clubhouse, Westbrook, Connecticut, papercraftclubhouse.com/
Qingquing's Stamp Shop, Portland, Oregon
Runaway, Art & Craft Studio, NE Salem, Oregon www.runawayart.com/
Simon Says Stamp, Columbus, Ohio www. simonsaysstamp.com
Topflight Stamps, Irmo, South Carolina topflightstamps.com/

Our brand is only available from established stockists who are VAT/ GST/ sales tax registered and for whom product education is a core principle. We would rather supply a few hand selected stockists, than the greater masses. If you would like to apply to be a stockist, you can find our more about our supply criteria here.

PaperArtsy Links
Facebook Group PaperArtsy People
Facebook Page PaperArtsy