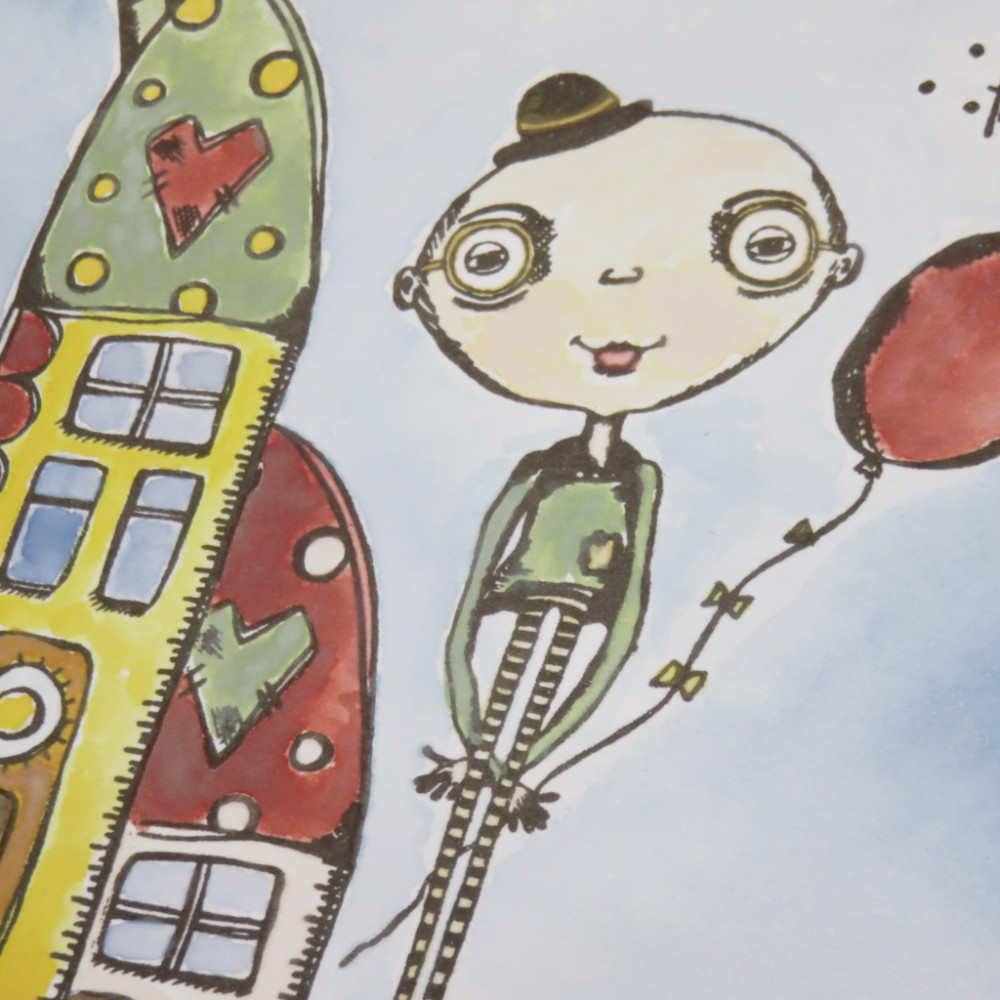
Showing posts with label EDY21. Show all posts

Thursday, 19 May 2022

2022 Topic 07: Specimen Jar {by Riikka Kovasin} with Darcy stamps


Heippa everyone, it's Riikka Kovasin from Paperiliitin blog with you today, and I'm here to share with you my take on the "Specimen Jar" using Darcy's stamps. It ended up being quite a circus and not a single actual jar!


When I first read the brief about the topic, my thoughts went to cabinets of curiosity, but then my train of thought took a strange turn to Dali. An image of "The Burning Giraffe" popped in my head with the bizarre human-styled creatures with boxes. I thought that maybe stacking matchboxes on top of each other and adding some details might be interesting and a different kind of approach to the subject, and then got excited about the idea. Like persons are vessels of their experiences and memories or their secrets and desires. 

I hope that my take on the "box people" ended up being less frightening than Dali's version, but you could tweak this structure to fit your style easily by changing colors and stamps. What I also found interesting was the idea of putting something inside the drawers. What makes the character tick, what are his or hers inner workings or secrets? Or what about doing this kind of character as a gift and adding little present to each box? The possibilities are endless! 


I wanted to pair the joyous and quirky Darcy stamps with vibrant colors, almost going with primaries! Somehow I immediately saw the characters wearing blue and red, not so much yellow. Now come to think of it, I assumed it was the happy colors than then guided my ideas more to the circus feelings of a big tent and colorful clowns.

So, first I grabbed two Fresco Finish acrylic paints, China (FF101) and London Bus (FF37). I also picked my gel printing plate and some white cardstock. These would become the makings of the bodies of the characters. I opted to make the matchboxes white and decorate them with colors rather than make the boxes out of colored cardstock. In the end it worked beautifully with the white ruffles! Making the boxes out of one color also allowed me to play with the height as I could mix the boxes between different characters.
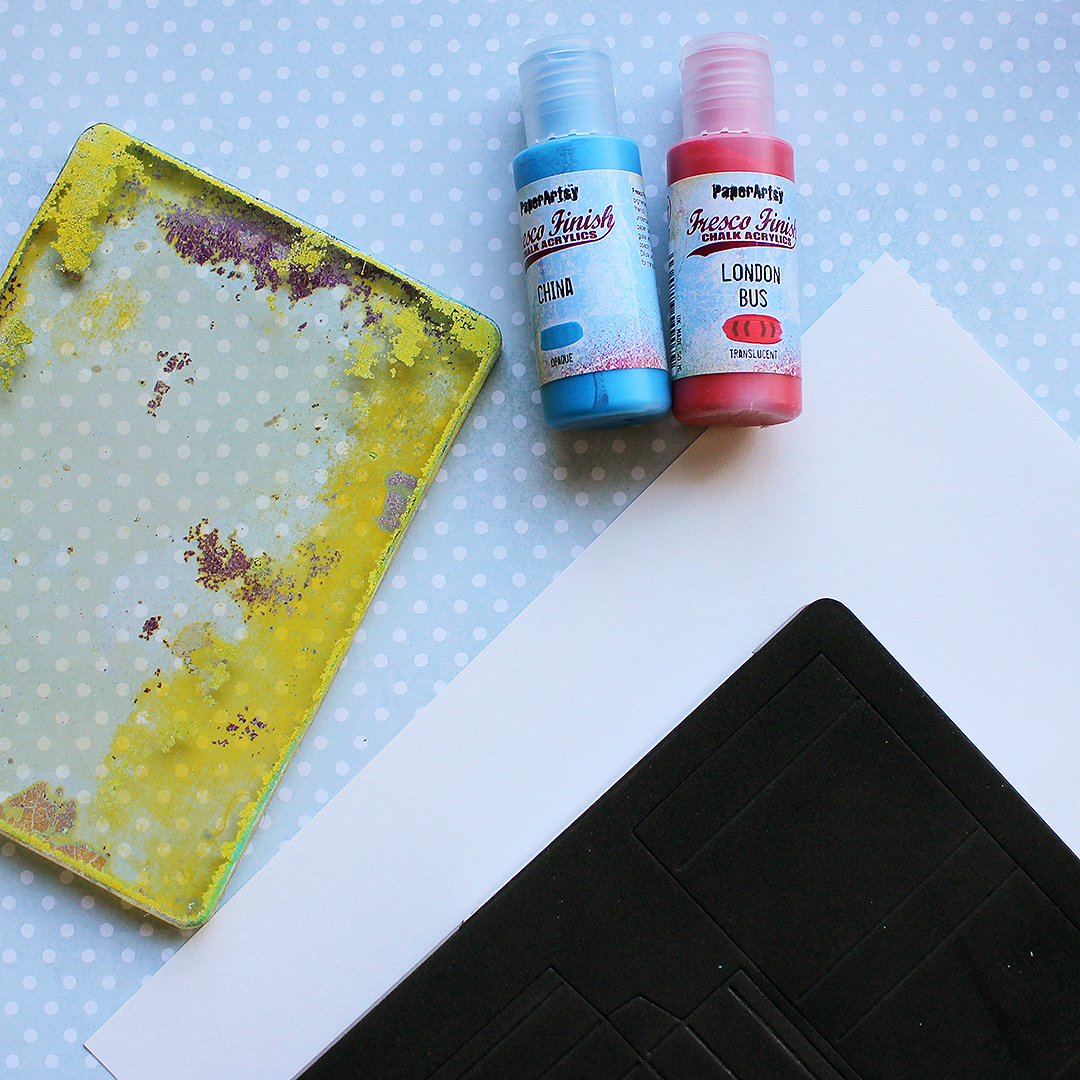

I patterned three pieces of white cardstock using different patterning tools. I made one blue, one red and one sheet with two of them mixed. The blue one I patterned with stripes by using a comb-like tool to go through the paint surface before pulling the print. For the red one, on the other hand, I made polka dots using bubble wrap. I pressed the bubble wrap to the wet paint surface on the plate before pulling the print. The purple version I patterned using a packaging of glue sticks. This caused a bigger dot pattern. 
 
 
I then cut the matchbox pieces out of white cardstock using a die and measured them to find out the measurement for the colorful bits. I cut the gel prints to cover the sides of the character but also smaller pieces to be added to the front of each little box. The side pieces are also holding the characters together.

First I cut just thin strips out of the prints but before I could add them, I needed to think about the height of each character. I chose to go with three different heights to have a more varying look rather than use the same height to all. I also didn't want the characters to have equal difference, like 6, 8, and 10 boxes, so I ended up doing one with 8 and the others with 5 and 4. 

I measured the height of each stack and added score lines accordingly so I could fold the piece nicely. I used double sided tape to adhere each box on top of each other and then the decorative strip around the stack. 


I also added the little pieces of the prints to the front of each little box matching the colors to the strips surrounding the stacks. 

As you can see, I chose the blue striped piece for the tallest character as I really liked the look of it. Then the red dots and purple-ish dots are almost the same height. The reason I chose the purple to the smallest character was that the print was the poorest and had a smaller section with a good pattern. This way I could use it to the maximum. 

 

Now that I had the bodies of my characters almost done, it was time to concentrate on their heads and inner workings. 

I chose a fun set by Darcy with two characters as the heads (EDY21) and then stamped elements from another Darcy set (EDY08) to be used as the items inside the drawers. I filled one sheet of white cardstock with the elements and after coloring them, I actually made another sheet with the elements I felt were needed to fill the designs. 


As you can see, I didn't stamp the characters completely, but only concentrated on their heads. This is because for these box people I didn't need more. I used the same thing for parts of the buildings as well, only inking a part of the stamp I thought I would use. Like for the hats I only stamped the roof of the house, not the whole building. 


I then colored the characters and parts coming to the drawers using brush tip markers and paint pens. I followed the same bright color scheme I'd decided with the paints, but added a touch of yellow in there as well. To highlight some details I used a white paint marker and drew each character rosy cheeks using a pink one. As with the stamping, I only colored the bits I thought I would end up using - like the cogs or the door.
 
 
To add a bit of marvel and wonder, I then made a sheet to be added inside each box. I wanted the drawers to reveal something magical, or maybe elements of magic, so I made a sheet of golden stars on a yellow background. 

I first colored a piece of white cardstock using a yellow tone of Infusions Dye Stain, Golden Sands (CS05). I sprinkled the crystals on to the sheet, added water and then used a big brush to cover the whole area with the dye. After drying the sheet I then added some golden stars on top using a Darcy stamp set (EDY08) with embossing ink, sprinkled golden embossing powder on top and melted the powder. At this stage I also thought to add some golden sequins to each drawer, but on a later stage decided against it.
 

Then it was time to fill each drawer with the just created dazzle and the vibrant elements! Some of the drawers ended up having just a little detail inside while others had a bigger element. This stage was so much fun! Thinking which detail to put inside which drawer. 

Instead of stamped details the drawers could hold some personal nicknacks as well or even found ephemera! Or what about a mixture of stamped items, personal pieces and vintage ephemera? Or even little rhymes or verses! There's so many possibilities! 


I used foam tape to add the little pieces inside the drawers to make them pop up more from the starry background. 


As a final stage I then needed to add the heads to the characters. I was first thinking of cutting a tiny slit to the top most box and sliding the head through it but the strong circus and clown feel I had been gathering the whole time resulted another way. Instead I steadied the heads with a big ruff. I cut a thin strip of white cardstock and accordion folded it. Then I adhered the ends together and turned the strip into a rosette of sorts leaving a small gap in the center for the head. I used hot glue to make the rosette and support the head in place. For one of the ruffs I used a strip of the gel print instead of just white cardstock. This was to have some variety in the bunch. 

I was happy that even though I added quite a big hat to each character and their neck was super thick, their heads were supported enough by the ruffle to stay upright! If you are using a thinner cardstock and it seems that the head keeps nodding, you could add either a wooden stick or a piece of wire to the back to support the head. This of course then means that the finished piece has even more one side where it's supposed to be viewed from. I did think if I should add another head facing the other side, when doing these, but then I thought that would be too strange. A bit too Janus like. On the other hand, I could have added a crazy ball of hair to each one thus making the characters more viewable from either side. 


After adding the heads and ruffles in place, the characters seemed to miss a little something. I was thinking about adding hands, but as the characters in the stamp set (EDY21) had really thin hands, I got no help there. I found it funny to draw the hands now that the heads were stamped. But instead the other character had a balloon in the set! So, now that I was already thinking these characters as a part of the circus, what could fit better! 

I made the balloons out of colored, stamped balloons and a length of wire. I used hot glue to add the wire to the balloon, poked a hole to the box using a needle and then pushed the wire through some hot glue to that hole. That way the glue secured the wire and made it sturdier. 
 
 
So, as the last detail I added some balloons to each character and then gave them a row of buttons running down the stack of boxes making up their bodies. I chose pink buttons for one, purple to another and yellow buttons for the tallest one. The reason I used pinks instead of red is actually due to the fact that all my red buttons were too big or too dimensional for these! 


This project pushed me a bit out of my comfort zone and I love it! I'm not usually accustomed to such a vibrant color palette, but I really like the end result. What I also like is how easily you can change the appearance of these characters by using different colors or stamps. 

I hope you'll give these characters a go! Think about the way you want them to look but also what treasures they hold inside, what you want to communicate with them. Or then just have fun, add elements together and see where you end up! It's not always about the finished piece, but about the journey.

Xoxo Riikka

Monday, 17 September 2018

2018 #16 Reinkers: Experiments with Rats, reinkers and EDY {by Raquel Burillo}

2018 Topic 16: Reinkers


Rats! Yes that is right!! Re-inkers and rats...2 words I never thought I'd be writing in a sentence!  Read on!! ~ Leandra

Hi everyone! Raquel here from scrapcosy. Today I’m bringing you 2 different projects (and therefore, 2 videos) that I’ve created for the Reinkers challenge.

You would think reinkers just exist to add ink on your wasted ink pads, however, as you may have seen from the intro post and as you will see here and the rest of the weeks, you can do many other things with them. At my end I will show you about 5 different uses and I will use my favourite stamp set by Darcy EDY21 and one of her new stencils from the latest release PS115.


Watercolour - Welcome Home


For this technique I decided to use the distress oxide reinkers as watercolours. I selected for my palette: fossilized amber, faded jeans, aged mahogany, vintage photo, bundled sage, peeled paint and a touch of picked raspberry). I stamped my images on a 5 by 7 piece of heavy smoothy paper using versaFine Clair fallen leaves, which seem to repel water very well and don’t get as much covered as regular archival or regular versafine. This is my go to ink when it comes to this technique. I used my PaperArtsy white craft mat as a palette and I put a tiny drop of each one of the inks on it, then with a waterbrush (or a brush dipped into water) I added water to the drop, and I started colouring my stamped composition. I used the stamp set EDY21 by Darcy.  


I did some masking to create a little neighbourhood out of just one house (I love that house!!) and I used just 5 colours of ink for the entire piece.


And since my composition was crooked, I decided to attach it to a dark background a bit twisted so the actual floor is flat.


I really spent a relaxing time with this project, I really enjoyed playing with the reinkers in this way! If you want to see it coming to life, here is the video:


Experiments with Rats


Then, I decided to experiment a little bit more. I recently bought a vintage photo regular distress reinker for my inkpad, since I was running out of that ink again… It’s my favourite ink to add a final vintage touch on projects. And I also had the Vintage Photo distress oxide reinker. So I decided to use both reinkers (regular and oxide) to create the same project in 2 tiny cards out of smoothy heavy cardstock and compare the results. Regular Distress ink is translucent and Distress Oxide ink is opaque so even if I used the same colour, I thought the results should be a bit different, and I was right. Here is a video with all the details of my experiments, but I'll also write down the main steps and techniques used.


The first technique was to create my background. I used 2 big drops of Chalk Fresco Paint on my craftsheet, I extended them with a palette knife and added one drop of Vintage Photo Oxide ink on one and regular ink on the other one, I mixed the paint loosely and dragged and touched each piece of card on the corresponding puddle of paint until I got full coverage. I got a pastel look and when dried it with the Heat Tool it surprisingly became pinkish. I didn’t finish there, I added some water on the leftovers of the sheet, picked it again with my card, sprayed on the card some drops and heat set, until I created that typical distressed background full of drops, splashes and all but in a softer version. They got similar colour but the oxide one (left) was lighter in colour.


The second technique was to add ink through the stencil. I just put a tiny amount of ink in my craftsheet and lifted/smudge it using a piece of cut-n-dry foam and I added the buildings using Darcy’s new stencil PS115 to my background. I had to headset the ink, since I’m applying a non permanent ink on a non porous surface, so it takes a while to dry. The regular distress is translucent, so I can still see some of that texture (drops etc.) I created (first picture). Distress Oxide (second picture) is opaque so all that texture becomes covered.


Then I added the floor on my background. For that I used the cobweb part of the stencil (covered with tape to create a flat line) and I used Grunge Paste through the stencil. For my third technique I mixed a drop (2 for the oxide ink, since they are smaller due to the type of applicator tip) with Grunge Paste and stencilled each rat. At first they looked similar in colour but when dry the regular distress rat (first picture) was much darker than the oxide one (second picture). With the leftovers of each sponge I aded some ink on the borders of the card and on top of all the GP areas (floors and rats) to add more texture.


At this point, the 2 cards were very similar but one was significantly lighter (oxides) than the other one (regular) so I decided to bring a quote about light and darkness as a final touch to my little experiments and Alison Bomber’s stamps EAB02 were just the perfect match


I used the stamp with the quote “If there is light, then there is darkness. Pitagoras” for my final technique. So I got a piece of cut-n-dry felt and I created a mini inkpad of distress oxide vintage photo (regular) to stamp my quote twice on a piece of card. Why I did it twice? Because I wanted half a sentence on one card and half a sentence on the other card AND I wanted my margin to be as wider as I could. If I had just stamped the quote once and had cut it by the middle, the margin I would have got would have been too narrow for my taste. So I cut each sentence from a different stamped quote. And this time I went for the same ink for both cards (regular distress) so there would be something coordinating between them. I finally assembled these on a light brown card (for the oxide sample) and a dark brown card (for the regular one) and I used crunchy waxed kraft paper torn by hand, one flat (oxide) and one crumbled (regular) to create an intermediate layer between the piece and the card base. I decorated each piece with a metallic star.


Thanks very much for reading! I hope you liked the techniques and I encourage you to get your reinkers out and come up with other new techniques. As you see, one colour it’s enough to experiment. And just consider that the ink is a very concentrated liquid paint, so almost anything you do with paint can also probably be done with a reinker.

If you want to stay in touch or see more about me, here are my social media links

To join our challenge and win a PaperArtsy Gift voucher:

Simply make something arty relevant to the topic, and link your creation from any social URL (eg. Instagram, Pinterest, Blog Post etc) sharing your original make to this challenge page.

The current topic link Topic 16: Reinkers will close 17:00 (London Time) Sunday, September 30th 2018, and the winner will be announced 2 hours later at 19:00.

All links go in the draw to win a PaperArtsy voucher for £50 to spend on our retail website. Please make sure we can contact you as a prize winner - it helps if you share your contact info from the platform you opt to use.

Good Luck! If you have any questions, don't hesitate to ask!

Monday, 18 June 2018

2018 #11 Enshrined: Welcome to my Home with EDY {by Helen Chilton}

2018 Topic 11: Enshrined


Another extraordinary post from Helen Chilton to kick off this blog topic! I love what she has done with Darcy's newest stamps, a veritable fairground of excitement! ~ Leandra

Hi everyone, it's Helen with you today, and I'd like to share with you my project on the theme 'Enshrined". When I first saw this theme I thought of Russian icon type things but that didn't really fit with my stamps.

These wonderful figures by Darcy just begged to be cut out and sat with bent legs to create dimension.These characters are also fun and quirky so I decided to make my shrine equally so. In contrast to my last very muted post colourwise (Vintage Neutrals), this time I went all out with vivid, in your face colour which should brighten up any day.


I'm using some of Darcy's recent stamps and a Kim Dellow stencil...

 Eclectica³ Darcy Set 21 (EDY21)

PaperArtsy Stencil {EKD} 040 (PS040)


I'm making my shrine from a large plastic ribbon spool.


I thought I'd put houses round the edge so stamped a long strip to fit - note they're all at different heights to add interest.


Colouring was easy - I went as bright as possible! I've used Distress oxide ink re-inkers as they're very quick to use. It's also much quicker to watercolour all the images at once - I tend to do all the yellow bits, all the green bits etc., working from light to dark so you don't have to change the water too often.


This white Posca pen is great for stencilling. I liked Kim's design as the circles and stripes fit well.


Not being that great at cutting circles I just got out the emery board to rub down the edges.


Then it's really a case of putting it all together. The houses at the back tuck into the strip and are fixed that way.


I added wire to make it a bit more enclosed and 'shrine-like' (maybe I'm thinking of 'entombed', not sure?) and then added twiddly bits.


I reinforced the back of each figure with a cocktail stick.


Love the way he really sits on the edge.


I've added a strip round the tiny cotton reel as well.

This has to be one of my favourite type of projects to make - I love working out how to design and construct something and these stamps were really inspiring. I was working on quite a tight time frame for this so needed something that was quick to make yet effective.

Upcycling a ribbon spool meant that the characters were literally put on a pedestal - have a look round at what you've got to see what you could use to make your shrine. I looked at a glass bottle, boxes, tins, the back of a canvas....

I hope this has inspired you to have a go!  
Helen

Blog: A Splash of Colour


To join our challenge and win a NEW Zinski apron:
Simply make something arty relevant to the topic, and link your creation from any social URL (eg. Instagram, Pinterest, Blog Post etc) sharing your original make to this challenge page.

The current topic link Topic 11: Enshrined will close 17:00 (London Time) Sunday, July 1st 2018, and the winner will be announced 2 hours later at 19:00.


All links go in the draw to win a PaperArtsy creative apron. Please make sure we can contact you as a prize winner - it helps if you share your contact info from the platform you opt to use. We have NEW APRONS ARRIVING ANY DAY - we're super excited!

Good Luck! If you have any questions, don't hesitate to ask!