Season's Greetings from PaperArtsy HQ,
We hope you are relaxing after the crazy-busy lead up to this holiday period, and perhaps now is the time you get to chill a bit. For us, it is a chance to look back at the year that was, and remind you of some of the wonderful posts our bloggers have shared over the year!
This year, we changed up the blog structure a little, we added a theme to arch over the 3 topics of each quarter. We try to offer 3 types of topics: they might be project, colour or designer focused.
Dounia has selected some posts from Topics #1: Shrines, #2: Tetradic colours, & #3: Designer Focus on Seth Apter. It's agony choosing just a couple of posts to showcase each topic; there are just so many that really are incredible creative offerings! If you want to seek the entire topic, then she has included links to the topic intro, and you can go from there to look back at each of the posts, you might even like to leave a comment.
Get ready for a bit of bling, brightness, and blooming good fun as we look back on the first 3 topics of 2023!
Leandra

As mentioned above, we added quarterly themes as a 'red thread' across the topics for an additional layer of fun! It is a new tool for us (and you) to guide the creative process and spark inspiration. We hope they may prompt you, and our bloggers to try new things.
For Quarter one the theme was 'Tracks' which can be interpreted many ways: mark-making, eg. the tracks your tools leave in your art; paths, trails or perhaps maps; in a more literal sense it could be following railroad tracks; it could also relate to travel and adventure. Let's not forget more abstract meanings: following in someone’s tracks, or creating your own, going off the beaten track… The possibilities are vast! You can discover a few more, and a lot of eye-candy in the theme intro post. Our amazing bloggers did not disappoint in coming up with their own version of tracks, here are few examples:
Claire Snowdon's set of altered cards is a great example of tracks as mark-making. They are sprinkled in all the layers of the beautiful background. Be sure to check her original blog post to learn about her process and management of colour. I love the contrast between the grungy background and the simple and sharp focal elements. Her chosen sentiments can also be interpreted as building a path for yourself and reminding yourself to keep on track!

Jenny Maples took 'following a track' literally with a journal illustrating the buildings and birds seen along a walk in her town. She also added some mark making for good measure! These elements really help bring interest to the quiet areas of her pages to balance the focals. I love the contrasting mix of textured background, sharp buildings and whimsical birds. She makes it all work together! All the other beautiful pages are also shown in her original blog post

Renata Peley chose to go with 'tracking'. It could be an animal, a celebrity or your progress but in her case, it is fairies! She made a beautiful fairy tracker kit with all you might need in your search for the elusive magical creatures: reference portraits, instructions and even a vial of fairy dust! The creativity and attention to detail in her project is amazing! Discover all the elements of this intricate project in her original blog post.


Celebrating the new year, the first topic of 2023 was SHRINES here on the PaperArtsy Blog! Shrines are present in most cultures and religions, in an incredible range of size, styles and uses to honour gods, saints, ancestors. From pagan offering boxes crafted from natural materials to the intricate and bejewelled or metal embossed catholic reliquaries, everything is possible.
Nowadays, personal shrines are popular among makers, a way to honour, preserve and display crucial pieces of our life. This topic was an opportunity to explore what we deem sacred or significant enough to be worthy of a special artistic display. For more artistic and crafty inspiration, check the Topic intro post!
Let's start with this modern and funky triptych by Etsuko Noguchi, inspired by Japanese spirit shrines and her history with PaperArtsy. That substrate certainly immediately brings 'shrine' to mind. Perfect for bird royalty! And how fun and fresh is this colour palette, playing on the complementary purple and yellow to make the birds pop! This shrine is intricately embellished on both sides so be sure to visit her original post to see al the details.

Perhaps you missed this series of matchbox mini shrines by Riikka Kovasin? A very personal piece inspired by Finnish mythology while also celebrating the members of her family. I love how she experimented with polymer clay to create these amazing half-erased stone icons partially hidden by greenery. So evocative! Her original blog post is certainly worth a read as the Finnish folklore tale is fascinating, plus a chance to peek inside the shrines - quite a surprise!

Let's not forget this beautiful fabric shrine by Victoria Wildings. She was inspired by Catholic pocket shrines to make to remember her mum with a deeply personal project, using mainly upcycled materials. To decorate it, she beautifully translated JoFY stamps into embroidered flowers contrasting nicely with the denim. It is such a labour of love so be sure to check her original blog post to see all her work.


In 2023, we are continuing our exploration of the colour wheel and all the possibilities it offers. As a reminder, in 2022, we had already covered:

Source: Alex Guzman
After exploring 2-colour and 3-colour schemes last year, it was time to discover 4 colour combinations within the realm of Tetrads. These are composed of two pairs of complementary (opposite) colours. You can see below this creates 3 different types of schemes, with varying levels of contrast and harmony:

Source: Alex Guzman
This allows for endless possibilities, especially when using a non traditional colour wheel. However tetrads can be a bit troublesome to balance than with 4 colours to juggle, so be sure to check the Topic intro post for a lot of tips and tricks and some picture inspiration.
Ellie Knol chose rather classic starting colours: Yellow Submarine, Blueberry and Claret for her red. She then selected a 'skinny rectangle' scheme. In a skinny rectangle, there are the 2 pairs of complementary, and therefore contrasting colours, but they are right next to one another, allowing for subtle variations. The contrast is then between the warm and cool groups, rather than between the individual colours.

Ellie kicked off her project with a gel printing session. Be sure to check her process in her original blog post! The resulting prints were elevated in these notebooks covers. The colour contrast between the mainly warm warm print and the cool background is quite characteristic of tetradic colours in general and the skinny rectangle in particular. I love how she used the blue of her palette to create shadow and depth in her print and focal images.

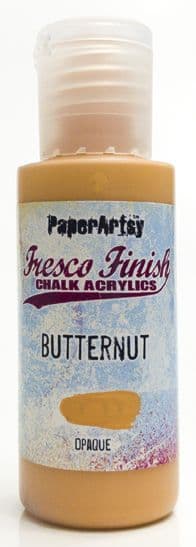
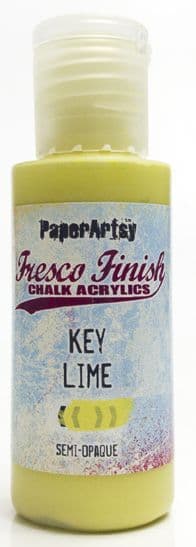
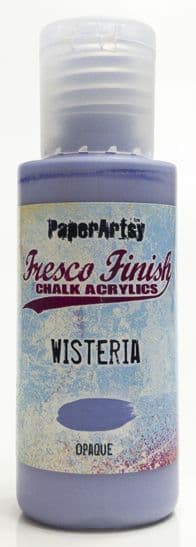
Liesbeth Fidder-de Vos extracted a classic rectangle scheme from her wheel, made unique by her choice of muted non-primary starting colours: Key Lime (greenish yellow), Wisteria (purple) and Butternut (orange). The whole wheel is full of subtle, original tones! The rectangle is the most classic (and easy to use) tetrad; the four colours are quite distinct and contrasting but will still harmonise well.

Liesbeth used her colours to bring to life this very dimensional tunnel card. Each layer is mainly one of her chosen colours. This separation by layers is a good way to avoid clashing colours. Her use of little touches of additional colour then brings everything together. The more you look at it, the more you notice all the textures and subtle details! Pictures of all the layers and, technical details and more are in her original blog post, so give it a read!

Martha Ponsanesi went a step further in wheel-customisation and chose a neutral, Nougat, as one of her starting colours, adding Berry Nice (purple) and Coral. Look at that wheel! She then chose a balanced square scheme full of soft and delicate colours! Among the tetrads, the square has the most colour contrast, with two spaces between all the colours. It creates palettes with a lot of 'pep', softened here by the creamy opaque Frescos that the Nougat creates.

With this beautiful palette, Martha built pages for a mini photo album. She went full production chain so be sure to check be sure her original blog post to see all the elements and pages! I love how she played with the different colour combinations inside her square scheme. She used one main colour per page with the others as accents. It is another great way to balance tetradic colours without your project looking gaudy or too busy.


Another new development on the blog for 2023 was to shine a spotlight on our amazing designers and their unique and varied styles. It was a chance to share with you more about their backgrounds, discuss their crafting philosophies and discover their design process. We invited our bloggers to explore the designers, and asked them to put their twist on the collection.
Already a confirmed artist, Seth Apter entered the PaperArtsy designing family in August 2016 and now has more than 35 A5 stamp sets, 30 minis and 30 paint colours, with 4 more coming early 2024. His grungy style is loaded with abstract elements, inspirational quotes and versatile textures - instantly recognisable. Learn all about his artistic start, his inspiration, and his creative process in the topic intro post as well as his live interview with Mrs PaperArtsy. Now let's see our bloggers' interpretation of his products!
We love this assemblage by Renata Peley. It was a project outside of her comfort zone, exciting to see our bloggers try a new groove! The 3D aspect caused her quite a bit of trouble but she prevailed! I love the attention to detail: every element is beautifully planned and finished. Go check her original post for a better look at all the amazing layers!

Going in a different direction, and proving Seth's products can be colourful and very feminine, what about this scrapbook layout by Asia Marquet? She certainly shares Seth's love of circles! I love how she manages to combine soft colours with bold designs and grungy elements with glitter. Keeping white space helps the striking portrait integrate with the rest of layout. Be sure to learn all of Asia's composition tricks in her original post.

Finally, I hope you did not miss Keren's sewing experminets: dyeing and paper-casting. what an eye opener to the possibilities! I know she was not a fan of the final colour of her dyed fabric but I personally love this colour palette with its soft contrasts and pops of colour. Each of her tags is a mini project with its own journey and techniques making her original blog post well worth a read!

We'll be back in a few days with more highlights from the PaperArtsy Blog, hope to see you again!