


Hi everyone, Keren Baker here today, so delighted to be sharing about creating an Art Doll. I love the variety of styles of Art dolls: they can be fantastical, lifelike or something else. I guess I'm drifting towards the 'something else'.
Rather than creating a doll from scratch, I thought I'd use something already with proportion and physiological features - kind of like a creative shortcut. Turns out, it didn't turn out very much shorter at all!

I used decoupage, sculpture, folding and plenty of painting - lots of fairly straightforward techniques that anyone can try and ended up exploring a much more complex topic.

When I start, I always gather my supplies and let them decide upon the direction I'm to head in. I really wanted to use a doll a bit like a Barbie- and hoped to get one from a charity shop- but alas, they didn't have any. In a stroke of luck, they had two vases instead which proved to be the pivotal design decision.
I usually try and get my substrates second hand in order to give them them a second life so was so pleased that I could use my charity shop haul. Here's what I gathered initially.


With the main theme for this quarter being 'transparent', I wanted to use some of the Fresco Finish Chalk Acrylic Paints that were transparent or semi-opaque so I mainly used Tango, Mustard Pickle, Sargasso, London Bus & Blew.
The reason for this colour scheme was inspired by Queen Elizabeth I, but that theme didn't come together until I started designing the piece! Confused? Keep hanging in here with me!


As I looked at how I'd use the doll, I put the doll into the round vase. Not only did it look like an old fashioned toilet roll holder (!) I was astonished by the doll itself. Just look at her shape!

So this is what we're giving some young girls to play with...what does it say to them about their own bodies? It clarified what my art doll should be about; beauty and our obsession with unrealistic standards. I'll explain more about each part of the doll as we go. First up- the head.
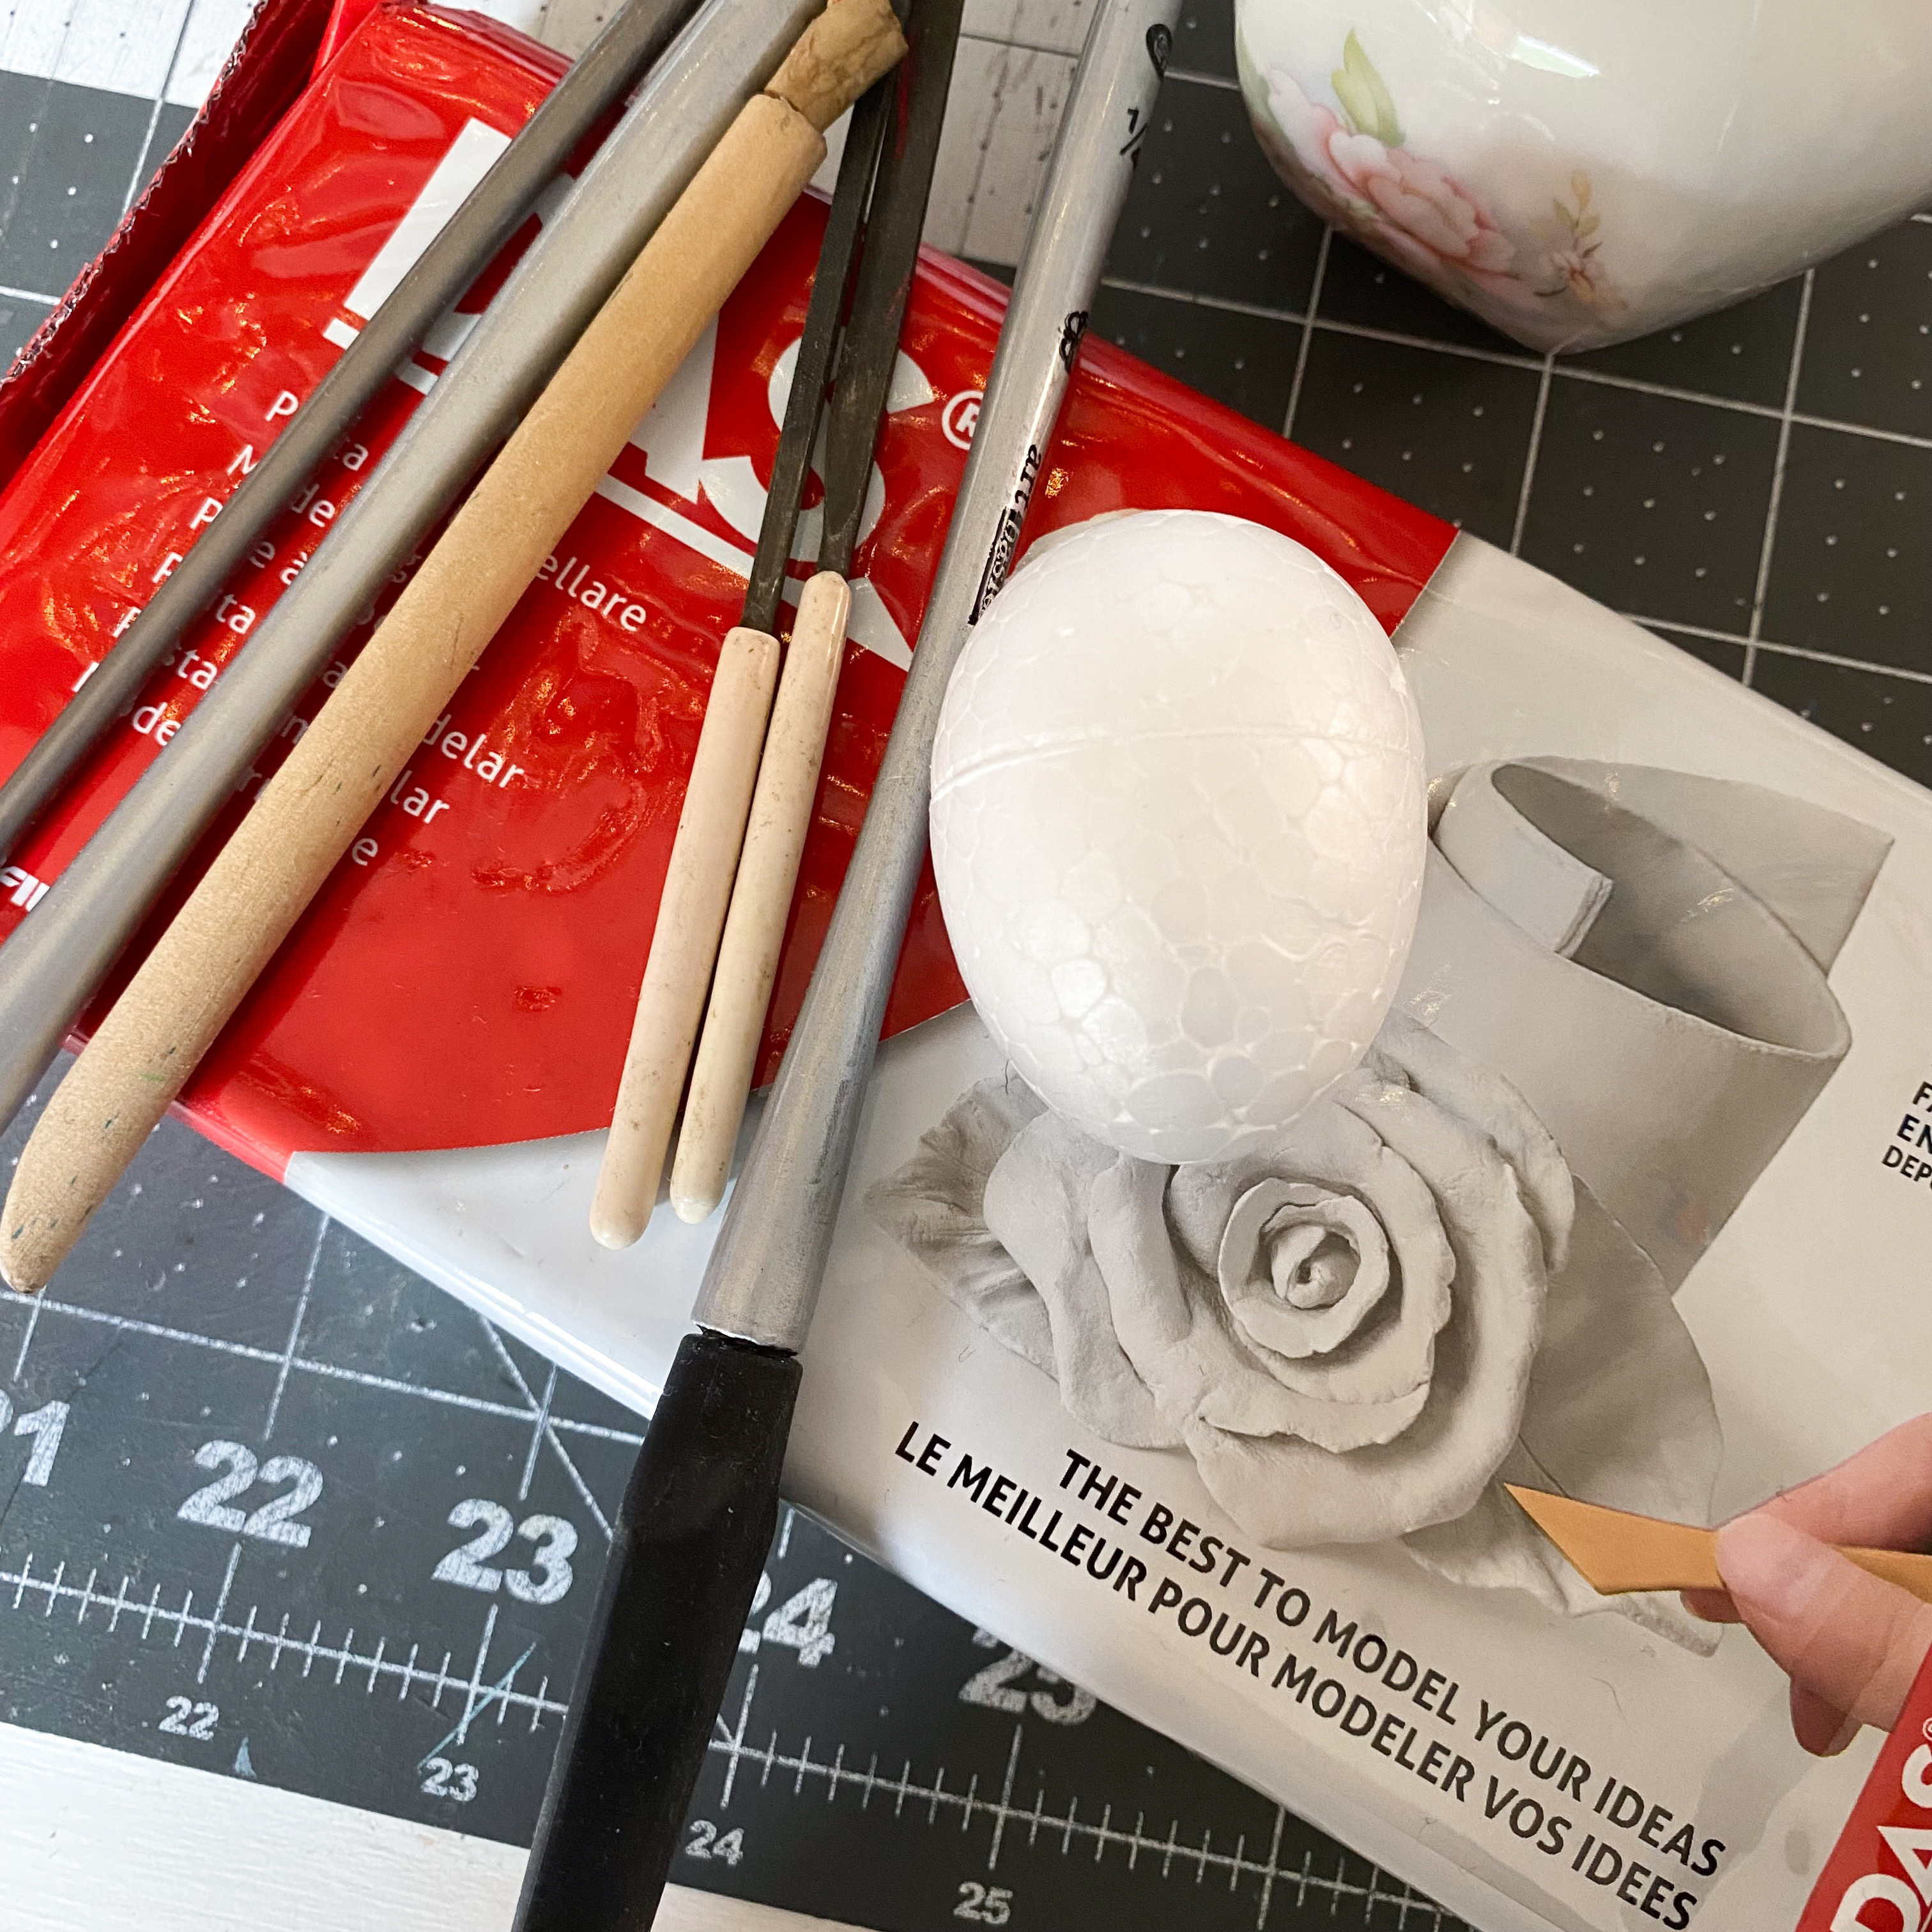
I thought Air Drying Clay would be perfect moulded onto a styrofoam egg as there isn't too much weight in either and therefore wouldn't topple the vase. Sticking 3 cocktail sticks into it was helpful to give it balance as I built clay onto it.

I knew there was potential but was a little nervous about creating and sculpting the face.

Taking courage, I added a thin layer of clay and then added chunks to build up the forehead, nose and cheeks.

I'll show you the finished face later. Next I wanted to work on the body. I cut the arms off the doll and decided to add PaperArtsy tissue paper (which by the way, is awesome decoupaged onto things) and added that to arms- which resulted in a transparent effect.

The sculpting was taking shape. I finished covering the whole vase. My kids at this point thought that what I had created was horrendous. To be fair, they weren't far off the mark!

Adding more strips of tissue and Matt Mod Podge helped make a secure bond for the arms.

Here she is- certainly not a traditionally 'desired' shape. Many things that are unique but not necessarily what we might emulate. The next challenge was how to give her features that would make people think and question.


There was plenty of adding to do. I love JOFY's flowers and wanted to paint them in oranges and blues.


Trying to decide what to next was quite a decision. I knew the flowers would be draped around her but how was she to look? What about her hair?


I googled how to create curls with wool. Apparently winding them around skewers, adding boiling water over them and then putting in the oven for 15 minutes. Allow them to dry and you've your very own semi-permanent perm!!!

I wanted to explain the details in this section - how they all relate to this comment upon what society says is good and desirable.
This first photo shows Adelina's face. Her features are pronounced, her nose is long and she has wrinkles and not perfectly smooth skin. I was tempted to file and smooth her face, but that's not real is it?

If you look at her face closely- you might notice 2 unusual things. Firstly there's an 'E'. It stands for 'Error'; much of what is fed to us via social media, advertising and TV/films isn't the truth. It feeds our insecurities and can damage our sense of self- particularly younger people (& not just girls).
The second addition is the list of numbers over her mouth. She is gagged by those 'numbers', numbers that define clothes sizing. Not able to articulate the sense that there is no 'normal' and those sizes have a restricting influence on her.
.jpg)
See the back of her? Her hair? It's not thick, voluptuous. It's thin, with gaps. But does that matter- does it define us? Who are we? Is it our outer 'beauty'. Is what we look like what counts?

Here's the scribbly painted flowers. I didn't want them to look perfect- I wanted them to be real. I wanted them to cascade organically around her. The 'beauty' lettering is from the set 'Words 2'. The font is perfectly imperfect, just like me.

Want to know her name? I've called her Adelina as it means beautiful in Romanian- which is the original provenance for the £1 charity shop vase.

Here she is, surrounded by everything natural and beautiful. Flowers just content to bloom and be who they were meant to be. She seems at home amongst the poppies, speaking silently and deafeningly that real beauty isn't what it seems. Those people that you are drawn to because of who they are rather than whom they are trying to portray in their clothes or makeup or manner.


I love a piece of artwork that makes me reflect and be thoughtful. It has been a good reminder to me to cultivate the inner me more than the outer one. My wrinkles may be increasing but hopefully my character is deepening.
What does this piece make you think about? Do you have any opinions about societal norms and could you create a piece of art about something that's important to you? Have you ever made an art doll and what type of doll would you make?
Keren x


