Saturday 29 April 2017

2017 #7 Found Coffee {by Raquel Burillo}

2017 Topic 7: Found Objects


If you are a coffee addict like me, then this post is certainly not only practical, but beautiful to boot! As we embark on a spring bank holiday weekend here in the UK, this is the perfect project to enjoy your extra day of free time!

Hi everyone, Raquel here from Scrapcosy. 

Today I’m bringing you a project that I wanted to do for months: a nespresso capsule holder! Well, at home I was not the only one craving to get it done… I had created a card stock base using a cereal box, cut it and resized it to fit 5 boxes of nespresso capsules (measurements at my blog) and painted with white gesso that had been wandering around the kitchen for some time (it was even a bit dirty with coffee splashes… If I had given it a little more time it would have decorated itself completely! hehe) I was being chased by my boyfriend to actually finish it and finally hang it from where it should be. So when the new topic #7 Found Object was announced at PaperArtsy blog, it seemed the right time to complete this project.

I really enjoyed the project and I believe that the fact of playing around with found objects helped me to give it the right shape. It's plenty of embellishments but I believe I managed to make them coordinate. What do you think?


I’ve incorporated different found objects, like the bulb which I kept for some reason (it was so cute and tiny and it seemed it could still work as a bulb) but I never thought I would incorporate it in any crafty project, I also added a handle for a jewellery box drawer and also some brass chains that I normally use to create jewellery and which help me to hang the capsule holder from the Chicago screws (or however those Tim Holtz’s screws are called…).


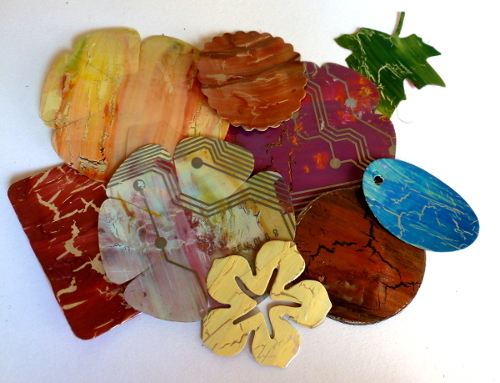
I’ve also incorporated other objects, not found but created by me like the key hole and filigrees. I used some moulds that are actually to create sugar decorations for cakes but they did the trick. I got inspired by Jennie Atkinson in using Paper clay, it was my first time using it and I can tell it will not be the last one. The results are great. I just painted the Paper Clay with some treasure gold (onyxite), it seems just like real metal! And I used treasure gold for the numbers too: I painted a card stock and then I die cut the numbers, they really seem like metal and they coordinate with the other elements perfectly.


I originally wanted to create a dark brown background, because this is to hold coffees, but since I’m in love with Rusty Car Infusions and the wood effect that I can create with it, I went for a more light tone and I feel that it was the right choice. I didn’t paint my box directly, I created 3 panels (front and two sides) in grey chipboard which I painted with fresco paint Nougat and then decorated it before attaching it to the box (all measurements in my blog). I divided the main front panel in 5 by painting 4 division lines with a permanent fine liner in brown and painted each panel independently with Rusty Car Infusions and Satin Glaze and by masking each section with post it notes, as you may have seen me doing for the crafting at ally pally make and take.


For the main decoration I used my favourite stamp set at the moment from my first release with PaperArtsy, ESC03 ...


and its related stencil PS051 ...


...which was very convenient for this project, it was about importers of TEA, but for me now it was about coffee, so the part that I stencilled with grunge paste - just great in the project.


I painted the stamps (stamped with Versafine ink Vintage Sepia) with a mix of Satin glaze and Infusions (creating my own translucent acrylic paint), I used Olive tree Infusion for the leaves and Raspberry Infusion mixed with Rusty Car Infusion for all the flowers and fruits in the stamps.


When all was dry I put in place all the embellishments and started to poke holes for the brads in the chipboard. Then I used the chipboard as a template to poke holes in the cereal box and then I tried to stick both with modpodge, but it wasn't that great, so I kept to my original plan of using the brads to keep everything in place. Now my brads have a double purpose: decorative (nice metallic touch) and structural (keep my chipboard panels attached to the cereal box)


My bulb is attached in a very simple way, it’s just a copper colour wire that goes around the base of the bulb for a few rounds and then I use that same wire to keep it in a lamp-like position. In this case I just poked the hole in the grey chipboard and using a needle. I passed the wire through the hole and fix it with cello tape to the back of the chipboard. This is then hidden when I stick the chipboard panel to the cereal box.


For the rest of decorations, the filigree, the Fleur de lis and the lace, I used a hot glue gun. And since the gun was still hot, I decided to use it to join the joints properly between the front panel and the side panels. That made my structure even sturdier. For the numbers I used modpodge. I'm still amazed at how shiny these are.


My capsule holder hangs from the Chicago screws and I used a chain that goes from one side to the other. Then one string goes from the middle of the chain to my wall. This is easy enough to release in case I struggle getting the expresso boxes in or out.


I’ve recorded a video with all the step by step process (except the creation of the base, which is in my blog with measurements, so I don’t overwhelm you here with too many info). This is a very, very long video but if you have time and are curious about how it was done, get some popcorn or a cup of tea, click play and enjoy!


Well, I hope you had fun, you feel inspired and you want to try it yourself. On my side I'm very happy with the result and at home we enjoy our morning coffee even more. I'll definitely try incorporating found objects in other projects since I enjoyed the experience a lot and I finally found a purpose for some of those nice little treasures that I was keeping for no apparent reason. Have a look at the things you collect, I’m sure you have plenty of little items that would look great in a crafty project! 

If you want to ask any questions feel free to leave me a comment. You can contact me or follow me in social media using the details below:  
Blog: https://scrapcosy.com
Youtube: https://www.youtube.com/c/scrapcosy
Instagram: https://www.instagram.com/scrapcosy/ 
Facebook: https://www.facebook.com/raquel.burilloperez

I adore this idea Raquel! What a masterpiece! And so practical, I bet your boyfriend is pleased you have now created something so wonderful for the kitchen too! Thanks for the video! Totally brings everything you do to life! ~Leandra


We always hope that you  learn something interesting from our blog. Our bloggers deeply appreciate your comments so much, so please take time to let them know you've been inspired! Why not join our challenge by blogging your interpretation of the current topic and link it here?

The current topic link (Found Objects) will close 17:00 (London Time) Sunday, May 7th 2017, and the winner will be announced 2 hours later at 19:00.

All links go in the draw to win a £50 voucher to spend on products of your choice from the PaperArtsy online store.

Friday 28 April 2017

2017 #7 Full of memories {by Ellie Knol}

2017 Topic 7: Found Objects


In this post Ellie creates a gorgeous Forest Floor, almost fossilized scene with the perfect mix of found objects and foliage stamps. Treasures might have been washed down a stream, found on a beach or carefully treasured from the forest floor.

Hi everyone Ellie Knol from PAPER-STAMPS-COLOR here .

Lovely to be here on the PA blog tonight. I've chosen to share with you a board with ... yes .. found objects. 

I really like this theme.. Why?
I have been collecting items (mostly from nature) all my life, even later on when we had children. Looking for tiny seashells (for example), could keep us on the beach for hours and hours. Especially my daughter and I were looking for them. The boys were always running around trying to keep their kite in the air, or making sand castles. 

Nature speaks to me.
The colors, the texture, the smell... it's fascinating. 
AND these colors, AND these stamps, AND the stencil ... they made me choose for this topic!


Wanting nature to frame nature, I used some branches from a prunus. Next time I will do it a slightly different I think, but in the end I like the non-perfectionism of it.


I first made a template of what I would add, and the placement of it. You may notice that I changed a few details as I went! This is where the FUN started! 


These keys have been lying around in my garden for a quite a while now, for a purpose....  to get them rusted. Now they are suitable for my project.

I added a little blue (Fresco Finish - Beach Hut) to it. I also used this blue paint (watered down) to color the background. It is a translucent chalky acrylic paint.

The white accents on the branches have been done with Fresco Finish - Snowflake


The theme ochre is all about rust (and the color of it) as far as I am concerned. 
And the blue reminds me of all the blue skies I've seen in life. Or the color of the ocean .. 


I like the effect of the background details like the stencilled structure paste, and the background stamping, and the bookpaper, and the drippage of color.
 .. I LOVE these new stamps from Lin brown, set ELB33


And this stencil was used in the background too. PS021


Do you see all the treasures in these tiny glass jars? Some tiny little shark teeth, tiny tiny seashells, and some other teasures from sea.


I've also added some seeds from a tree. And an ice cream stick! Stamped on it after painting it with Fresco
AND finally a close-up of my favorite section of this project : 


New miracles made by nature, treasures, to be found everywhere... All leaves get transformed by nature differently...  

I like weather-beaten leaves...and have lots of them. 
The fabric, color, script, stenciling and dots give it a finishing touch!

Do you also have some treasures lying around.. use them in your art. Maybe you'd like to approach it very differently than me, but go make them artsy in some way. You might want to put them in a bigger bottle and decorate it, with maybe a label stating what's in it, or where you found it, or the date you found it. 
I have more plans to use these treasures in my future art! 

Hope I've inspired you to go create (with found objects) today!
Ellie Knol 

Blog: http://elliecreahoekje.blogspot.nl/
         http://ellieatcs.blogspot.nl/
Owner of : https://www.facebook.com/groups/DutchArtJournal/ 
Facebook: https://www.facebook.com/profile.php?id=100008479362838
Pinterest: https://nl.pinterest.com/ellieknol/

Oh this really makes you think about all there is to appreciate in the environment around us! I love you jars full of precious finds, and the twig-frame is fabulous, just perfect! Thanks Ellie for sharing this with us, it's fantastic! ~ Leandra


We always hope that you  learn something interesting from our blog. Our bloggers deeply appreciate your comments so much, so please take time to let them know you've been inspired! Why not join our challenge by blogging your interpretation of the current topic and link it here?

The current topic link (Found Objects) will close 17:00 (London Time) Sunday, May 7th 2017, and the winner will be announced 2 hours later at 19:00.

All links go in the draw to win a £50 voucher to spend on products of your choice from the PaperArtsy online store.

Wednesday 26 April 2017

2017 #7 Lost and Found Jewellery {by Dounia Large}

2017 Topic 7: Found Objects


Every year Dounia helps us at Version Scrap with our make and takes. And every year, she swoops like a magpie on my experimental bits and bobs that I am keen to throw away and rescues them so she can re-purpose and recycle! I cannot think of a better person to blog on this topic as she often sees things in a new way that so she can re-create something interesting out of something run of the mill.

Bonjour everyone Dounia from France here.

So great to be back on the PA blog tonight, after a whole PA week-end in Paris! I've chosen to share with you some ideas to turn little everyday objects into beautiful substrates for unique projects (again).

This fortnight is all about found objects and I must confess the concept baffled me when I first encountered it. Indeed the direct French translation of "found object", "objet trouvé", is our expression for the English "lost and found". I was therefore quite surprised by all the beautiful things people, in my mind, found on the street! I soon realised my mistake but it got me into the habit of looking... To honor that I combined my magpie habit with my love for Crackle glaze to make Spring jewellery.


I was inspired the little city garden of my complex. Weather has been very sunny and hot so everything is green and the rosebushes are already flowering!


For such a project, I begin by emptying my coat pockets and exploring my "weird and cool things that could be useful" to kickstart my inspiration. I try to end up with an eclectic mix, from broken glass to electronic parts, including lots of packaging materials (soda cans, water bottles, etc) as they make cheap and sturdy substrates. Then it's time for Fresco paints!


I alway begin with a layer of glaze to keep the look of the material, then a round of the amazing Crackle glaze. I make a lot of samples at the same time so I can play with colors, opacity and shine. On metal (from soda cans) you can go from bold to subtle. I especially love metallic paint on metal!


On plastic sheets, I like to explore transparency and to build layers, as the background can dramaticcaly change the look of a piece. Again love the metallic colors!

The result is even more interesting if the material is patterned, like this piece of keyboard.  I enjoyed contrasting the electronic design with bright, happy colors!


Cutting those beautiful backgrounds gives pieces with lots of character! Not much more to do to, just a little bit of mixing and matching to achieve a finished embellishment, broach or earing.


I really love this technique, it is very versatile and as the base material are industrial, the results are quite sturdy. Also they're basically free you don't have to worry about wasting, allowing you to play, try new combinations, step out of your comfort zone! Other examples of jewelry made with this technique and found objects are on my blog.

So great to use bits of plastic and stuff to re-create something totally different! I love your jewellery pieces and how you have cut, shaped and layered them so successfully!! Lovely to see you in Paris again!! I hope you have an easy week this week!! ~ Leandra


We always hope that you  learn something interesting from our blog. Our bloggers deeply appreciate your comments so much, so please take time to let them know you've been inspired! Why not join our challenge by blogging your interpretation of the current topic and link it here?

The current topic link (Found Objects) will close 17:00 (London Time) Sunday, May 7th 2017, and the winner will be announced 2 hours later at 19:00.

All links go in the draw to win a £50 voucher to spend on products of your choice from the PaperArtsy online store.

Monday 24 April 2017

2016 #7 Found Heart {by Kim Dellow}

2017 Topic 7: Found Objects

Close up of Found Heart hanger by Kim Dellow

Tonight Kim starts our 'found objects' topic with this little hanging piece. A great combination of found elements with a stamp that perfectly complements the theme.

Hi Guys, it is Kim Dellow back on the PaperArtsy blog and I've got to say this is one of my all time favourite themes because I am a compulsive scavenger! I love found objects and I often come back home with my pockets full of rusty bits that find themselves abandoned in the street. 

So for my share I have combined a street-found washer and a large metal grommet with part of an old comic book page to make this little hanger using the electro-heart from the EKD04 stamp set that I designed for PaperArtsy.

Full view of Found Heart hanger by Kim Dellow

I do love playing about with how we view projects and I love the way this one changes depending on if the light source is behind it or in front of it.
See how transluscent the Found Heart hanger by Kim Dellow is

The old rusty washer and large metal grommet are not just part of the design, and fun to look at, but they are functional too.


Clearing the holes on the found object inclusions to hang the Found Heart project by Kim Dellow

I've used wire to make the hanger as wire is one of my favourite additions to my three dimensional projects.


Getting ready to hang the Found Heart project by Kim Dellow

And have you spotted the colour and texture from the Royal Blood Infusions in the piece as well?


If you like this piece then do come and visit my blog to see more of my three dimensional projects as well as all the other things I regularly share. You can find me at Kim Dellow, on YouTube, where I regularly post project how-tos and walk-through videos, and on Instagram. I'm on all the other social media channels too under my name so let's hook up! 

Thanks Kim, what a great little piece of combined lost treasures, I love that you keep an eye out for them while you are out and about. The ready made rusty bits are perfect with your circuit board heart. ~Darcy

We always hope that you  learn something interesting from our blog. Our bloggers deeply appreciate your comments so much, so please take time to let them know you've been inspired! Why not join our challenge by blogging your interpretation of the current topic and link it here?

The current topic link (Found Objects) will close 17:00 (London Time) Sunday, May 7th 2017, and the winner will be announced 2 hours later at 19:00.

All links go in the draw to win a £50 voucher to spend on products of your choice from the PaperArtsy online store.

Sunday 23 April 2017

2017 #7 Found Objects {Challenge}

 2017 Topic 7: Found Objects

Ali Clifford
Well hello everyone, Darcy here with the latest topic, this time we are scavenging, recycling, treasure hunting and re-purposing. Our new challenge is all about 'found objects' and using them in art. This means not not using things that are intended for art, but instead looking around you and creating art with what you can find. 

Interest in found objects is not new, but instead can be traced back to the 16th century. Items were displayed in private 'curiosity cabinets' these items were not used in art though until the 19th century. The name is a literal translation from the French, objet trouvé, this referred to objects that had non art functions that were then transferred into an art context. 


This led to a small art movement known as 'the readymade' Picasso used bits of a woven chair on his canvas, Degas used real tutu fabric on his ballerinas. 
Scour your attics, old toy boxes, sheds and garages, keep an eye out when walking in the park or the beach. You would not believe how many lost shoe buckles I have picked up in car parks!

Maria
Fantastic papers can be made by stamping with found objects, we will look at a few examples, but I wonder, what have you got in your cupboards and drawers that you could try stamping or painting with? As for painting, why use brushes? what could you use instead. 

Embellishments too can be found, broken jewellery, disassembled clocks, ornaments, clothing. Pretty soon  your eye will be caught by any little object left behind by others, looking at it in a new light, wondering what you can make. 

So much fun can be had trying to make things fit, so who is up for a bit of Wombling?


Before we start, let's see who won the Topic 6: Resin and UTEE Challenge...


The winner of Resin and UTEE is: Claire from Claire's Crafty Makes 


Email Darcy to claim your prize. Darcydotneedles@gmail.com

So, to begin any project we need to create a base, with paper crafts we generally start with painted or patterned papers. So let's see some fabulous examples of how those can be created with all kinds of weird and wonderful objects

Just look at these beautiful delicate flower prints, made with real flowers!

Robin Clement
There are lots of packaging elements that can be used with ink and paint, bubblewrap is a great one but I adore these hearts, who knew the humble loo roll tube could print so well. 

Tammy
Have you tried bubble art? washing up liquid and inks and a straw  can all be 'found' in your house, blow some bubbles and create gorgeous paper. 

Yaser
What about food printing, the thought of this always makes me smile, and takes me back to childhood potato prints. 

This corn on the cob makes a great repeating pattern. 


This next one is stunning, I can't believe it is a vegetable print. BTW I have no idea what Treviso radicchio is but I feel the need to find one!

Martha Stewart
Watch how this painting comes to life just using cotton buds. 


Now you have your painted backgrounds, time for some embellishments. A really effective and inexpensive way to make embellishments is to use clay, specifically paper clay. However you usually need a mould, but what about instead of pressing the clay into a mould, you just press something into the clay?

Glue buttons to the end of corks and you have ready made stamping tools, they are really effective in clay. 

Martha Stewart
Now you can cover your cards or canvasses, wrap boxes and begin to build. use your embellishments and found treasures, what amazing creations can you come up with?

Remember that walk to the beach, look at this lovely arrangement of seaside memories. 


Are you ever lucky to find sea glass, the prettiest things can be made from those little pieces of tumbled glass. 

Crafting timeout
I adore these hanging pieces, found glass,, pieces of driftwood and twine, simple and effective. 

Eliza Martinez
A quick trip to your garage can yield some special trinkets, combine these with your hand made embellishments, perhaps paper beads made with your printed papers and create jewellery.

Joan W
For something a little smaller how about a mixed media playing card, paint it with found objects and then arrange more 'treasures' on top. You will never see a paper clip in the same way again!


Claudia Neubacher
Perhaps you wish to just display your found objects, printers trays are perfect for this, but on a smaller scale a box frame works really well. 


Julia Mckenzie
How about something a little fishy? how cool do those reclaimed, rusty washer look!

Jackie 
Or go all out and create a masterpiece by recreating a classic painting. You really need to open this image up, when you see what is there you will be amazed. 


Jane Perkins
I have to end with this one, it really made me chuckle. From a distance it looks great, really detailed, colourful and intriguing.. and obviously a coral reef. until you get closer...


Lynn Aldrich

...and you see it is made from kitchen scrubbies! Follow the link in her name to see lots more. 

So much fun don't you think? so many ways to use found objects from colouring your paper and fabric to making embellishments right through to creating full pieces of art. I can't wait to see how you transform your carefully hoarded rubbish treasure into works of art.

Don't forget to follow Darcy and Leandra's Pinterest boards if this topic pushes your buttons, you will see plenty more examples to whet your appetite there! I am really looking forward to seeing what you create over the next 2 weeks!

~ Darcy


We hope that you  learn something interesting from our blog. Our bloggers deeply appreciate your comments so much, so please take time to let them know you've been inspired! Why not join our challenge by blogging your interpretation of the current topic and link it here?

The current topic link will close 17:00 (London Time) Sunday, May 7th 2017, and the winner will be announced 2 hours later at 19:00.

All links go in the draw to win a £50 voucher to spend on products of your choice from the PaperArtsy online store.

Challenge Guidelines

  • The challenge is a for you to show how you are inspired by the current blog topic. We encourage you to play with us and explore your personal creative style.
  • Please mention which PA blog post inspired you and and why (link directly to that post). Please don't link to the home page of your blog because then no-one can track back to easily find the original post.
  • We prefer your challenge blog post is created exclusive to our challenge, but if our topic fits perfectly with another challenge, then you may link to both if appropriate.
  • You are most welcome to use stamps/ products/ substrates you have to hand from a variety of companies, we do not expect you to exclusively use PA products - it's lovely when you do though!
  • You can enter as many times as you like. We don't want to restrict your creativity! 
NB. Link closes at 17:00 Sunday May 7th   (London Time)

Prize: The winner will receive a £50 credit voucher to be redeemed on the PaperArtsy Website. The credit voucher includes VAT and postage. We request that one of your purchases is an A5 rubber stamp. You can add any other items to your basket, but the final total should not exceed £50. It's your responsibility to claim your prize coupon from Darcy. 
email: darcydotneedles@gmail.com

NEW Challenge/ winner: Each fortnight on Sunday, the winner will be announced at 19:00 (London time). In the same post, the link for the next fortnight will be posted. 

Good Luck! If you have any questions, don't hesitate to ask!