
2021 Topic 9: Baubles & Bling
It's
time for another designer to share ideas with their own stamps, this
time Tracy is here with a Christmas panel full of bling, shine. Her
clever background gives an impression that strings of Christmas lights
are turned on and shining bright!
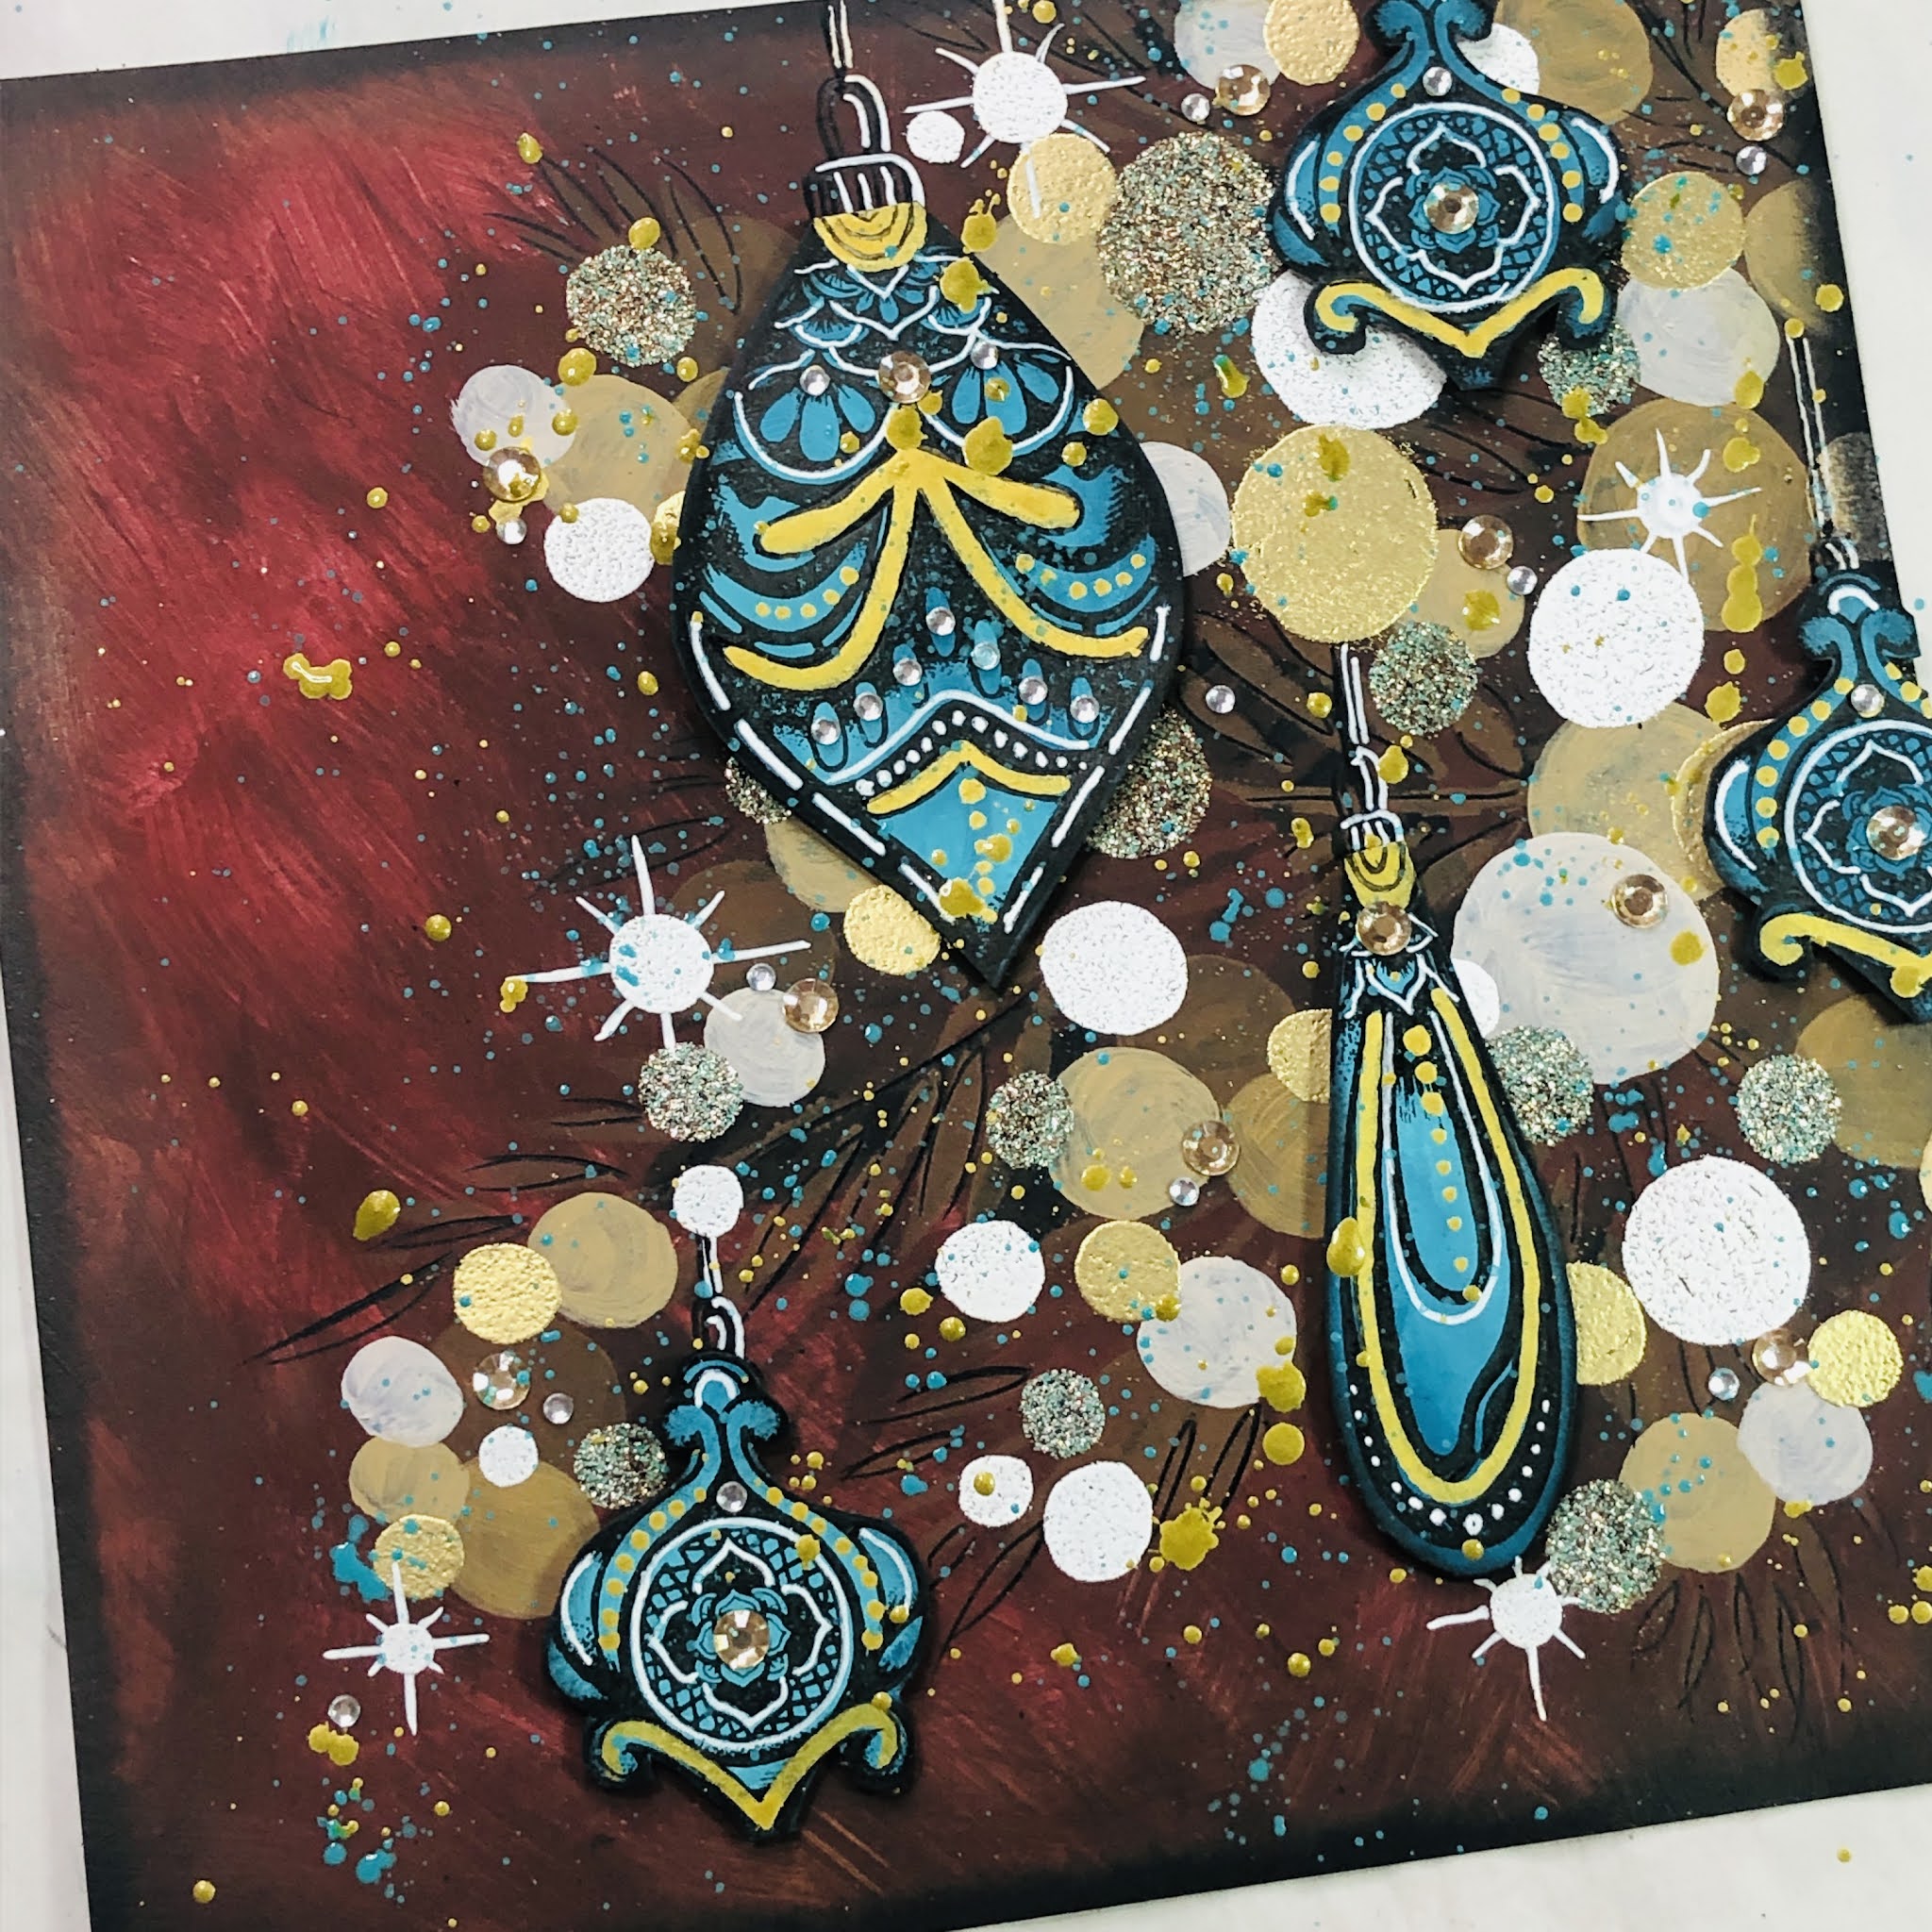
~ Leandra
~ Leandra
Hi everyone, it's Tracy here with you today, and I'm here to share with you my project for the current 'Baubles & Bling' topic......
For
quite some time I have wanted to try my hand at creating a painted
bokeh effect and the current topic gave me the perfect opportunity,
blurred tree lights sparkling behind pretty baubles.
It
turned out to be much easier than I expected and whilst my first
attempt may not be perfect, I am thrilled with the effect and will
definitely be trying this again in the future.

1.
I wanted to create a dark background for this one so that the bokeh
effect would be more prominent so I decided on Fresco Chalk Acrylic (Chocolate Pudding) and Fresco Chalk Acrylic (Mahogany)
for my base colours, using an old brush to create a more textured look,
I decided to keep it darker on one side and lighter as it moved across
the surface.


2.
I wanted to start building the layers for my foliage so to create
depth, I first started with my darkest colour which was Fresco Chalk
Acrylic (Little Black Dress) and my leaves stencil PaperArtsy (PS226).


3.
Next up I used the fern style leaf from my new stencil PaperArtsy,
PS268 (stockists can be found at the bottom of this blog post here) and layered up, first stencilling with Fresco Chalk Acrylic (Chocolate Pudding) & Fresco Chalk Acrylic (Mahogany),
as these are the same colours that were in the base layer. The
stencilling is very subtle, but really helps to build depth. Finally,
the top layer was stencilled with Fresco Chalk Acrylic (Toffee) to add structure.


4. Time to start creating the bokeh effect. I began with my darkest colour first Fresco Chalk Acrylic (Chocolate Pudding),
painting in various sized circles using a flat brush (of course if you
have a circles stencil you could stencil these on instead). You then
repeat the process with the next colour, in this case Fresco Chalk
Acrylic (Mahogany) ensuring
that the circles are different sizes and overlapping in places.
Continue to repeat until you have used all of the colours working from
darkest to lightest... Fresco Chalk Acrylic (Toffee, Caramel, Gold Rush, Vintage Lace)


5.
To add even more depth and sparkle, I next used my WOW embossing pen
and WOW embossing powders, drawing over the circles with the pen and
then heat embossing the powder. I embossed with WOW (Gold Rich, Mojito
and White). I love the depth and detail using the metallic and glitter
embossing powders add.

6.
Next up it was time to create the baubles for my tree, I decided to use
a couple of the stamps from my new stamp set Tracy Scott Set 62
(TS062), (you'll find a link to stockists at the bottom of this blog
post here),
even though they were certainly not designed to be baubles it turns out
that they work perfectly. I used two of the shape stamps and then used
part of the key to create the small bauble. I painted my PaperArtsy Smoothy Card with Fresco Chalk Acrylic (Cerulean) and Fresco Chalk Acrylic (Deep Sea) before stamping directly over the top with Versafine (Onyx Black) ink.


7.
Now it's time for finishing touches.... I added my baubles to my page
using 3D foam to add a little dimension and once attached I went ahead
and added detailing using gold, white and black pen work, drawing the
hangers directly onto my page. All that was left to do was to ink up my
edges with Ranger Inks (Potting Soil, Jet Black) and add some self
adhesive gems to both the tree and baubles and of course splatter. For
this I used Fresco Chalk Acrylic (Cerulean) and Fresco Chalk Acrylic (Gold) It certainly pulls it all together.


Here's a few close up photos so you can see the detail ...


Thank
you for stopping by. I love how this page turned out. Although my bokeh
wasn't perfect (it was my first time after all!!) it still conveys the
feel that I was after for this piece. And whilst the background colours
would not normally be my first choices they really do work perfectly for
this project. I hope you enjoyed my step by step today and really can't
wait to see what you create. I will definitely be creating more with
this technique.
Tracy
Facebook: Tracy Scott Creative Cafe
Instagram: Tracy Scott


