Thursday 30 March 2023

2023 Topic 4 : Mail Art {by Martha Ponsanesi} with Ellen Vargo stamps


Hi everyone, it's Martha (@CraftingMarthawith you today, and I'm here to share with you a peculiar kind of project using some stamps designed by Ellen Vargo.

The new Topic #4 is all about Mail Art, and as chance would have it, wandering around on IG, I came across a very inspiring project and when the new topic came up, I thought it was perfect.

It is a foldable art cube with layers of traditional and gelliprinted stamping.


It was very amusing build layer after layer with PaperArtsy Fresco Finish Chalk Acrylic, Distress Oxide, Grunge Paste and WOW! embossing pwoder.


Let me tell you more about this project
: is an art and charity initiative organized by Diane Beauchamps from France, and you can find it on IG with the #cubicmailproject or follow them on Insta at @cubicmailartproject.

You can send a e-mail at cubicprojectdb@gmail.com, and the lovely Diane will send you by post, a foldable cube with her logo, ready to be decorated by you with your own style. Then at the end of the year she will sell all the cubes in a caritative exhibition.

Here is my cube ready to be decorated.


I chose to use cheerful PaperArtsy Fresco Finish Chalk Acrylic and background stamps by Ellen Vargo.

 
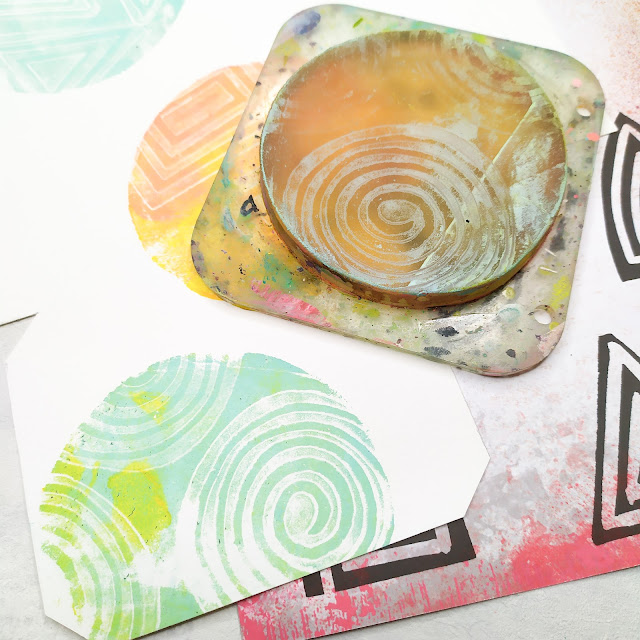
As first layer I decided to use a mini round gel plate on which I stamped several elements from the EEV01 stamp set.


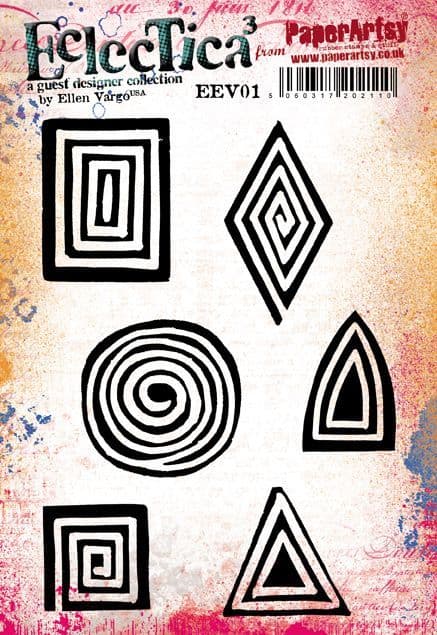
Mixing a couple of PaperArtsy Fresco Finish Chalk Acrylic at a time, here I'm using Aqua Duck Egg (FF199) and Yellow Submarine (FF73)


With a stamp at a time I use my mini gel plate first as a 'traditional' ink pad, then as a stamp its self.


I decided also to optimize my resources, so instead a simple sheet of paper to spread the excess colour, I used a white envelope with which I'll send Diane my cube.


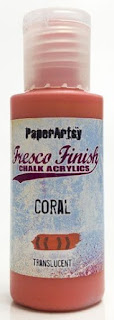
There are the other two PaperArtsy Fresco Finish Chalk Acrylic I chose for the cube: Bubble Gum (FF116) and Coral (FF122)


Here you can see how the cube looks like after the first layer, and the progress on the white envelope.


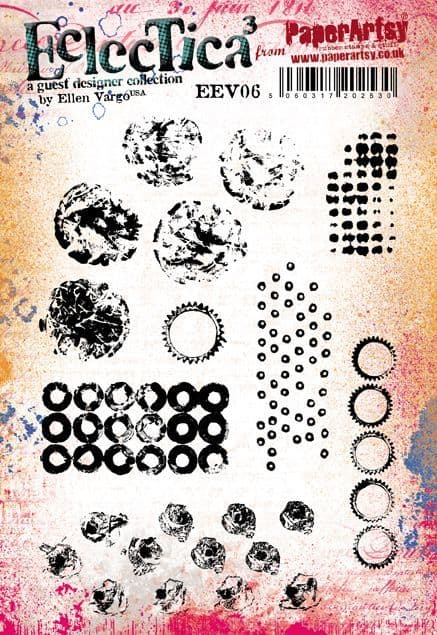
For my second layer I chose Some Distress Oxide similar to the PaperArtsy Fresco Finish Chalk Acrylic used before, stamping with EEV06


Keeping in mind also the Quarter Theme that is Texture, with a spatula I added here and there some Grunge Paste (GP190) to give more interest and get a more cohesive look.


It is a must for me to use embossing powder, so I grab one more time the stamp set by Ellen Vargo EEV01 and stamped in black and embossed with WOW! Clear Embossing Powder.


I really like the grungy and distressed effect achieved stamping over Grunge Paste.


At this point I was very satisfied with how my cube turned out, but I realised that a few sentences would complete the picture.
I think that this adorable mini stamp (MN109) is a perfect match.
Now, if you know me a little after all this time, you certainly noticed that I must have a huge quantity of elements to chose from :)
This is way I stamped and embossed several times on different backgrounds.


And cut the different sentences.

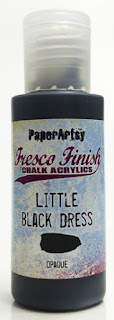
Before gluing the sentences, I added some more touches of black, stamping these little dots from with EEV06 and splatting some diluited PaperArtsy Fresco Finish Chalk Acrylic - Little Black Dress (FF19)


My cube is ready to be shipped to Diane, in its coordinated envelope :)


Some close-ups.


With some repositionable adhesive I tried to see the effect of the assembled cube and I really really like it :).


I am so satisfied with the result, creating an artistic cube in this way was enjoyable, building layer after layer and also the challenge of stamping over the grunge paste, the fact that these stamps have a bold design style helped to achieve a pleasant result, a distressed look rather than a badly stamped effect :).

I hope that more people will join us in this project. The idea that my cube will be among hundred other cubes made by artists from all over the world and for a good cause is so exciting.
Thank you Diane for #cubicmailproject .

Have fun
Martha xxx


Monday 27 March 2023

2023 Topic 4 : Mail Art {by Victoria Wilding} with Nicci Battilana stamps


Hi everyone

Victoria here with you today.

As we step into spring I'm ready to start exploring and filling up on inspiration. I always feel really energised in spring and am buzzing with new ideas to share, so the mail art topic definitely got me thinking about how I could share the creative bug with all of you PaperArtsy people. The result of that thinking is a blog post which is a little different! It's a 'how to' guide and an art call, all rolled into one. What do you mean by 'art call' I hear you say, well keep on reading for all the details!


Many moons ago penpals were a thing and I had penpals all over the world. Nothing beat the excitement of seeing those blue airmail letters landing on the doormat and the Mail Art topic reminded me of those letters. As I thought about it more, it naturally led me to dreaming about creating a project that could be shared via snail mail and take me back to the excitement of real, physical post arriving through the letterbox. And so the PaperArtsy Mail Art Journal was born!

My idea was to create an art journal which could be filled with handmade art from PaperArtsy people all around the world. I mean, just the thought of all that lovely art zipping through the world's postal systems, colour magic hiding behind the envelope and landing on someone's doorstep, gets me giddy! Today's project is going to take you through how I made the handmade journal and then I'm going to give you all the information about how to get involved. 


The joy of a project like this is that you can use literally whatever you have to hand. Art journals are such a personal representation of thoughts and style, with no right or wrong, so anything goes. I was mindful that the art I receive to fill the journal will vary depending on individual makers styles so I wanted to include images and words which hint at the creativity contained behind the covers. For this I decided to use stamp sets 10 and 12 by Nicci Battilana (ENB10 & ENB12). I also selected three PaperArtsy Fresco Finish Acrylic Paints in Hint of Mint (FF87), Niagara Falls (FF205), Venice Blue (FF133) and White Fire (FF121).

Linking into the Quarter 2 theme of 'Texture' I wanted the journal cover to look like it had passed through many hands, using a colour application that looks weathered and what better product to use for this than Infusions coloured stains. I selected the colours Sleight Blue, In the Navy and Royal Blood.

For extra texture I decided to use fabric as the journal covers main substrate, with some PaperArtsy tissue paper (PT01), used ribbons and threads for extra details. And what project wouldn't be complete without just a hint of embossing and glitter! 


Part one of this project was always going to be creating the art journal to fill with lovely art. I was inspired to create a fabric cover using techniques shared by Paula Cheney in her One Lucky Day Blog, to create an oilcloth type finish. To start I got some plain cotton fabric and cut a rectangle measuring 8x12 inches.


I then used a wide brush to coat the fabric with collage medium and whilst wet sprinkled it with Infusions.  


I then spritzed with water to activate the dye. Add more or less water depending on how speckled you want the finished results to be. 


Setting the fabric aside to dry, I moved on to preparing the images I wanted to add to the cover. 
 

Using black Archival Ink, I stamped the images onto tissue paper. 


I then applied PaperArtsy Fresco Finish Acrylics to the back of the images for some subtle colour to show through when viewed from the front. 


Once dry I painted round each image with water to separate the images, creating a natural feathered tear in the tissue paper and help it blend into the background once applied to the fabric. 
 

I then did the same to some PaperArtsy Tissue Paper, to have some more background elements to collage. 


With the substrate dry, I applied the tissue paper images using collage medium. Remember that the rectangle will be folded in half to create a front and back cover for the journal, so place images accordingly. 


Once applied some of the tissue outline was more visible than I would have liked. To try and blend this into the background colour I first applied some colour with a paintbrush. 


And then tried carefully sprinkling some more colour direct to areas and spritzed with more water.


Once dry, I machine stitched around the edges to create some extra texture and a border edge to the cover. I also stitched on the embossed journal name plate on the front cover. 


The tissue paper edges were still more visible than I would have liked, so admitting defeat, I decided to make a feature of it and added a touch of sparkle along the edges using Stickles. 


Then for a final touch of colour, I added some metallic gel ink on top of the images,
 

With the artwork for the cover complete, it was time to move onto transforming the cover into a journal.


I decided to create an inside cover, to give the journal cover a little more rigidity. I wanted to create something relatively plain, so that it won't clash with first and last pages once these are inserted. I cut a sheet of white card to measure 7.5 x11.5 inches and applied PaperArtsy Fresco Finish Acrylics (Niagara Falls & Venice Blue) to the edges using a brayer. 


I then stamped two of the unused images from the stamp sets and coloured them with coloured pencils. 


Next I secured the paper to the backside of the cover using collage medium. 
 

Once dry I punched three small holes, 1/2 an inch apart to the top and bottom centre of the sheet, creating a spine for the journal. I then threaded elastic through the holes, to create  four elastics which will be used to hold the folded paper signatures in place.  


Next I punched two more holes to the middle of the side edge, on both the front and back cover and secured these with a brass eyelet.  


To create a journal closure, I threaded some ribbon through the eyelets and tied in a bow. 


For some final texture, I created a ribbon and thread dangle for the spine. I selected a number of different threads and ribbons and tied these together with metallic thread at one end, passing the same thread through the top holes on the spine to secure. 


The finished journal cover is a bit grungy and hints at the inspiration and creativity lying beneath the covers. And that's where the real magic of this Mail Art Journal begins. 


So, now it's over to you. What art would you like to put in the pages inside? Would you like your art to feature on one of the pages of this PaperArtsy Mail Art Journal? I'd love for this little journal to be bursting with mail art from all over the world. A real PaperArtsy treasure trove of creativity and inspiration, with no right or wrong, just colour magic and creative happiness!

The process to get involved in the #paperartsymailartswap is really  
  1. Sign up here to participate.
  2. Create the art you would like to send me: a postcard, tag or journal page, making sure to use a PaperArtsy product. Send the item off on it's travels through the post, to arrive with me by1st June 2023. More info here
  3. Once the item has arrived with me, I will add your mail art to the journal, take pictures and share on my Instagram stories, and the IG highlight, tagging you the artist. 
  4. I will post back to you a handmade piece of mail art I have made just for you.
  5. Use the hashtag #PaperArtsyMailArt to share your project on Instagram or use the album on the PaperArtsy People Facebook Page. 
  6. Once the journal is complete, I will film a flip through and post to socials.
  7. All participants will have the chance to win a Lucky Dip Box of PaperArtsy products, with the winner announced on the 4th June 2023.

I've done some minimal construction of example pages inside the journal to give you some ideas and options for different ways to contribute. I'll also be adding to the blank pages and providing some inspiration by sharing on socials. 

The construction of the pages is pretty flexible and mail art you could send includes, tags, postcards, labels or full pages. I will build the pages to suit whatever you send, but please bear in mind the sizes suggestions (journal, tag or postcard) as anything bigger than this won’t fit. 


If you'd to send me a journal page, your mail art size needs to be 5x7" (for a single page) or 10 x7" inches, folded in the middle (for a double page spread).
A tag can be #8 size.
A standard postcard is the third size option.

At this link you will find labels to print (A4 or US letter size docs are available) and put on the back of your mailart tag or postcard. There is also an envelope to assemble to send your journal art in. You will also find a challenge guidelines document there too.


So there you have itI hope you will be inspired to participate in the art call for the #PaperArtsyMailArt swap. If you have any questions just leave a message in the comments below or come find me on socials. I can't wait to see what you make!

Wishing you a creative, happy week!

Victoria