Wednesday 31 August 2016

2016 #16 Hello Beads {by Anneke de Clerck}

 2016 Topic 16: Beads,Charms and Dangles

Hi everyone Anneke here.


Tonight I'd like to share with you a post about beads, charms and dangles. I have tons of beads in my stash and I love making cards. No wonder I use beads on my cards from time to time :)


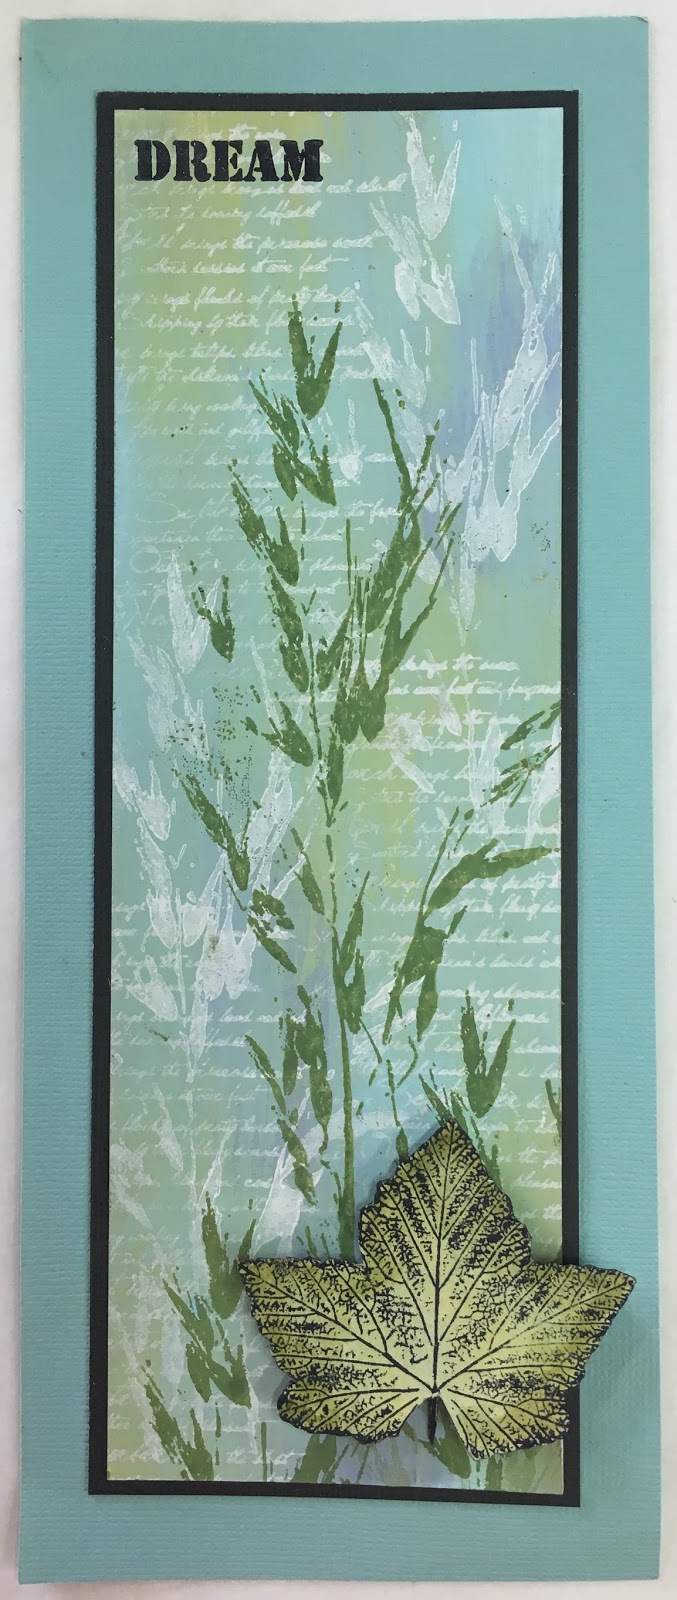
I've made a set of cards and worked with a simple technique for the background. I layered colors of paint on top of each other using my gel printing plate. For this project I've chosen an older Squiggly Ink stamp set, one from the Flora and Fauna series. Love the shape of the stamps, it's a very versatile set. At the end I'll demonstrate a few possibilities to add beads on cards.

Let's get started.

Step One: Gelli Printing
I worked with my 15 x 15 cm gel printing plate and Fresco Finish Chalk Acrylics Zesty Zing, Limelight, Caribbean Sea, Mermaid, Lake Wanaka, Ice Blue, Pixie Dust, Candy Floss, London Bus, Prawn and Bougainvillea. I've cut 4 cards from a sheet of PaperArtsy Smoothy 340grs cardstock.

I started by spreading a small amount of Candy Floss randomly  to the gel printing plate with my fingers. I made a monoprint on each card. Next I repeated this step with Prawn. I changed back and fort with the order of the cards while printing so each card received the same amount of paint during the printing process.


I continued printing, one color at a time. By using this technique the colors are sitting on top of each other, they do not blend together. So there is no chance to end up with muddy colors. It's a simple technique I learned from Kate Crane. Not a lot of thinking involved, just playing!


Step Two: Stencilling
After the monoprinting was finished I added dots by applying Mermaid and Zesty Zing through a stencil (Donna Downey Signature stencil 'Halftone Dots'). 


I added black accents using Archival Ink Jet Black and a stencil (Donna Downey Signature Stencil 'Mini Alpha Rerun').


Step Three: Stamping
I stamped flowers, flower centres and leaves from the Squiggly Ink Flora and Fauna 5 set on scraps of painted paper with Archival Ink Jet Black and cut out.


Step Four: Assembly and Embellishing
On each card I put together a flower, used a strip of painted paper as a stem. I stamped the same flower on gesso-ed vintage booktext as well, used these prints to further decorate the cards. I used the small stamps from the set to do some background stamping. 


Time to add some beads now :)


I decorated two of the cards with a row of dangling beads on a cord.


With my We R Memory Keepers Crop A Dile I set an eyelet on which I knotted the cord.


On this card I attached a strip of painted tissue paper to the bottom of the card using mini staples. I decorated the card with beads, charms and cord as shown. I make sure to only use small beads on my cards.


Here I glued small beads in matching colors to the bottom of the card. I added an orange one to the flower centre as well. I generaly attach beads with micro glue dots or with a very small amount of Tacky Glue. 


The complete set.


I'm sure you have lots of beads and charms in your stash as well. Go get them, give it a try and join the challenge. It would be lovely to see what you come up with!
I just adore the way you put colours together and the amazing results you create so easily! It really is a joy to follow your process, and so fantastic to end up with these perfect cards! Thank you! ~Leandra

We would love to see how you interpret this Beads,Charms and Dangles topic by linking what you make to our 2016 Challenge #16  HERE.

All of our bloggers love to see your twist on their ideas,  particularly if you were inspired directly by their post.

All links go in the draw to win a £50 voucher to spend on products of your choice from the PaperArtsy online store. The Beads,Charms and Dangles link will close 17:00 (London Time) Sunday, Sept 4th 2016. The winner will be announced 2  hours later at 19:00.

Monday 29 August 2016

2016 #16 Charming Shrink Plastic and Clay {by Lucy Edmondson}

 2016 Topic 16: Beads,Charms and Dangles

Hi everyone, Lucy from Lucy's True Colours here.

Tonight I'd like to share with you a post about making clay and shrink plastic charms to decorate a box, together with a background technique using Crayola Slick Stix.

I love using stamps to make my own charms, and both shrink plastic and clay have always appealed to me: shrink plastic because of the way it miniaturizes everything whilst retaining the detail, and clay because I love the solidity of the finished piece. I have kept them black and white on this occasion, along with the box itself, and offset them against brightly coloured fun crayon backgrounds.


Step 1: Charms
To make the crown charms I used the two crowns from Lynne Perrella LPC 003


and LPC 007 


I rolled the oven bake Sculpey out to a quarter inch thickness and then inked the stamps with Versafine in Onyx Black, pressing in well. I then cut then out with a craft knife. The oven baking will heat set the ink. You can use a sanding block around the edges after.


Step 2: Shrink Plastic
Next I used the same crowns and the pen from Lynne Perrella LPC 030 to make the shrink plastic charms, this time using Jet Black StazOn and white shrink plastic. 

Here's a tip, don't do as I did here. I tend to be a bit stingy with my supplies and as the stamps are so small I thought I would use up my scraps. It's not a good idea to do this, particularly if you want several identical items, as you can get some distortion. If I understand it correctly, shrink plastic is manufactured by heating and stretching pieces of plastic in one direction, so if you use your scraps you are likely to change the orientation of the piece so it will shrink in a different direction and might be slightly wider or longer than the item next to it. So it is advisable to use a whole sheet of shrink plastic and work across and down it in rows. 

Anyhow, cut the pieces out with a slight border around them, and shrink with your heat tool and flatten with a mounting block. 


Step 3: Slick Stix
Next I had a bit of fun with Crayola Slick Stix, which are new to me. They are twistable water soluble crayons, very similar to gelatos and distress crayons, but cheaper. They don't come in as many colours but they blend well to create additional colours. I painted my pieces of card with gesso and for my project I wanted two separate colour ways. For my first, I used yellow, orange, blue, and green. I applied them one colour at a time as shown, blending them with my finger as far as they would go before adding the next colour beside it, blending that into it and away from it as far as it would go.


Step 4: Water
To blend and dilute further, I spritzed the card quite generously with water and waited a few moments for some bleached spots to appear for extra interest. I then used a flat paintbrush to go evenly back and forth from left to right with absorbent paper underneath to pick up any colour coming away. As you can see, the top half is much more blended than the bottom. The blue crayon has created an additional shade of green. Spritz again if you want more water spots or more dilution but heat set before stamping. 


Step 5: And repeat
Repeat the process with the two shades of Blue, Purple, and Red crayons.  Stamp a selection of Lynne Perrella images onto a mixture of the two colours of cardstock, clear embossing with Versafine in Onyx black.


Step 6: Box Backgrounds
As you can see here, I used stamps from Lynne Perrella Eclectica LPC003 LPC014  LPC030 LPC034. I added some white highlights with gesso and some extra colour with Fibralo pens on the final pieces. I cut the pieces to fit the box compartments and it took me a loooooong time deciding on placement! In addition to the stamped pieces shown, as you can see in the final pictures I decided to use the text stamp from LPC 014  as the best way to show off the charms. 


Step 7: Box Front
Now for the box itself. I sanded and gessoed it, and then painted it with Fresco Snowflake. Then, holding my breath, I carefully clear embossed the pen from Lynne Perrella  onto all four sides of the front of the box with Versafine Onyx Black. You need to be tentative with the heat gun because of the clear film in the frame. I neatened around the edges of the front of the aperture by gluing a line of tiny black accent beads. I lined the inside compartments with spare pieces of the prepared cardstock in the relevant colours and adhered the stamped pieces in place. Finally, I glued the shrink plastic and clay charms into position.


In this final close up photo, you can see where I have used a little gesso on the faces etc, and some Fibralo pens.


I had such fun playing around with the crayon backgrounds for this project and I love how the black and white has worked against the bright colours! The charms were easy, but it was such a fiddly project to decide which stamped images looked best where. It looks so simple now it is finished! I hope you will have a go making your own stamped charms in shrink plastic and clay, perhaps experimenting with some different colours.

Lucy Blog: Lucy's True Colours Twitter @CraftyLuce

Lucy I love your gorgeous frame with the clever, very beautiful niches decorated so perfectly! All the little charms sit so well in thier individual frames! This project is adorable! ~Leandra

We would love to see how you interpret this Beads,Charms and Dangles topic by linking what you make to our 2016 Challenge #16 HERE.

All of our bloggers love to see your twist on their ideas,  particularly if you were inspired directly by their post.

All links go in the draw to win a £50 voucher to spend on products of your choice from the PaperArtsy online store. The Beads,Charms and Dangles link will close 17:00 (London Time) Sunday, Sept 4th 2016. The winner will be announced 2  hours later at 19:00.

Saturday 27 August 2016

NEW PA Products {By Lin Brown}

Hi Everyone, Leandra here with some amazing new stamps by Lin Brown...

Take a look at Lin's stamps over the years, and every other year she switches it up to something quite new. We started with carved stamps, stamps and dies, sketchy houses and birds, and most recently bold hand drawn flowers. 

This time its still a nature kick, but she really wanted to head back to realistic collage elements, and she got cracking making marks that she knew would be so useful as stamps. I love this new direction, and Lin has plenty more ideas ready to present in the New Year.

So lets take a closer look at the actual stamps...


I'll hand over now to Lin who will explain how her new stamps came into being, and she will share with you a few ideas. Enjoy and don't forget to leave us your comments!

~ Leandra

Hi everyone, Lin here to show you my newest stamps designed for PaperArtsy


Those of you who know me well , will know that I am always looking for a new direction for my art. I have loved all of my previous stamp and stencil releases but recently I have been been longing to get back to the more "artsy" style that I love so much. I have always had a passion for PaperArty's Hot Pick stamps, they always tick all my boxes. For my new collection, without copying the fabulous collages that Mr PaperArtsy puts together, I wanted to be able to achieve similar collage-style artwork from a collection of useful elements.

I had been playing around with my Gelli Plate, printing leaves and grasses using black paint and realised that this would be the starting point for my new collection of stamps. Once I had a bunch of different size and shape leaves, I turned my mind to what would work well with them......... I needed background stamps! Again using my Gelli Plate to help me achieve some cool prints, I gathered together things like corrugated cardboard, sequin waste and mesh to name just a few items.

Tonight we start with a step by step project, to share with you the concept that I had in my head when I was designing these stamps.  


Project One: Elegant Grasses


Step 1: Background
Over a blended background of two pale colour Fresco Finish paints, I used my stencil PS024 with Sage Fresco to create the first layer of my background.


Step 2: Second layer of background
Using Cornflower Blue Archival ink by Ranger, I chose to use the numbers, leaf and very fine script from ELB30 to fill in some of the gaps.


Step 3: Feature
Time for the focal image. I stamped the script with Jet Black Archival in the centre of my card knowing that I would be placing the grass just to one side so that it slightly overlapped the script. 


Step four: Embellishing
A small paint brush and some Hey Pesto Fresco adds just a hint of colour to the otherwise very black grass and some tiny dots of Gold paint adds a little something extra to the stars I stamped underneath.


Extra Notes: I really would like to try and create a collage like this on some fabric and turn it into a mini art quilt. I think it would look fabulous embellished with all kinds of stitching and beading.


I would also like to share a few more finished samples with you. No step outs this time.


Project Two: Wish

This one is a framed canvas using the new stamps to decorate the frame and background as well as some of the focal images. The tag which has some of Tim Holtz Tissue Wrap on it was just lying on my desk from a previous play day and worked perfectly for this project!


Project Three: Leaf Duo


These tags show how I had intended for the leaf stamp to sit beautifully over the image from the corrugated card on ELB29.


Project Four: Single Leaf Tag

This tag shows how completely different the leaf stamp looks when stamped over a more colourful background. This background was created with Tim Holtz Distress Crayons that I blended with Snowflake Fresco Finish paint.


Project Five: Single Leaf

I loved the simplicity of the Snowflake Fresco paint over my pastel background. I really didn't want to cover it at all, so a single leaf from ELB29 added a small focal point allowing the background to shine through in all it's glory.


I hope that my samples have inspired you and helped you to understand the concept behind these designs. There will be more to come in the new year but I'm excited and looking forward to seeing what you guys create with these new images.

My upcoming teaching gigs...
3rd & 4th September 2016 - The Craft Den, Wisbech, Cambs PE14 7DA
1st & 2nd October 2016 - The Street Where We Live, Milton Keynes

You can find me, Lin Brown on...
Twitter: @yoursartfully
Blog: Yoursartfully


Ohhh myyyyy....
 I was so excited to see these new ideas from Lin, and she demoed up a storm at Stevenage last weekend for those of you who managed to attend.

All these stamps are available now from your favourite PaperArtsy stockist, as you know,  we urge you to support your local independent retailer.

Below is a list of the retailers who have already got these new releases in stock ready for you to buy NOW!

Enjoy! ~Leandra

PaperArtsy Stockists around the world with our newest stamps are....

United Kingdom
Artist Trading Post, Powys, Wales.
Artworks, Nottingham.
BellaCrafts, Eastleigh, Hampshire.
Birds in the Barn, Marks Tey, Essex.
Blade Rubber Stamps, Bloomsbury, London.
Clacton Arts and Crafts, Clacton-on-Sea, Essex.
Countryview Crafts, Potton, Bedfordshire.
Craftylicious, Bury St Edmunds, Suffolk.
Crafty Ideas, Studly, Warwickshire.
Keep On Crafting, Bury St Edmunds, Essex.
Loobi Crafts, Leighton Buzzard, Bedfordshire.
Out of the Blue, Chipping Sodbury, Bristol.
Papermaze, Ipswich, Suffolk.
Rowantree Crafts, Carnforth, Lancashire.
Simply Craft, South Glamorgan, Wales.
Stampers Grove, Edinburgh.
That's Crafty, Romford, Essex.
The Artistic Stamper, Faversham, Kent.
The Craft Barn, Merstham, Surrey.
The Craft Den, March, Cambridgshire.

Continental Europe
Expression-Hobby, Marcinelle, Belgium.

Kerudoc Creations, St Yvi, France
Toutencolle, Dun Sur Auron, France.

Stempelfee-Shop
, Hilden, Germany.
Stempeloase Munich, Munich, Germany.

Marte, Savona, Italy

Creafine
, Papendrecht, Netherlands.
Bianca's Toko, Drenthe, Netherlands.
Hobbycompleet de Duif, Leeuwarden, Netherlands.
Leuke Stempels, Nijverdal, Netherlands.

Cien por cien Manualidades
, S.L, Barcelona, Spain
Manu Tam, Madrid, Spain.

Big Time Stempel
, Gockhaisen, Switzerland.

USA/ Canada
Artistic Studio Creations, Fayetteville, Georgia.
Frantic Stamper Inc, Eagle Point, Oregon.
Kept Creations, Whitman, Massachusetts.
Scrap and Bean, Alberta, Canada. 
Simon Says Stamp, Columbus, Ohio.
Vintage in KC, Johnson, Kansas.

UAE
Paper Lane, Dubai, UAE.

Asia/ Pacific/ Africa
Tiny Dots, Chiba, Japan.

Mandy's Cards, 
Taipei, Taiwan

Crafters Cupboard Pty Ltd,Berwick, Victoria, Australia.

Scrapbook Studio
Jeffreys Bay, South Africa.
Stencil Art, Gauteng, South Africa.