Monday 18 September 2023

2023 Topic 10: Tags {by Liesbeth Fidder de Vos} with Emma Godfrey stamps


Hi everyone!

It´s Liesbeth here, and I´d love to show you my 'Tag book shelf tag' ;-) ! 

The topic Tags speaks to me, I love tags so much and use them a lot, in every size. Inspired by the two stamp sets I chose, I got the idea of creating a little tag book that´s placed on a bookshelf, and the 'wall' behind the shelf is a big tag itself.


The theme for this quarter is Typography, so nice and usable in so many ways! For that I used paper from an old book, I used it in three different ways.
I hope you will enjoy the process and get inspired too!


My starting point was these wonderful PaperArtsy Eclectica stamp sets designed by Emma Godfrey: EEG25 and EEG26. I really love the Portuguese atmosphere of the stamps!


At this stage I never know where the projects ends... I was only sure about these things: I needed thick grey-board to make a big tag with a shelf, some wood grain paper for the shelf, cardstock tags for the tag book. For a vintage effect I chose PaperArtsy Fresco paints in off-white (Nougat) and brown (Chocolate Pudding). I also knew I would need some PaperArtsy Crackle Glaze.


First I cut a big tag out of a piece of 3mm thick greyboard. I used a big paper tag as a template and cut it out. My tag is 23 x 11 centimetres tall.


Now that the basic tag is ready, let's decorate it!


To prevent the paint from soaking in the greyboard, I started with two layers of gesso, I covered the entire tag with it at both sides and let dry well. Paint both sides also stops the board from curling. After that I painted the tag with two layers of PaperArtsy Fresco paint Chocolate Pudding.


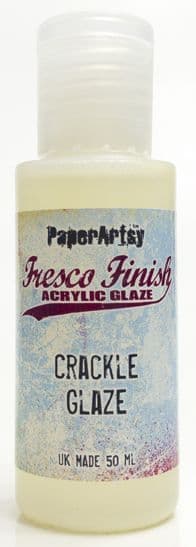
In some places I smeared a bit of PaperArtsy Crackle Glaze, not on the whole surface..., and let that dry well.


Now the magic starts! I painted the entire surface with PaperArtsy Fresco paint Nougat. It's best is to paint this in a quick movement with a generous coat of paint. The thicker the top coat of paint, the thicker the cracks will be!


As soon as everything was dry and crackled well, I stamped the beautiful big tiles stamp from PaperArtsy stamp set EEG25 here and there with waterproof brown ink. I used Tsukineko StazOn ink-Spiced Chai. I also glued some small torn pieces of old book paper onto the tag. The first Typography themed item!


As it was a bit to clean, not vintage enough for me, I sponged the tag a bit with Distress Ink-Vintage Photo, and sprayed a little water to give it an old look. I also sponged the edges with the brown StazOn ink. I think it looks much better now.


From the thick greyboard I cut out a strip for the shelf, 9 x 2 cm, and also two small triangles. I rounded off two corners of the shelf.


Using tacky glue I covered the pieces with wood grain paper (Ranger-Tim Holtz) and sanded the edges with a sanding block to make them smooth and to round them off. After that I sponged them with Distress ink- Vintage Photo and StazOn ink-Spiced Chai. Now it looked like real wood!


I assembled the shelf and glued it onto the tag at 3,5 cm from the bottom. I used tacky glue for it and let everything dry overnight.


The big tag with shelf is ready! Here I added two metal embellishments to finish it off.


That bookshelf needs a book, a tagbook of course, and so that's what I made next. My idea was to create a small leporello tag book. Using my Big Shot and a die, I cut out 7 white tags, 16 x 8 cm. Seven later turned out to be a mistake haha! I write about that later. I decided to add some colour to let everything pop a bit more. I chose a wonderful blue one: PaperArtsy Fresco paint-China.


I temporarily fixed the tags in row with a tiny bit of glue, easy to remove them again, onto a big piece of paper. Using PaperArtsy stencil large PS234 and Fresco paints China and Nougat I made some motifs at the edges of the tags with a small piece of foam.


I think this stencil works perfect with the stamps I used! Those tiles!


After drying I sponged the tags with Distress inks Vintage Photo and Broken China, played with water spray to create beautiful waterspots.


I took the same PaperArtsy stencil PA234 again and sponged the circles with dark brown Distress ink (Walnut Stain) here and there.


Time for some more backgrounds and also focal points! I used almost every stamp of the stamp sets PaperArtsy EEG25 and EEG26 using black waterproof ink. (Tsukineko StazOn-Jet Black) I chose the beautiful door for the front of the book.


Using Distress ink-Walnut stain, I stamped the bricks stamp here and there, and I stamped the city name boards Tavira and Lisboa on a piece of old book paper and cut them out. With  bleach, a synthetic brush and a bit of water I bleached most of the black images to highlight them and let them pop out.


At this stage I looked what the book was going to be and what it still needed now. I tried to fold them together the way I wanted and than I realized seven is to much! Six tags is perfect so I took away the least beautiful tag. :-) Oops


When I was thinking about a nice cover for the backs of the tags I was inspired by our new quarterly theme -  Typography, and I thought : why not continue with the old bookpaper?? So with my tag die and old book pages I punched out 6  perfect book page tags.


Using Distress inks Vintage photo and Walnut stain and a blending tool I coloured them, especially the edges, to make them look very old and antique.


I flipped them over to backside up and glued a long piece of brown  ribbon on the middle of the book paper tags, leaving 2 or 3 millimetres between the tags. The overhanging ribbon is at both sides about 25 centimeters, enough to close the book with, later on.


Then I glued the stamped tags onto the bookpage tags, the ribbon in between. And.. a foldable and closable leporello book appeared!


When I looked at the little book at this stage I was almost satisfied...only some small things were missing.

As the finishing touches I made some accents with a white gel pen: some details of the stamped images, a white spot onto the brown circles, and  highlighting some letters. A black fine liner is used for some accents as well. 

I also used my charcoal pencil for shadows behind the bigger stamped images. I used the charcoal at the edges and wiped it out with my finger. I finished with three lovely ladies (paper art dolls) and small metal ornaments onto the holes of the tags.

I finished by adding the bookpaper city boards I stamped and cut out before. Here below you can see the finished tags better.


Here you see the tag book neatly folded, closed and stored on it's shelf! Here I put it on a small easel.


This 'tag book on a shelf tag' was so much fun to make! And if I may say so I am very happy with the result! I love the colour combination of the three PaperArtsy Fresco Paints: Nougat, Chocolate Pudding and China. I tried to continue that colour combination using the inks and in my opinion it turned out well! And how I love the stamps I used! The Portugal stamps PaperArtsy EEG25 and EEG26 worked perfect here!

I was also very educational: next time I will practice how to fold a tag book before just starting! ;-)
I hope I inspired you to play with tags too, there are so many possibilities! Can't wait to see what you create! Enjoy!

Liesbeth XX


Instagram: liesbeth_fidder

I will teach four different workshops, stamping techniques,  in Finland 6-8 October 2023!
Seinäjoki Areena, Kirkkokatu 23, Seinäjoki
Read everything about it HERE  or HERE (Finnish language)

2 comments:

Helen said...

Brilliant - love the way you've created a shelf for the tags.

Claudia N. said...

What an inspiring tag make, Liesbeth! Love it!
And that you even made a shelf for your tag booklet is the icing on top of the delicious cake! So cool!

Claudia x