It´s Liesbeth here, and I´d love to show you my 'Tag book shelf tag' ;-) !
The topic Tags speaks to me, I love tags so much and use them a lot, in every size. Inspired by the two stamp sets I chose, I got the idea of creating a little tag book that´s placed on a bookshelf, and the 'wall' behind the shelf is a big tag itself.
The theme for this quarter is Typography, so nice and usable in so many ways! For that I used paper from an old book, I used it in three different ways.
I hope you will enjoy the process and get inspired too!
My starting point was these wonderful PaperArtsy Eclectica stamp sets designed by Emma Godfrey:
EEG25 and
EEG26. I really love the Portuguese atmosphere of the stamps!
At this stage I never know where the projects ends... I was only sure about these things: I needed thick grey-board to make a big tag with a shelf, some wood grain paper for the shelf, cardstock tags for the tag book. For a vintage effect I chose PaperArtsy Fresco paints in off-white (
Nougat) and brown (
Chocolate Pudding). I also knew I would need some
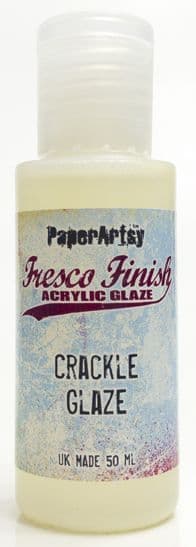
PaperArtsy Crackle Glaze.
First I cut a big tag out of a piece of 3mm thick greyboard. I used a big paper tag as a template and cut it out. My tag is 23 x 11 centimetres tall.
Now that the basic tag is ready, let's decorate it!
To prevent the paint from soaking in the greyboard, I started with two layers of gesso, I covered the entire tag with it at both sides and let dry well. Paint both sides also stops the board from curling. After that I painted the tag with two layers of
PaperArtsy Fresco paint Chocolate Pudding.
Now the magic starts! I painted the entire surface with
PaperArtsy Fresco paint Nougat. It's best is to paint this in a quick movement with a generous coat of paint. The thicker the top coat of paint, the thicker the cracks will be!
As soon as everything was dry and crackled well, I stamped the beautiful big tiles stamp from
PaperArtsy stamp set EEG25 here and there with waterproof brown ink. I used Tsukineko StazOn ink-Spiced Chai. I also glued some small torn pieces of old book paper onto the tag. The first Typography themed item!
As it was a bit to clean, not vintage enough for me, I sponged the tag a bit with Distress Ink-Vintage Photo, and sprayed a little water to give it an old look. I also sponged the edges with the brown StazOn ink. I think it looks much better now.
From the thick greyboard I cut out a strip for the shelf, 9 x 2 cm, and also two small triangles. I rounded off two corners of the shelf.
Using tacky glue I covered the pieces with wood grain paper (Ranger-Tim Holtz) and sanded the edges with a sanding block to make them smooth and to round them off. After that I sponged them with Distress ink- Vintage Photo and StazOn ink-Spiced Chai. Now it looked like real wood!
I assembled the shelf and glued it onto the tag at 3,5 cm from the bottom. I used tacky glue for it and let everything dry overnight.
The big tag with shelf is ready! Here I added two metal embellishments to finish it off.


Brilliant - love the way you've created a shelf for the tags.
ReplyDeleteWhat an inspiring tag make, Liesbeth! Love it!
ReplyDeleteAnd that you even made a shelf for your tag booklet is the icing on top of the delicious cake! So cool!
Claudia x