Showing posts with label Purple Rain. Show all posts

Tuesday, 2 August 2022

2022 Topic 11: Stamp Mash-up {by Nikki Acton} with Tracy Scott, Nicci Battilana and Scrapcosy stamps


Hi everyone, it's Nikki here with you today with some 'mashed up' occasion cards using stamps and stencils from Tracy Scott, Nicci Battilana and Scrapcosy. 


I decided to create some greeting cards using the designers products - although, as usual, my first idea is not what I ended up with! After our 'Leftovers' blog topic I have enjoyed using scraps for collage so thought this could play a part too!


I began by selecting my colours - well actually they were on my desk from a recent project! I do not naturally reach for purples, but the recent project was something for a friend's special birthday... and it is her favourite colour.


I created some prints using my gel plate and selected colours - PaperArtsy Fresco Chalk Acrylics - Purple Rain, Periwinkle and Bora Bora. I also incorporated PaperArtsy stencil - PS336 , by Nicci Battilana, with both paint and simple drawing of the circles with a black or white pen.
 

For some prints I worked on black paper - I discovered recently that when you tear this it gives a wonderful effect!


Next I decided to explore using the large flower image on PaperArtsy stencil PS340 (Tracy Scott). I sponged through the image onto black card with my three colours. I then used a white pen to outline the painted flower before fussy cutting.


On this card I took half of the image and reached again for Nicci's stencil (PS336) and added some white lined circles. I then stamped one of the rectangles from PaperArtsy Stamp Set ETS073 by Tracy Scott on one of my backgrounds.
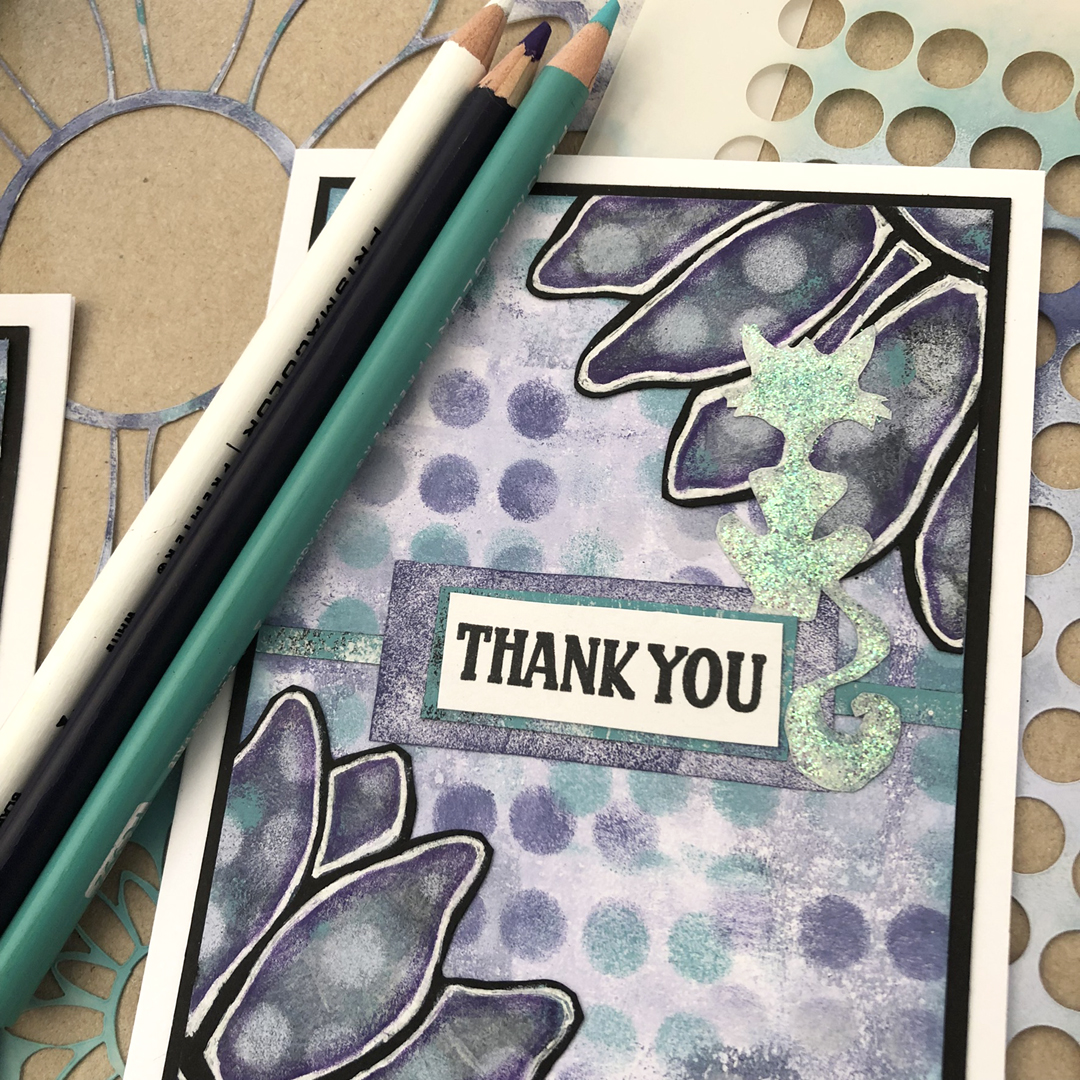
 

I had to use the other half, so cut it again and added some more circles/dots - this time in paint to add to another of the backgrounds. 

I made it quite easy for myself to incorporate the Scrapcosy stamp set - PaperArtsy ESC29. The greetings can be used for lots of occasions and you may have also spotted earlier how I used some of the labels on white paper as one of collaged elements.

The finishing touches on all of the cards included some highlighting with coloured pencils - this adds definition to some of the stencilled shapes. In addition I added some Stickles to each card. For the thank you card I stencilled one of the cats from PaperArtsy Stencil PS287 by Nicci Battilana. Pretty sure the cat is designed for Halloween but not here - he/she is green and sparkly!
 

Another of the rectangles from Tracy Scott stamp set ETS073 was great for layering the greeting on this card.


As I always say in these Mash Up posts - they are a great challenge - limited supplies and trying to make things work together that might seem a little strange. It is fun, give it a go (and don't forget to use black paper for gel prints sometimes!).

Nikki

Tuesday, 14 September 2021

2021 Topic 11: Twinkle Twinkle with ZA {by Tracey Springer}

  2021 Topic 11: Twinkle Twinkle


From a hidden gift card holder to a clever concertinaed tunnel card, Tracey is showing some great kinetic cards washed down with a hearty sprinkle of stars in many forms. Using some of her favourite fun Zini characters, she's twinkled her way to the stars!

Hi everyone, it's Tracey Springer with you today, and I'm here to share a concertina card with a tunnel front for the 'Twinkle twinkle' theme. While I had lots of stamps and an idea it took a while to find my MOJO and know where to start. I ended up with something I really love and explored lots of techniques along the way!


To start I picked out some of my favorite Fresco Finish Chalk Acrylic colours and started painting a very watery wash of circles on my foundation page.


By this stage, I knew I wanted to try a tunnel card (or my version of one) using lots and lots of stars. I cut my page into 5x4in cards and die-cut 3 various-sized circles out of them. I inked the edges with distress ink to really build up more colour (my night sky is certainly not your regular sky lol!).


Then came the fun with Grunge Paste, Fresco Finish paint 'Elephant' and silver stickles. I mixed it all together to give me some grayish silver stars when used with Stencil PS018.


I absolutely love this big star from JOFY 08 set, I colored it in various shades of yellow Copics and decided to add bling and sew it into a shaker star! Really love how it came out.


I then stamped, Copic colored, and cut out lots of stars from these sets: 


I started playing with how and where everything was going to go. To add 'Twinkle' I gold heat embossed some of the stars. I played with the placement of the circle tunnel and well, I ended up liking it better when it was offset.


The circles still needed something more to make them 'pop' so I painted a thin rim of Fresco finish 'Byzantium' (one of my go-to colors!)


Then it was onto gluing on stars and assembling layers with foam tape.


Once I had all of that I knew the perfect Zini character to add (yet another of my favorites!).


By this stage, I decided why not make it a tunnel card with a concertina back?? So I painted a strip on the back of my foundation page with Fresco Finish Lilac FF11.


And wanted to add a surround of stars with Fresco finish 'Byzantium' and Stencil PS018 - It didn't quite look like I imagined (as I watered it down too much and it bled under the Stencil and I smeared it) BUT...I could have started again but instead I played around with it and added inks and gold embossed stars and my 'oops' became an 'actually I like this'.


To finish it all off I added white pen around some of the stars, added lots more cutout stars, these gorgeous word stamps from Eclectica EEG20.
I really couldn't resist adding another fab Zini character, and a pocket slot to hold a gift card.


I really hope you have enjoyed this as much as I did creating it! Run with your ideas, no matter how crazy they seem, make your 'oops' become a 'wow'.

Excuse the two different colours of my project...that's what happens when you take pics in two different lights, oops!

Have fun, take care,
Tracey xx


Instagram: @tracey_Springer