Showing posts with label JOFY75. Show all posts

Thursday, 3 February 2022

2022 Topic 02: Pattern Play {by Renata Peley} with JoFY Stamps


Hi everyone, it’s Renata Peley with you today, and it's my first time here on the PaperArtsy blog, I'm one of the 2022 newbies! As you will see, my style is bright and fresh, and that's what I will show you today for an art journal page that I made with some super-fun JoFY stamps.


I very much enjoy making backgrounds. I know many people say that the focal point is what matters the most and be that as it may, I think that a well-made background makes the focal point stand out, be more beautiful and have more meaning. For today’s topic, “Pattern Play”, I wanted to create patterns that would complement the focal point, grab some attention but still not “steal the show” from the main image.


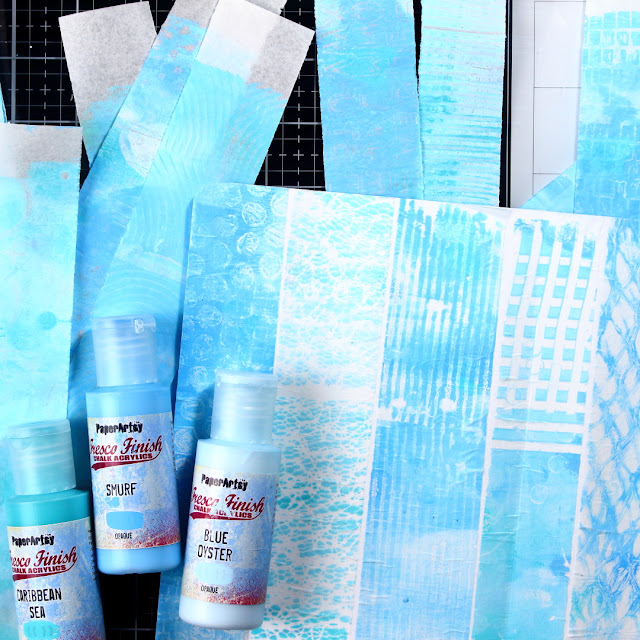
When I think about patterns, what always comes to my mind is the gel-plate and all the ways you can play with the stuff just laying around in the house. And that was as far as I had it planed out. I took some parchment paper, pieces of cardboard, a straw, some plastic cards for texture making (I don’t know the proper name for these), a brush, a bubble wrap and so on. I also tried stamping my stamps on the gel-plate and that turned out pretty, as expected. But now the problem was which pattern to choose. So, at the end I decided to use as many of them as I can. Since I used parchment paper for gel-printing, they were easy to rip into thin, more or less similarly sized strips.


Of course, me being me, I used blue and turquoise colors, or to be more precise Caribbean SeaSmurf and Blue Oyster. The shades that I chose are gentle, beautiful and just ideal for subtle backgrounds. I chose not to use the shades or colors that are too much different from each other, because I think that gives the feeling of a too busy background, as the patterns were already giving enough interest on their own. The next step was to glue them all down to my paper with matte medium. When gluing the parchment paper, some wrinkling happened, but to be honest, that didn’t concern me much and I decided to look at it as a fun texture element.

 

With that, the skeleton of my background was done and now came the time for stamping. On a separate piece of paper, I stamped, embossed and colored the images from the JOFY75 stamp set, as I have planned them for my focal point.
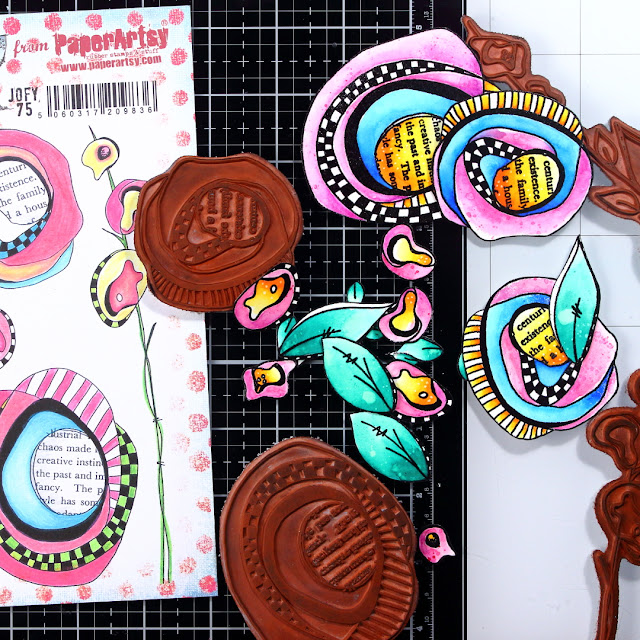

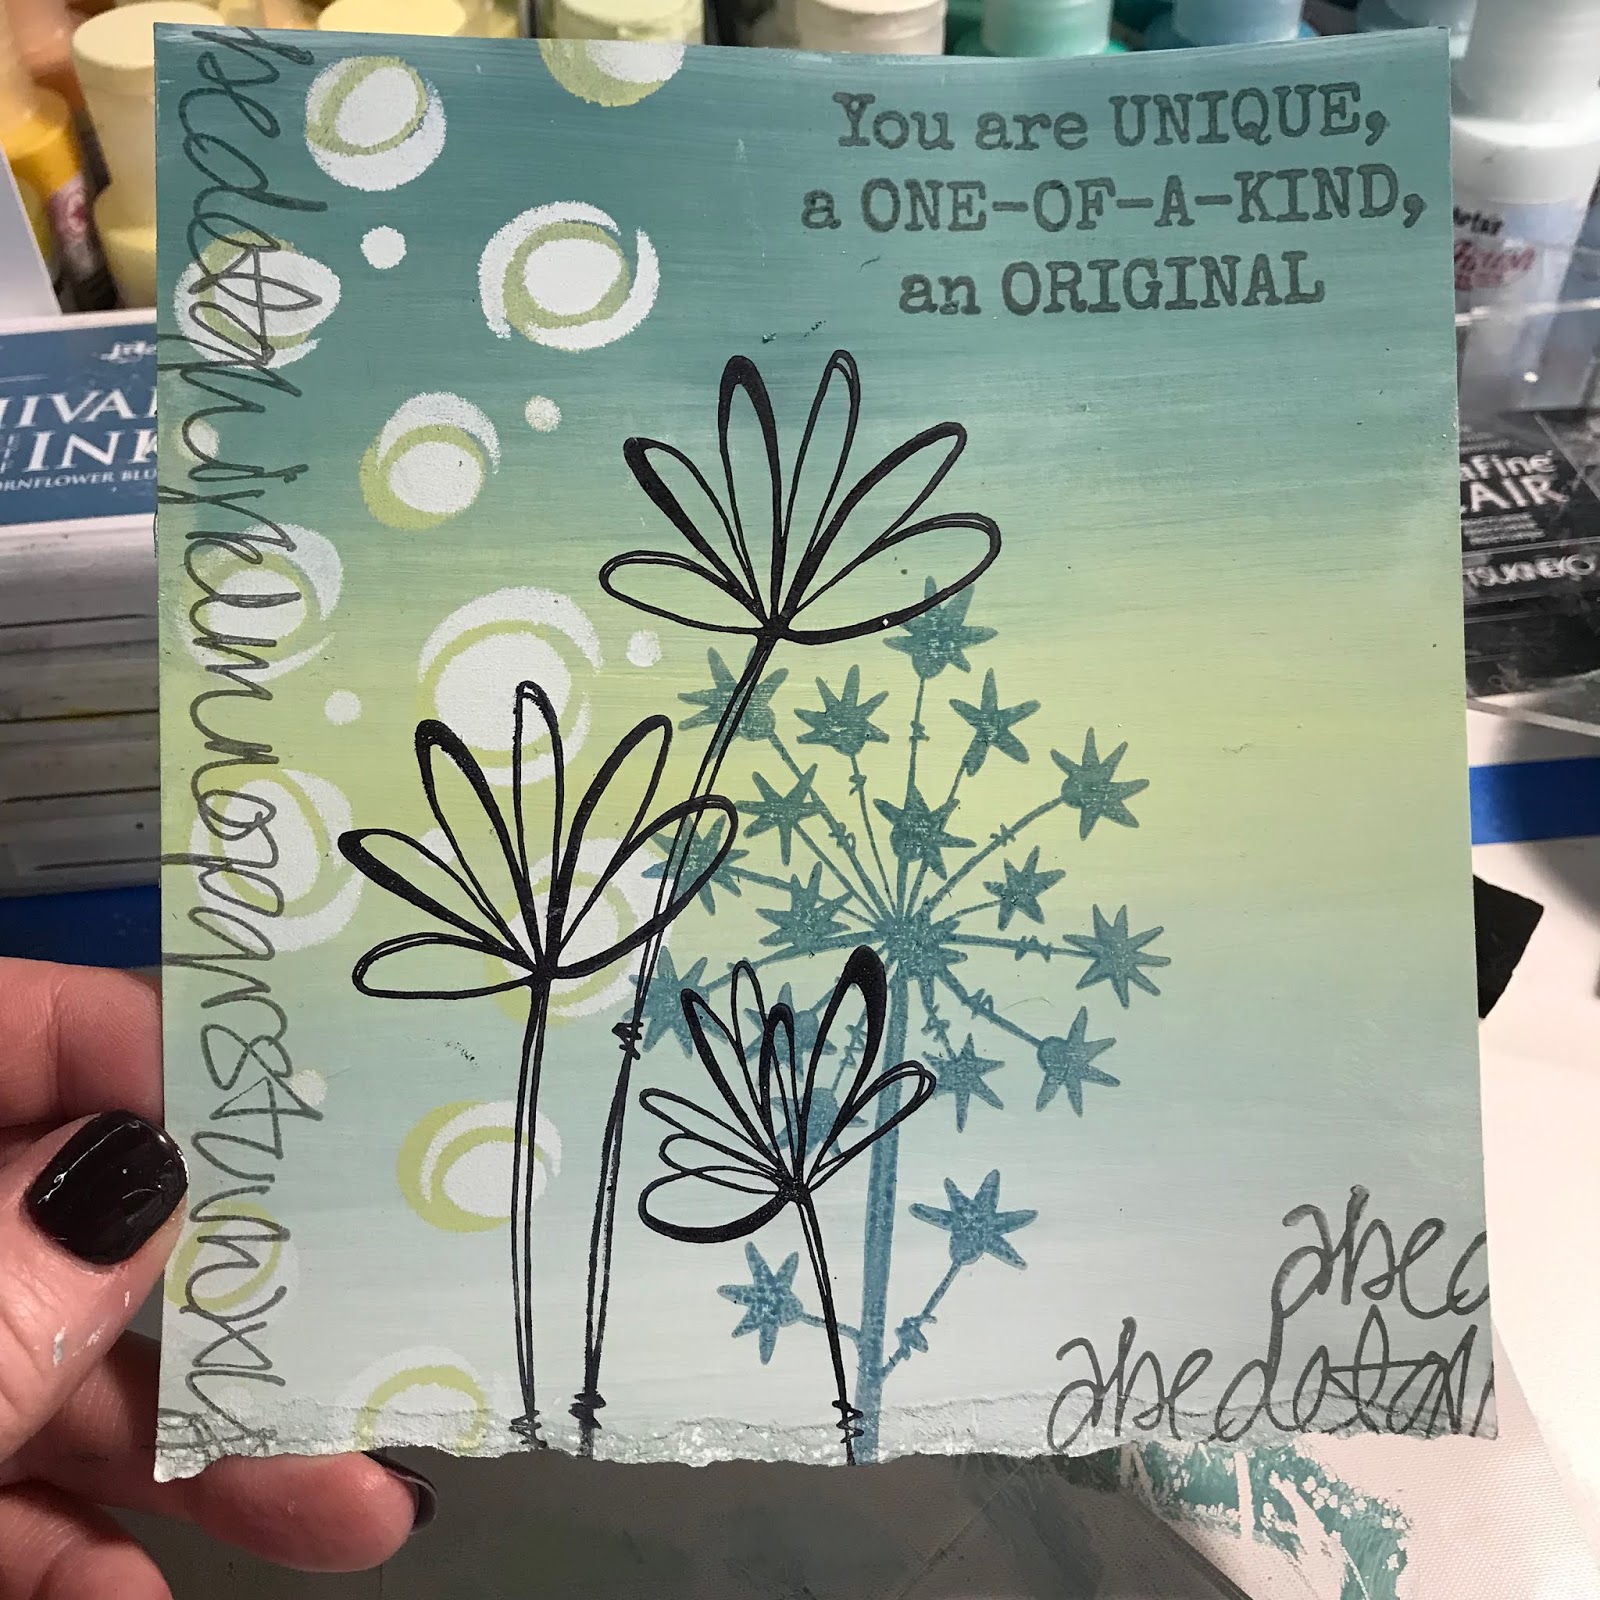
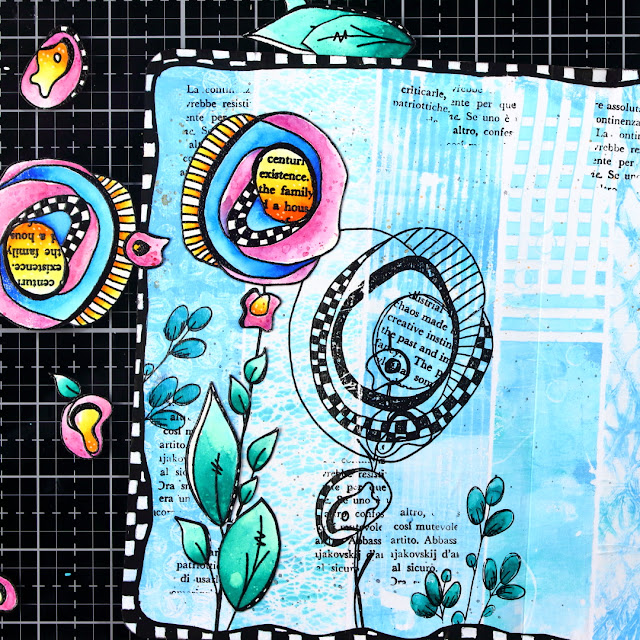
To further embellish the background, I used JoFY102 stamp set. I also decided to stamp the focal image onto the background, so I would determine the position of my focal images in advance, but also more importantly to get the stems of the flowers onto the background. At that time, I fell into my own art journaling process patterns and added some splatters.


The following step was to add an edge doodle that would complement the patterns of the main images. My idea was to imitate the patterns of the doodles from the stamp, so that they would serve as a connecting element between the focal image and the background. For these, I used acrylic markers and gel pen.

As my background was complete, I decided that it is time to start paper piecing my focal images.



When the majority of my project was done, I felt I need a sentiment to make it complete. I like when my quotes refer to the picture that I have just composed, so I thought that the JoFY PS008 stencil would be just perfect. There was this quote that I heard some time ago “Where the flowers bloom, so does hope” by Lady Bird Johnson, so I have decided to print it out.
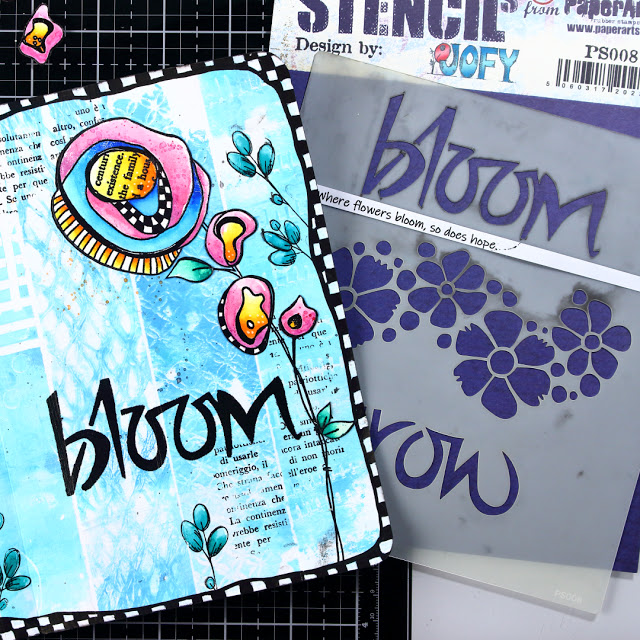

I cut the printed sentiment in to pieces and glued it to a black scrap paper, so that it would give it a frame of a sort. I also tried to emphasize the word bloom with adding some white highlights with my gel-pen.



I think, sometimes my impatient nature gets the better of me. Otherwise, when I think back about what I would have done differently is that I would have played with pattern-making some more. I guess, a lot of us have the same regret after packing up our gel-plates…why, oh why didn’t I try the print of that thingy from my husband’s toolbox…or something like that. Also, perhaps instead of the strips I could have cut the parchment paper into little cubes and that way I could have fit more of the various patterns on my background. Anyway, in general I am happy with how it turned out and I definitely love the colors.

Well, this was my first post for the PaperArtsy blog. I hope you enjoyed my creative process and even more, I hope I inspired you to try pattern play in your own ways.

Renata


Facebook: Peley Renata
Instagram: @renata_artjournaling

Monday, 16 December 2019

2019 #20 A Bit of Sparkle: Bling Wreath with JOFY {by Keren Baker}

2019 Topic 20: A Bit of Sparkle


What a blingy beauty from Keren...sparkles, lights, stars, red and green - the totally perfect Christmas combination! ~Leandra

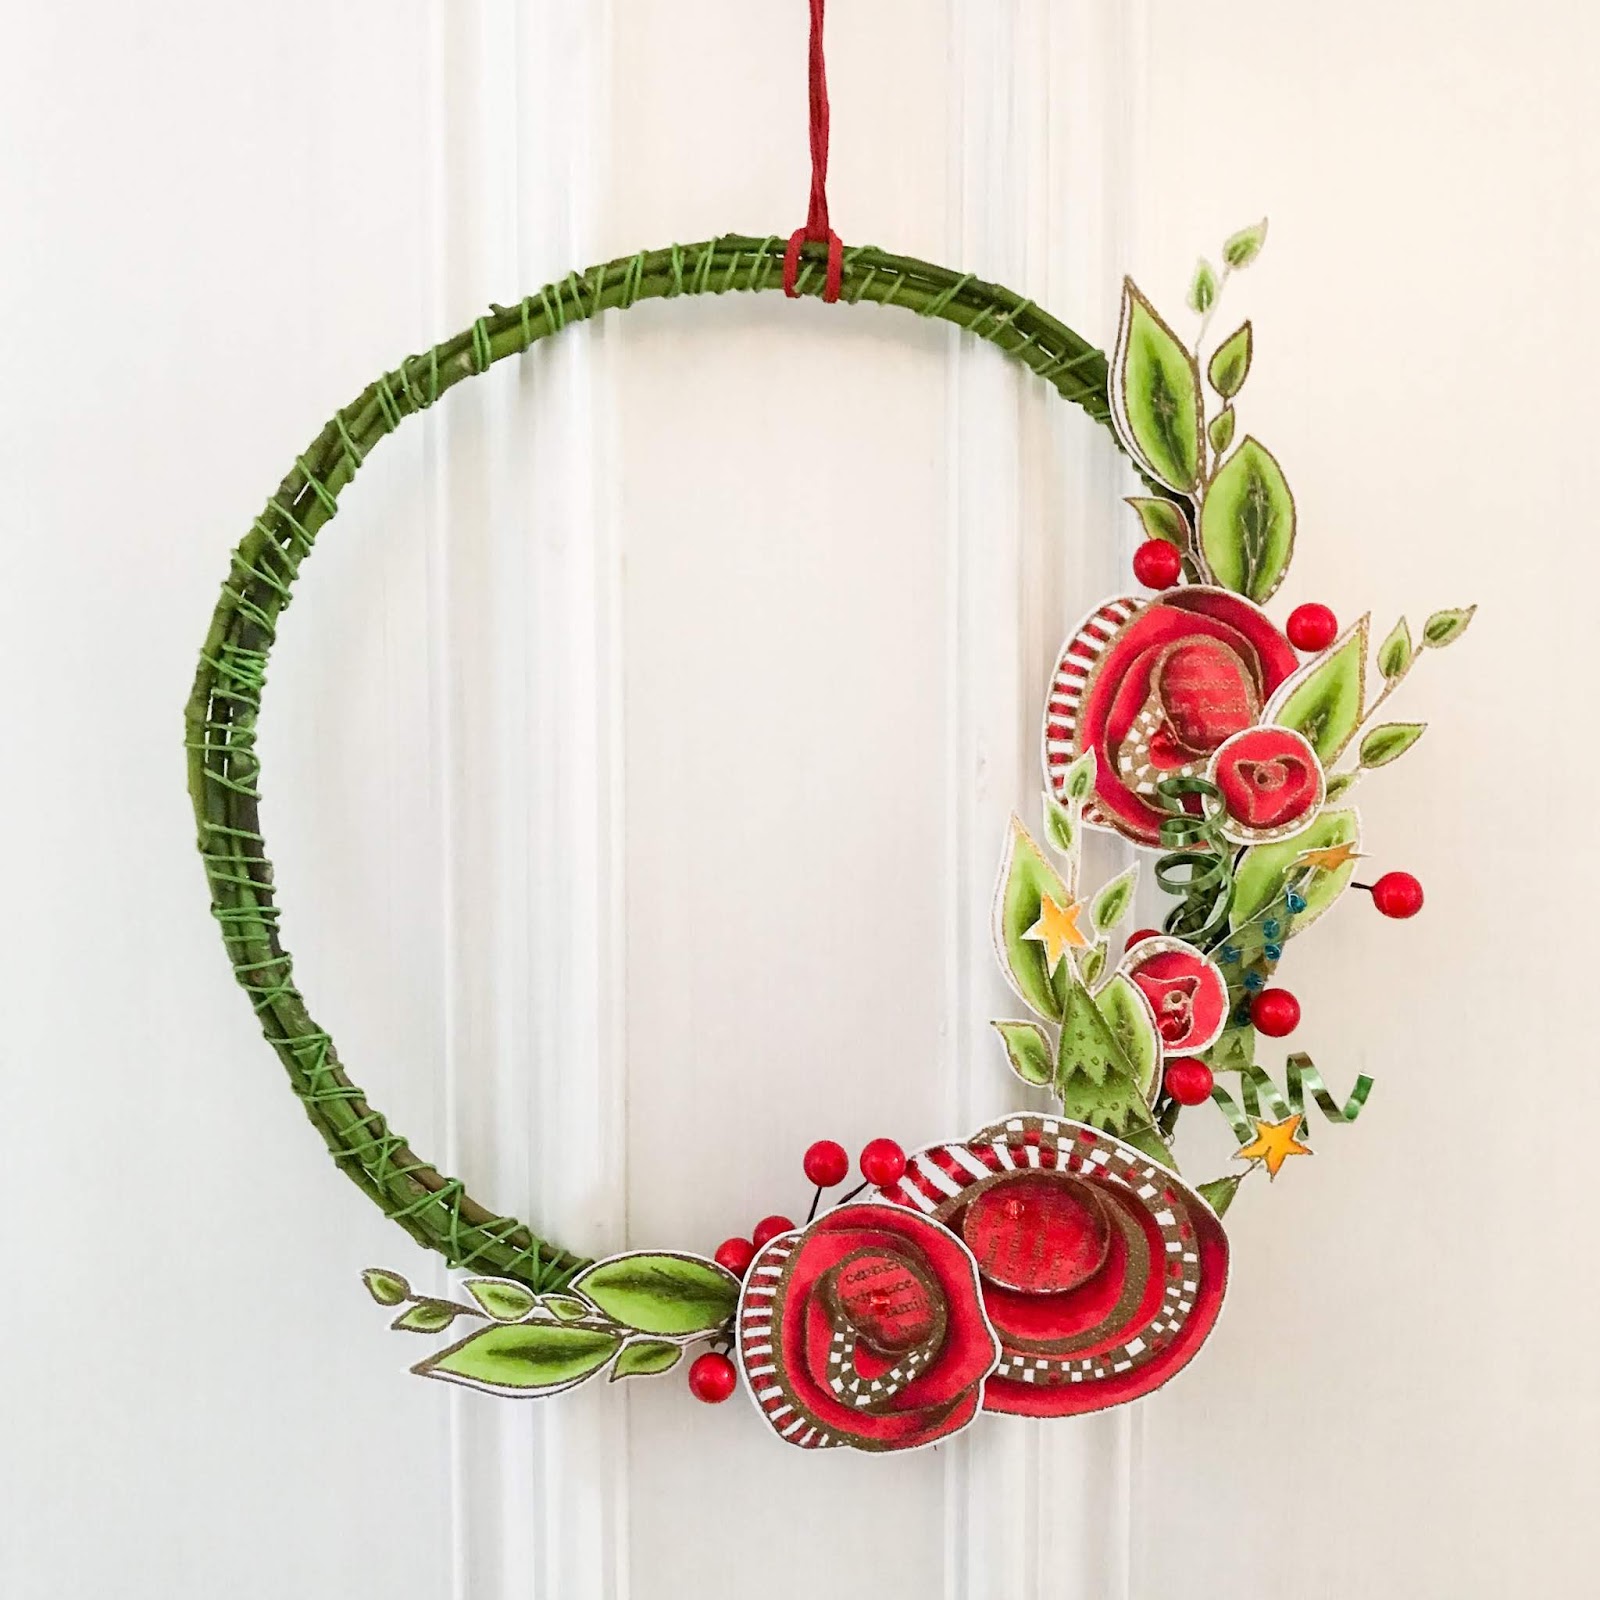
Hi everyone, it's Keren Baker with you today, and I'd like to share with you a little wreath courtesy of some sparkly embossing powder plus some other sparkly details. I wanted to do something that was a little more subtle..although it didn't quite end up like that and is rather more 'blingy' than I ever would have chosen. Good job that Christmas often is a time of lights, sparkle and glitter, so this wreath might not appear quite so over the top! 

I'd wanted to try creating my own wrapped wreath using some greenery from my garden, so this project seemed the perfect opportunity to give it a go.


I selected some long branches- the sort that are spindly with little foliage; exactly the ones that should have been pruned already (oops!). By joining a couple together and securing with some gardeners wrapped wire, it started to take shape. I worried that the circle would be misshapen, but the more branches I added, the better the shape became. I went a bit gung- ho with wrapping the branches but have ended up loving the textural effect.


I needed to stamp and heat emboss a lot of images. I used WOW! Metallic Gold Sparkle embossing powder with a combination of JOFY floral and Christmas Stamp sets- JOFY 75 and JOFY84.


To put the wreath together it involved a lot of wire. I used Heavyweight Smoothy as I knew I couldn't successfully glue the elements on and needed a substantial surface to support wire. I'd coloured the images with alcohol markers and then found little anchor points to place the wire on. With the large flowers, I poked a hole and used a bead to stop the wire from disappearing back down the hole.


Once the elements were all coloured and wire added, I just needed to add them in the order of the background ones first and work around the wreath.


Onto some more detailed shots. When you're using cardstock for a dimensional project, it really does need some added extras. These little wire berries were perfect for the job.


It really was quite 'sparkly' (quite hard to capture) but I wanted to add sparkle by way of reflective surfaces to make things sparkle. I had some rings of flat wire and created some spirals to help bring another dimension.


The lovely trees from the JOFY 84 are so perfect for trimming out separately. They made surprisingly good fillers and I added some beads on a wire wrapped around one of the trees. I love creating tiny details.


Truthfully, I didn't entirely love the end result. I wished I'd added sparkle using glitter or mica more sparingly but once I'd begun, I just had to continue. I thought one more type of sparkle might reduce the overall bling; it did! The tiny lights add a wonderful seasonal warmth and I just might put it up in my home now!


It's great to create something that's not just a card or journal page. I think that the topic title was completely right; a 'BIT' of sparkle! I loved creating my own wreath base and suspect my garden might look a bit more sparse by the end of the Christmas season! I definitely  recommend combining natural products from around you with your favourite PaperArtsy products! Thanks for joining me and I want to wish you all a very happy Christmas and peaceful New Year too!
Keren x

Blog: Kerenbaker's Blog
Twitter:@craftstampink
Instagram: @craftstampink
Pinterest: @craftstampink


Wednesday, 29 May 2019

2019 #8 Put a Brush on it: Puddles of Paint with JoFY {by Alison Bomber}

2019 Topic 8: Put a Brush On It


Beautiful dripping brushes creating painty puddles is a real delight from Alison as she takes us through the process from concept to reality.

Hi everyone, it's Alison here from Words and Pictures here with you today, and I'd like to share with you some Puddles of Paint.

Who knows where creative ideas spring from?  And sometimes I slightly wish they wouldn't !  When one of those ideas pops into your head that seems really great, but then you realise you're going to have to try to turn it into reality... well, this was one of those.  But I am glad it did pop up, because I enjoyed the challenge and I'm so happy with the end result.


I loved Leandra's "Put a Brush on it" theme, and originally envisaged all sorts of vintage layering and detail.  But then I happened to glance at the new JOFY stamps and a whole other idea popped up - quite a long way from my vintage comfort zone.


I immediately saw those fabulous layered splodges as puddles of paint, spreading out onto a canvas.


And above all, my imagination saw the paint itself dripping from the brush to create the swirling puddles on the canvas...


... as though you'd just laid down the brush for a moment to do something else, and the paint decided to create some art all by itself.  Now all I had to do was make it happen in real life.


I've used not only the large splodges from JOFY 75, but also the flower heads from the stem on the right to create my puddles.


I stamped the puddles onto plain card and had a wonderful time layering up paint colours and white pen doodling.


There are lots of paint colours involved from the Fresco Finish Chalk Acrylic range - opaque, semi-opaque and transparent, but all applied in watery washes to get nice layered shades.  Rather than list them all, it's probably simplest if I just show you the photos of the bottles I had lined up on the craft table!


I gesso'd a couple of very cheap paintbrushes and worked out where I wanted to perch them around the rim of the reverse 12x12 canvas (also gesso'd). I cut out my puddles and arranged them so that they could be "dripped into" by the brushes.


All that got glued down and while the glue was drying I started experimenting with various mediums to see how I could create my dripping paint. I'd originally thought of paperclay or Fimo, but in the end I worked with some heavy semi-gloss gel medium.


That meant I could brush it onto the bristles to get some texture like real paint, and then form the columns of paint "pouring" onto the canvas so that it really looked like a continuous stream.


I left my "paint" to dry overnight, so that it would be fully set. The next day, according to where it "landed" in the splodge, I painted my dripping paint the right colour to match the puddle area it was pouring into.


I toyed with the idea of adding a gloss glaze finish to the paint puddles, so that they would look as though they were still slightly wet paint...


... but the semi-gloss of the medium already gives the paint on the brushes a slight shine, so in the end I went with adding some glassy bubbles to catch the light instead. I think it somehow tricks the eye into believing there's a glossy wetness to the whole piece.


I added the words freehand. I should just have gone straight to the Copic marker in bold turquoise, rather than going with a fine pen version first, but I wasn't quite brave enough. Ah well, maybe next time!


And the words themselves formed from that first idea of the paint creating art by itself as it drips from the brushes. Who ever thought that watching paint dry was boring anyway?!


It's a much cleaner, fresher look than is usual for me, but I really like it. There's something so summery and light about the blue, green and white, and I love the light on the glass and the shadows of the brushes creating lots of depth.


I'll admit it was a bit sticky and fiddly moulding the gel medium, but so worth it.  I couldn't be happier with my flowing paint pouring from the paintbrushes to create the puddles of paint. I hope you'll be inspired to play with incorporating your paintbrushes into your projects as well as using them as tools. 

Thanks so much for stopping by to watch the paint dry with me. I hope you had as much fun as I did!
Alison x

Blog: Words and Pictures
Pinterest: butterfly crafter

Sunday, 17 March 2019

NEW PaperArtsy Products: March 2019 {JoFY}

 JoFY Collection
March 2019 New Product Announcement


OK, this is one I've been soooo looking forward to sharing with you. I absolutely adore these new stamps from Jo. She has been working on the concept for several months now to bring a bolder vibe to her creative florals, plus she was so keen to incorporate book text, which if you have ever taken a class with her, you will know is one of her 'must have' elements in any project she undertakes. Can't wait to hear your thoughts! A list of stockists is at the foot of this post, so go stalk them or ask in our facebook group 'PaperArtsy People' for up to date availability. ~Leandra

Hi everyone, Jo here (www.jofy.co.uk) and I'm really excited to share with you my newest release for PaperArtsy - 3 stamp sets and coordinating stencils.

These new designs are much more abstract and remind me of the first flower stamps I designed for PaperArtsy.They are based on drawings I made in my sketchbook on holiday. I  always pack a small(ish) 'holiday' art kit to keep myself occupied & this year I packed a set of watercolour paints. When the sun was too hot, I sat in the shade and doodled and painted. I had a lot of fun!  I came home with a (light) tan and new stamp designs!  win win!


These designs are so versatile - because of their abstract vibe you can use them in many ways and I've created a few samples to show you how.  All these stamps and stencils work so well together several of the samples use more than one stamp set. To be honest with you, I like them so much I couldn't limit myself to using one set at a time!
 

Tomorrow Keren will be along to share more ideas. You can also see ideas on Instagram, Facebook, Twitter, Pinterest. So no matter what your preferred social media platform, we will be sharing with you!

Let's start with some ideas with each of the new products.

  New Stamps
Price: RRP £18.74 +VAT
Size:5" x 6" (13 x16.5cm)
All stamps are individually trimmed onto cling foam, presented in a clear hanging bag
with a laminated storage/index sheet.

  
JoFY Collection Set 74 (JOFY 74)


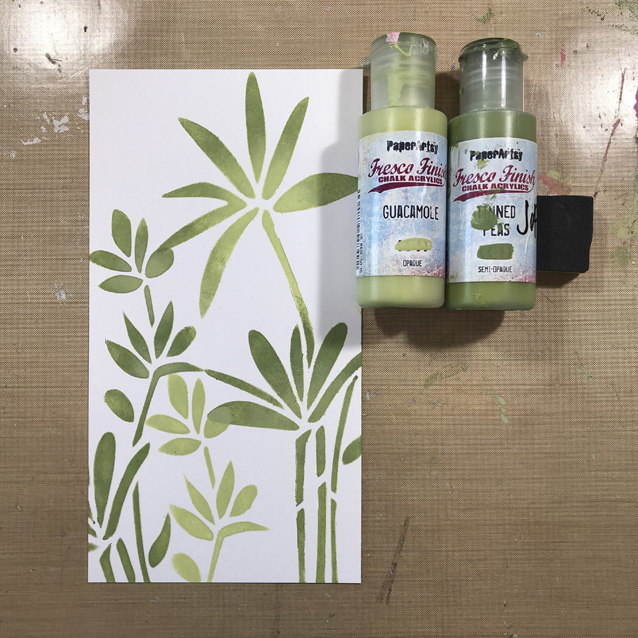
I really like the looseness of these stamp designs & they're probably the most abstract ones I've designed - I really like that about them.  I used the 'grasses' from stencil PS135 on the sample above, I like to see the solid image behind the black stamping of the flower ball stems.

JoFY Collection Set 75 (JOFY 75)


This card has lots of white space which just make the flowers 'pop' even more. I like just using part of the leaf stems.

JoFY Collection Set 76 (JOFY 76)


These cards use the big scribble flower as a feature motif and a background pattern.  The line of squares on the left hand side of this card was created by using one of the designs on stencil PS135 which you can see below.


This panel used most of the stamps in this set along with its coordinating stencil (PS137) which you can also see later in this post. 

New Stencils
Mini Size: 3.5" x 3.75" (9 x 9.5cm) Price: RRP £2.50 + VAT
Regular Size: 6.5" x 7" (16 x 18cm) Price: RRP £4.60 + VAT
Large Size: 6.25" x 9.5" (16 x 24cm) Price: RRP £5.40 +VAT
  
PaperArtsy Stencil 135 (PS135)


The three designs on this stencil are sized to fit a standard greeting card size - a 10x15cm (6x4inches).  I cut the stencil apart so it is easier to use and recommend you do the same - but always leave a decent size border near the apertures.
I'm really enjoying using these stencils in my junk journal (page shown above) and on cards.  I find them super  useful - I hope you do too.

PaperArtsy Stencil 136 (PS136)


I used this stencil on a canvas board to create the background for a project you'll see further down this blog post. The swirl design echoes the swirls in the flower designs.  Its also great for adding extra, personalised doodling onto!

PaperArtsy Stencil 137 (PS137)


I've included this photo because I wanted to show the stencil before any stamped images were added over the top.  I placed it offset towards the right hand side of the panel and then repeated it on the left hand side... using two shades of green gives interest and intense depth.


Project One: Abstract Flower Canvas.


I wanted to use these new designs on something other than card so I decorated a canvas board (5x7in/12.5x17.5cm) using a combination of sets.


First I painted the background with Koala Fresco around the edges and blended with Chalk towards the centre.  Then, with Snowflake Fresco, I stenciled PS136 several times to cover the entire surface.


I gathered several stamped/painted/ cut out flowers and laid them on the canvas deciding which ones to use and how to arrange them.  I took a photo with my camera to refer to for the next step.


I then stamped the various 'flower' stems using black Archival ink and painted the 'flowers'.  I added more stems until I was happy with the arrangement.


I added shading to the loopy stems and to the 'layers' on the flowers.


The finished canvas, framed.


Project Two: Flower Swag Journal Pages

I've included this journal spread to show you how these stamps can be used with paper-piecing - a technique I really like! (Its a great way to use up paper stash!)


These journal pages are, to me, joyful!  The paper pieced flowers, the ombre painted background, the stamping, the die cut elements and the stenciled background - all things I love to use - all on one very happy journal spread - it just makes me smile!   I think I could've filled a whole sketchbook with this style of flowers! lol


Here are a few more samples (some made during the recent trade shows) - mixing up these new plates with older stamp sets AND with other PA stamp ranges.


And one rather large sample made by Leandra while she was demoing at Frankfurt too


Lots of lovely new stamps to create with.  If/ when you upload photos to social media of projects you've made using the JOFY range please tag with #jofy or @jofyjo so I can see what you create - I really look forward to seeing what people make with my stamps & stencils.

Take care

Jo

Socials...
Website: www.jofy.co.uk
Pinterest:  @jofyjo
Facebook: www.facebook.com/JoFY.JoFirthYoung
Twitter: @jofyjo
Instagram: @jofyjo

Teaching Schedule:
23.03.19  Forget Me Not Kraft Kabin  Rochford, Essex ph: 01702 547833
06.04.19  Create98, Leigh-on-Sea, Essex  www.create98.co.uk

20.04.19 The Artistic Stamper, Faversham, Kent  Easter Extravaganza  www.theartisticstamper.co.uk
11.05.19   Keep on Crafting, Bury St Edmunds, Suffolk,  www.keeponcrafting.co.uk
18.0519   Loobi Crafts, Leighton Buzzard, Beds   www.loobicrafts.co.uk
08.06.19  The Artistic Stamper, Faversham, Kent  www.theartisticstamper.co.uk
July-August 2019  Australia!!  Details to follow

If you see PA branded items on Amazon, Ebay, Aliexpress, Wish, then they are counterfeit products manufactured illegally without our permission. To purchase from such sites undermines our brand, our retailers and our product designers.

We ONLY manufacture RED RUBBER STAMPS (not clear, polymer or silicone). We manufacture ALL our products on site in Essex, UK. We DO NOT outsource ANY of our manufacturing.

We EXCLUSIVELY supply the following stockists in this list below. If you purchase from an approved PA retailer, you know you are buying authentic, PaperArtsy made products. 

New 2019 PaperArtsy Products are available exclusively from these approved stockists:

Australia
Art and Soul Studio, Burrum Heads, Queensland www.artandsoulstudio.com.au
Arts and Craft Supply, Frenchs Forest, NSW https://artsandcraftsupply.shop  
Auzz Trinkets and Crafts, Calamvale, Queensland https://atcraft.com.au/
Bella Paperie, Brendale, Queensland, www.bellapaperie.net.au

Bev's Cross Crafts, Spreyton, Tasmania https://www.bevscrosscrafts.com.au/
Crafters Cupboard, Berwick, Victoria www.crafterscupboard.com.au
Scrap Matrix, Port Elliot, South Australia http://scrapmatrix.com/
The Thread Studio, 6 Smith Street, Perth http://www.thethreadstudio.com/

Time To Create, Modanville, NSW www.timetocreate.com.au

Austria
CP Marketingservices Gmbh, Wilhering, Upper Austria,office@cpmarketing.at

Belgium
Cart N Scrap Art, Antwerp, cartnscrap@gmail.com
Cotrain, Kontich, www.cotrain.be

Expression Hobby, Marcinelle www.expressionhobby.be

Canada
Emerald Creek, Clagary, Alberta, https://emeraldcreek.ca/

Scrapbook Centrale, Dollard Des Ormeaux, Quebec www.scrapbookcentrale.ca
Treasured Memories, Duncan,BC www.treasuredmemoriesscrapbooking.ca
Simply Scrapbooking, Prince George, BC https://www.facebook.com/simplyscrapbooking/
Scrap Addicts, Edmonton, Alberta https://www.scrapaddicts.ca/
Scrap and Bean, Edmonton, Alberta http://scrapandbean.com/
The Paper & ink Boutique, Calgary, Alberta https://www.paperandinkboutique.com/

Czech Republic
Hurapapir, Brno https://www.hurapapir.cz/

Denmark
Hobbyboden Scrapworld Samso www.hobbyboden.dk
Papir Ulven, Lejre www.papirulven.dk
Three Scoops Design, Frederiksberg, www.threescoops.dk

Finland
Käsitellen, Lempäälä, https://www.kasitellen.fi/
Piia Takalo, Kittila, www.piiapaper.com/fi

France
Eirl Bancon Cartoscrap, Midi Pyrenees, https://www.cartoscrap.com/blog/
Horizon Creatif, Ste Jalle h.creatif@gmail.com
Katzelkraft, Ingwiller http://www.katzelkraft.fr/en/
Kerglaz, Basse Goulaine, https://www.kerglaz.com/  
Kerudoc Creation, St Yvi www.kerudoccreation.com
Quartier Serre Teston, Ste Jalle, hcreatif@gmail.com
Scrapo'naturel, Tourville La Riviere, www.scraponaturel.fr/livraison 
Toutencolle, Dun sur Avon www.toutencolle.fr

Germany
Paperbasics, Hessen, www.paperbasics.de
Stempelbar, Berlin, www.stempelbar.de
Stempeloase Munich, Munich www.stempeloase.de
Stempelfee Shop, Hilden www.stempelfee-shop.de
Stempellaedle, Stuttgart, www.stempellaedle.de/shop

Greece
Scraps N Pieces, Kallithea www.scrapsnpieces.gr

Italy
Immagine SAS di Rapaccini, Rome, www.immaginelab.com
Il Negozio Della Mamma Di Cle, Torino, clelia27@liberio.it
Marte Savona, Savona, www.martesavona.it
L'artistica Glo, Cinisello B (Mi), www.artisticaglo.it 
Piccole Passioni, Siena, www.piccolepassioni.it
 
Japan
Tiny Dots, Funabashi-shi, Chiba www.facebook.com/TinyDots

Netherlands
Creafine, Papendrecht www.creafine.nl
Creatotaal, Barendrecht, www.creatotaal.nl
De Hobbystudio, Genemuiden, www.dehobbystudio.com
De Scrapheap, Sprang-Capelle, https://www.descrapheap.nl/ 
Doe@ding,Spijkenisse https://doeading.nl/
Hobbidee Breda, Noord-Brabant, www.hobbidee-breda.nl
Hobbycompleet de Duif, Leeuwarden www.hobbycompleet.nl
Kimya Verpakleingen, Arkel, https://kimya.nl/
Scrap & Co, Klarenbeek www.scrap-co.nl
Scrapbookdepot, Uitgeest, www.scrapbookdepot.nl
Stampingcorner, Capelle Aan Den Ijssel www.stampingcorner.nl
The Stamping Cottage, Schaijk www.thestampingcottage.nl

New Zealand
Art of Craft, Papamoa, Bay of Plenty, www.artofcraft.co.nz

Norway
Hobbygarasjen, Kopervik, www.Hobbygarasjen.no
Hobbykunst, Rasta, www.hobbykunst-norge.no
Scrapbookengros AS, Kleppe www.hobbylageret.no

Spain
Arts & Crafts, Barcelona, pebdesign@hotmail.es
Cien por Cien Manualidades, S.L., Bizkaia, Catalunya,  www.100x100manualidades.es
Endulze & Crista S.L, Navarra, endulze@gmail.com
Ideas 10 Manualidades Y Scrapbook, Bilbao https://ideas10manualidades.com/
Marakiscrap, Tarragona, www.marakiscrap.com
MundoMint, Sabadell, Barcelona, www.mundomint.es
Scrap & Papers Experiences, Barcelona, Info@casonadequintana.com

Scraphouse S.L. Barcelona www.scraphouseshop.es
The Paradise Corner, Barcelona, www.facebook.com/theparadisecorner 
Endulze & Crista S.L., Pamplona, Navarra, www.endulze.com 

South Africa

Kcraft Imports Ltd, Centurion, www.kcraft.co.za
Stencil Art, Gauteng, www.stencil-art.co.za 

Sweden
Butik Elva, Staffanstorp, https://www.butikelva.se/
HC Design, Svedala, www.hcdesign.nu

Switzerland
KRL and Co, Payerne, http://www.krlandco.com/en/

Taiwan
Mandy's Cards, Taipei www.facebook.com/mandy.card

United Kingdom
A Trip Down Memory Lane, Ipswich, Suffolk, http://www.atripdownmemorylane.co.uk
Abermaw Quilting & Crafting, Gwynedd, Wales ph 07818556758
Aldridge Crafts, Attleborough, Norfolk www.aldridgecrafts.co.uk
Amelia's Creative Crafts, Studley, Warwickshire  www.ameliascreativecrafts.co.uk
Art from the Heart, Harrogate, Yorkshire www.afth.co.uk
Bellacrafts, Eastleigh, hampshire www.bellacrafts.co.uk
Blade Rubber Stamps, London www.bladerubberstamps.co.uk
Clacton Art Craft Model Centre, Clacton on Sea,  Essex, http://www.clactoncrafts.co.uk/
Countryview Crafts, Potton, Bedfordshire www.countryviewcrafts.co.uk
Craft World Scotland, Glasgow www.craftworldonline.co.uk
Craft Your Art Out, Ballynahinch, County Down, craftyourartout@outlook.com
Crafty Bunch, Telford, Shropshire, http://craftybunch.co.uk/
Crafty Snippets, Billingshurst West Sussex www.craftysnippets.co.uk
Crafts & Candlelight, Ipswich, Suffolk www.craftsandcandlelight.co.uk
Crafts @themalthouse, Herstmonceux,  East Sussex, http://www.coldfusionglass.co.uk/

Craftrange, Burnley, Lancs, https://www.craftrange.com/
Handmade at Helen's, Dumfries, Scotland, https://www.handmadeathelens.co.uk/
I Love Mixed Media, Cromhall, Gloucestershire, https://www.ilovemixedmedia.co.uk/
Imagine, Design, Create, Seaton, Exeter http://imaginedesigncreate.co.uk/shoponline/

Kay Carley http://www.kaycarley.com
Keep on Crafting, Bury St Edmunds, Suffolk www.keeponcrafting.co.uk
Kraft Crazy, Amesbury, Wiltshire https://www.facebook.com/KraftCrazy/
Lisa B Designs, Maidstone, Kent, http://www.lisabdesigns.co.uk/
Lets Create, Lincoln, Lincolnshire, http://www.letscreateartandcrafts.co.uk/
Loobie Crafts, Leighton Buzzard, Bedfordshire, www.loobicrafts.co.uk
Papermaze, Ipswich, Suffolk www.papermaze.co.uk
Paperstory, Norfolk www.paperstory.bigcartel.com
Poppycraft, Wallingford,  https://poppycraft.co.uk/

Rowan Tree Crafts, Carnforth, Lancashire www.rowantreecrafts.co.uk
Fave Rave, Stourbridge, West Midlands www.shabbychicstencils.co.uk
Scrapbook Magic, Mullion Helston, Cornwall, www.scrapbookmagic.co.uk

Scrapcosy, https://www.etsy.com/uk/shop/Scrapcosy
Shed Load of Crafts, Enfield, Middlesex, www.shedloadofcrafts.com
Simply Crafts, Cardiff, www.simplycraft.com
Snazzy's, Swindon, Wiltshire. https://www.facebook.com/snazzystampingandscrapbooking/
Stampers Grove, Springbank, Lilliesleaf, Melrose,Scotland www.stampersgrove.co.uk
Stamps & Memories, Hungerford, Berkshire
www.stampsandmemories.co.uk
Swanstitch, Deal, Kent www.facebook.com/swanstitch
That's Crafty, Romford, essex www.thatscrafty.co.uk
The Artistic Stamper Craft Store, Faversham, Kent www.theartisticstamper.com
The Craft Box, Barnsley, South Yorkshire www.thecraftbox.biz
The Craft Den, Wisbech, Cambridgeshire www.thecraftden.co.uk
The Craft Room, Newcastle-Under-Lyme, Staffs https://www.garnersgardencentre.co.uk/crafts/
The Craft Studio, St Austell, Cornwall https://www.facebook.com/thecraftstudio/
The Forget me not Kraft Kabin www.facebook.com/TheForgetMeNotKraftKabin
The Stamp Pad, Saddleworth, stamp-pad.blogspot.com
Whichcraft, Wallasey, Merseyside


USA
Artistic Artifacts, Alexandria, VA https://www.artisticartifacts.com/
Artistic Studio Creations, Fayetteville, Georgia www.facebook.com/ASCbyCrystal
Artistree Workshops, Fulton, New York, www.facebook.com/artistreeworkshops
Big Mouth Scrappers, Forney, Texas, https://www.bigmouthscrapperstx.com/ 
Clay with Me, Colorado www.facebook.com/Claywithmestudio
Creative Designs by Debbie Castle Rock, Colorado debbie.knight@centurylink.net
Creative Inkling, Hatnboro, PA https://www.creativeinkling.com/
Creek Bank Creations, Indiana www.creekbankcreations.com
Ephemera Paducah, Paducah, Kentucky www.ephemerapaducah.com
Everything Scrapbook & Stamps, Lake Worth, Florida www.everythingscrapbook.com
Frantic Stamper, Oregon www.franticstamper.com
Free Heart LLC, Denver, Colarado, http://www.freeheartllc.com/

Golden Hills PaperCrafts, Fairfax Station, Virginia, https://www.goldenshillpapercrafts.com/
Guadalupe's Fun Rubber Stamps, Santa Fe, New Mexico www.santafe.com
Joggles, West Warwick, Rhode Island, www.joggles.com 
My Rusty Crown, Escondido, California, https://myrustycrown.com/

PaperCraft Clubhouse, Westbrook, Connecticut, http://papercraftclubhouse.com/
Papere Parachute Art Design Co., Beaverton, Oregon www.paperparachute.com
Runaway, Art & Craft Studio, NE Salem, Oregon http://www.runawayart.com/
Sherries's Stuff, Warrenton, Virginia, https://www.facebook.com/sherriesstuff.va/
Simon Says Stamp, Columbus, Ohio www. simonsaysstamp.com
Stamplistic, Cleveland, Ohio www.stamplistic.com
The Artistic Palette Studio, Eugene, OR, http://www.artistspalette.com/studio/

The Crafty Scrapper, Waxahachie, TX http://www.thecraftyscrapper.com/
The Doodlebug Inc, Jasper, IN, https://www.thedoodlebuginc.com/
The Ink Pad, New York, www.theinkpadnyc.com
The Queen's Ink Savage, Maryland www.queensink.com
Topflight Stamps, Irmo, South Carolina https://topflightstamps.com/
Seth Apter, New York www.sethapter.com
Stamp Fever, Orange, California www.stpstamp.com
Whim so Doodle, Saint Petersburg, Florida, http://whimsodoodle.com/ 
Vintage in KC, Shawnee, Kansas, http://vintageinkc.com/

Our brand is only available from established stockists who are VAT/ GST/ sales tax registered and for whom product education is a core principle. We would rather supply a few hand selected stockists, than the greater masses. If you would like to apply to be a stockist, you can find our more about our supply criteria here

PaperArtsy Links
Facebook Group (NEW) PaperArtsy People
Facebook Page PaperArtsy
Blog blog.paperartsy.co.uk