


Hi everyone, it's Etsuko (My favorite things) with you today, and I'm here to share with you the Needle Book. I've created for the current topic: Fabric, using Ink & Dog by PaperArtsy Collections.

I've always wanted to give fabrics a rust-colored stain effect, And for the current topic this time was 'Fabric' so I tried this effect with PaperArtsy Ink & Dog stamps with Rusting Powder, and decided to make the Needle Book to use when embroidering fabrics. I am very happy to be able to use my favorite Pierrot and Fairy stamps here and show them to you.


Let's get started. The first time I'm going to show you is the supplies. I used for this project and this time I finished with iron rust stain, stitch and stamping without using paint.

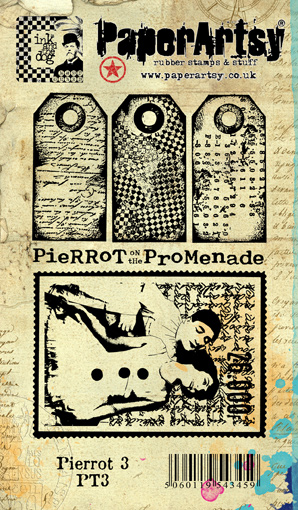
Next as you can see these supplies, to make the rust stain effect on the fabrics. I prepared PaperArsty Collections Ink & Dog (ID-PT2, ID-WGS3, ID-FR4,) PaperArtsy Rusting Powder, Vinegar, Versa Mark and linen and cotton fabrics.




PaperArtsy Rusting Powder is much finer than embossing powders, and as a metal of course it is not embossable, but you can use it with embossing ink. The idea with rusting powder is to help the metal powder grab to a surface, then slowly help the metal particles to rust by adding water (spritzing). The addition of an acid like vinegar or lemon can speed the process up. This seems to work best on natural fibres like fabric, wood. The powder is fine enough to reveal the delicate detail within stamped images, but please be careful not inhale in the particles when tapping off excess powder from the back. They tend not to be airborne easily as the particles are heavy, but it is common sense with any craft powder to take care.

Previously I have used rusty nails and hardware to make stains on papers and fabrics, but this is my first time using stamps, so I was little worried. I stamped with VersaMark (in the same way as embossing) and sprinkled powder over the image, then tapped off the excess powder and placed the fabric on a tray. I sprayed the vinegar 2 or 3 times on it (you want to keep it damp over a period of time to allow it to rust) to get good results, the other option is to spray it and leave it overnight. Versamark is quite a sticky ink, so the powder will 'grab' to the ink.

After the above process is applied and left overnight, the powder is rinsed off the the fabric allowed to dry. On the left is the result of less time and less vinegar. The difference to traditional ink and 'embossing' is that with rust, the stamped lines become more blurry as the rust travels, and so things are likely to be less sharp than ink of course, but I like it. I used the sample on the right for the project book cover.

I masked around the image with Post-it notes to reduce bleeding of the vinegar. I used this fairy below on the back cover. I put her Pierrot hat on found from PaperArtsy collection Ink &Dog set (ID-PT2)


Since I didn't use paint, I made a pattern with Ink & Dog set (ID-FR4) and PaperArtsy Hot Pics set 1304 (HP1304) stamps with PaperArsty Rusting Powder on fabrics, then ripped or slow-stitched them and I made a collage for each page.



Here is how I attached and made the accessories and the lace frame for the cover in the final stage.

Vintage spools from PaperArtsy Hot Pics set 1214 (HP1214) were stamped onto the Smoothy (Heavyweight) A4 white card by Ranger Archival Ink (coffee) and I used it to wind the thread around.


In the same way, I have used PaperArtsy Scrapcosy set 09 (ESC09) with Ranger Archival Ink (coffee) on the Smoothy (Heavyweight) A4 white card and I made 'Handmade by' tags. Such tags are very useful when gifting.


Now let's take a look how the fixtures were made to complete the book and finish the pages. I decorated around the cover image with several types of lace and made the book belt from the leftover fabric. The Pierrot's hat was stitched from (ID-PT2).

The first page was collaged with (ID-FR4) framed pattern stains, with the previously made spools of thread in the pocket. It can store the pins and sewing needles are on the right page.


I have finished the needle book by placing the supplies on each page in this way.
I always wish the fun of composing this would never end! These 'Handmade by' tags were placed in the last page pocket.

The pretty fairy (ID-WGS3) is on the back cover. The Needle Book measures 5" x 4" and just is the right size to keep in a bag or sewing box.



My goal of this project 'Needle Book' was to keep it simple, making the most of the rust stain marks and the raw linen. I made that it would always be by my side when I start sewing or embroidering, that it would not get in the way, and I could enjoy it when I opened it. I used things that are all around us. Why not make your own?
-For reference-
There are still many ways to use Rusting Powder for a paper and fabric, such as using stencils, sprinkling powder around leaves or other thin shaped object as if they were masking, making rust water and soaking paper, cloth, etc. in it to dye. I think it's good to soak overnight in water with salt or vinegar to stop the colour.
Rusting Powder is available at stores that carry PaperArtsy.
Thank you so much for visiting.
Etsuko xxx

Blog: My favorite things
Facebook: Etsuko Noguchi
Instagram: Pixienest
Pinterest: Etsuko N


