Showing posts with label Ellen Vargo. Show all posts

Saturday, 5 December 2020

2020 Topic 21 'O, Christmas Tree...' with EEV (by Amanda Pink)

  2020 Topic 21: Masterboards


You might be forgiven for thinking that so many masterboards in one topic would end up all looking quite samey. It's not turned out like that at all. Amanda wraps up our topic with a set of cards and tags that boast really painterly backgrounds and shiver with a beautifully cool atmosphere.
~ Keren.

Hi everyone, it's Amanda Pink (ink-a-pink) with you today, and I'd like to share with you the project/s I have created for the current Topic 'Masterboards'. 

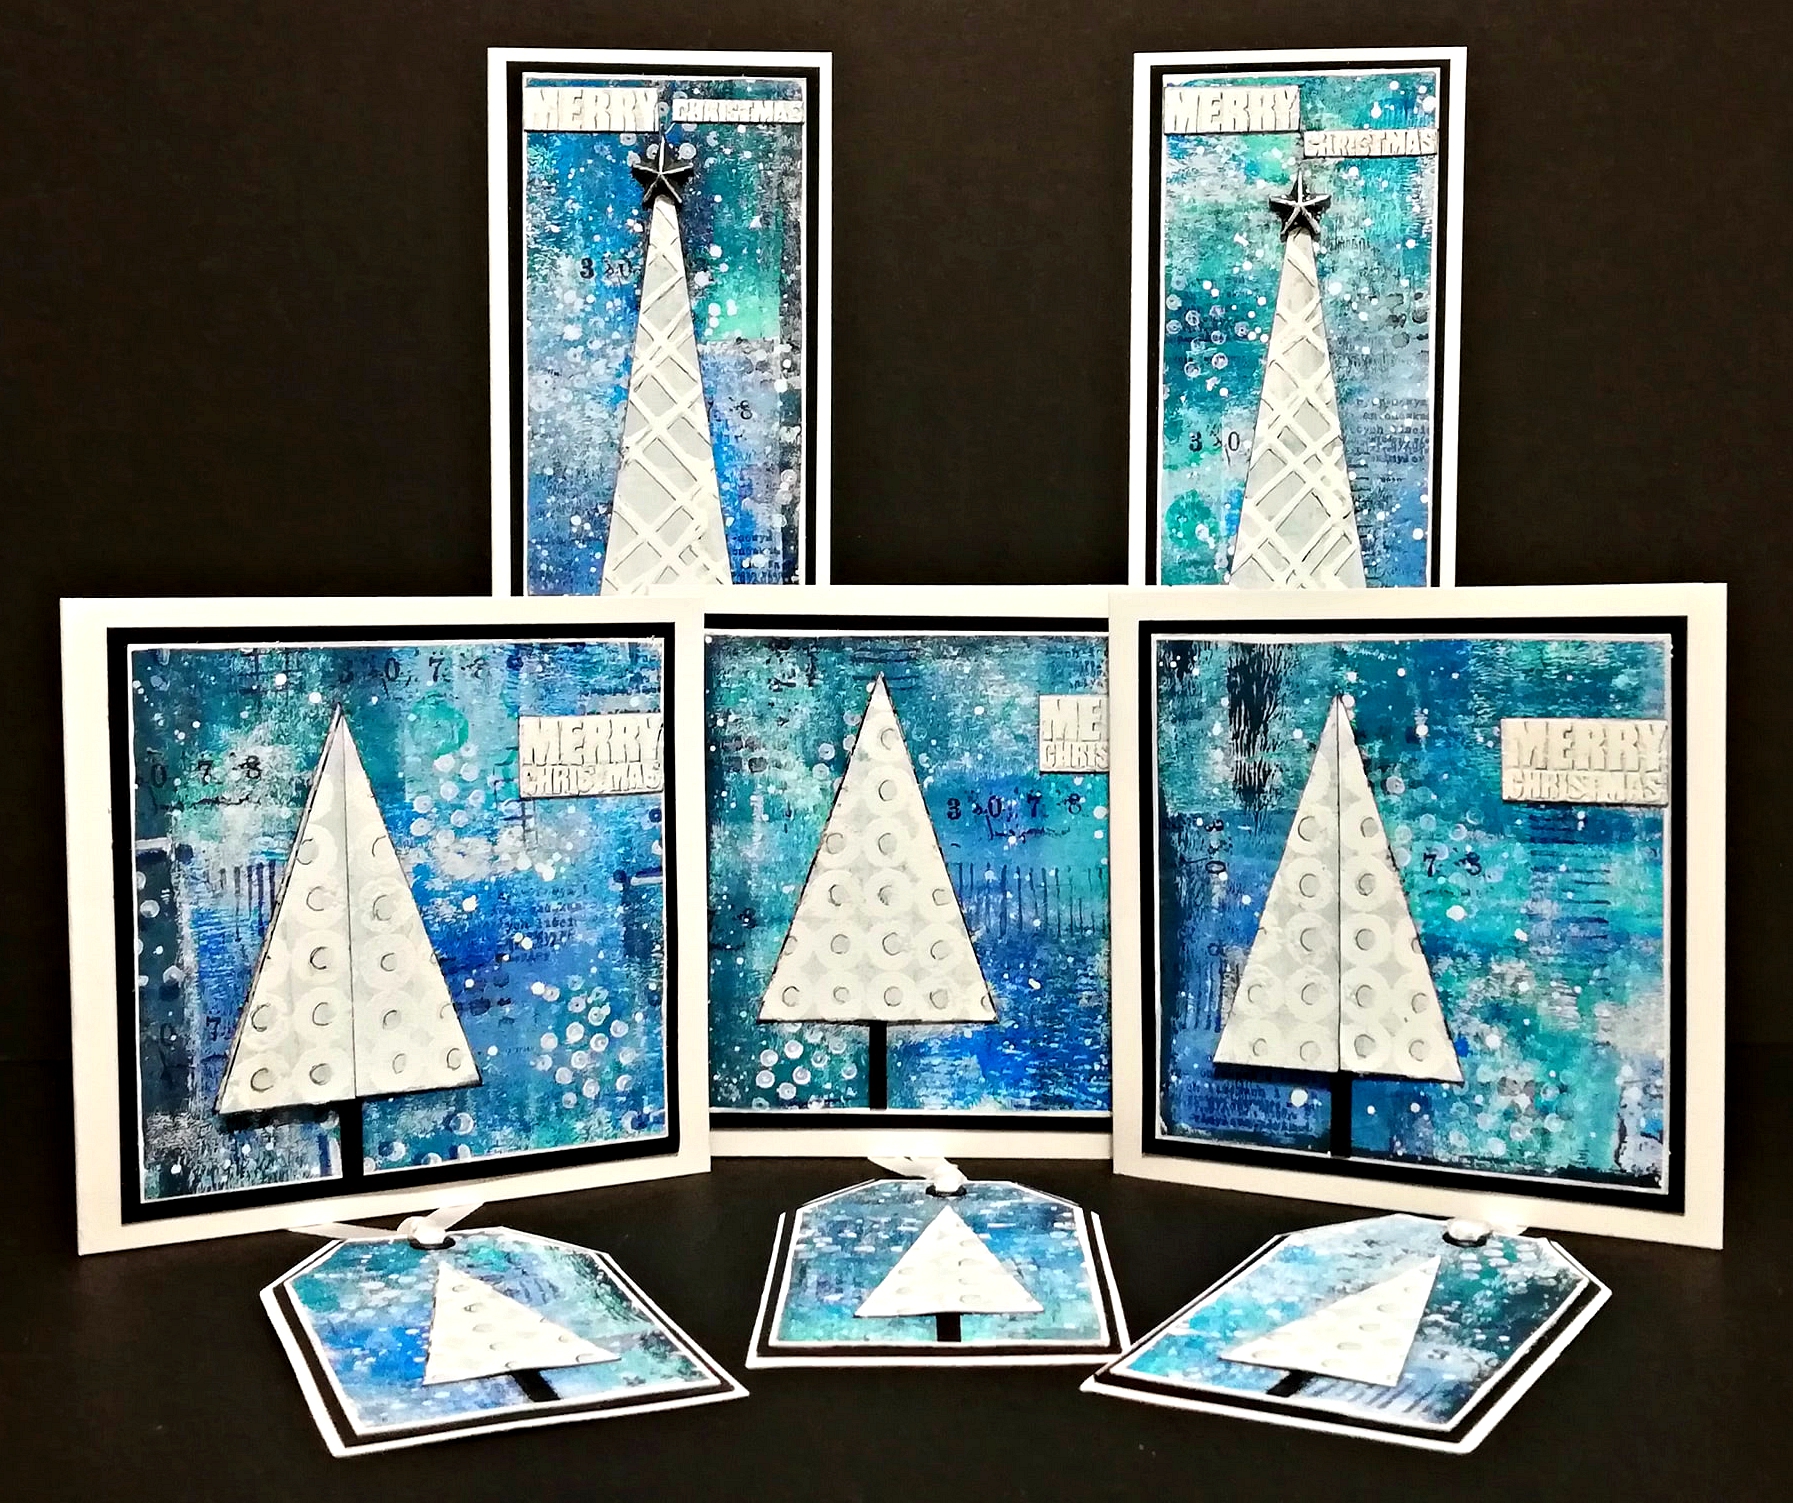
I always seem to be on the last push when it comes to creating my own handmade Christmas cards and often end up resorting to shop bought ones so this topic was perfectly timed and offered me the ideal opportunity to create a couple of masterboards, which I then turned into backgrounds and trees that I used to make some Christmas cards. I couldn't resist making a few gift tags as well! 

I chose to create with a more contemporary Christmas colour palette so used a few of the new PaperArtsy Fresco Finish Acrylic Paints: Cloudy, Azure and Crispy Blue along with Aquamarine, Midnight, Inky PoolGlass Blue and Snowflake.  I do love blues and whites together for Christmas.


To create the masterboard that became the backgrounds of the cards and tags I brayered a piece of Heavy Smoothy with the Frescos to build up layers and depth of colour.

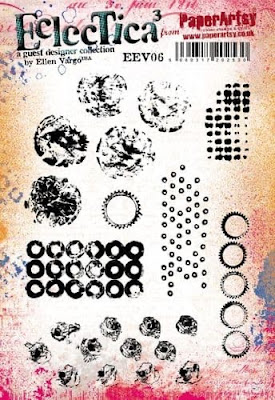
PaperArtsy have some fabulous stamps that lend themselves to masterboard creativity. I used stamps from the following stampsets: PaperArtsy Eclectica (Ellen Vargo) Collection EEV05 and EEV06


A very small part of the PaperArty Vintage I&D Collection (A6) Background (plate 5) plus PaperArtsy Minis MN108.


I stamped all around the board in either Archival ink (Cobalt Blue, Blue Violet, Garden Patina, Jet Black) or PaperArtsy Fresco: Snowflake


A few close ups may help you identify the stamps I used from Ellen Vargo's 2 stamp sets. Some are more obvious than others which I personally favour as it lets the eye seek them out! 


I only stamped part of the stamp design too. I just prefer a somewhat 'broken' impression for this kind of creativity. Helps prevent things getting 'over cluttered'.


To create the masterboard that I made into trees I again brayered a piece of Heavy Smoothy, (A4) with a couple of the Frescos mentioned above: CloudySnowflake and a touch of Inky PoolI wanted this masterboard to be much lighter than the other.


I then stamped and embossed a repeating circle design onto about half the masterboard using one of the stamps from EEV06.


I think this stamp is a favourite as the 'grungy' in me loves how some of the circles have an unfinished appearance.

The two masterboards were then made into cards and tags simply by cutting them up into backgrounds and trees.
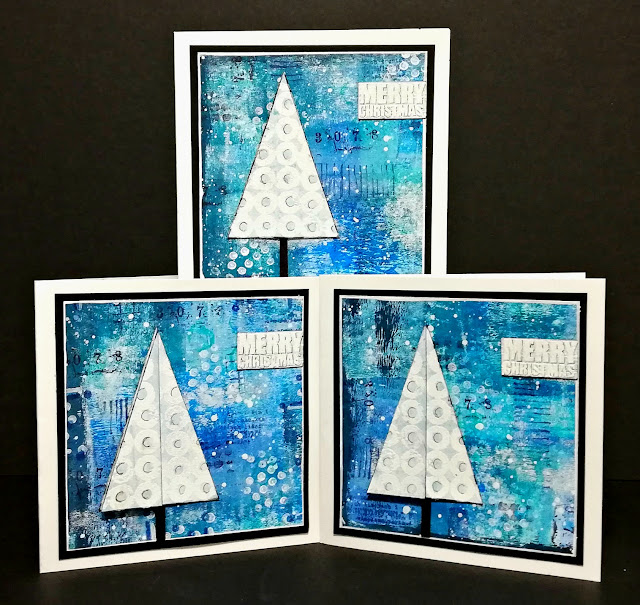

There's 3 small square cards.


The Triangle trees were cut out of the embossed masterboard. I freestyled the cutting but a triangle die could be used instead. On one of the cards I kept the tree one dimensional...


and on the other 2 cards I made one half of the tree two dimensional by adhering half a triangle to one side of the full triangle trees.


The dimension can be appreciated more when the cards are viewed at an angle.


I felt the cards needed a sentiment so I stamped and embossed the words 'Merry Christmas' onto the lighter masterboard using part of the word block stamp on PaperArtsy (Hot Picks) Collection (HPXM07).


There's also a trio of small gift tags.


No room for a sentiment on these but that's ok as I will be writing Christmas wishes on the reverse before hanging them on presents.

With some of each of the masterboards left I also created a couple of tall slim cards, well this style does seem to be 'on trend' at the moment, doesn't it?


I changed up the tree embossed stamping for these two, using the long 'interwoven' stamp on EEV05.
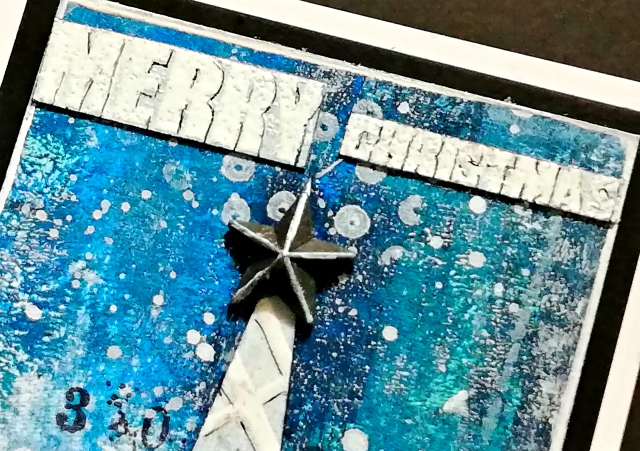

They were each topped with a metal star and the sentiment on these two cards was split in 2 to fit. 

It seems these are masterboards that just 'keep on giving' as believe it or not there's still  enough left to make another couple of small cards and tags!! 

Creating masterboards and turning them into cards and tags makes for happy, fun creativity. It enables you to create cards/ tags/ gift cards/ money wallets in batches very easily. Although your 'makes' will be similar they will also be unique to themselves as each of them will have been created with a different part of the masterboards.

It's very much a stress free activity. Just pick out some colours a few stamps and stencils and away you go. If its something you don't often do why not give it a go? Be warned though as if you are anything like me once you've created one masterboard you'll no doubt be keen to create another and another and .. 

Before I go I would like to wish you all a very Happy Christmas/Happy Holidays and however you may be celebrating the festive season this year take care and stay safe and well!

Thanks for joining me today/ tonight.
Keep on Creating 
Amanda
x

Blog: ink-a-pink
Facebook: Amanda Pink
Instagram: p1nkart
Pinterest: PinkArt

Monday, 13 April 2015

2015 #7 Niches Cigar Box {by Ellen Vargo. PA Signature Designer}

2015 Theme 7: Niches


Hi everyone, Ellen Vargo here, joining you this evening with a post about the new theme of Niches.  It's great to be back here on the PaperArtsy blog after a few months' break.  Since I last visited, I have been on a kick of altering old cigar boxes so this theme really spoke to me.  Today we're starting with a small cigar (cigarello) box and altering it using my favorite technique - fresco paints, a brayer, and some stamping.


The cigar box is about 4 3/4 " L x 3 1/2" W x 3" H.  I have seen many people alter cigar boxes and leave the decorative tape around the edges, but today I decided to paint the whole box with a double coat of black gesso.  It gives excellent coverage and hides a multitude of flaws.


Now we need to create some gorgeous painty papers to cover our box.  I started with two sheets of Heavyweight Smoothy card, several shades of blue and green fresco paints, and my trusty brayer. I started by brayering some Chalk paint as base, and then added Limelight and Guacamole paints.


Then I moved on to the blue shades. I used Mermaid, Bora Bora, Beach Hut, South Pacific, and a touch of Inky Pool. 


Now it's time for some stamping.  I used the bold stripes from EEV03 with Chalk paint and the washer circles from EEV06 with Mermaid paint.  


Then the scratchy diamond background stamp from EEV08 with Bora Bora paint, and the painted stripes from EEV05 with Little Black Dress paint.  I tried to space out the stamped images across each page so when they were cut down to smaller sizes for our box there would be some variety on each cut section.


From here, you could choose to keep going, adding some layers of collage using stamped tissue paper, book text, dictionary paper, or any other collage material of choice.  You could also opt to add a layer of stenciling.  I chose to keep it fairly simple for this box.

After some careful measuring and a paper trimmer, I had all the shapes/sizes needed.  I used a black paint pen to outline each piece so the white edges wouldn't stand out against the black box, and some extra strong double sided tape for adhesive to cover each panel of the box, both inside and out.


And the final step was to add some "feet" to the bottom and a knob to the lid.  I used unfinished wooden drawer pulls that I got at my local craft store, painted with the same black gesso as the box, and adhered with some matte medium.  Here's our finished box.


I hope you enjoyed following along with my take on the "Niche" theme. I just love working with cigar boxes because the possibilities are literally endless. Some ideas for other ways to alter include:  patterned scrapbook paper to suit your own tastes or a special occasion / holiday, textured metal - I have done a LOT of these lately, collage, stenciling, stamping, adding treasure gold as an accent, dimensional embellishments, a favorite quote, etc. etc. etc. Just follow your own heart and your own style.  Most importantly - have fun!  Try something different, or use an old favorite technique. I hope you join in the Nice theme over the next two weeks.  Thanks for following along!
  
~ Ellen Vargo - ten thirty-six arts & crafts.

It is lovely to have you back Ellen with another fantastic project. The bold gesso'd edges look great against the zingy layered frescos and of course your background stamp images are just perfect.

We would love you to join in with challenge #7: Niches If you are inspired by any of our guests who blog with us over the fortnight, then please join in and link up your creativity HERE

All links go in the draw to win a voucher to spend on products of your choice from the PaperArtsy online store. The Niches link will close 17:00 (London Time) Sunday, April 26th, winner will be announced 2 hours later at 19:00.
  

Wednesday, 17 December 2014

GD: Anneke De Clerck Project #3 Precious Hanging Board

"Good evening, Anneke here. This is my final project as guest designer for semester 3 here at the PaperArtsy blog. It has been a pleasure to be part of the team! For this project I decorated a large box canvas with a 3D flower. I worked with the EEV09 stamp set by Ellen Vargo and Fresco Finish Acrylic Paints. The background of the canvas is build up by many layers. When it comes to layers I'm often inspired by the work of Donna Downey. In my opinion she's a  master in adding layers". Let's get started.


I randomly stuck some tags (I bought these at that well known swedish store) to the canvas. I used a 6 x 16" PaperArtsy Box Canvas (15 x 40 cm). 


I spread an uneven coat of PaperArtsy Grunge Paste over the canvas and tags. I used a palette knife. As you can see on the picture this creates lots of texture.


I painted a thin coat of gesso over the backgroud to further embed the tags.


I adhered layers of text (anti stress tips from a Dutch Flow magazine :)) and washi tape with gel medium.


 I covered the text and tape with gesso.


I coloured this background as shown with Turquoise, Lake Wanaka, Inky Pool and Chalk. I added some Slate to the edges of the canvas.


To create the flower I coloured scraps of paper with Candy Floss, Plum, Spanish Mulberry and Orchid. Stamped a leave from the EEV09 stamp set multiple times with StazOn Cherry Pink on the paper scraps and cut out. 


I assembled the flower as shown. I added a thin coat of Chalk to the leaves to achieve a distressed look. I attached seed beads to the centre with Ranger Glossy Accents.


This is a close up of the layered background.


I coloured some cheesecloth/gauze with Candy Floss and added it to the canvas. Cut some words out of an old book.  I adhered cord as a stem, coloured the cord with Chalk.


I used the same cheesecloth to add a bit of 'body' to the flower.


At last I want to say thanks to everyone at PaperArtsy for giving me the opportunity to be part of the team, thank you so much and I want to say thanks to all the readers of the PaperArtsy blog * YOU * for the support, the visits, the comments.... during these 4 months. Thank you so much!

I'm wishing you all a Merry Christmas and a Happy New Year!!!

~Anneke~

A huge thanks to you Anneke for all the inspiration you have shared with us. We have loved having you and enjoyed your "clean lines" style. This project is so pleasing to the eye and multi textural. Seasons greetings to you and yours.

We would love you to join in with the challenge. If you are inspired to action by any of this month's guests who have blogged in December 2014 then join in and link up your creativity HERE. You might win a voucher to spend on products of your choice from the PaperArtsy online store. You need to add your link by 17:00 (London time) Dec 31st 2014, the winner will be announced 2 hours later at 19:00, Dec 31st, 2014.