2021 Topic 8: Nature's Treasure
We
love it when a designer uses another designer's products. It is super-interesting to see the outcome, and on this occasion, Kay Carley has
used Jo's stamps to create a wonderful floral, buzzing summer scene. Her explanation of the process she uses to build those amazing garden layers is super helpful!
~ Leandra
~ Leandra
Hi everyone, it's Kay with
you today, and I'm here to share with you a decorated wooden hanging
plaque that I created using JOFY stamps. With all the media coverage
about bees at the moment I definitely wanted to create something
involving these wonderful insects for my Natures Treasure project as we
would be lost without our bees!
To
go with the bees I chose to create a garden full of flowers for the
bees to collect their pollen from. I've found that the trick to creating
a pleasing, layered composition such as this, is to keep my colour
palette quite contained, so although I have used quite a few different
Frescos I've kept the colour palette to tones of greens, yellows and
pinky/purples.
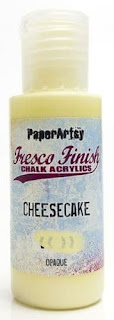
To begin my project I assembled three pastel colours of Fresco Chalk Acrylics to create a random background and chose a contrasting Fresco colour to stencil on top.
You
can see that I kept quite an ethereal feel to how I applied my paint
which was achieved by sponging (using a sponge wedge) rather than
painting with a brush or brayering.
I also kept the stencilling soft as I didn't want any defined imagery at this stage - I just wanted subtle interest.
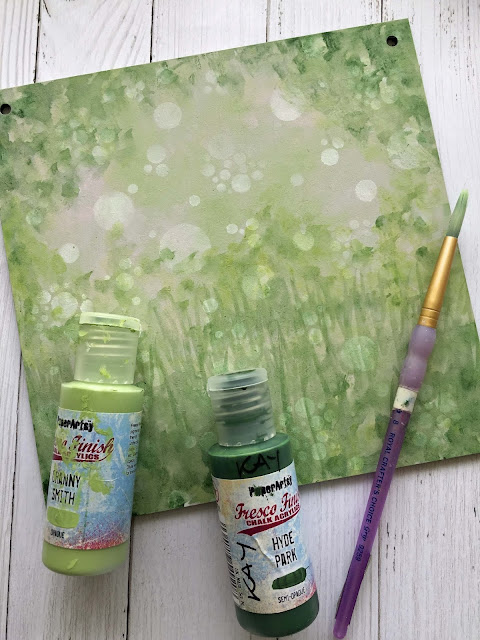
Next I wanted to create some foliage as a backdrop for my garden. It's important to get the backdrop right at this early stage, as it is quite hard to add it at a later date once all your imagery has been stamped and painted.
I chose just two colours of green for this and switched to using a No.8 round paintbrush.
The
secret to applying the paints to create this effect is to have a very
wet paintbrush. If you don't have enough water you cannot get the two
paints to mix and merge together to create this watercolour effect. Note
that you can still see my original background peeping through. It's all
about creating that depth early on.
Next
up is to stamp your composition and have fun colouring it! I mainly
used Fresco Chalk Acrylics for this but I did add some details using
Polychromo pencils too. To sink the smaller flowers into the grass I
only inked up a small amount of the stem. Once I got to the base of the
panel I inked up slightly more of the stem to help with perspective.
You
can see how I have layered up the imagery using a combination of JOFY
stamps. Overlapping some imagery helps with creating depth to the scene.
I also lightly stamped some wording into the background first using
Ranger's Distress Ink (Picket Fence).
I chose two of Jo's stamp sets to create my scene with namely (JOFY26) and (JOFY30). (JOFY 26)
contains both the little and big flowers thus allowing me to create
lots of interest by dotting the smaller flowers all around in the grass.
Whereas the larger flowers allowed me to create some depth and
perspective when stamped in front of the beehive and each other. I also
used a variety of Ranger Archival Ink to stamp my imagery namely (Leaf
Green), (Olive) and (Jet Black).
To
really frame the composition I needed to add some imagery around the
sides of the panel so I delved into my stash of stencils to achieve
this.
Creating
scenes like this does take a little bit of time but you can begin very
simply by just overlapping a couple of images to create some depth.
Perhaps try stamping an image and then stencilling something to slightly
overlap part of your stamped image. The beauty of working with
PaperArtsy's Fresco Chalk Acrylics is that many of the colours are
opaque which makes it so easy to block out an image that is underneath,
so no fiddly masking is then required!
Love Kay x
Blog: Kays Crafty Corner
Facebook: Kay Carley
Blog: Kays Crafty Corner
Facebook: Kay Carley
Facebook Group: Crafting with Kay Carley
Twitter: @carleycards
Instagram: kay.carley
Pinterest: Kay Carley
Twitter: @carleycards
Instagram: kay.carley
Pinterest: Kay Carley
At
this current time, all of my teaching is being done online. You can
find details of all of my past and current online workshops over on my Crafting with Kay Carley Facebook Group.


8 comments:
that's just beautiful, Kay!
So beautiful. I love it.
www.rsrue.blogspot.com
Great depth and colour. A lovely aspirational scene 🤗
Gorgeous Kay!
Gorgeous Kay!
This is so beautiful- it’s like those stamp sets were made to go together!
WOW Kay! I have to say this piece really pops and has just the right amount of vibrancy to make it jump out at you. It's a stunner for sure! I love seeing these stamps at play again. xx, Autumn
Beautiful project Kay
Post a Comment