
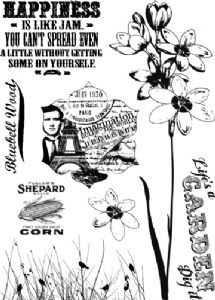
Well tonight we have a very special treat for you. One of our very own signature Designers, Lin Brown is here to give you a few ideas using her brand new stamp set that she created for us this birthday month! Tadaaa! (below) As you can see it has very useful stamps that make great background elements, resist options, or alternative stalks and such for flowers, plus some fabulous flower heads. This is going to be a very useful set in conjunction with her other stamps. You were lucky enought to get a sneak peek from Carol Quance herself just a couple of days back, so here's ideas from the boss herself !
 |
| ELB04 |
As many of you are aware, Lin is also our very good friend, and the amazing, talented one with whom I used to teach our bi-annual ArtsyCrafts weekend retreats for 5 years! She is now retired (ha!) but teaches classes in the midlands, UK on a monthly basis, and occasionally she will go and teach or demo in craft shops in other parts of the country. Lin has an wonderful eye for pulling a project together. Her use of colour, texture, embellishments and layers is very considered, and always creates a stunning overall effect.
I'll leave you with Lin ....enjoy!
"I have been using PaperArtsy stamps for many, many years and I was delighted when Leandra invited to join in the fun to celebrate their tenth anniversary. To add to the excitement, I have a brand new plate of stamps which compliment the existing three plates with additional flowers and much needed greenery. With new stamps to work with, I started to think about how I could use them in a birthday project. It occurred to me that it would be nice if I could include some of my all time favourite stamps and products from PaperArtsy as well as some of my favourite techniques. Choosing the stamps was really easy as I have a couple that are firm favourites but techniques......there were way too many to include!!!! This project out a lot more involved than I first thought but that's how it goes sometimes, I never know where I'm going to end up, so I'll apologise in advance for the mammoth post, you might want to grab a cup or glass of something nice to see you through"!!
I started with a paper mache book and a chipboard arch.

Using Matte Medium, I glued some book pages to the whole book, pasting some of the medium over the top of the pages to seal and protect the paper as I knew that the paper would probably disintegrate with all the layers of paint that I was about to apply.


Once the box was completely covered in paper, I left it to dry naturally. I like to do this for two reasons, first of all, I find that if I dry the matt medium with my heat gun, it does become a bit tacky and the other reason is that you don't want to encourage air bubbles to appear and this does seem to happen more with a heat gun!!
Now for Grunge Paste ....I love this stuff!!! It's smooth, it's creamy, it's lightweight, it's easy to apply and it dries fast. I couldn't ask for anything better. I used a palette knife to scrape some Grunge Paste through a few stencils on the front of my book, bearing in mind that the arch would also sit on the front of the book so I only needed designs around the edges.

While I had my Grunge Paste on the desk, I decided to prepare all the other items that needed Grunge Pasting. First up, a little experiment. I wondered if I could make embellishments out of Grunge Paste so I filled a little mould with the paste and set it aside to dry. I found that I needed to leave this over night to dry thoroughly as it stayed wet underneath for quite sometime. I'll return to these later.

Next up, the arch. I scraped some Grunge Paste onto the arch, then pressed my stencil into it instead of scraping the Grunge Paste through it. I like how it kind of sticks to the stencil and has that sucky feeling when you lift it off so it creates an uneven, peaked effect.

I scraped some more Grunge Paste on other areas of the arch and used Mini 61 (my fav mini script stamp) to add some more interest to the frame. Remember to lightly spritz the stamp with water first, this stops the stamp sticking to the Grunge Paste.


Now for paint. I really love rich, warm autumnal colours and as this project is all about my favourite things, I decided to use some of my favourite colours too. I started by painting the frame with Chocolate Pudding, making sure that the paint got into all the nooks and crannies. I hate it when you see those pesky white bits staring back at you!! When this was thoroughly dry, I dry brushed some Brown Shed over the top. The secret to dry brushing is to use very little paint and quite a stiff brush, if you keep those two things in mind and build up slowly, you will achieve some fabulous effects.

(By the way, those are not pesky white bits on my frame.....must be fluff!!)
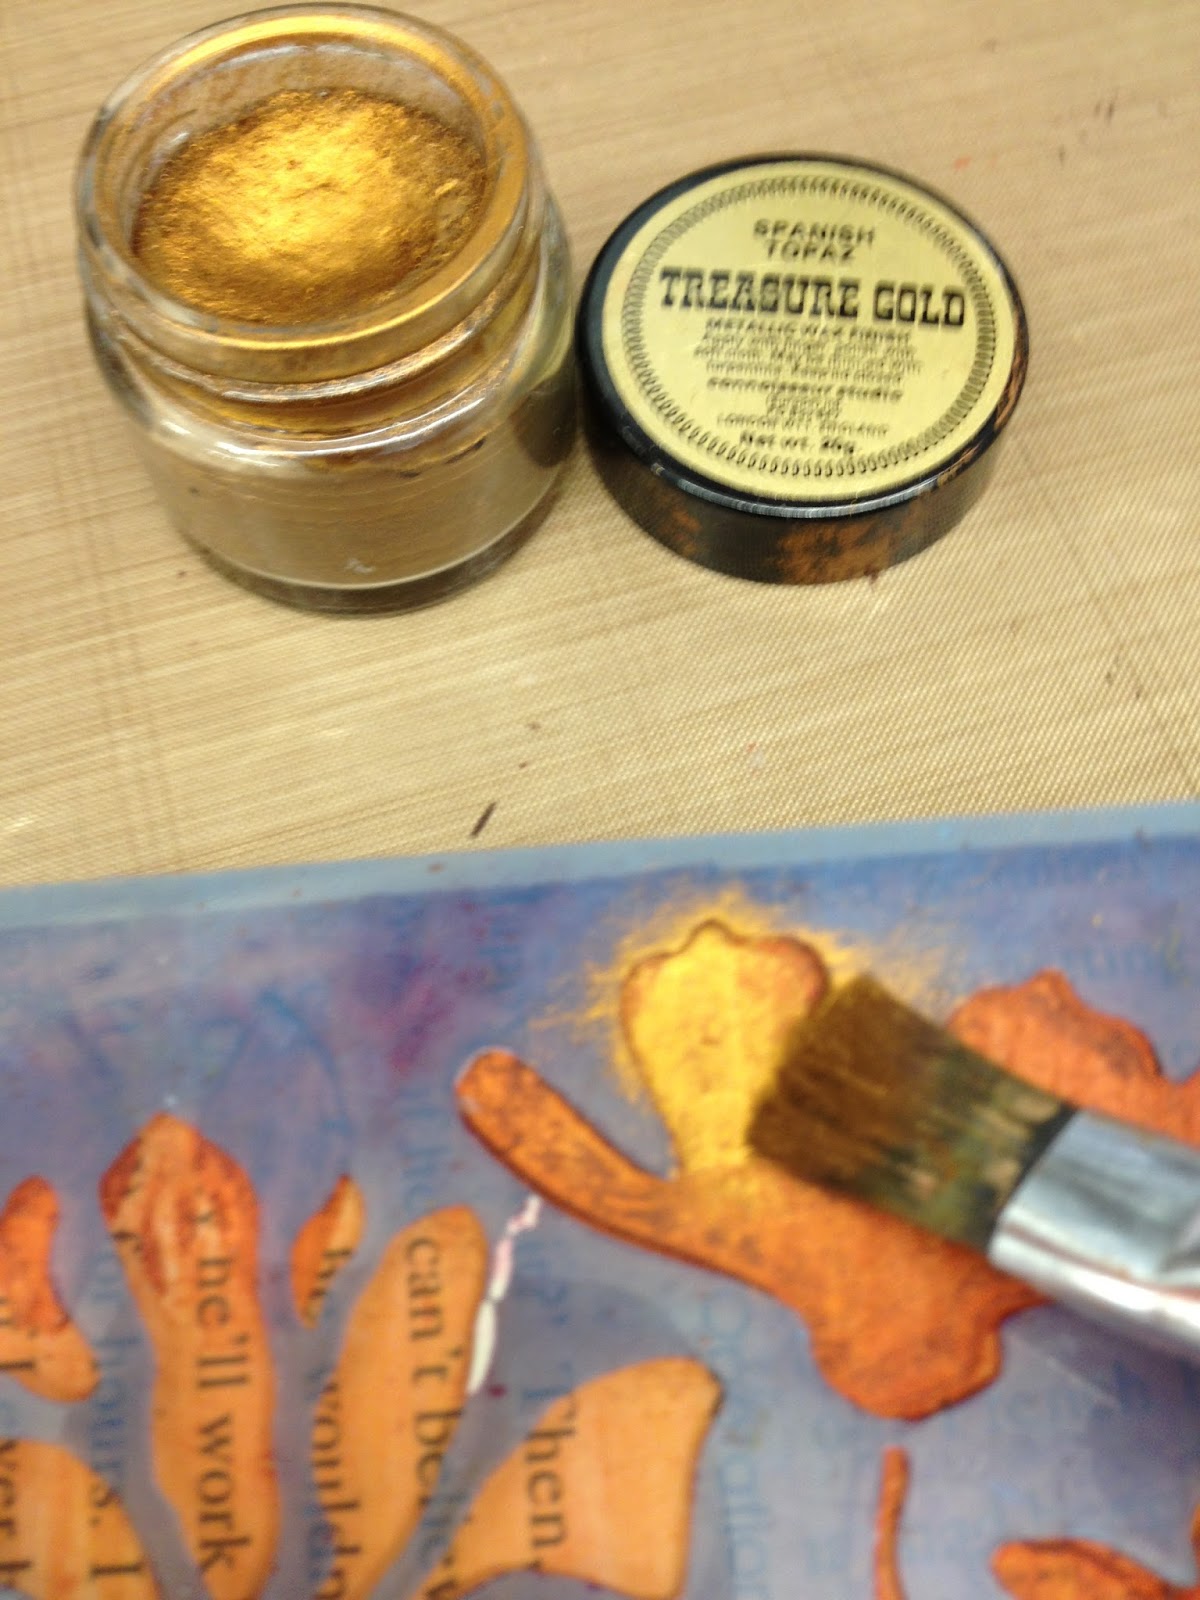
I added a touch of Treasure Gold with a flat brush and this really highlighted the texture of the Grunge Paste.

Now back to the book box. I started by painting a layer of watered down Pumpkin Soup over the whole box. Even though this is a translucent colour, I knew that I would be adding more layers of paint and I wanted to make sure that the text would be visible. Once dry, I added a layer of watered down Brown Shed, applying this more to the outside edges. After drying, I dry brushed some Chocolate Pudding to the edges.

Here's a great tip for applying Treasure Gold to the stencilled Grunge Paste. Simply re-position the stencil before applying the Treasure Gold, that way the Treasure Gold only appears on top of the Grunge Paste and not down in the dippy areas.
Next, I cut some Tando Creative chipboard borders to fit both the outside and inside of my box.


I painted these in the same way as the frame. Chocolate Pudding, dry brushed Brown Shed and then Treasure Gold. A bit of bling to give it a lift and some ball chain to hide the join. In case you're wondering, Claudine Hellmuth's Matt Medium works a treat for sticking metal embellishments.
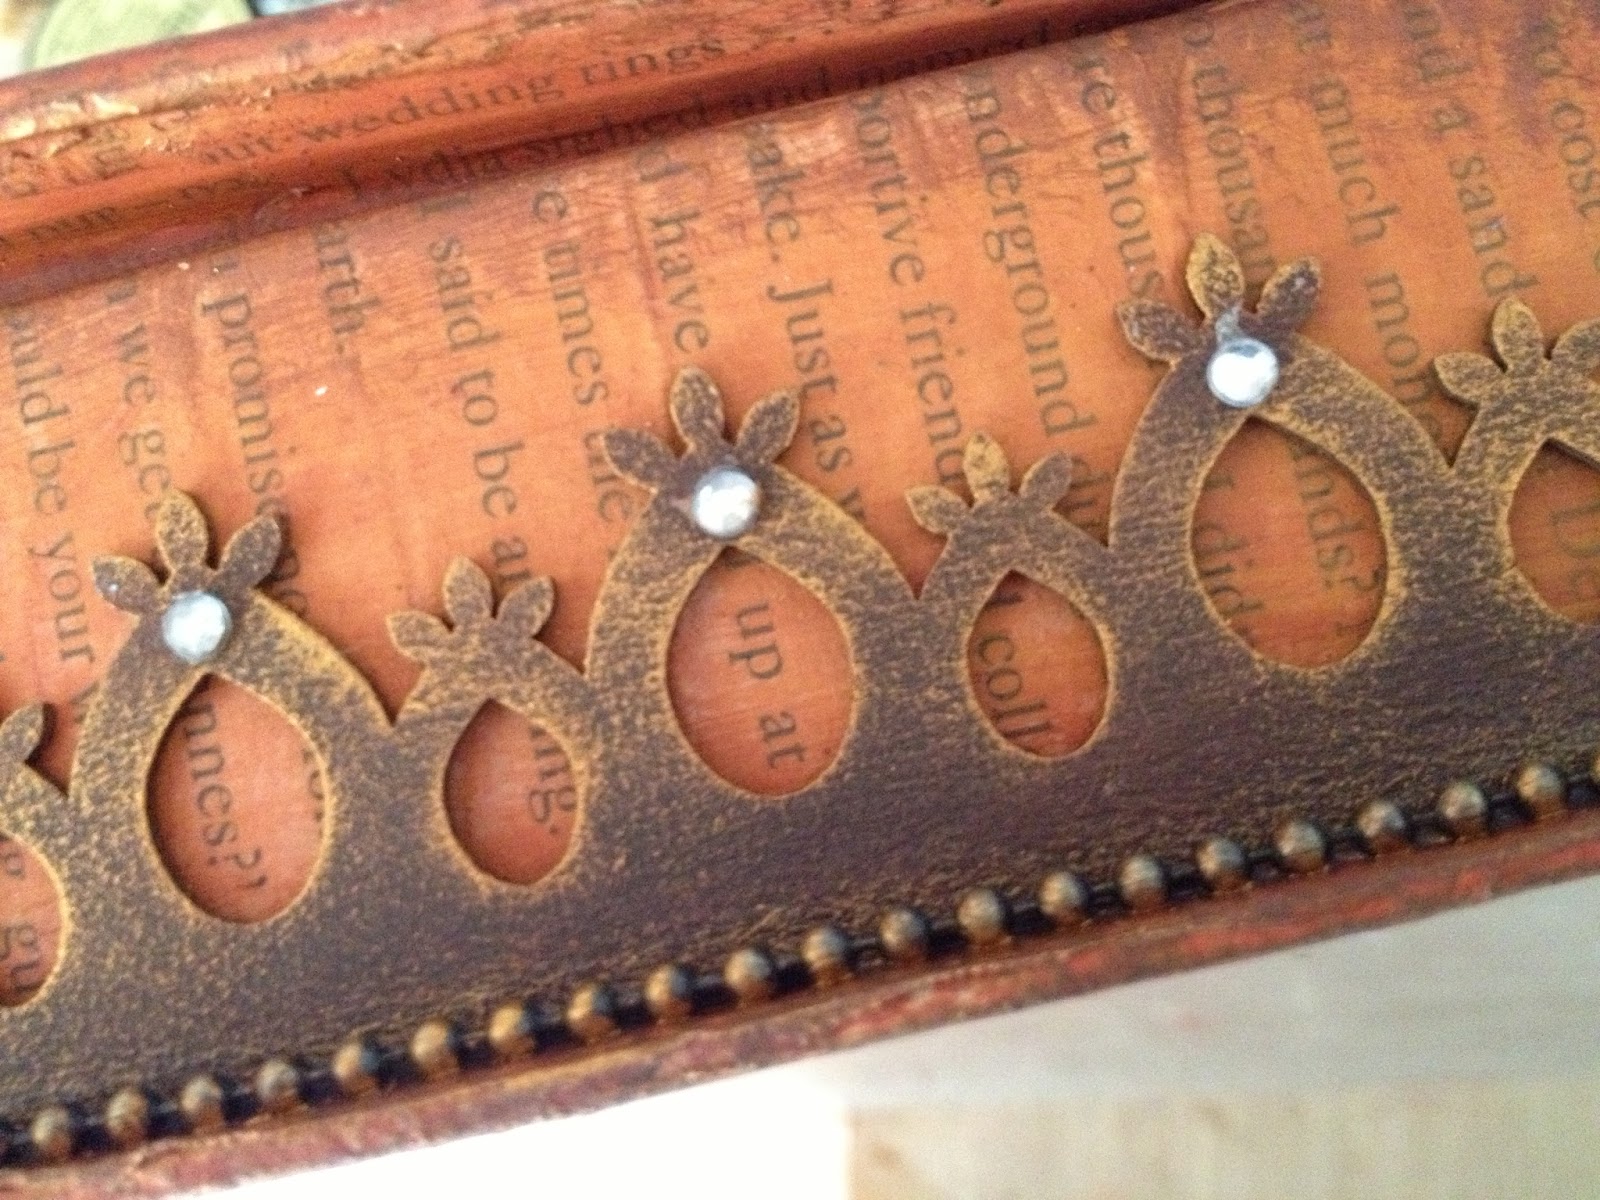
I did glue some black card behind the trim that went inside the box as I needed to use a stack of foam tape to stick it in place and that would not have been a pretty sight through the lovely border trim.

Moving on to the flowers. I'm in love with fabric at the moment and I wanted to revisit something that Leandra and I taught at our very first ArtsyCrafts event....stamping on cotton. A fine weave calico works great but at the moment, I really like Egyptian cotton, it's really smooth and is a great surface for stamping detailed images. This flower is from HP1009 and has to be my all time favourite PaperArtsy image, it is so versatile, I've use it on acetate, metal, fabric, wood grunge-paper and it stamps up beautifully on every surface.
I use Rangers Archival Ink for fabric stamping, it is oil based so it stays wet longer that most other ink pads but it still gives a sharp, crisp image. When stamping on fabric, make sure that your ink pad is well inked, stamp the image on the fabric but leave the stamp in place for a minute or so. The fabric will suck all the ink from the stamp, giving you a fabulous image. Most important of all, heat set this ink. If you don't heat set, the ink will smudge when you start painting.

I started with a layer of watered down Pumpkin Soup. Blended some watered down Brown Shed and added my final shading with watered down Blood Orange.

I realised that one sprig of flowers wouldn't fill my arch, so I added another one with the intention of filling in the gaps with some text when I had finished all the painting. Once you are happy with your flowers, heat set them. This is important as it was at this point that I sprayed the fabric with water to help me create a soft, blended background. After spritzing with water,, I used a wide brush to apply a layer of watered down Pumpkin Soup. While it was still wet I a added some watered down Brown Shed. I do find that rubbing the second colour in with my finger helps blend the paint evenly. I like to leave the fabric to dry naturally if I am not pushed for time. Sometimes I find that I get tide marks if I don't dry it evenly with a heat gun.

While I had some fabric and spare paint on my desk, I made this little fabric panel which will appear inside the box later. I used one of the images from my new plate ELB04.

It was printed with Pumpkin Soup that I had applied to the stamp with Cut N Dry foam.

I wanted to print a selection of flowers and leaves so that I could create a garden inside the box along with a few spare flowers to embellish the front cover. The first flowers (from ELB04) were printed on book pages which meant that I needed to use translucent paints in order to see the text. I sponged Pumpkin Soup over the whole stamp, edged it a little with some Brown Shed then went back over it with Pumpkin Soup to blend the colours together before printing on the book page.

I then glued the book page to some brown card so that I could trim the flower leaving a small brown border.

The next flowers and leaves were printed on brown card which meant that I needed an opaque paint so that it would show up well on the dark card. I began by sponging a layer of Haystack on the stamp, followed by a layer of Pumpkin Soup, edged with Brown Shed as per the previous image and blended with a little more Pumpkin Soup. When the paint was dry, I stamped some script on the flower.


I used a few stamps from one of my original sets of stamps ELB01.

The large bloom in this set has a matching die and you really need to know how to use them together.
There is a small notch on the die which is crucial to lining up the image correctly. Once you have die cut the shape, leave the card in the die, and mark the notch in the back of the die. The petal under the notch corresponds to the petal shown at 1 o'clock on the index sheet. NOTE: the side you mark with the pencil is the side you stamp on! This is why you don't want to remove the card from the die until AFTER you have marked the notch.

The notch matches the petal that is at 1o'clock on the index sheet. I recommend that you also mark the back of your stamp so that when it is on the acrylic block, you line up the arrow on the back of the stamp with the notch-mark on the card, and you are good to go every time you want to use this image. Once you have done it a couple of times its easy. This is the same system for PaperArtsy's Grunge Flower dies 1,2,3 as well.

This one was stamped on a book page and mounted on brown card to match my other flowers.

Remember the Grunge Paste in the mould? That has now become the centre piece for this flower. I painted it with Chocolate Pudding and added some Treasure Gold, which highlights the texture really well!
Are you still with me? I promise I'm on the last leg now!!! Here is my garden, assembled inside my box with a few extra buttons, pearls and flowers as embellishments.The flowers are stuck in the box on layers of foam pads so that I could achieve a different height for each flower.

The little square of fabric that I created earlier now has my favourite PaperArtsy phrase stamped on it. It comes from HP1204.


I placed a layer of wadding behind my stamped fabric before sticking it down with a sheet of humungo sticky tape. This is the same as red line double side sticky tape but in a larger sheet. This allowed me to stick everything in place in one go and at this point I was up for anything that was speedy!!!

The last element proved tricky. I wanted to use some of the Eclectica chipboard shapes which were designed to fit my stamps. I really like using them with some of the Lynne Perrella faces to make unusual flower embellishments (you can see the concept on the chipboard packaging below).
The 'face' image I use a lot is this lady is one of my favourites from LPC008.

Originally I used the stem from Eclectica shapes 06

but when I tried to open my book, it was too wide and the book wouldn't fully open so I swapped it for the stem from Eclectica shapes 01 instead!!

My last tip of the day is how to paint the faces. All the Fresco flesh colour paints are opaque, so it would be quite tricky to paint in a face without obliterating all the detail of the stamped image. The easy solution is to paint the chipboard with either Nougat or Vintage Lace first, and then stamp the image in black over the top with Archival Ink. That way you have a lovely skin tone and all details remain sharp and clear. Just make sure you use translucent colours to paint the rest of the image to create shading and depth.

Phew! Sorry this was such an epic post but I hope it inspires you to try one or two of the ideas that I've shown you.

I wonder what the next ten years in the life of PaperArtsy will bring us to play with?
Leandra says: Well, Mrs (as you would say) it's always nice to have you drop in and share your creativity. I love the layers you get in your fun flower garden, its' more like a secret garden really, tucked in that book!! Thank you for not only making amazing hand carved style stamps that are so cool but for all the laughs we've had figuring out weird and wonderful ideas together. Ranger Red Snot deffo was the most hilarious invention ever!!
Gillian says: Adore the depth built up on your layers using the opaques and translucents Lin, as always a beautifully created project. Loving the additions to your Eclectica collection (adds to list of must things *giggle*). x
So my lovely blog people! Leave a comment for Lin on this post and for 3 people we have a set for each of her 6 different Eclectica shape sets to give away. Just leave a comment on this post to go in the draw!


60 comments:
one word WOW!!!!!
Simply and utterly wonderful! I have some of those books and been wondering what to do with them... not that I could match this! What a lovely project for a wet Saturday.
Wow! Outstanding! Totally beautiful project.
Thanks so much for the concise instructions and step-out photos, as well as the helpful tips!
What a fabulous creation, really gorgeous.
WOW!!!! Love it. What a clever idea and perfectly executed, but we'd expect nothing less xxxx
Goodness Lin, that was an epic post & an epically gorgeous project. It really is incredibly beautiful & I thank you for taking the time to explain & show everything so clearly. I've got to find some time to try some of these ideas.
Awesome project and lots of fun to have a dabble at making something like this, my project would be a lot smaller though.
Thank you for sharing each step of your anniversary project. You never cease to amaze me :-)
utterly gorgeous, I am not a flowery person as such but wow I have fallen in love with Lin's stamps over the past week. Totally smitten now that I have seen them being used.
Love, love, love it!! Xx
Gorgeous
Gorgeous
Well Lin...absolutely fantastic as always...love all the layers in that book..brilliant just brilliant!!
A totally stunning project!! It has so many elements - and each one has been beautifully created. Thank you for sharing all the hints and tips too. Claire x
Wow, what a gorgeous project and a great tutorial along the way. Thanks so much for the fabulous inspiration! :)
Wonderful projects. The colouring of the flowers is amazing. We already have the first 3 stamp sheets, we NEED to have the fourth as well.
Oh Lin it's like bring back at your workshops at Olney, just amazing you are so talented, absolutely love it, will certainly try parts of it. Thank you so much for sharing!! Margaret
Wow. I love the arch, the texture the colours. Treasure gold really brings it all out. The garden in the box is just lovely. Did I say wow?......
This is absolutely amazing Lin - I was entranced reading through how you achieved each fantastic element of this wonderful project. Some great ideas indeed. Margie x
WOW, absolutely stunning piece Lin. Great depth and you just make those flowers pop.
Love how you use the LP faces on the chipboard pieces, can't wait to give it a go!!
Awesome tips and ideas incorporated in fab techniques - thank you.
Sam xxx
another amazing creation Lin, you have creativity by the bucket load, I'm always amazed at how many projects you make that are always so different
hugs
Wow, this is so beautiful and totally inspiring.
Emma x
What a fabulous blog post! So much better than my usual Saturday night out clubbing (!). Thank you so much for going to so much trouble for us. I really enjoyed settling down to this with my bag of fruit gums. Particularly loved the idea of the grunge paste in the moulds, and love your new stamps,
Lucy x
Words fail me this is so gorgeous! I love the fabric and the little secret nooks and crannies! This is so beautiful I am in awe! Wish I had time to respond creatively to it! One day...Julie Ann xx
All the parts went together so perfectly. Love the colors. :)
This is so special, I cannot find the right words. Thank you for the explaination, I wil go and give it a try because I have some of the stamps. Please go on and make more beautiful artwork. Anneke.
Wow - Lin has outdone herself with this project - it is totally amazing
Just lovely and some great tips to try x
This is just lovely - I so want to make it
Lin's projects are always fab, love her stamps.
Dear Madam Linda (Missie is not appropriate after such a mind-blowing project!) - this is one of your top five -- and you have had many, many, wonderful projects. Your creativity is just stunning and the glory of the colours, content, composition is so pleasing to the eye. How do you do it? Thank goodness for the long-lasting combi of the two "L's" and all the marvellous wonders you have taught us and shown us.
Much love - Sally xoxo
WOW 'nuff said. This is amazing Lin, not just the making of it but the thinking of it in the first place! xx
I love boxes and this is simply sunning I love everything about it the colours are amazing x
Amazing !!
WOW!! WOW!!! What can I say that hasn't already been said? What an amazingly beautiful project!!! Thanks for sharing the tutorial, too!
What a stunning altered box. I love how you have layered the flowers. And those stamps with the flowers and faces are my absolute favorite! They are gorgeous! Great tutorial. So glad you shared with us.
Kate
Fab to see how 'retirement has not dimmed your creativity!!! I lobe th warm oranges and shades of autumn... X Gill
Lin, your book box is wonderful. I love flowers and yours are so beautifully created. The colours are gorgeous and details so well explained. Thanks for the walk through tutorial.
Alexandra x
Fabulous as expected from Lin. Thanks for the chance to win such a generous prize and happy 10th birthday too. Here's to the next 10 and the 10 after that too.
What a fabulous tutorial! A full lesson of wonderful techniques. Love every scrumptious tidbit, Lin!
I must get some Treasure Gold as it really does add a lot to the stenciled areas.
Terrific job, my Friend,
~Linda
Wow! Wow! Wow!! A fabulous box. Love all the stamps and shapes and textures created here! How it would be to win these stamps!
Wow wow wow I love love love your book box, it's absolutely gorgeous stunning and amazing. I love how you have built up all the flowers, and I so need your new stamps. I have the others and they are yet to see an ink pad as I always use them with my frescoes lol. Kezzy :-) xxx
one word WOW !!!!! Lin, totally love your box
Janet x
Fabulous project Lin!!
I love it!
Bizz
Hmm, commented everywhere on this gorgeous make except here .... Doh! Lin it's absolutely stunning and I just have to get some of your stamps next. Thanks for such a detailed post. It's a big help with the techniques.
Hugs
Lesley Xx
such beautiful ideas as ever. Love all the exquisite detail in your projects x Lavinia
Thank you so much for the clear instructions for this project. What can I say it is beautiful and has so many tips for techniques I have struggled with. I have not taken much notice of your stamps in the past even though I am a great fan of all Paperartsy products. I will certainly be adding some to my stash now. I could go on for ever about this but I had better not.
Pat xx
Just great
Sue
This is so beautiful, very inspirational:) X0x Annie P
oh wow this is AMAZING I love it gonna try out a few bits as soon as the dreaded housework done
Beccy x
Gorgeous as ever.
Such a good eye for colours, shapes and details. Love the project and the story.
Margriet
Uh... WOW! It may have been a long post, but I LOVED every bit of it! Thank you SO much, for your amazing ideas, stamps and creativity. Whew, off to read it again :)
Fabulous project, love the colours, such a talented lady, Love Carole
gorgeous project Lin, love your flowers!
Wow, wow, wooow !!! What a wonderful project Lin, I love all the details on it !!! xx
Absolutely stunning Lin ! The Grunge Paste embellishment is fabulous ! Sue C x
Wow, Lin! how beautiful is this. Can't wait to give it a try. You're so inventive. Will there be a class? ( Please, pretty please :) )
Simply beautiful!!! xxx
Stunning!
Thanks for showing us each step!
Wonderful, just makes my fingers itch to start creating.
I want one !! this is just the instructions I needed- thanks xx
Post a Comment