" I was recently looking through some old
photographs and I spotted one of a doorway which sparked the idea for
this project".
I cut the arches from thick cardboard
using a Sizzix die.
I cut one of the arches into two and
then used a brick stencil with Grunge Paste onto the 2 'doors'. When it was dry I used
Stone Fresco Finish Paint and painted all 3 pieces.
Then I went around the edges with French Roast adding a little more to where I want the door handles to be.
I made an extra panel for the back as I
decided to double up the centre panel to give it some strength.
I then painted the inside of the doors
with a mixture of French Roast and Mud Splat. When the paint was dry
I then added a layer of Crackle Glaze.
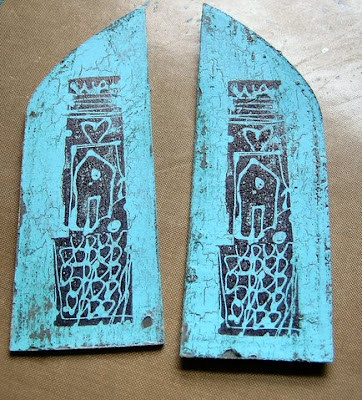
I used Bora Bora for the top coat as I wanted the crackles to be dark showing through the lighter colour on top. The thicker you apply the paint, the larger the cracks will be.
I sanded the doors a little to make
them look shabby, and then stamped them both using a stamp from:
I then used a Diamond Stencil on the
centre panel with Moccha Mousse, when it was dry I moved the stencil
slightly and used French Roast over the top. I didn’t bother too
much about the centre as I knew it would be covered.
I then cut a small piece of white
cotton fabric and stamped the image from the Lynne PerrellaCollection 005 using Black Archival Ink. I re-inked my ink pad before
stamping the image to make sure I got a really good image. A tip that
I was given at one of Lin Brown’s workshops is not to remove your
stamp too quickly when stamping on to fabric. By leaving the stamp in
place a little longer the ink sinks in to the fabric. I then heat set
it and painted it using Limelight, Beach Hut, Inky Pool and Claret.
For the face I used Vintage Lace with a
little Butternut mixed in. I then frayed the fabric around all of the
edges.
I’ve used French Roast around the
edges with lots of water. I wanted a dark colour so that it would
stand out against the paler background of the arch. I had my heat
tool to hand so that if the colour started to seep too far I could
dry it quickly.
I then cut four hinges from Grunge
Paper using the Hardware 1 die.
I wanted to use these metal embellishments but I didn’t want them to be silver. So, I used Florentine Treasure Gold to change the colour of them.
I glued the hinges to the doors and the
back of the middle panel. The brads have been painted with LittleBlack Dress and I’ve snipped off the legs and stuck them in place
on the hinges. The little door handles are Tim Holtz embellishments
which I’ve also snipped the legs off.
This is what it looks like from the
rear.


.jpg)
23 comments:
Fantastic project Sue! xx
Beautiful inside & out!
gorgeous!! definitely going to have a go at this one!!!
Gorgeous! x
Love it Sue!!
Stunning!
wonderfully textured and coloured doors and hinges Sue. fab project!
How cool is that - the brickwork looks amazing with those painty layers. Fabulous!
Alison x
Love the project Sue. The layers of colour are great.
Jo
x
Fabulous project - very inspiring
Beautiful. I love the texture
Beautiful. I love the texture
Fab triptych, love the design !!
Hi Leandra
that is a totally amazing piece of art that you have created. It is so real and so stunning all the attention to detail
I love it
Ria
Wow...this looks amazing!!!
Dot x
This is lovely! Thank you for the great tip about stamping on fabric too! This image looks gorgeous and the doors and triptych design that encase it are just fabulous.Julie Ann x
This is so very clever - love the brick work and the hardware!
sandy
Love that brick wall effect and the contrast with the inner parts, especially that stencilling. Hugs, Jenny x
Morning Sue, This is absolutely stunning, I'm so loving the brick wall with paste, and colours are fantastic, I love the use of the hinges and the delightful door knobs, the inside stamping is gorgeous, the treasure gold is the finishing touch, and your attention to detail is stunning.
Lots of love from Patricia xx
Another terrific project, Sue! You are Queen of the Stencils! And I love the stamping on fabric,
Lucy x
So wonderful. I love all the texture, colors, and details.
Really like this one :)
Happy craftin
Rebecca
Wow wow absolutely gorgeous, I am so wanting to have a go at this. I have a few browns and I never use them so this would be good for me to play :-) Kezzy xxx
Post a Comment