Sunday, 24 November 2019

2019 #19 Topic Introduction: Cute Critters

 2019 Topic 19: Cute Critters


Well hello everyone, Keren here with a new topic involving critters and CUTE! Yes, you read that right...we haven't taken leave of our senses, this is 'cute', the PaperArtsy way! Think quirky, funny with a whole dash of cuteness thrown in. Cute and artsy can coexist in the same universe! Strictly speaking, I might just be stretching the definition of cute as far is as humanly possible! So here's the intro post to get you inspired with the possibilities of 'cute critters' and Chris Dark is kicking us off with a gorgeously detailed mini work of art making a Zini just shine! Love his expression!

PaperArtsy Blog - Chris Dark

Edging towards the kooky side of cute is this gorgeous pair of textile twins. The patches and different sized stitching give character and life and I think they're really mesmerising.


The next artist adds the cute-factor with pretty eyes and elongated bodies. The subtle palette adds to the dreamy effect.


This lovely fluffy sheep is a beautiful watercolour piece and is wonderful mix of artistic and sweet.


Cute doesn't need to be pink and pretty, this duo look like they've been carved! The swirling sinewy lines give softness and appeal.


Cuteness is obviously in the eye of the beholder, and I do adore this 'A Deer Couple' created from polymer and acrylic paint. There is something so soulful and loving in their expressions; quite magnificent considering they're just models.


The next example is really a stretch for this category- but the twinkle in her eye really grabbed me. She has an elegant cuteness...or am I going too far?! I love the combination of a classic painting, human body and animal head. Perhaps you might try your own Frankenstein-esque combos!


This next example is simply for inspiration. It's critters, not so much cute ones, but universally adored even so. Love the patterning and if anyone's got the time to stamp me a pair of cute critter tights, I'd be very grateful ;-)


This next piece of inspiration had me wondering whether it was little humans dressed as critters or critters with humanoid features? Either way they're pretty stinking cute!


Our next artist is well known to us at PaperArtsy as she's been on the blog. I chose this image because I loved the sentiment and also because it has the cute factor but without the sickly bit!


This artist is on my radar for originality. Her quirky is strong and her critters are certainly original. The link goes to a video where she shows how she puts them together.


I wanted to add in an example of some PaperArtsy characters that I found scampering around the internet. Elena's Christmas characters look perfectly at home upon a giant bauble!.


This arresting piece is some wonderful assemblage in someone's home. Apart from the imagery, I love the rhino who seems almost soft and cuddly against the hard images and the black and white lobster.


Simple is often best, and this CAS piece features one of Lin Brown's cute images. 


Onto something a little more artsy; this fun critter has so many layers and terrific details. I love the startled expression.


If there's a cute specimen hanging around, Lauren Hatwell won't be far behind! This is just one of her examples with more Zinski loveliness.


Sweet creatures and babies are the perfect combo. This lovely print would be perfect in any nursery. The wide-eyed rabbit is really rather enchanting.


Chameleons have enduring cuteness-power (think Disney's Tangled) but this stripey one has rather gorgeous patterning and even the spikes seem adorable.


Most things look cute in a spotted party hat, and this duck is no exception!


Felting can produce amazing detail. This fox rather took my breath away!


Heading backwards to quirky cute, those birds never fail to make you smile!


This horse ( or is it a donkey) is resplendent with his knobbly knees and cute stripes. Love the black and white stripes and watercolour background.


Last, but by no means least is this wacky wonder sporting the best tie! Lots of colour and keeping the cute factor high.


I hope this has inspired to try cute, or at least quirky artsy cute! 
You're going to love the projects we have coming up for this topic. We are not doing the linked challenge  for 2019, so if you want to create along with us and this topic, please share on our social feeds so we can see what you get up to.  

The best places are Instagram @paperartsy or post in PaperArtsy People Group on Facebook. Make sure you tag us in your contributions, we love to see what you get up to in your creative world!

Saturday, 23 November 2019

2019 #18 Shaving Foam: Some Experimenting with ETS {by Lucy Edmondson}

2019 Topic 18: Shaving Foam


As we bring our shaving foam experiments to a close, Lucy works with dark and bright reinkers in shaving foam to create this canvas using Tracy's stamps and stencils ~ Leandra

Hi everyone, it's Lucy from Lucy's True Colours with you today, and I'd like to share with you a canvas board made with Tracy Scott's stamps and stencisl and some techniques with shaving foam.

When I first started papercrafting back in 2003, but before I started stamping, I dabbled with shaving foam as many of us did, but was not very happy with the effects. I had some marbling inks which were only available in primary colours and so I found the end results not very subtle. Now we have such a huge range of options available to us that we can float and marble to give so many different looks. in 2014 (and I couldn't believe it was so long ago!) I did some experiments here on the blog with Fresco Finish Paints and really enjoyed using shaving foam again.

So today I knew I wanted to do something different and to do some further experimenting, and had immediately decided I wanted to use Distress Oxide reinkers. I wanted to see if I could dip and swipe with a number of different materials using the foam and Oxide combo. I had mixed results. I knew that because Oxides are chalky they show up on black so I thought I would introduce black backgrounds into my project but I don't feel the nuances of the different colours show up as clearly as they do on white. I quite like the rather dreamy quality it gives though. I felt other aspects of the experiments were more successful.


I started off in the traditional way with my shaving foam and drops of Distress Oxide reinkers in Twisted Citron, Seedless Preserves
, Dusty Concorde, Picked Raspberry, Broken China, Abandoned Coral, and Shaded Lilac. I like to use a baking tin covered in foil to make clean up easy. You can then lift it out of the way to clear your work surface so you have space to do your scraping.


I made a feathered pattern with a wooden skewer, making sure to break up any dots of colour.


For my substrate, I painted a piece of canvas board with Fresco Finish Little Black Dress.


I then dipped it in the shaving foam mixture and scraped across once with my ruler. If you're not happy with it, you can repaint your canvas with Little Black Dress.


I did a piece of black cardstock at the same time, to make a matching greetings card. Well, really it was just part of the experiment! The markings seem much more distinct. I don't know why.


I then gold embossed the stem from the large flower from Tracy Scott Eclectica ETS29 onto the canvas.


I dipped pieces of pink tissue paper into the shaving foam mixture. The colours are glorious! You need to take a little care when pulling the ruler across as the shaving foam is a little soggy and the tissue paper is delicate but it's not too difficult to do so.


I then used my pieces of tissue paper to gold emboss the small and large flowers from Tracy Scott Eclectica ETS17 concentrating on the areas where there is most colour, and cut them out and layered them together.


I scooped up some of the surface shaving foam with a credit card (yes, it's buried under there!) and scraped it through Tracy Scott's stencil PS111 onto pink tissue paper and once the flower circles were dry I cut them out. 


I just love this versatile stencil. I cut up pieces of these circles and applied them around the edges of the canvas in a random fashion using gel medium. I love the translucent, veiny look.


I did the same thing onto a piece of canvas sheet from a pad, cut around it, and used my scissors to distress the edges so there were lots of cotton strands. This was one of the bits of the experiment I liked! I used this as a base for my layered tissue paper flowers and positioned it above the gold stem.


I used some of the remaining inky foam on the credit card to scrape across some canvas paper and once it was dry, I gold embossed the word 'Bloom' from Tracy Scott Eclectica ETS29 and roughed up the edges. I positioned this at the base of the flower stem.


To finish off my canvas I added some white text from Tracy Scott Eclectica ETS28 using Fresco Finish Snowflake, some white paint splatters, and some white lace at the bottom which I pleated. 


I took a silver bulldog clip and painted it with Fresco Finish Little Black Dress which adhered beautifully to the metal. Whilst the paint was a little wet, I added some random flecks of gold embossing powder for some rough texture.


I hope you have enjoyed seeing my creative process, what worked and what maybe didn't work so well, and that it has given you some new possibilities to try. I made such a big fat mess along the way I wasn't sure I would manage to get a successful project made at all! You could say it was a close shave!

Blog: Lucy's True Colours
Facebook: Lucy Edmondson
Twitter:@CraftyLuce

Friday, 22 November 2019

2019 #18 Shaving Foam: Festive Foam with ETS {by Chris Dark}

2019 Topic 18: Shaving Foam


Chris has taken Infusions and shaving foam to another level; the beautiful marbled results are inspiring. She has some useful observations when comparing them directly with Fresco Chalk Acrylic paints and creates some boldly coloured marbled patterns.

Hi everyone, it's Chris Dark with you today, and I'd like to share my shaving foam projects for this topic. I hadn't ever tried the shaving foam technique before although I'd seen many lovely creations around the web. It's very satisfying to see the results when you lift up your substrate and scrape away the foam. The crispness of the pattern when using Fresco Finish Chalk Acrylics was a nice surprise; this is where my results resembled the marbled papers you see on the inside covers of old books.

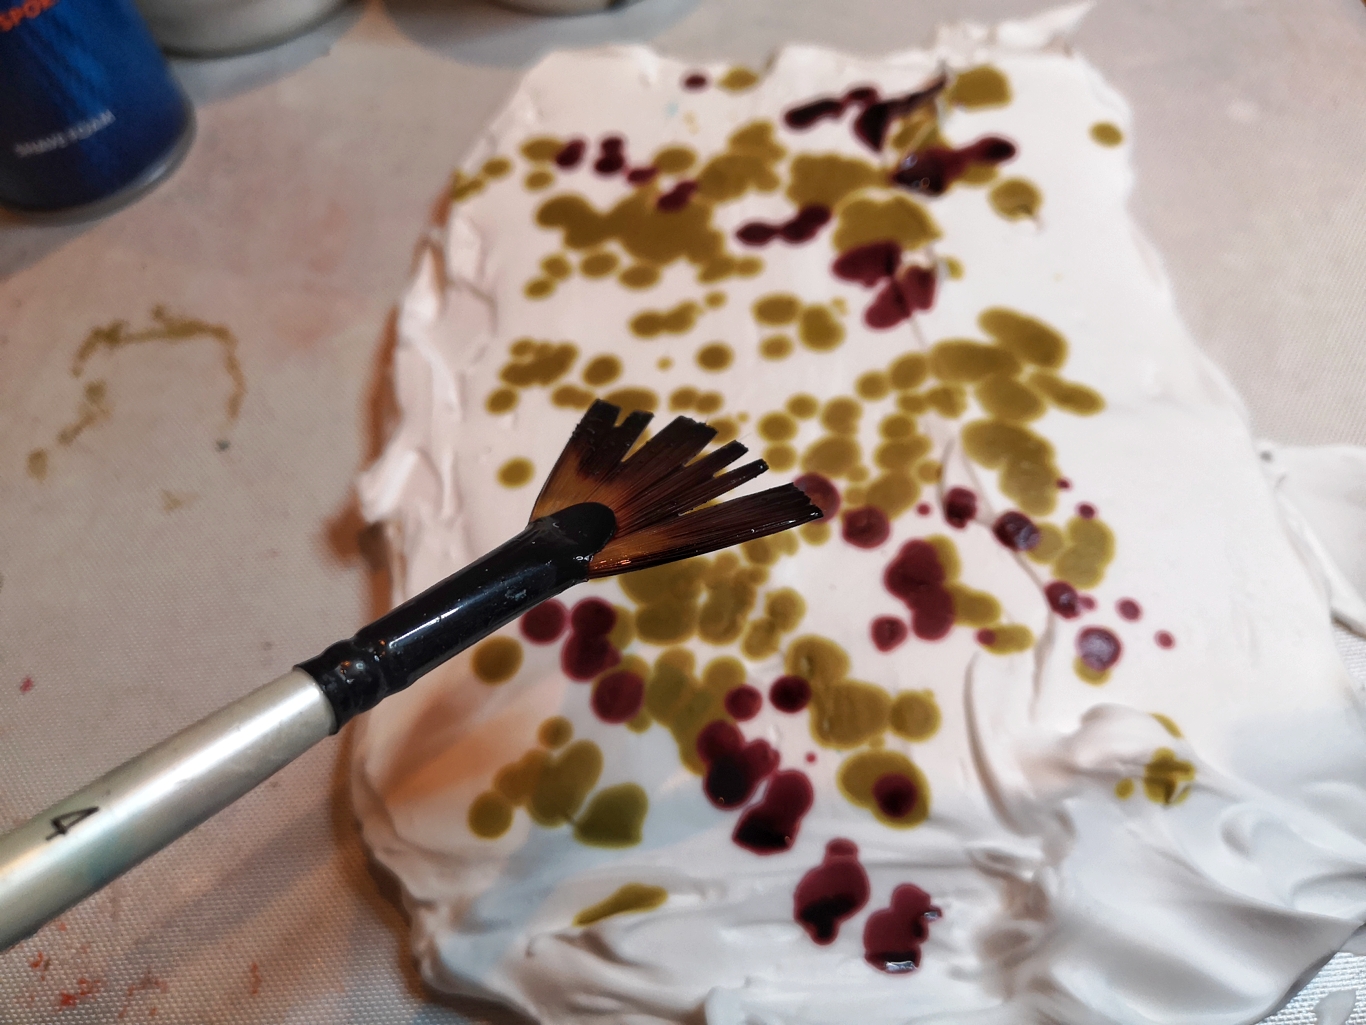
I added water to Infusions powders to make my liquid watercolours using Blackcurrant, Golden Sands mixed with Slime and Sleight Blue.  This is definitely my favourite use of the shaving foam technique, I love the boldness of the results. You can see below how that looks before my stamping over the top which in all cases doesn't allow it to show through very much but I really like how I get depth in the layers of colour and stamping with a nice background to start with.

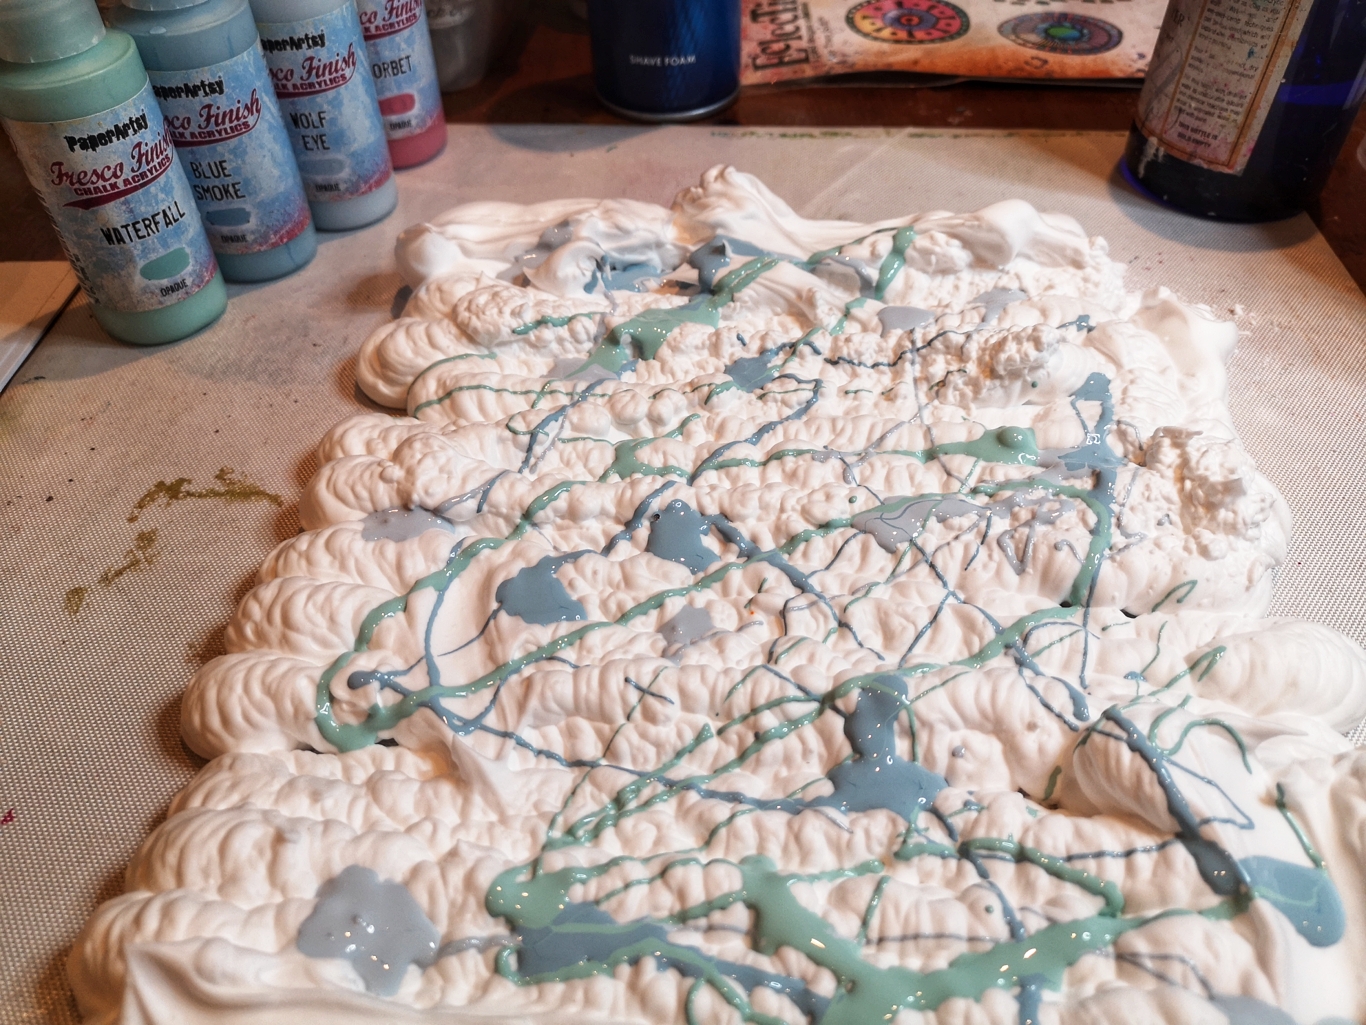
Fresco Finish Chalk Acrylics were used for the 'shaving foam with paint' technique in Wolf Eye, Blue Smoke, Iceberg, Midnight, Magic Moss, Waterfall, Electric Violet, Purple Rain and Sorbet and Tracey's gorgeous new stamp set ETS32 for the stamping, such a great addition to her line.


I've turned everything into Christmas cards and I like that I can make stamps not intended for Christmas work with the addition of doodling and festive die cuts.


Starting off with liquid watercolours made by adding water to Infusions powders and you don't need that much powder to get a really vibrant colour.


Splashing the Infusions watercolours onto a bed of shaving foam with a fan brush; love this brush for splashing.


All the colours added randomly.


Swirl the colours around with the end of a paintbrush.


Take a print and scrape off the foam. This is my favourite print!


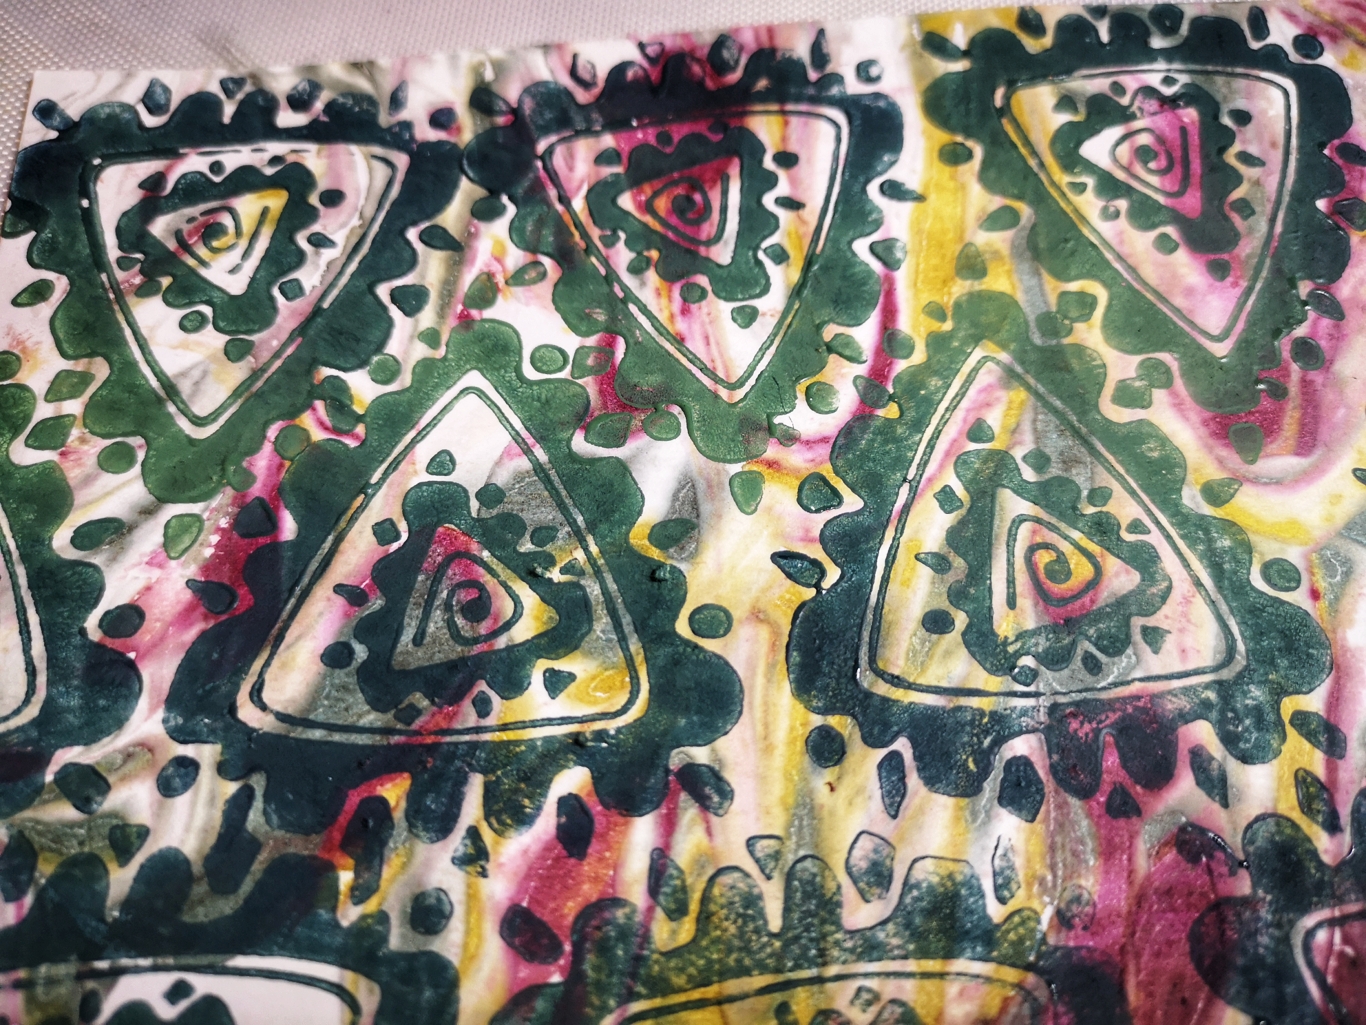
I mixed together Fresco Finish Chalk Acrylic in Moss and Midnight and brayered onto the stamp.


I made a pattern all over this sheet. The stamping has a slightly variegated appearance due to the two colours of paint.


Here I've used the paint technique and kept to a blue colour scheme.


On a second print I added some pink to the mix, the effect is crisper with the paints.


A snowflake fest on the next cards, I love how the stamping helps the die cuts to stand out.


This was fun and I'll definitely try it again especially with Infusions trying some different colours and mixing differently on the foam. I hope you'll try it too and let us know your results with Frescos, Infusions or both!

Have a great weekend, I hope you get some art time!

Chris x

Instgram: @chrisd999