Showing posts with label Altered Book. Show all posts

Friday, 31 May 2024

With 3 Things: Storage Book of Pockets {by Floss Nicholls}


Hello lovely creatives...It's Floss here with you today with the 3 things challenge. 

I was excited when I opened the box with the three surprise supplies in and found; stamp set Lynne Perella LPC006, The Hot Picks stencil PM018 and Shark Mattint (available from stockists). 

I knew in that moment that I wanted to do something with fussy cutting.  I'd incorporate my free motion stitching as a feature based on the Panacea Pizpireta image I'd seen a few weeks before that I found inspirational by Lisa Kokins and that I would hide stamped images in folds to incorporate the hidden element for this quarters PaperArtsy theme.

I was itching to get started and so went to find a fairly thin hard back book. 

I folded eleven pages roughly in the centre of the book using the deep margin as my measurement...and glued those folds down.  I then folded the remaining pages in half lengthways but did not need to glue these.  The idea behind this was to use the book as storage for my fussy cuts.  The front half of the folds to store the rough cuts, the back half for those that had been fussy cut and the middle pockets for anything in between.

With a thicker book, if I'd have folded all the pages in half it would have given me an open rolodex book holder, but I wanted to be able to close this one and potentially be able to flip through the pockets and tuck spots so I took a few pages out too...Being able to close the book would hold all the fussy cuts securely in place and this was important so I could have it with me wherever I went. My reel shows me shaking it about and nothing falls out :)


Using my gel plate, PaperArtsy stencil PM018, and their slimed and desert bush fresco paints I created some papers which I would use for the concertina edging which would hold the centre pockets together and bring some colour to the project. 

I measured the depth of the page for the length of each segment and made each segment wide enough to allow the pages to open enough to access the pocket area and also enough space to stamp the hidden feature within the folds.  I chose to stamp some images using Ranger Archival Plum Ink as I thought it suited the greens beautifully. 


I used my stamping platform to create a whole stash of prints to fussy cut...again I used Ranger Archival Inks in black and plum for this.  I used the Shark Mattint to bring a little interest to some of the prints using a small brush.


I really liked the idea of the hidden images in the folds...with two segments between each page it gave me an opportunity to mix the images up by stamping directly on to some of the concertina folded sections and fussy cut and glue black and white stamps on to others making this hidden detail more visually stimulating.


I wanted to explore using the shark Mattint further and wondered what it would look like on mulberry paper...It looked/reacted as I hoped it might and was definitely a YESSSS moment!

I squirted the Mattint straight onto the mulberry paper and spread it to cover the surface using and old store card. It absorbed deeper into the areas where the mattint was squirted than where it was spread and so it left some 'streaks' which was, for me, a bonus.  But it was the way the mattint worked with the little fibres inside the paper that was what I wanted to test...The fibres remained white giving me another visible texture. You really must try this technique if you like mulberry paper.


I glued tissue paper, fabric and paper 'Lynne Perrella' flowers made with stamp set LPC006 for a further variety of texture and surfaces onto the mulberry paper. I enjoyed using different parts of the stamps to give me colour density variation too. My free motion stitching around the flower using plum and cream coloured threads gave me a little more attention to detail and interest with another on the reverse. I then glued this onto the book creating the cover.


I used a lace ribbon to secure the tuck folder book together keeping all the fussy cuts safely stored away ready to be used on other projects.


I now have somewhere safe to keep my fussy cuts; it's organised sections means I can take my tuck folder book anywhere with me and I can trim to my hearts content at any given moment!

I really enjoyed making this project and I shall be putting a class together for this soon so do give me a shout if you are interested in doing this in person or online.

I must say one of the things I really like about doing the 'with 3 things' blog posts for PaperArtsy is that I have absolutely no idea what same (or very similar) three products/supplies the three blog artists will receive and then how we all make something so very different. You'll already have seen one fabulous post by Autumn yesterday and so make sure you look out for the third with 3 things using the same supplies by Mags tomorrow.

Until next time 
Sending lots of creative love
Floss x x x


Thursday, 30 May 2024

With 3 Things: Altered Book {by Autumn Clark}


Hi friends, it's Autumn Clark from SewPaperPaint with you for another With 3 Things post. I was so happy the current Topic, Books & Journals, was announced in conjunction with these particular 3 things.

I had previously started a shabby Lynne Perrella altered book and was thrilled to incorporate these 3 things into its pages.  Find more details on the altered book HERE.

Our allotment of treasures included the new PaperArtsy Mattint in Shark, along with a beautiful stamp set by Lynne Perrella (LPC006) and a favorite Hot Picks Mini Mask (PM017).

I had previously torn the pages between a spread to make room for the added artwork and decided it would be a fun place to start these journal pages.  I used the glue properties of the Mattints to adhere the layers of torn pages together.  The finished result was a sturdy, tinted page on which I could journal, with loads of texture as a bonus!

I mixed up a bit of Sleight Blue Infusions with water to make some "ink" for journaling.  I used a brush to scribe some thoughts in large script onto the tinted pages, adding some splatter for extra detail.  I tried to do some stencil monoprinting with PaperArtsy Fresco Chalk Acrylics over the backgrounds, but it didn't show up very much, so I tried to come up with an alternate idea for using the Mini Mask.  


I grabbed some tea dyed paper and did a stencil monoprint with Infusions  on the paper.  I wet the stencil thoroughly so it bled through to the backside of the thin paper.  I decided I would use this two-sided paper to make flaps for some "hidden" journaling to tie in with our quarterly theme.  


I sewed some random lace and blank pages along with some wrinkled strips of paper I had dyed with the leftover on my kraft mat from the monoprinting.  I liked how this wrinkled paper tied into the torn paper book page base.


I used the remainder of my Infusions "ink" mix with a glass dip pen to do some journaling on the blank pages.  I had never tried using a glass dip pen and was surprised at the way my faux ink flowed so evenly!  I used two of the stamps from the Lynne Perrella set as my focal images on either side of the spread.  The book closes very well because the thin papers don't add much bulk, but looks incredibly textural nonetheless.  I hope this project has inspired you today!  Perhaps you can use your Mattints to adhere some book pages together in your own altered book.  

Have fun!  xx, Autumn


YouTube: SewPaperPaint
Facebook: Autumn Clark
Instagram: @sewpaperpaint
Pinterest: SewPaperPaint

Sunday, 22 May 2022

2022 Topic 07: Specimen Jar {by Liesbeth Fidder De Vos} with Vintage Ink and the Dog stamps


Hi everyone, it's Liesbeth here with you today, and I'm here to share with you my Specimen Jar project! However it's not a jar...it's an altered book with niches and drawers, in a vintage style.


Starting a project like this, I never know where it will end... I was inspired by this two wonderful stamp sets! Very vintage and a bit mysterious, they made me think about a cabinet book with secret holes and drawers. So I just started with that idea and this is what I made!


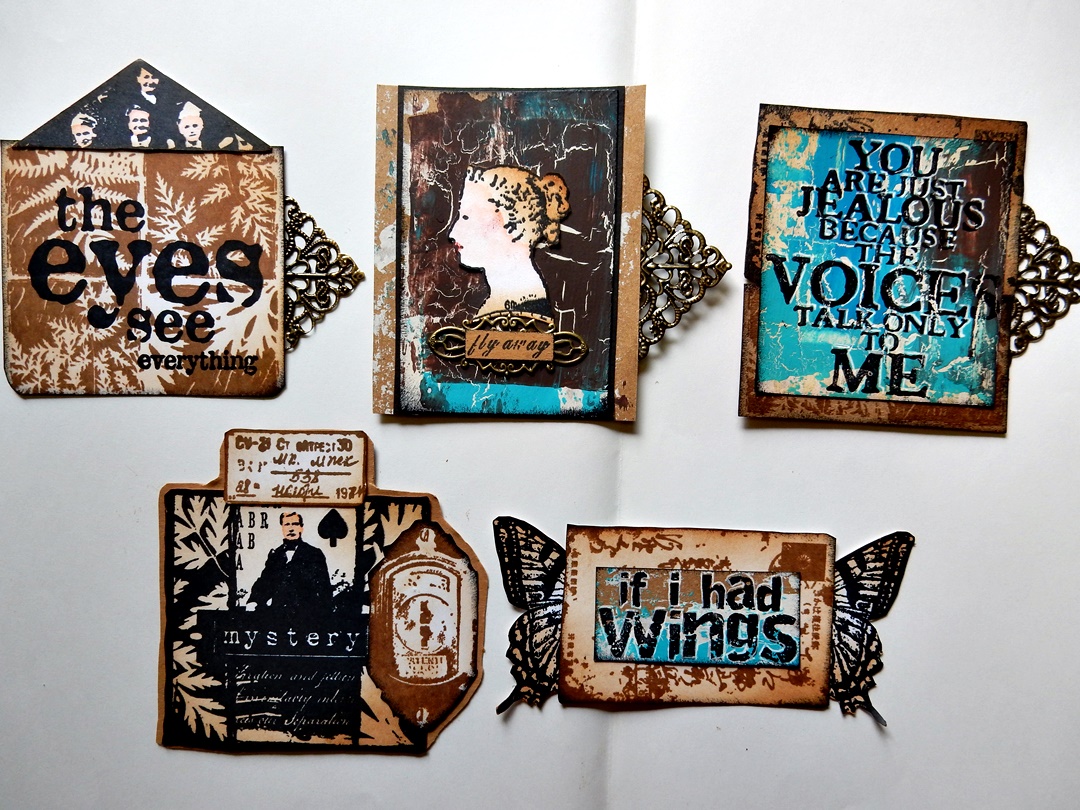
5 cards in the side opening.


Two niches and two drawers.


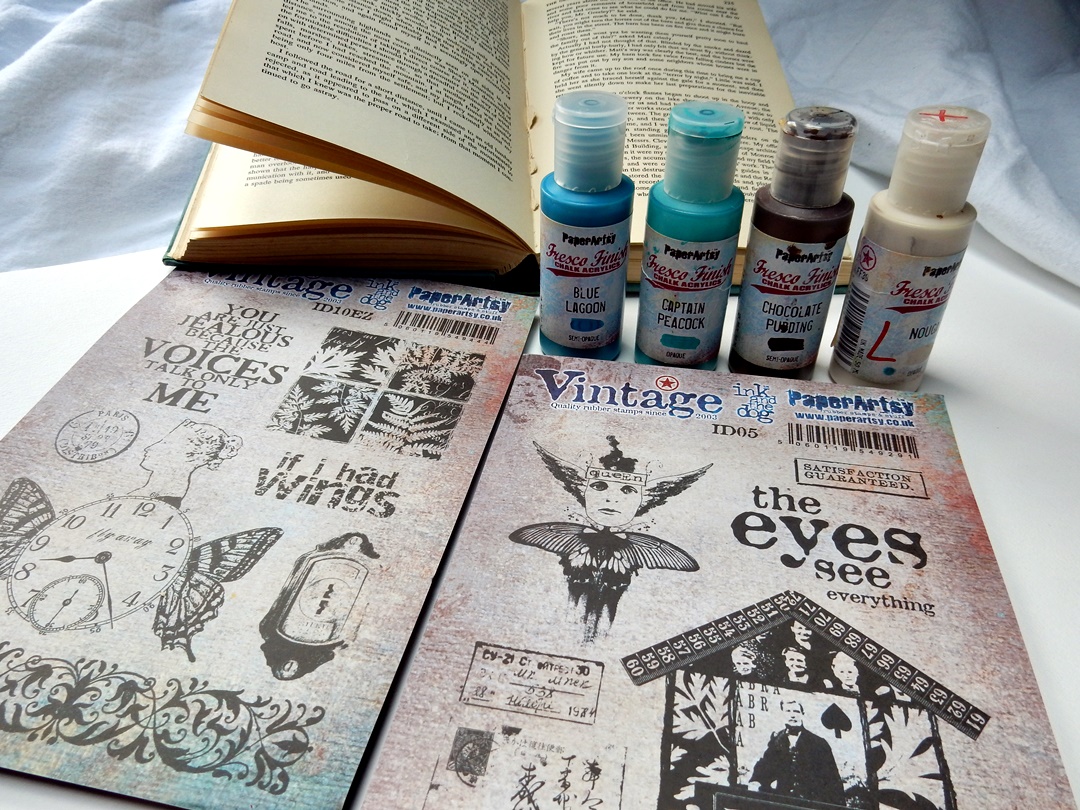
I challenged myself to use ALL the stamps in the two stamp sets, and it worked, I did! :-) I used PaperArtsy Vintage Ink and the Dog ID05 and ID10. I really love them!


The basic item for this cabinet book is, needless to say...a book. I used an old one, a nice blue color, gold printed at the spine. A newer one works too. I chose the color combination blue/turquoise/brown/off-white, so these four PaperArtsy Fresco Finish paints were perfect: Captain PeacockBlue LagoonChocolate Pudding and Nougat.This combination always works perfect for a vintage style. (And the blues are my favourite colours).


The cover of my old book is made of blue fabric, with a nice golden print, so I decided not to paint it and just leave it the way it is.


Let's start: The drawers are made out of two small match-boxes. I used the last part of the book, a stack of pages as thick as the match-boxes. I drew the size on the side of the book and also a niche in the center.


I also drew the match-boxes and the niche onto the top page.


Using a glue stick, I glued the edges of all the pages of the ,drawer part' together... yes...every page. ;-)


Onto the first page of the book I drew a house shape, using the house stamp as a guideline as shown. Again, I glued all the pages under it  together, until about 10 pages are left between this house piece and the drawer piece.


Now the big job started: carefully I cut the layers off, until 10 pages are left (Tip: put a small cutting mat in between).


I also cut out the hole for the drawers and the niche. I glued the boxes into the holes. I covered the sides, the cutting edges, of the big niche with a strip of bookpaper for a nice finish (no picture). Now I also glued the ten left over pages together to cover the niche and the match-boxes. Everything is glued together now.


Using the Fresco Finish paint, the two blues, Nougat and a tiny bit of brown, I painted the insides of the house niche and the boxes. I mixed the paints on my brush and I didn't work very neatly for a nice old and weathered effect. The left page and around the house niche I painted with Fresco Finish Nougat, Distress ink Vintage Photo, water and a little brown paint I made spots and smudges, again to create an old effect.


I stamped the left page here and there with the fern and text stamp using Distress ink Vintage Photo and Gathered Twigs. With these two Distress inks I also sponged the edges of the entire book and the match-boxes to create a very vintage look.


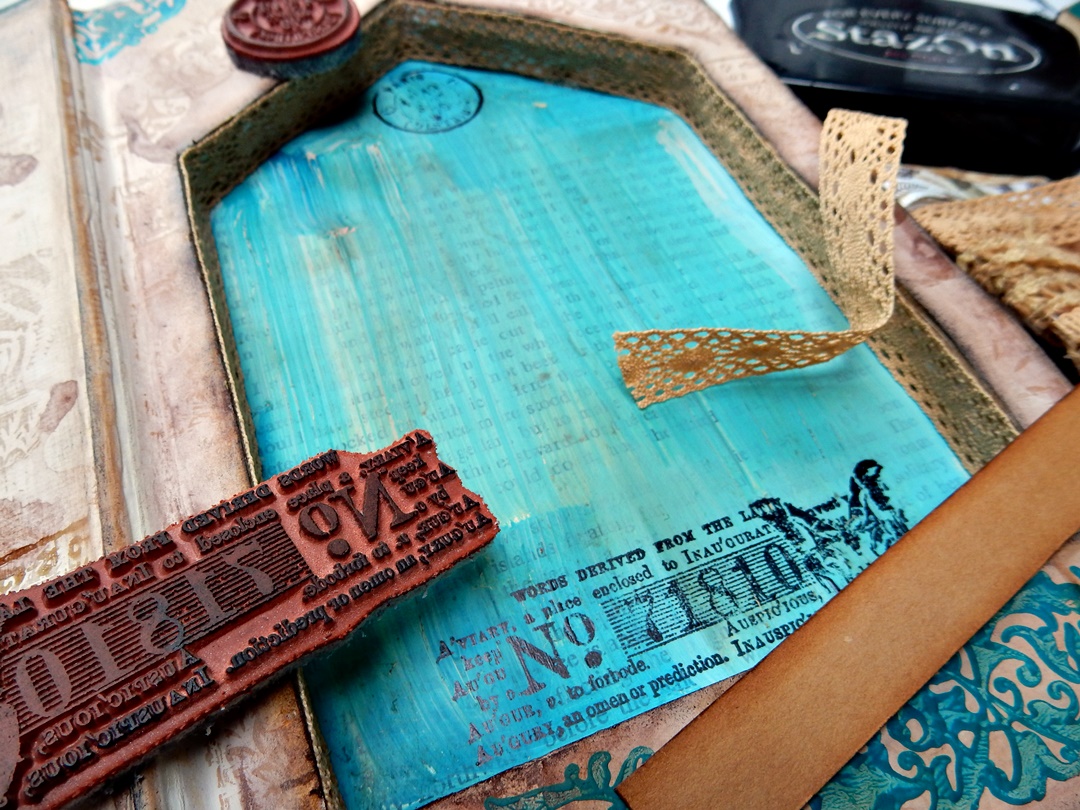
That border stamp is so perfect for this!! I spread a thin layer of Fresco Finish paint Blue Lagoon on a piece of paper and used it as an ink pad. I stamped it at the bottom edge and on the small pieces at the top. Later on I also stamped it with Distress ink along the niche.


Using black ink (Tsukineko StazOn Jet Black), I stamped some texts in the niche. I covered the sides with lace and made a cardstock shelf at the bottom of the niche.


In this phase I still didn't know exactly how I was going to finish it. If I start stamping like crazy, the ideas always come naturally! :-) So I took pieces of brown, white and kraft cardstock and started the stamping. I used almost every stamp of the two beautiful sets! I used the black StazOn again, and also Ranger Archival Coffee.


Then I realized I needed a bit more colour, so I painted a piece of kraft paper very raggedly with the four Fresco paints. I started with Nougat and after that I added Fresco Finish Crackle Glaze here and there. After drying I painted the colours with an old credit card and (the right piece) with a pallet knife. I stamped some of the texts onto this painted cardstock.


Now it was time to put everything together and combine things, and to fill the boxes and niches! I cut out lots of the stamped images and assembled them till I was satisfied. Of course I had lots of left overs, but I will use them later, I never throw things like that away! I painted the faces with pink watercolour and sponged the edges with the Vintage Photo and Gathered Twigs Distress ink using a blending tool. I used a colour pencil (red) and a white gel pen here and there.


Time for some embellishments: I inked one of the text stamps wth StazOn and rolled small bottles over the stamp.


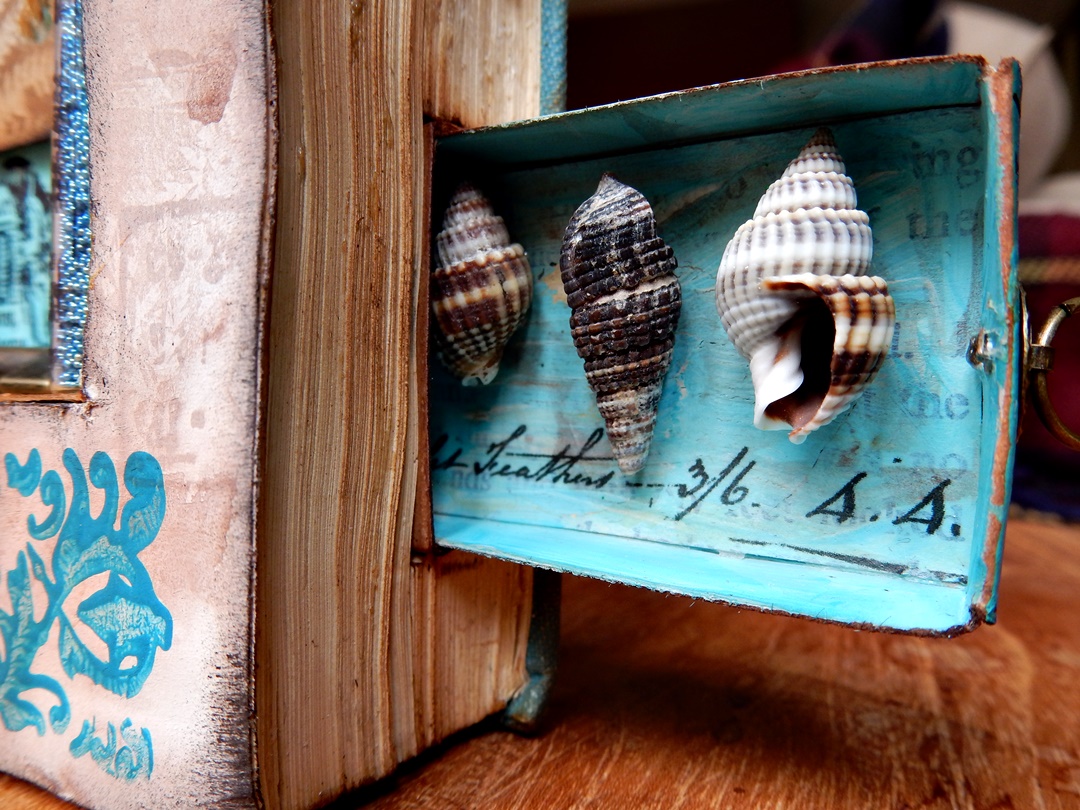
Using PaperArtsy printed tissue paper (you can also stamp on tissue paper yourself) I tore out small pieces of text and glued them into the match-boxes using gel medium. I also glued some small shells and pen nibs in the boxes and  added ring fasteners at the outside.


I composed five cards/tags to keep in the niche on the side of the book. I combined lots of stamps and also affixed some metal pieces and  sometimes an extra layer of black cardstock.


Left page finished.


Right page finished. I attached the stamped house and wings using 3D foam tape.


The little bottles are filled with mini beads, glitter, tiny shells, and I tied string around them. I also added some metal stuff and glued everything with tacky glue.


Detail of a drawer.


At the very last minute I decided to stamp this wonderful stamp onto the front cover of the book, using gold embossing powder. 


I think it's all done now!


Oh how I love to do this kind of time-consuming projects, it was so much fun! The process of combining the different PaperArtsy stamps is great! Cutting out the niches is the hardest part. If you can't or don't want to cut this much, why not try something like this in a shadow box, or onto the backside of a canvas? There are so many possibilities! Hope you give it a try and hope you will enjoy it as much as I did! Have fun!

Thanks for stopping by!

Liesbeth