Showing posts with label Niches. Show all posts

Sunday, 22 May 2022

2022 Topic 07: Specimen Jar {by Liesbeth Fidder De Vos} with Vintage Ink and the Dog stamps


Hi everyone, it's Liesbeth here with you today, and I'm here to share with you my Specimen Jar project! However it's not a jar...it's an altered book with niches and drawers, in a vintage style.


Starting a project like this, I never know where it will end... I was inspired by this two wonderful stamp sets! Very vintage and a bit mysterious, they made me think about a cabinet book with secret holes and drawers. So I just started with that idea and this is what I made!


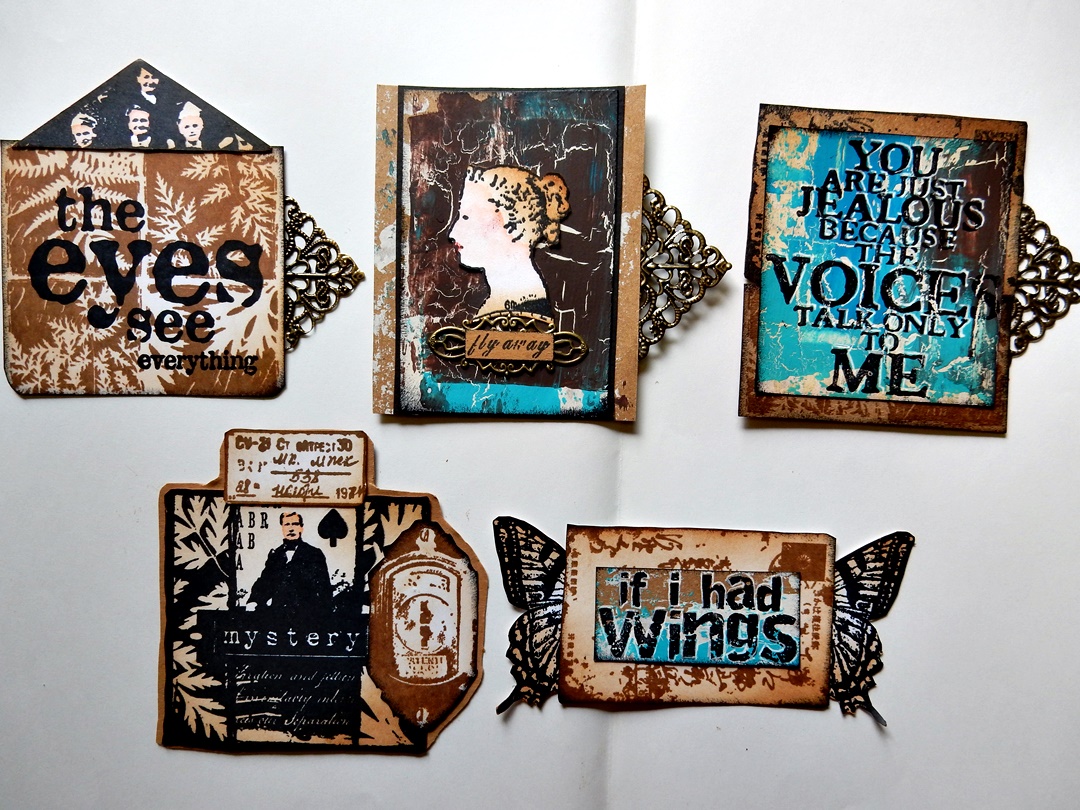
5 cards in the side opening.


Two niches and two drawers.


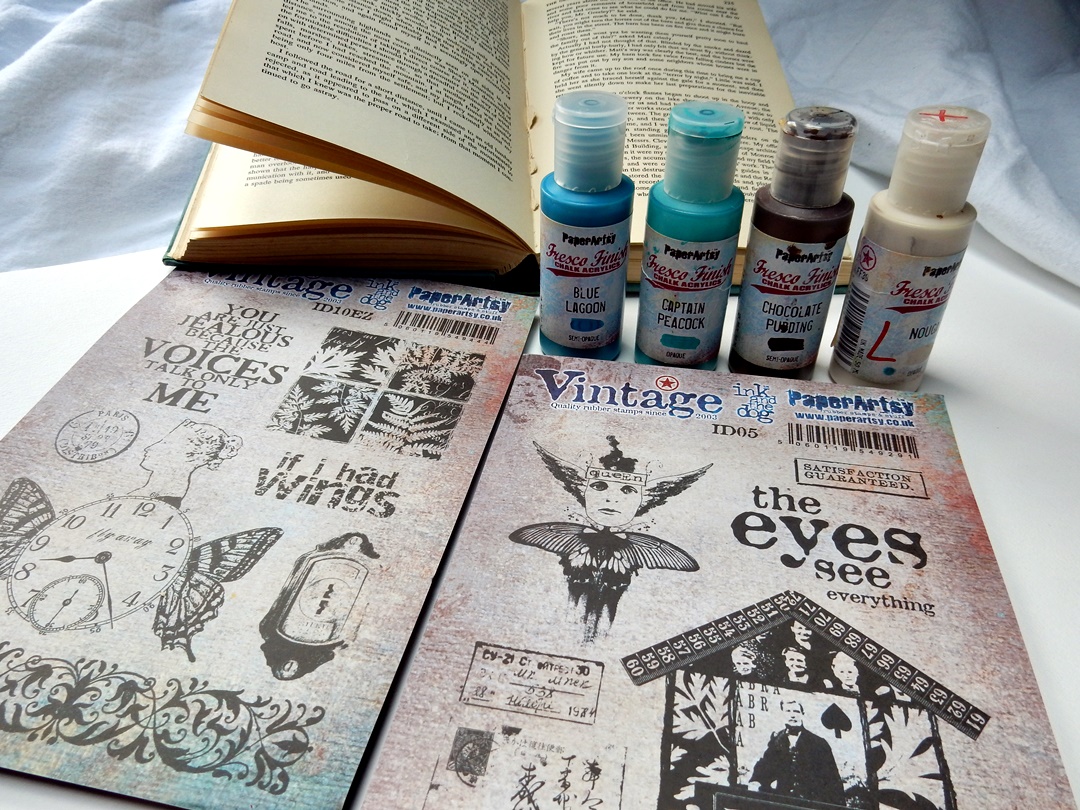
I challenged myself to use ALL the stamps in the two stamp sets, and it worked, I did! :-) I used PaperArtsy Vintage Ink and the Dog ID05 and ID10. I really love them!


The basic item for this cabinet book is, needless to say...a book. I used an old one, a nice blue color, gold printed at the spine. A newer one works too. I chose the color combination blue/turquoise/brown/off-white, so these four PaperArtsy Fresco Finish paints were perfect: Captain PeacockBlue LagoonChocolate Pudding and Nougat.This combination always works perfect for a vintage style. (And the blues are my favourite colours).


The cover of my old book is made of blue fabric, with a nice golden print, so I decided not to paint it and just leave it the way it is.


Let's start: The drawers are made out of two small match-boxes. I used the last part of the book, a stack of pages as thick as the match-boxes. I drew the size on the side of the book and also a niche in the center.


I also drew the match-boxes and the niche onto the top page.


Using a glue stick, I glued the edges of all the pages of the ,drawer part' together... yes...every page. ;-)


Onto the first page of the book I drew a house shape, using the house stamp as a guideline as shown. Again, I glued all the pages under it  together, until about 10 pages are left between this house piece and the drawer piece.


Now the big job started: carefully I cut the layers off, until 10 pages are left (Tip: put a small cutting mat in between).


I also cut out the hole for the drawers and the niche. I glued the boxes into the holes. I covered the sides, the cutting edges, of the big niche with a strip of bookpaper for a nice finish (no picture). Now I also glued the ten left over pages together to cover the niche and the match-boxes. Everything is glued together now.


Using the Fresco Finish paint, the two blues, Nougat and a tiny bit of brown, I painted the insides of the house niche and the boxes. I mixed the paints on my brush and I didn't work very neatly for a nice old and weathered effect. The left page and around the house niche I painted with Fresco Finish Nougat, Distress ink Vintage Photo, water and a little brown paint I made spots and smudges, again to create an old effect.


I stamped the left page here and there with the fern and text stamp using Distress ink Vintage Photo and Gathered Twigs. With these two Distress inks I also sponged the edges of the entire book and the match-boxes to create a very vintage look.


That border stamp is so perfect for this!! I spread a thin layer of Fresco Finish paint Blue Lagoon on a piece of paper and used it as an ink pad. I stamped it at the bottom edge and on the small pieces at the top. Later on I also stamped it with Distress ink along the niche.


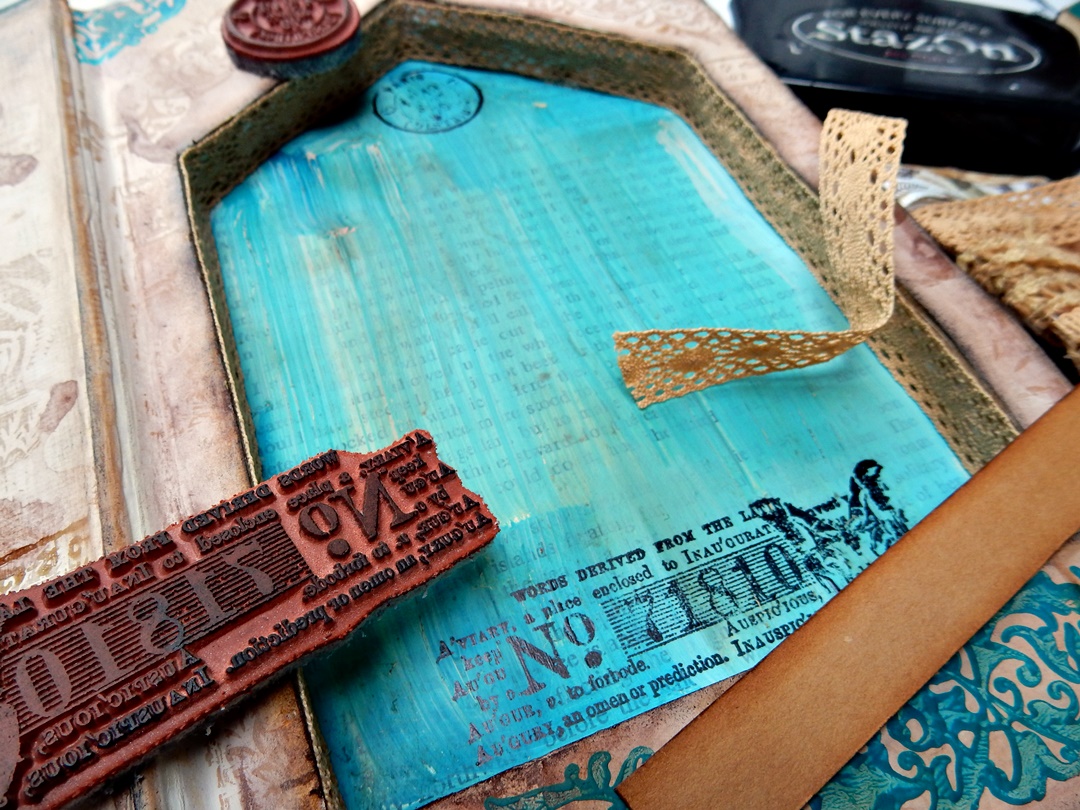
Using black ink (Tsukineko StazOn Jet Black), I stamped some texts in the niche. I covered the sides with lace and made a cardstock shelf at the bottom of the niche.


In this phase I still didn't know exactly how I was going to finish it. If I start stamping like crazy, the ideas always come naturally! :-) So I took pieces of brown, white and kraft cardstock and started the stamping. I used almost every stamp of the two beautiful sets! I used the black StazOn again, and also Ranger Archival Coffee.


Then I realized I needed a bit more colour, so I painted a piece of kraft paper very raggedly with the four Fresco paints. I started with Nougat and after that I added Fresco Finish Crackle Glaze here and there. After drying I painted the colours with an old credit card and (the right piece) with a pallet knife. I stamped some of the texts onto this painted cardstock.


Now it was time to put everything together and combine things, and to fill the boxes and niches! I cut out lots of the stamped images and assembled them till I was satisfied. Of course I had lots of left overs, but I will use them later, I never throw things like that away! I painted the faces with pink watercolour and sponged the edges with the Vintage Photo and Gathered Twigs Distress ink using a blending tool. I used a colour pencil (red) and a white gel pen here and there.


Time for some embellishments: I inked one of the text stamps wth StazOn and rolled small bottles over the stamp.


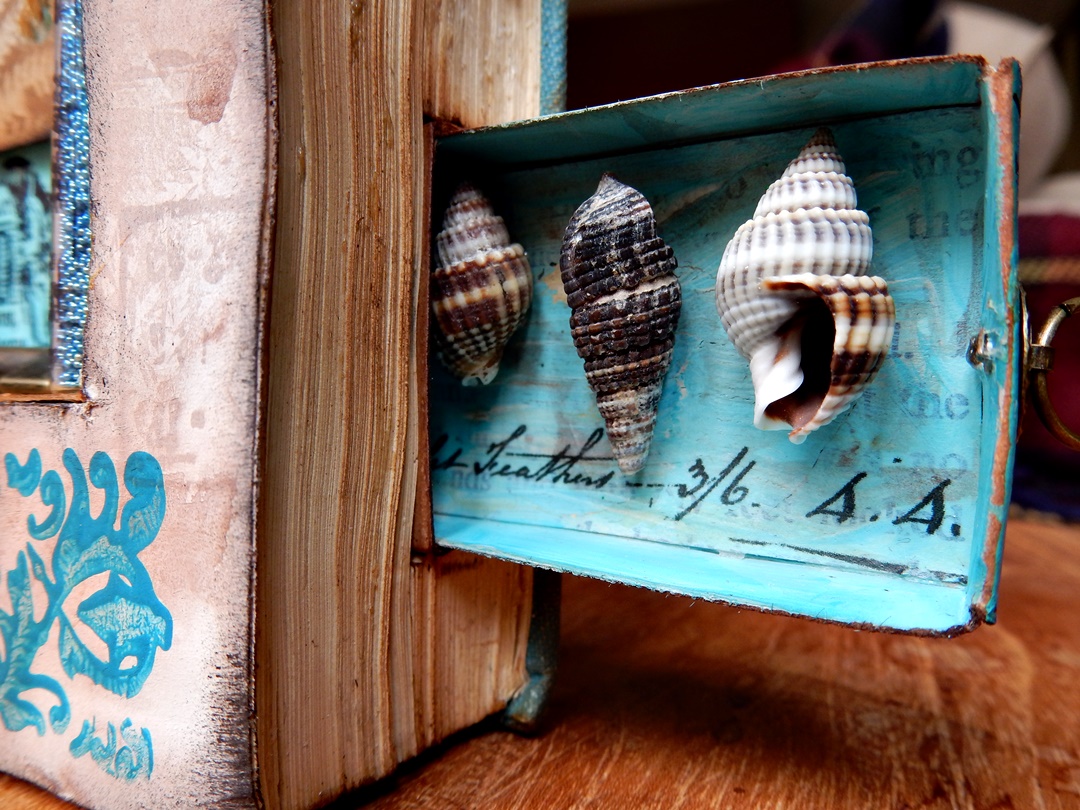
Using PaperArtsy printed tissue paper (you can also stamp on tissue paper yourself) I tore out small pieces of text and glued them into the match-boxes using gel medium. I also glued some small shells and pen nibs in the boxes and  added ring fasteners at the outside.


I composed five cards/tags to keep in the niche on the side of the book. I combined lots of stamps and also affixed some metal pieces and  sometimes an extra layer of black cardstock.


Left page finished.


Right page finished. I attached the stamped house and wings using 3D foam tape.


The little bottles are filled with mini beads, glitter, tiny shells, and I tied string around them. I also added some metal stuff and glued everything with tacky glue.


Detail of a drawer.


At the very last minute I decided to stamp this wonderful stamp onto the front cover of the book, using gold embossing powder. 


I think it's all done now!


Oh how I love to do this kind of time-consuming projects, it was so much fun! The process of combining the different PaperArtsy stamps is great! Cutting out the niches is the hardest part. If you can't or don't want to cut this much, why not try something like this in a shadow box, or onto the backside of a canvas? There are so many possibilities! Hope you give it a try and hope you will enjoy it as much as I did! Have fun!

Thanks for stopping by!

Liesbeth


Sunday, 17 June 2018

2018 Topic 11: Enshrined {Topic Introduction and Challenge}

 2018 Topic 11: Enshrined

Heather Campbell

Well hello everyone, Darcy here with our latest topic. After a week of brand new releases to get you all fired up and inspired i am sure you are ready to dive into a new topic with all those fabulous new stamps. 


So what does enshrined mean? well according to the dictionary  it is this " to place (a revered or precious object) in an appropriate receptacle"  thankfully that is pretty open to interpretation. You can use anything at all as the receptacle, and what you consider to be precious is a very personal thing, so again it could be absolutely anything. 

Perhaps you treasure religious icons or you have a favourite animal, or a piece of jewellery? I know people that have collections of beautiful (real and unworn) shoes in glass cabinets, this collection would be very much classed as enshrined. Perhaps you revere an actor or singer, or inventor? Personally I am wondering how I can build a shrine to cake!

Jennie

Before we start, let's see who won the Topic 10: Paper Dolls Challenge...

The winner is: Macarena from Macarena Creative

Email Darcy to claim your prize. Darcydotneedles@gmail.com

For as long as mankind has worshipped or held in reverence any form of deity, ancestor or martyr, there have been shrines. We mainly think of them as having been traditionally religious, but they were around before organised religions existed, some cultures have always built shrines for family members, or leaders of their tribe. 

Shrines are traditionally heavily decorated, but from an art point of view anything goes, so your shrines may be decorated and colourful or minimal and understated. You can go bold, bright and modern or use vintage,muted colours. Use any substrates and any theme. 

A fun theme here is Alice in Wonderland. 

Jools Robertson
Another modern twist on a shrine to a family member here, it used to be that shrines were for ancestors, but how about one for your mum on Mother's Day.

Kathy Cano-Murillo
Another fabulously bright and colourful shrine now for the Day of the Dead celebrations.

Teresa

Shrines do not need to be large, I adore these tiny papier mache matchbox shrines.

Sarah Campbell
 Other small substrates include tins,  the easiest ones to find are sardine tins. The colours used here are so pretty and delicate.

Debrina Pratt

Revered elements are often put on pedestals, like this sweet bunny. 

Debrina Pratt
Or this one, dedicated to all things haberdashery, so many details, carefully placed to ad height and texture. 

Patter Cross

Carol Owen creates wonderful shrines that she calls Spirit Houses, here is just one but there are lots on her website,she also has an excellent book with instructions on how to build them from foam core board. (Crafting Personal Shrines)

Carol Owen 
Halloween isn't far away, how about creating a little spooky shrine to stand in the window. 

Shelly Hickox

This is  a fun piece, a shrine to the moon, with such cute little houses. 

Nichola Battilana
I think this next one might be my favourite, not only has this artist create a shrine to her trip to London, she has used a suitcase as the substrate. What an amazing idea, you can decorate it, create the shrine on all sides and the top... AND then fill it with mementos an treasures!

Kathy -Cano Murillo

This project is not a traditional looking shrine, no box shape, no bright colours, but I feel it is absolutely a shrine, an could be used to honour family members. I love the simplicity. 


Edwina Bridgeman
Now for a shrine to the sea fairies, stunning colour palette, so peaceful. 


Bugatha

Finally how about some jewellery, shrines can be tiny and wearable. 


Debby Anderson
Some gorgeous examples, I think you will agree. So have they inspired you? collect all your treasures and favourite bits and create a special place for them. We can't wait ti see what you create, have fun and link up your projects for us to see. 

Don't forget to follow Darcy and Leandra's Pinterest boards if this topic pushes your buttons, you will see plenty more examples to whet your appetite there! 
I am really looking forward to seeing what you create over the next 2 weeks!

~ Darcy


To join our challenge and win a NEW Zinski apron:
Simply make something arty relevant to the topic, and link your creation from any social URL (eg. Instagram, Pinterest, Blog Post etc) sharing your original make to this challenge page.


The current topic link Topic 11: Enshrined will close 17:00 (London Time) Sunday, July 1st 2018, and the winner will be announced 2 hours later at 19:00.


All links go in the draw to win a PaperArtsy creative apron. Please make sure we can contact you as a prize winner - it helps if you share your contact info from the platform you opt to use.

Good Luck! If you have any questions, don't hesitate to ask!