Showing posts with label 2022 Topic 7. Show all posts

Sunday, 22 May 2022

2022 Topic 07: Specimen Jar {by Liesbeth Fidder De Vos} with Vintage Ink and the Dog stamps


Hi everyone, it's Liesbeth here with you today, and I'm here to share with you my Specimen Jar project! However it's not a jar...it's an altered book with niches and drawers, in a vintage style.


Starting a project like this, I never know where it will end... I was inspired by this two wonderful stamp sets! Very vintage and a bit mysterious, they made me think about a cabinet book with secret holes and drawers. So I just started with that idea and this is what I made!


5 cards in the side opening.


Two niches and two drawers.


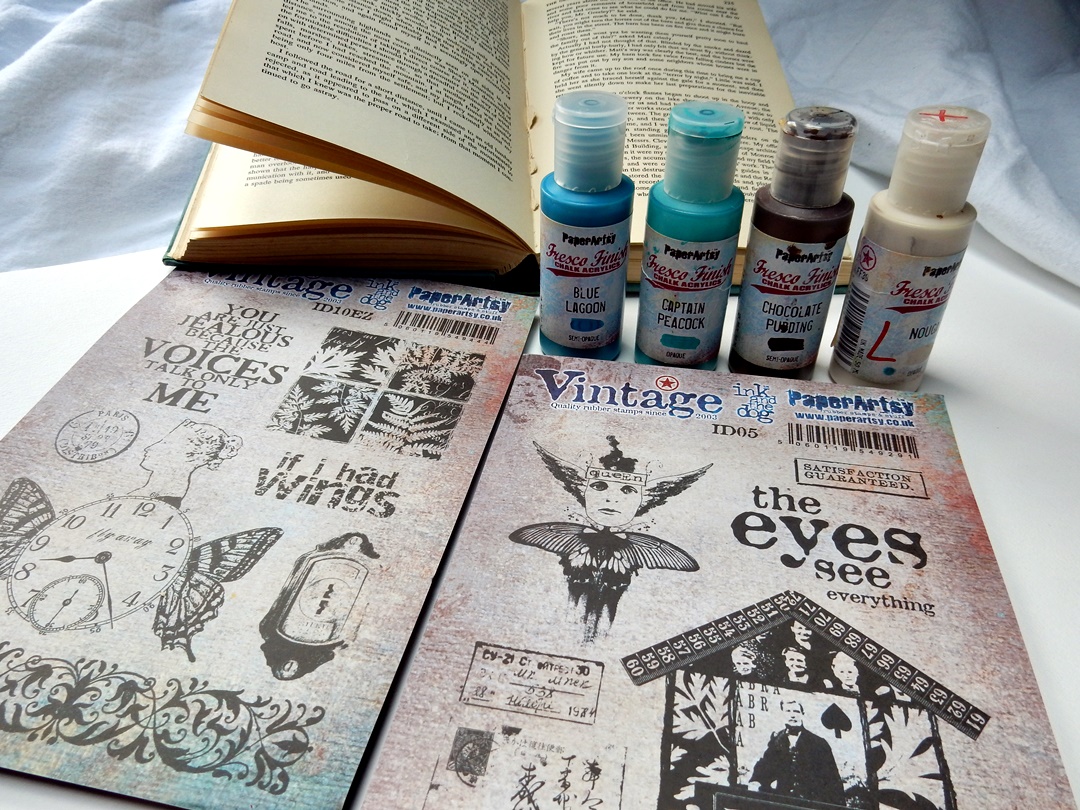
I challenged myself to use ALL the stamps in the two stamp sets, and it worked, I did! :-) I used PaperArtsy Vintage Ink and the Dog ID05 and ID10. I really love them!


The basic item for this cabinet book is, needless to say...a book. I used an old one, a nice blue color, gold printed at the spine. A newer one works too. I chose the color combination blue/turquoise/brown/off-white, so these four PaperArtsy Fresco Finish paints were perfect: Captain PeacockBlue LagoonChocolate Pudding and Nougat.This combination always works perfect for a vintage style. (And the blues are my favourite colours).


The cover of my old book is made of blue fabric, with a nice golden print, so I decided not to paint it and just leave it the way it is.


Let's start: The drawers are made out of two small match-boxes. I used the last part of the book, a stack of pages as thick as the match-boxes. I drew the size on the side of the book and also a niche in the center.


I also drew the match-boxes and the niche onto the top page.


Using a glue stick, I glued the edges of all the pages of the ,drawer part' together... yes...every page. ;-)


Onto the first page of the book I drew a house shape, using the house stamp as a guideline as shown. Again, I glued all the pages under it  together, until about 10 pages are left between this house piece and the drawer piece.


Now the big job started: carefully I cut the layers off, until 10 pages are left (Tip: put a small cutting mat in between).


I also cut out the hole for the drawers and the niche. I glued the boxes into the holes. I covered the sides, the cutting edges, of the big niche with a strip of bookpaper for a nice finish (no picture). Now I also glued the ten left over pages together to cover the niche and the match-boxes. Everything is glued together now.


Using the Fresco Finish paint, the two blues, Nougat and a tiny bit of brown, I painted the insides of the house niche and the boxes. I mixed the paints on my brush and I didn't work very neatly for a nice old and weathered effect. The left page and around the house niche I painted with Fresco Finish Nougat, Distress ink Vintage Photo, water and a little brown paint I made spots and smudges, again to create an old effect.


I stamped the left page here and there with the fern and text stamp using Distress ink Vintage Photo and Gathered Twigs. With these two Distress inks I also sponged the edges of the entire book and the match-boxes to create a very vintage look.


That border stamp is so perfect for this!! I spread a thin layer of Fresco Finish paint Blue Lagoon on a piece of paper and used it as an ink pad. I stamped it at the bottom edge and on the small pieces at the top. Later on I also stamped it with Distress ink along the niche.


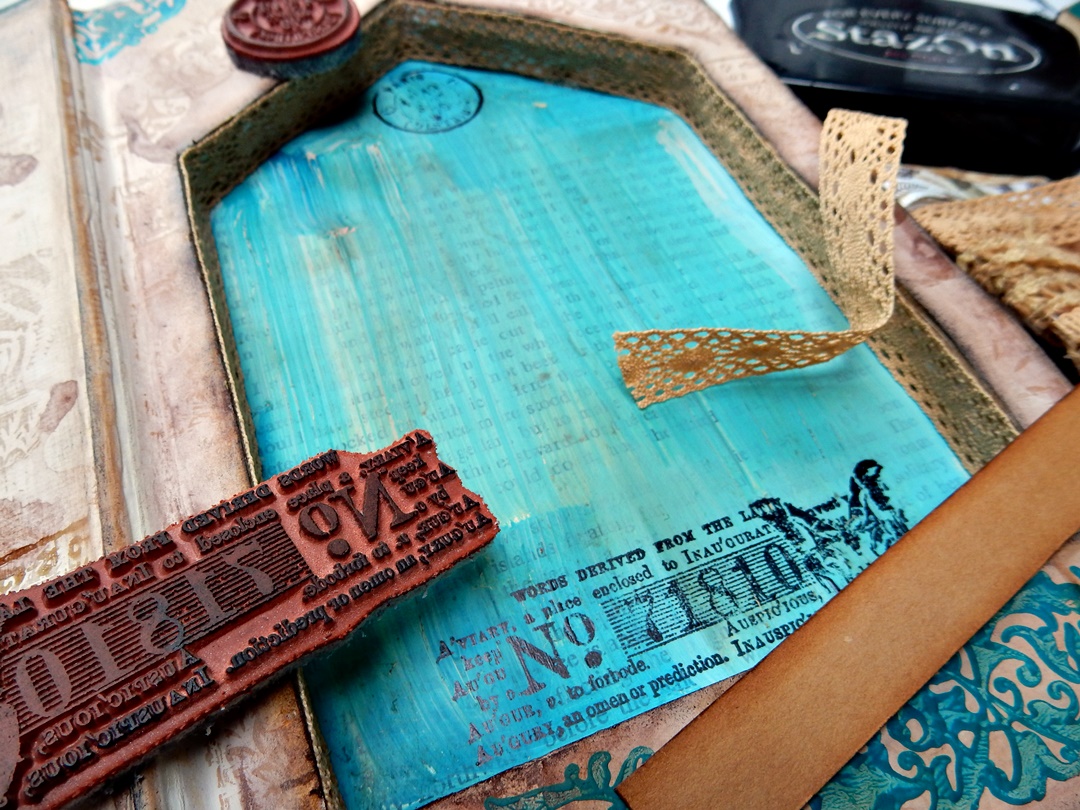
Using black ink (Tsukineko StazOn Jet Black), I stamped some texts in the niche. I covered the sides with lace and made a cardstock shelf at the bottom of the niche.


In this phase I still didn't know exactly how I was going to finish it. If I start stamping like crazy, the ideas always come naturally! :-) So I took pieces of brown, white and kraft cardstock and started the stamping. I used almost every stamp of the two beautiful sets! I used the black StazOn again, and also Ranger Archival Coffee.


Then I realized I needed a bit more colour, so I painted a piece of kraft paper very raggedly with the four Fresco paints. I started with Nougat and after that I added Fresco Finish Crackle Glaze here and there. After drying I painted the colours with an old credit card and (the right piece) with a pallet knife. I stamped some of the texts onto this painted cardstock.



Now it was time to put everything together and combine things, and to fill the boxes and niches! I cut out lots of the stamped images and assembled them till I was satisfied. Of course I had lots of left overs, but I will use them later, I never throw things like that away! I painted the faces with pink watercolour and sponged the edges with the Vintage Photo and Gathered Twigs Distress ink using a blending tool. I used a colour pencil (red) and a white gel pen here and there.


Time for some embellishments: I inked one of the text stamps wth StazOn and rolled small bottles over the stamp.


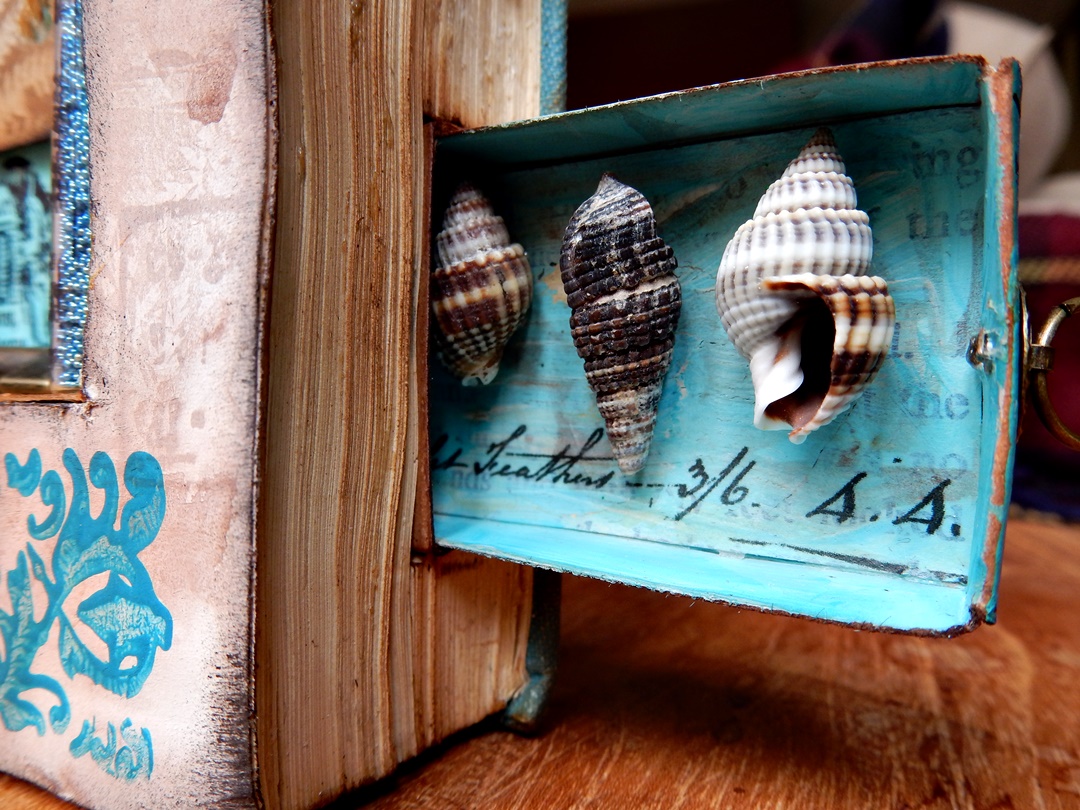
Using PaperArtsy printed tissue paper (you can also stamp on tissue paper yourself) I tore out small pieces of text and glued them into the match-boxes using gel medium. I also glued some small shells and pen nibs in the boxes and  added ring fasteners at the outside.


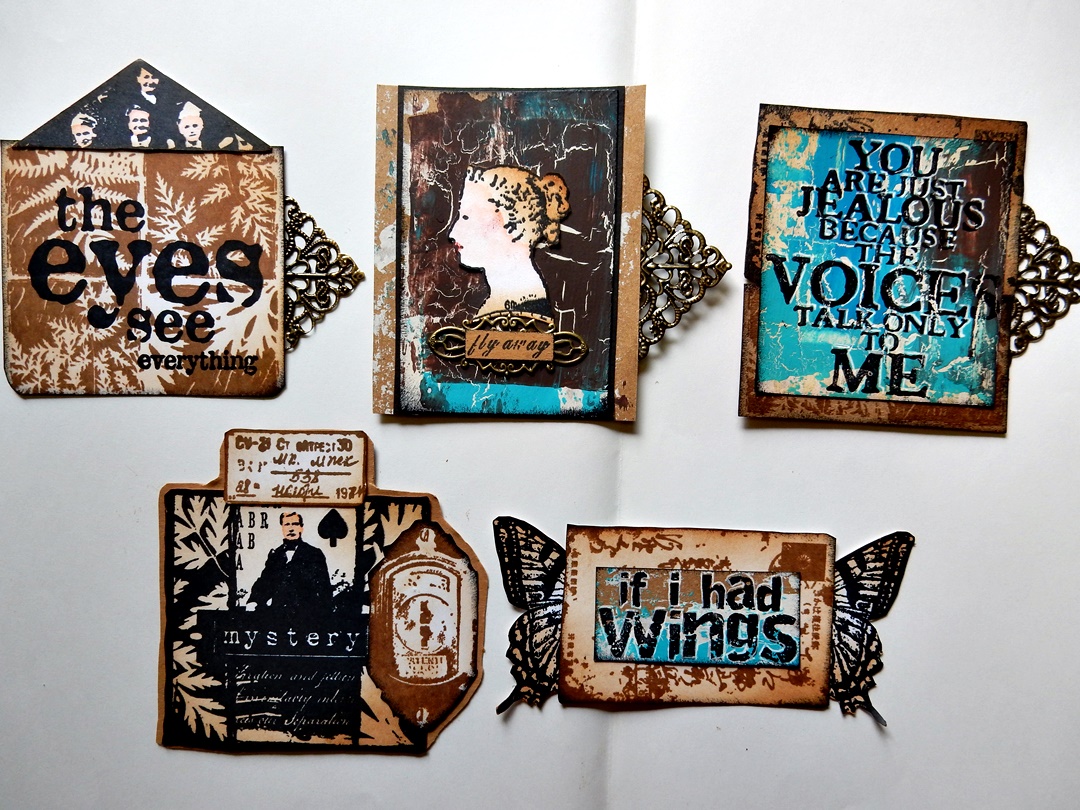
I composed five cards/tags to keep in the niche on the side of the book. I combined lots of stamps and also affixed some metal pieces and  sometimes an extra layer of black cardstock.


Left page finished.


Right page finished. I attached the stamped house and wings using 3D foam tape.


The little bottles are filled with mini beads, glitter, tiny shells, and I tied string around them. I also added some metal stuff and glued everything with tacky glue.


Detail of a drawer.


At the very last minute I decided to stamp this wonderful stamp onto the front cover of the book, using gold embossing powder. 


I think it's all done now!


Oh how I love to do this kind of time-consuming projects, it was so much fun! The process of combining the different PaperArtsy stamps is great! Cutting out the niches is the hardest part. If you can't or don't want to cut this much, why not try something like this in a shadow box, or onto the backside of a canvas? There are so many possibilities! Hope you give it a try and hope you will enjoy it as much as I did! Have fun!

Thanks for stopping by!

Liesbeth


Tuesday, 17 May 2022

2022 Topic 07: Specimen Jar {by Asia Marquet} with Gwen Lafleur stamps


Hi everyone, it's Asia Marquet (Lemon Creationwith you today, and I'm here to share with you rather unusual project for the Specimen Jar topic- a set of interactive ATCs.


First of all I need to tell you that I am more of a paper crafter and making a real Specimen Jar would have been too big of a challenge for me. But trying to put this idea on paper- that's something which really speaks to me. Mixing up things is always good and the beautiful stamps by Gwen Lafleur, perfect for this type of project, were calling me from afar. So this is my very first Specimen Jar project and because it's interactive- it's fun!


I had an idea in mind when I thought about this project. To use more than one jar stamp I decided to make a set of  two ATCs, with flowers which can be put in and taken out from the jars. Everything was supposed to be in earthly/ rusty tones, kind of like a herbarium colour scheme. So naturally my choice was to use Infusions with their walnut tones (Green ManRoyal BloodLemoncello and Orange County). They are a perfect match to two of Gwen Lafleur's stamps (EGL13 and EGL25). My last minute decision was to use handmade paper- once again for a more vintage look.


I was not sure how Infusions would behave on the handmade paper, but I was pleasantly surprised. I love the texture of this type of paper- with the colour it added a really vintage look. I sprinkled Orange County and Lemoncello on the paper and then sprayed it with water and let it dry. 


For once I didn't want to keep any white space- after all it was supposed to be a vintage project.
 
 
I love this look- the choice of Infusions and handmade paper was a really good idea. What I forgot to mention was the fact that my handmade paper was A5 size, so to make two ATCs out of it, instead of cutting the paper I teared it to create an ATC size- a neat idea with great results. If you don't have handmade paper, you can do this  with  regular paper. Torn edges add rustic looking colours add so much charm.


Just because I found the colour on paper a little bit too bright to my liking- (after all this is vintage project so the colours are supposed to be a little dull), I added touches of white to the paper with Fresco Chalk Acrylic- Snowflake and the brayer. But in order to not add too much white, I diluted it with water to get it more liquid, harder to stay on the brayer and therefore not too pronounced on the paper. The last step was to darken the edges with Distress Oxide- Vintage Photo.


There is this stunning tissue paper which you can get now with your PaperArtsy purchases. There is a lot of old-looking  script on it, so I added some of it to the background together with some script stamp from Background Plate 2.


Let's start with the part which took the most work, but I didn't mind, I was happy to have my paper base ready and really wanted to see how the flowers and branches were going to fit with it. They were to be my interactive part- being able to put them into jars or take them out- it was to me such a fun idea. I am gonna talk more about jars a little bit later, but I wanted to attach them to the paper  with their top part open, so there will be no problem to slide inside them the branches. At this point I was not sure how am I gonna do that, but ideas come to me sometimes at the last moment. Baby steps.

First step- preparing the paper for stamping. I sprinkled on it Infusions: Royal Blood and Green Man, then sprayed the water. I let it dry, not worrying if the paints covered the whole surface of the paper.


When the paper was dry I placed it in the stamping platform and stamped on it the flowers and branches from Gwen's stamp collections: EGL25 and EGL13


The longest part was fussy-cutting the images. Here is the hint- do it while watching something, it goes much faster! My question at this point was how to make them more layered, more 3D. Going for a Crackle Accents was a good choice. Once again- crackled make you think vintage- isn't that right?  I am thinking however that the best option would have been to crinkle them a little, as crackle is quite shiny. On the other hand maybe the ATCs needed a little bit of shine?


Next stage was to prepare the specimen jars (stamp EGL25). To me the jars needed to be transparent, so I went for stamping and embossing them on heat resistant acetate. Not an easy task! Even though I used an anti-static tool, I got some particles from embossing powder (Lindy's Gang- Blazing Black) kind of all over the place. Here is a technique I am not mastering! But I am not aiming for perfection and the older I need the project to look, the more forgiving it is.

I stamped 3 jars in total, not sure which one I would use and which ones would fit better with the flowers. Finally I chose two smaller ones which were just the perfect size for ATCs.


The idea on how to attach the jars to the ATCs came to me during the stage of embossing on acetate. When I cut out the jars, I left a small border to be able to run them through my sewing machine. I love adding sewing to my projects, leaving loose threads hanging. So this was obviously an idea I was really happy with. I needed to sew slowly to be sure I followed the edges of the jar. To the top part of the jar I inserted a piece of paper- a reminder that this is the part which needs to stay open and I can't, under no circumstances, run it through my machine.


For the sentiment I opted for colourizing a piece of masking tape with Lemoncello and add some delicate stamping with the same Background Plate 2 stamp. I tore the tape into two pieces and later glued it to the ATCs. On top of that tape I glued tiny words from old book and added the black base cards to the backs of the ATC.


The nicest part of the whole project was to put the flowers and branches into the jars. I spent few good minutes arranging and rearranging them over and over again! 
It is my very first interactive project and I love this aspect of it- the possibility to play with it and find new ways of fitting all of those beautiful flowery elements together.


Working with stamps is such a pleasure for me and the two sets of Gwen's stamps I used here are just perfect for specimen/ herbarium type of project. The interactive part of the project surely was (and still is), the most enjoyable part for me.  There is still some part of improvement and  that part is definitely embossing on acetate. But the rest- colourizing handmade paper and masking tape with Infusions and sewing the stamped elements onto the background, was really enjoyable and gives such a great end results!

Thank you so much for stopping by.

Asia


Facebook: https://www.facebook.com/profile.php?...
Instagram: https://www.instagram.com/lemoncreation/

Pinterest: https://www.pinterest.fr/LemonCreationAsiaMarquet