

A note from Leandra:
Ohhh do we have some beautiful things to share with you today!
We all have become great fans of Alison's botanical stamps - the gorgeous mixture of ephemera, nature and words are pulled together across a variety of media: ink, paints and watercolours. In this release she shows you a myriad of ways to use these new designs, from gel printed 'blueprints', to watery loosely stamped images and even a candle holder!
Alison's month as a Fodder School 3 tutor is coming up in August, so keep your eyes peeled for her supply list, which will soon be announced. Of course you may already know her stamp set (EAB-F) and recommended Fresco paints are already available from our stockists around the world.
Alison will be along to share with you LIVE her new products and ideas over in our Facebook Group, 'PaperArtsy People' shortly after this post publishes, and ... don't forget ...
These stamps are available EXCLUSIVELY from our approved stockists. Please check the list at the foot of this post to find a retailer online or geographically near you, it makes sense to order within your country where possible. Our retailers also endeavour to join the designer's live to share their direct shopping links - this makes it super easy for you to find a store with product in stock immediately.
Hello, all! Alison here from Words and Pictures, and I'm thrilled to be introducing these three new stamp sets to you. They are a continuation but also a development of the Botanical Textures series which began in February. Welcome to the Pressed Botanical Textures! Once again, I've really been thinking about how the stamps could be used both for simple stamping and also for exciting mixed media techniques.
You still get beautiful botanical sketches on these plates - but this time a sketch and a silhouette in each set, which gives you so much flexibility. There are scrumptious textures to layer up, as well as ephemera for adding detail. And of course there are words to go with the pictures... fragments of poetry and carefully chosen individual words. I can't wait to share them with you.
You still get beautiful botanical sketches on these plates - but this time a sketch and a silhouette in each set, which gives you so much flexibility. There are scrumptious textures to layer up, as well as ephemera for adding detail. And of course there are words to go with the pictures... fragments of poetry and carefully chosen individual words. I can't wait to share them with you.

Alison Bomber Red Rubber Stamps
Price: RRP €23.00 +VAT
Size:5" x 6" (13 x16.5cm)
All stamps are individually trimmed onto cling foam, with a laminated storage/index sheet
I love the leafy stems in this first set, EAB39 Pressed Foliage. They are reminiscent of ferns, but also have an echo of the formal decorative foliage you find in old books or in architectural detailing. The texture is some dry brush strokes which have a great distressed look. And there's storytelling in the ephemera as well as in those word fragments, as you'll see in the first sample I made with this plate.
Eclectica³ Alison BomberSet 39 (EAB39)

A Summer's Day Out By Train

This prosperous gentleman is the managing director of the Agences Generales de Voyage, and he's busy promoting the wagons lists or sleeping cars on his new trains. Have you ever thought of travelling overnight from the city and waking up to fresh country air and beautiful forests and fields!? And you could send a postcard home, with stamp and postmarks included. Those little pieces of ephemera can tell big stories, you see...

The pressed foliage leaves (layered as both sketch and silhouette) provide an organic spontaneity in the background, contrasting with the geometric squares and circles of the photo and the ephemera labels.

And those strips of masking tape have other foliage and meadow grasses on them (the strips are left over from creating the quartet of panels you'll see later in the post).

Pressed Foliage Tag Pair


And the detailed sketch is perfect for a simple stamping - so delicate and effective whether you colour it in or not. Got to love the detail on that postage stamp too, straight off a postcard sent from Prague in 1949 to some relative or other of mine!

The willowy meadow grasses in this second set, EAB40 Pressed Grasses, are based on some actual grasses I collected, glued down and water coloured on a solo art retreat on a Greek island some years ago. And given that splattering is a key part of almost everything I make, that seemed like the perfect texture to add to this set.
Eclectica³ Alison BomberSet 40 (EAB40)

Meadow Grass Candle Lantern

You know by now that I love my altered candle lanterns! I've got lots of autumn and winter ones, but now I've added to my summer lanterns for evenings in the garden with this Meadow grass Candle Lantern.

I started by stamping both the sketch and the silhouette in various green Archival Inks onto a piece of tracing paper, trimmed to fit round my recycled jar. It looked great on the mat, but when I glued it around the jar, they were a bit too subtle, so I added some more using Fresco Finish Chalk Acrylics in Lawn and Tinned Peas (as well as in a mixture of the two). These are much rougher, looser stampings - it's tricky to stamp on crinkled tracing paper wrapped around a cylinder - but I rather like the effect.

Now you have real depth in the meadow... with the detailed Archival stamping pale and subtle in the distance, and the rougher paint stamped images over the top - almost as though you've taken an artsy photo, and they're a bit out of focus in the foreground. I also stamped the splatter texture in Aquamarine Archival, giving that impression of a summer haze of pollen and heat and insects hovering over the meadow.
I love the medical gauze label that is on this set - in my head, it links back to those Culpeper botanical prescriptions on my previous stamp designs...
I love the medical gauze label that is on this set - in my head, it links back to those Culpeper botanical prescriptions on my previous stamp designs...

Pressed Grasses Tag Pair

And here are your simple tags, showing you just how detailed those grasses really are. In shades of green this time, with a full splatter background (again, just repeat-stamping the texture stamp in Bundled Sage Distress Ink), against which the silhouette grasses really pop, stamped in Archival Peat Moss and clear-embossed. And it's the same treatment for the words - this is a phrase from The Lake Isle of Innisfree by W. B. Yeats, a favourite poem of mine. We've got more fragments of that same poem on the previous sets, as well as on these three. Pretty soon, we'll have the whole thing!

And the delicate fronds at the tip of the grasses sketch really don't need anything done to them to look great... here they are against a simple white background. This is as CAS (clean and simple) as I get! I love this piece of ephemera with Gothic font from a book frontispiece... just the publisher's name and the date, but it adds lovely detail to a project.

You had some Umbellifers in the Botanical Textures release, and they're here again but in a different form as EAB41 Pressed Umbels. I love every variation of the word... umbellifer, umbel, umbelliferous - and every variation of this flower formation! The crackle is a scan of some actual crackle texture I created for a book cover years ago, and the poetry fragments are courtesy of my two Williams again - William Shakespeare and William Butler Yeats (as they are throughout this trio of stamp sets).
Eclectica³ Alison BomberSet 41 (EAB41)

Dreaming of a Summer's Day

One really important thing for me about these stamps is that you have everything you need on one set to create a project - focal points, background texture, ephemera details and, of course, words!

I sponged layers of Cloud 9 and Chantilly off-white Fresco Finish Chalk Acrylics onto this MDF tag (PaperArtsy has so many brilliant shades of not-white!) and then used Pebble Beach Archival ink to stamp the crackle around the edges. Such a great effect! Pebble Beach again for some background Umbels using the silhouette version.

And then I stamped the sketchy umbels on a piece of Smoothy card (regular not heavyweight), and embossed them in Wow Primary Bark powder (a really rich dark brown). I used a mixture of green and blue Fresco paints and Dragonfly Mattint to add watery washes of colour before doing a loose fussy-cut around the flower heads.
The large ephemera label is also cut from a separate piece of card, but the postmark and airmail label are stamped direct to the background, and given a touch of the Dragonfly Mattint (mostly) to make them pop. This tag makes me very happy!

Pressed Umbels Tag Pair

And here's your simple tag pair so that you get a really clear look at what you get on this third stamp plate. The rubber of the silhouette umbels is very flexible, so you can vary the angle and relationship of the flower heads quite a lot. I love the drama of those stamens - like fireworks exploding. (Hey... there's another way to use them, minus the stems, on Bonfire Night or New Year's Eve projects!) And I can't get over how dimensional the crackle looks, just very simply stamped in Weathered Wood Distress Ink here, but it looks as though you'd feel the texture if you ran your fingers over it.

The incredibly intricate detail of the tiny petals at the end of the stems on the sketch version is just amazing. PaperArtsy rubber is deeply etched with really nice detail, so you get a brilliant imprint when you work with their Smoothy card and a good ink.

But as I mentioned in the introduction, a major part of the thinking behind this release was to use these stamps in really creative mixed media ways. The idea of having "pressed" plants is to be able to use them on the gel plate, as I did last time around, but this time I specifically wanted to explore creating "cyanotype" prints.
With my obsession with nature and botanicals, I've always adored cyanotypes of plants. A cyanotype is a photographic print created by exposing a particular chemical formulation to sunlight... the original "blueprints".
Cyanotype Explorations
I love basic cyanotypes, and the more complex chemistry involved in something like the beautiful work of Roxi Hardegree. I really hope to go on a real cyanotype learning curve one day, but it will involve a whole new investment and years of exploration (it'll just have to wait until there's more time and money!) so I wondered whether I could create some "faux" cyanotypes with these stamps for the time being...
Basic "Blueprints"


These were the colours I mixed and matched onto the gel plate in successive printings: Pea Coat, Twilight, Baltic Blue, Southern Skies and China.

Sometimes I stamped onto the clean plate directly, and used the Cloud 9 to pull that print, or to pull impressions whenever there seemed to be something left on the plate - a reverse "cyanotype" (I don't know whether that's possible with the real thing - it might be!).

I did a bit of playing around with creating additional layers and depth by stamping over the top of the print and white-embossing the image.

And of course I added some spatter, sometimes to the gel plate before printing and sometimes to the finished print later on. Cloud 9 again for the spatter... the bright white of my usual Snowflake would have detracted from the imagery, I think.

Complex "Cyanotypes"
And here are some of my "advanced" versions, inspired by Roxi Hardegree's complex chemical combinations. (It's really worth taking a look at her gallery which I linked to earlier - both to see where I'm coming from with these, and also just because it's breathtakingly beautiful work she creates!)

The backgrounds for these are done with Fresco Finish Chalk Acrylics again, but this time with some watercolour paints added while the underlying Fresco paint was still wet; and sprinkles of salt to create texture.


Then over the top of those backgrounds, I stamped in paint... yes, these detailed images are stamped in Fresco Finish Chalk Acrylic!

It was Snowflake for the most part, brushed onto the craft mat and stamped into there on the mat to pick up the paint, before stamping down onto the backgrounds. You can also use a gel plate (with your white paint brayered out evenly) as a stamp pad too. But it's possible on these I added some Cloud 9 and/or Chantilly at some point. I was in a lovely state of flow and so I wasn't taking detailed notes, I'm afraid.

When you're stamping with paint (or stamping into paint as with the basic blueprints above), it's REALLY important not to let the paint dry on the stamp. It could compromise the future clarity of your stamp if you do. You certainly don't want to try to get dried paint out of all the little cracks and crevices - you'll be repurposing an old soft toothbrush - much easier to get it off while still damp!

The bonus of that problem in this process is that after stamping you can give the painted stamp a spritz of water and then stamp that watery version too, and you get those wonderful soft impressions which also happen sometimes in the chemical processes of cyanotyping.

So then, as with real cyanotypes, you have beautiful botanical imagery in both crystal clear and deliciously soft images giving depth and variety to the "prints". And I love that these stamps look just as good in a non-perfect stamping as they do in pristine perfection!

I absolutely love the results of my explorations. I'm not sure what I'll do with them all yet (maybe there's another handmade book in the offing!) but here's one example mounted on a card, with the simple addition of some Liquid Platinum embossed words and an envelope decorated to coordinate.
Walk in the Meadow Quartet
This quartet of panels features one panel for each stamp set, plus one that combines the stamps from all three sets. ...

I masked off a large sheet of mixed media paper into quarters, and scraped on some gesso with a palette knife, before adding watery washes of these Fresco Finish Chalk Acrylics over the resulting texture - Summer Sky, Sky, Bora Bora, Tinned Peas, Lawn.

Then I stamped and stamped and stamped... layering up sketches and silhouettes in various Archival greens (Olive, Leaf and Peat Moss are all in there I think). EAB41 Pressed Umbels top left, EAB39 Pressed Foliage top right, EAB40 Pressed Grasses bottom left, and a mixture of all three bottom right.

You can create really subtle depth and variation by using the sketch/silhouette combination... and now you can see where the masking tape in the journal page came from! A bit of simple collaging over the top with Tim Holtz bits and bobs, and the words and phrases are embossed to help them pop - Bright White for the large words and Primary Bark for the poetry fragments.

Gilded Tags
I thought these botanicals would be perfect for creating framing effects or "garlands" around a focal point, so that's what they're doing on these tags. The Pressed Foliage in particular seemed to me to be crying out for a bit of gilding, so I've used different metallic embossing powders to pick out certain stampings in the border.
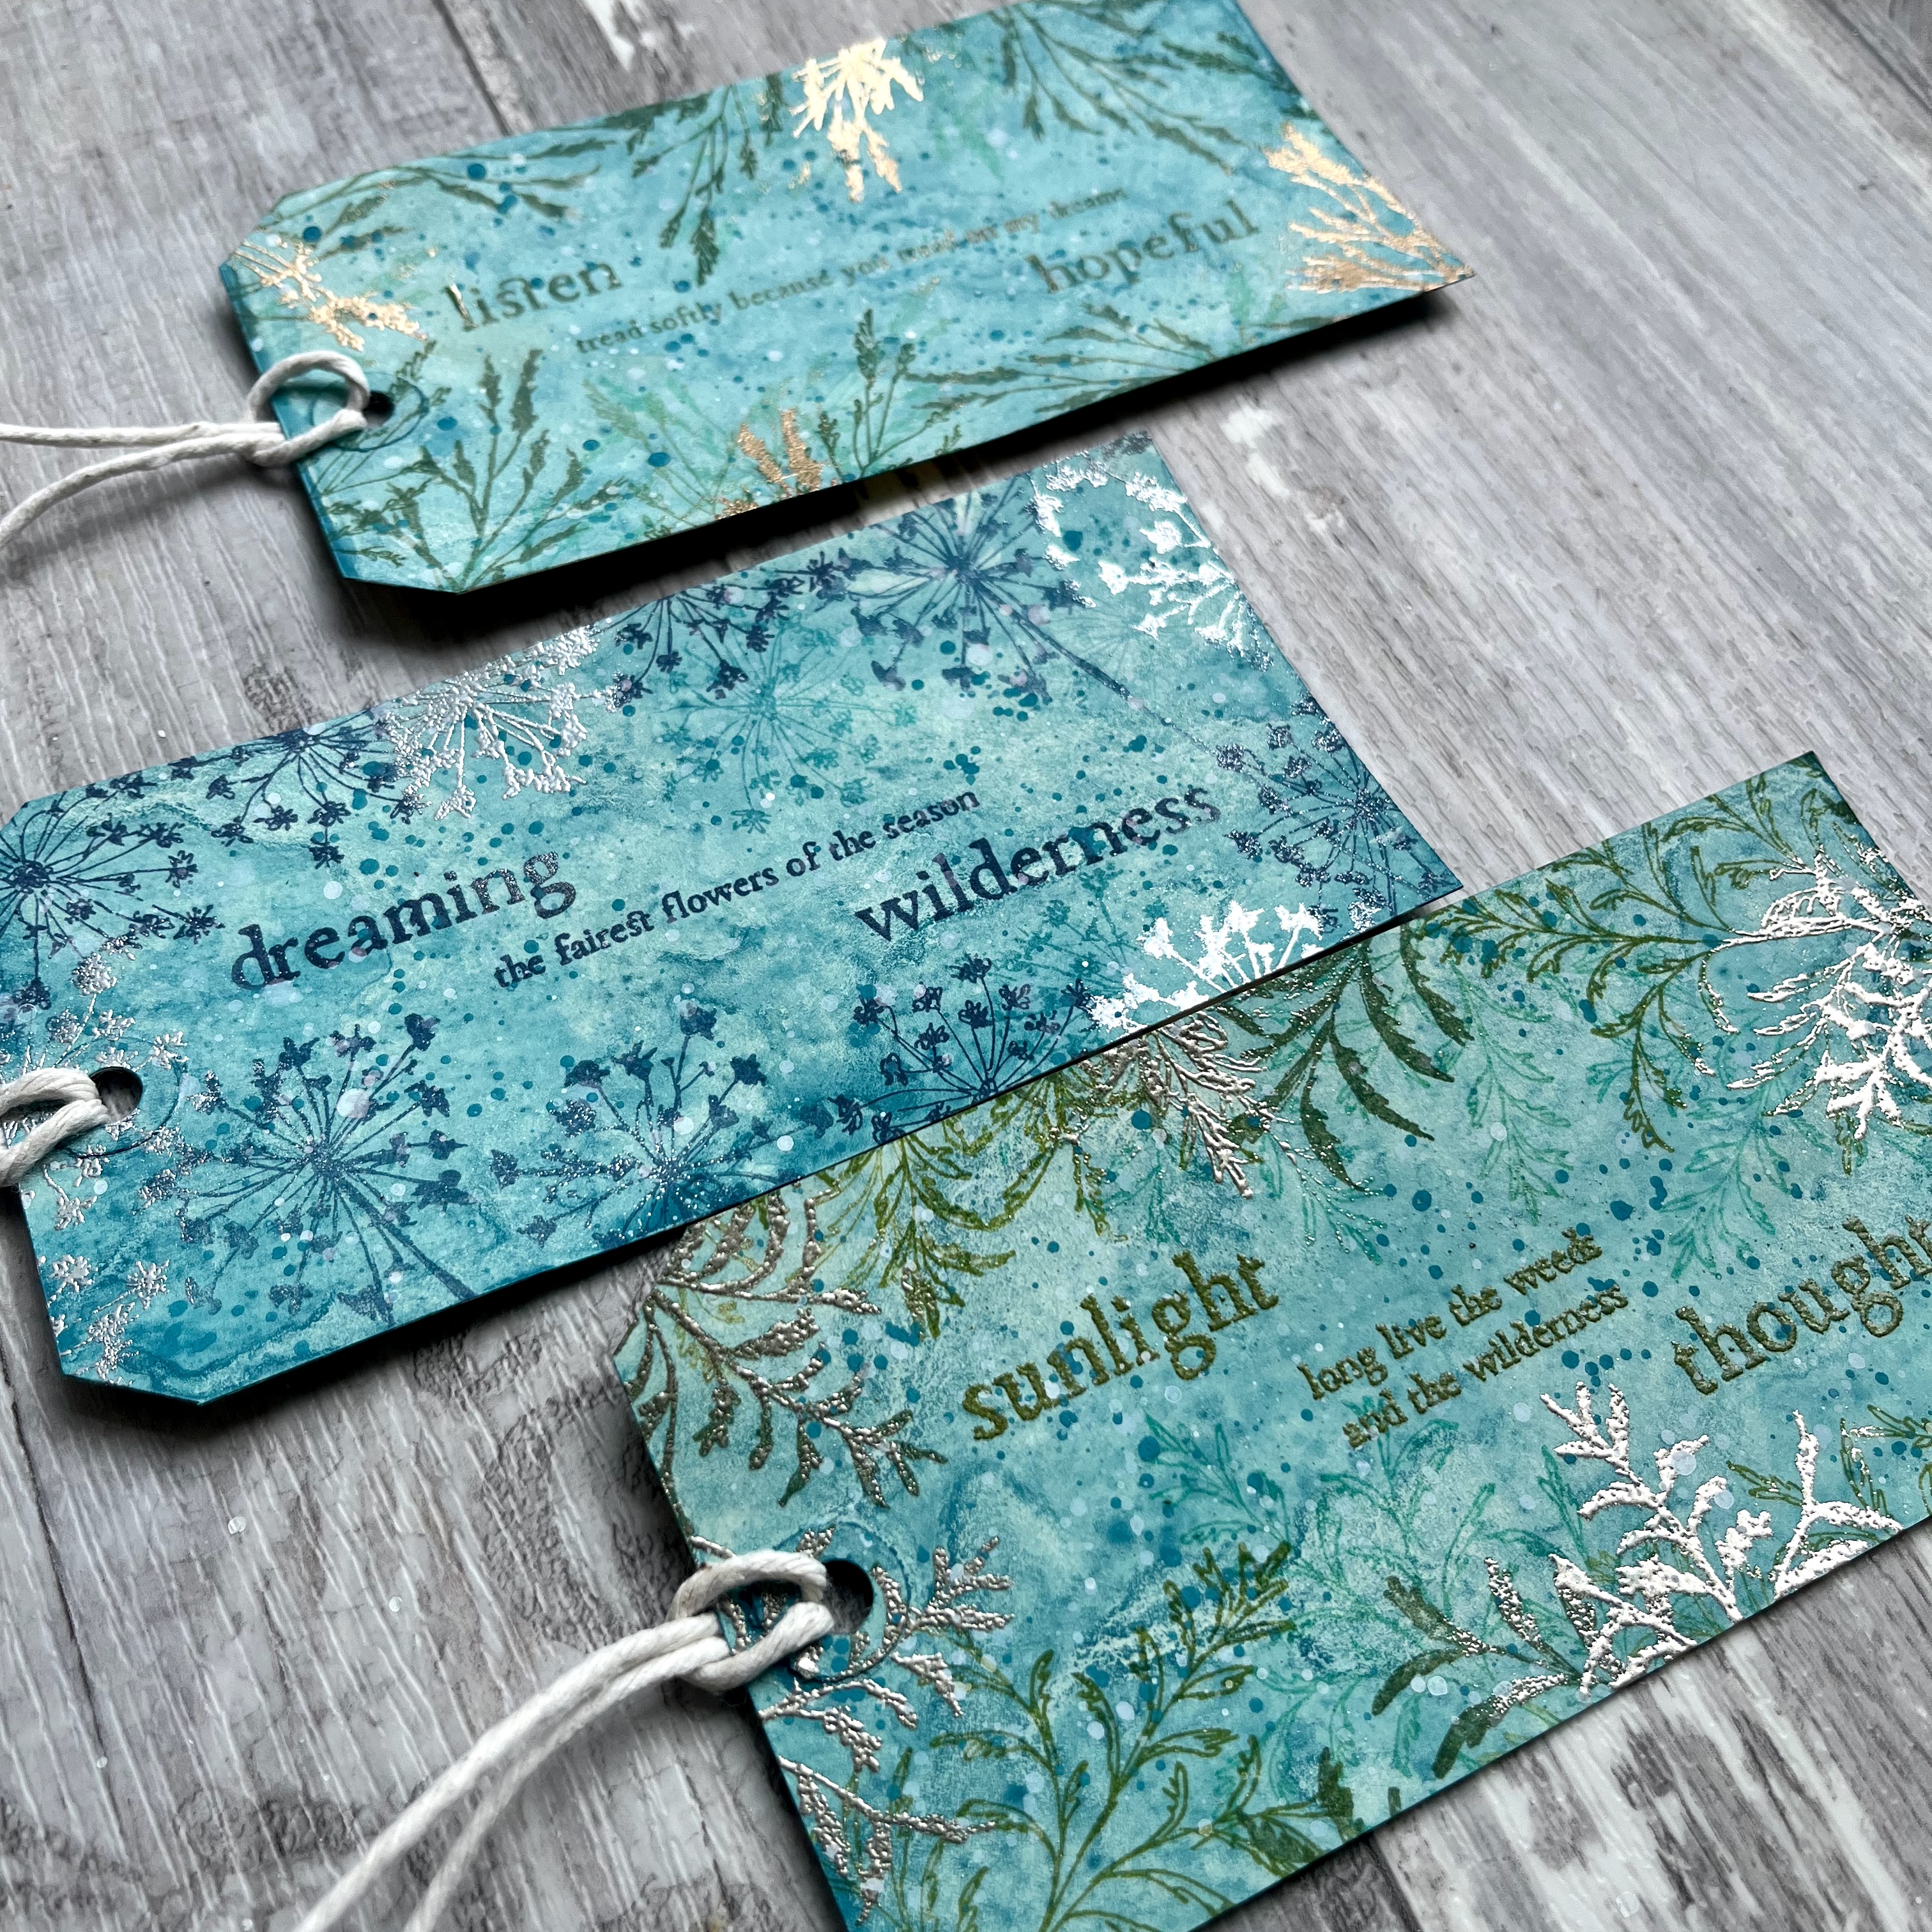
Again, there's subtle depth and variation from using the sketch/silhouette combination, and by using tone-on-tone stamping. Look closely to see the delicate sketch foliage stamped in Garden Patina over the soft green background. (I think these were probably mop up tags after doing the cyanotype backgrounds, but to be honest, I can't really remember!!)

The gilding on the Pressed Foliage is done with Liquid Platinum embossing powder, and the gilded stems on the Pressed Grasses are Queen's Gold (both Ranger powders).

On the Pressed Umbels, there's a more wintry look with silver embossing powder over the turquoises and blues. Again, look for that really subtle extra layer tone on tone... I love it!

And I think the poetry fragments and large words offer the perfect element to be framed... well, I am "Words and Pictures" for a reason, you know!
Watercolour Tags
Finally, here's a great example of what I mean about these stamps looking just as lovely in soft focus. Another (for me) clean and simple trio from some watercolour stamping...

The botanicals are done in Distress Inks with a spritz of water direct to the inked stamp just before pressing it down; and the words are in Archival Ink, to preserve the clarity of the lettering.

I thought I'd stamped one each of silhouette and sketch on each of these tags, but obviously with the softening effect of the water, it gets harder to tell! But the two pieces of foliage are definitely leaning in different directions, so it's certainly one of each on that one...

On the Pressed Grasses, it's the sketch version twice - one with quite a strong spritz of water in the paler colours - so it's filled in the leafy shapes quite a lot. The second stamping had a little less water on it, so you preserve a bit more detail.

And the umbels tag has the sketches on the left (lots of water so lovely and soft) and half of the silhouette on the right in that pretty soft version with a touch of turquoise (Evergreen Bough amidst the Peeled Paint, I think?). Such easy tags - ink it up, a spritz of water, bit of spatter (or use the spatter stamp if you want!)... a simple treat of a trio.

I hope that the samples I've been creating with this release will give you an insight into some of the thinking behind the designs, as well as a few ideas for different ways to play with them.
Also watch out for some exciting extra inspiration in the next few days... I had some brilliant crafty visitors - Nikki Acton and Brenda Brown - just when I was busy sample-making, and they had a lovely time in my craft room, diving in to explore the new stamps. They both created beautiful projects which they'll be sharing soon. (I'll be signposting those from my Instagram when they do.)
But now it's over to you! I know that what I've done here is just the tip of the iceberg in terms of possibilities, and I hope this post will inspire you to use your creative voice and take these stamps in new directions that speak to you.
But now it's over to you! I know that what I've done here is just the tip of the iceberg in terms of possibilities, and I hope this post will inspire you to use your creative voice and take these stamps in new directions that speak to you.
I am excited to hear what you think of these stamps and to see how you will use them, whether it's clean and simple, or messy multi-layered mixed media, and everything in between. Do tag me if you're sharing anything you make on social media - I love seeing what people get up to!
I'm deeply thrilled with these new designs, and I'm so very grateful to everyone at PaperArtsy. Without their skill, support, encouragement, and creative collaboration, none of this would ever come to life! Thank you all.
I'm deeply thrilled with these new designs, and I'm so very grateful to everyone at PaperArtsy. Without their skill, support, encouragement, and creative collaboration, none of this would ever come to life! Thank you all.
Alison xx
Want to see more? You can always find me at...
Instagram - @w0rdsandp1ctures and @b0hem1anh0me
YouTube - Words and Pictures
Website - Words and Pictures
Blog - Words and Pictures
Facebook - Words and Pictures
Reminder: Fodder School 3

As you may know, I am one of the twelve teachers on Fodder School 3 (the 2023/24 edition) and the stamp set is designed around the project I'll be sharing in my month of teaching, August 2024. The supply list will be sharedmmid July, and many of the regular PaperArtsy stockists are already selling my products created/ curated for class.
It's absolutely not necessary to have the stamp set or the paints to do the class, but it's there to help out anyone not comfortable with the sketching part of the lessons - and so of course it's available for you to purchase! We reccomend you find a retailer in your geographic corner of the world, its faster and cheaper to order locally where possible.

I've also curated three sets of PaperArtsy Fresco Finish Chalk Acrylics - again designed around the Fodder School 3 project - but perfect for any botanical painting you might do, and for creating subtle backgrounds for those botanicals to pop against. I don't want to make this blogpost any longer than it already is, so you'll find more about all of that over on my blog Words & Pictures.
 |
| Botanical Basics Paint set (above) |
 |
| Berrylicious Brights Paint set (above) |
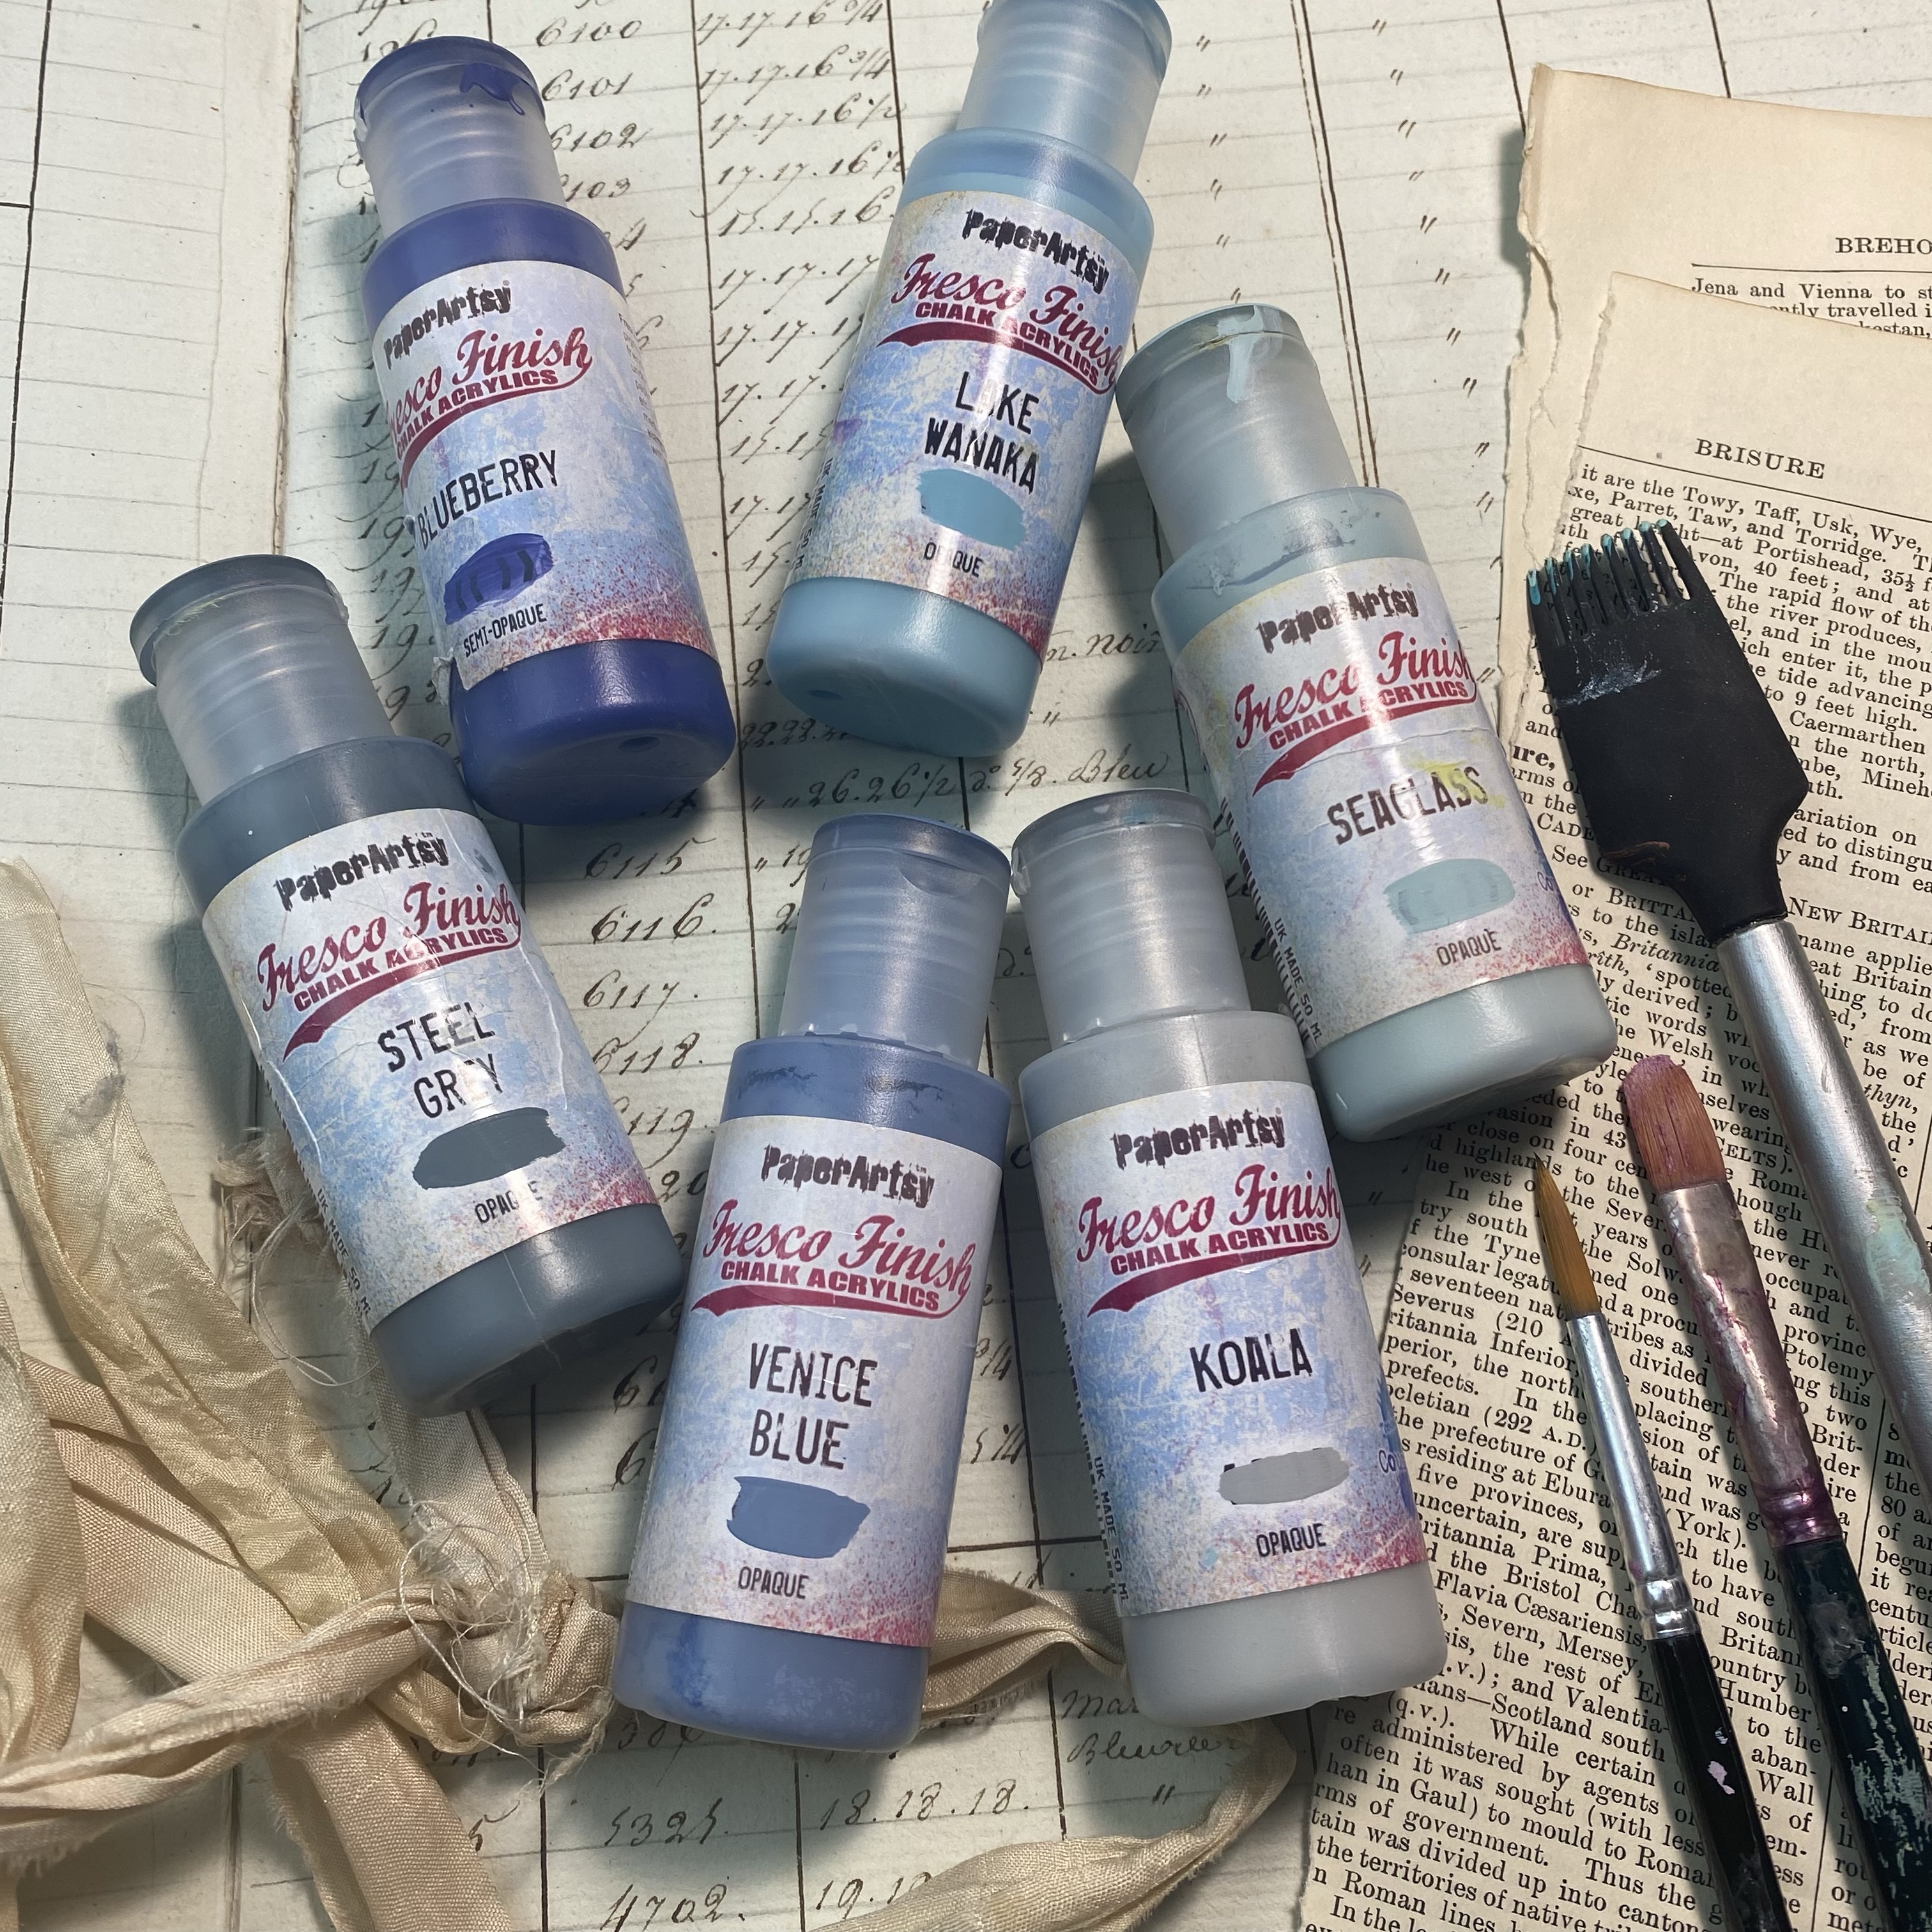 |
| Background Blues Paint set (above) |
You can also check out the stamps and paints here on the PaperArtsy website - and your local independent PaperArtsy stockists (worldwide!) should be able to help out if you'd like to get your hands on them. I'm really excited about the whole Fodder School adventure, and about these lovely new PaperArtsy/Fodder products, and so grateful for the collaboration that has brought them to life. I hope you will be too.

You can sign up for Fodder School 2023/2024 here
PaperArtsy Stockist List
Our stockists are your go-to source for all PaperArtsy products, and we suggest that you also use the PaperArtsy People Facebook group to source a retailer in your country. Many are members of our FB group and will happily share links to their online stores.
Australia
A Place to Create, Brisbane a place to create
Bev's Cross Crafts, Spreyton, Tasmania bevscrosscrafts
Crafters Cupboard, Berwick, Victoria crafters cupboard
Hillbilly Scrappin, Nikenbah, QLD hillbilly scrapping
Memories on the Murray, Murray Bridge, SA memories on the murray
Natalie May Scrapbooking, Dover Gardens, SA natalie may
Scrapbook Superstore & More, South Penrith, NSW scrapbook superstore
The Scrapbooker's Confetti Box, Swansea, NSW the scrapbookers confetti box
The Scrapbook Store, North Perth,WA the scrapbook store
Belgium
Cart N Scrap Art, Antwerp, cart n scrap art
Créatelier Caracolle, Liège, createlier caracolle
Canada
Clipper Street Scrapbook Company, Langley BC, Clipper Street Scrapbook Co
Glitter & Ink, Belleville ON Glitter & Ink
Paper Art Creations Inc, Leduc, Alberta, paper art creations
Scrapbook Centrale, Dollard Des Ormeaux, Quebec scrapbook centrale
Scrapbook Centrale, Dollard Des Ormeaux, Quebec scrapbook centrale
Scrap Addicts, Edmonton, Alberta scrap addicts
Scrap and Bean, Edmonton, Alberta scrap and bean
Scrapbooking Fairies, Drayton Valley, Alberta scrapbooking fairies
The Paper & ink Boutique, Calgary, Alberta paper and ink boutique
The Scrap Yard, Calgary, Alberta, the scrap yard
The Scrap Yard, Calgary, Alberta, the scrap yard
Denmark
Hobbyboden Scrapworld Samso hobbyboden
Finland
Korttipaja, Istunmaki Heidin Korttipaja
Klemmarikellari, Turku Klemmarikellari
France
Eirl Bancon Cartoscrap, Midi Pyrenees, www.cartoscrap.com
Emispheres Eurl Ruy Montceau,38300
Fée Du Scrap, Saint Sébastien-Sur-Loire, fee du scrap
Horizon Créatif, Ste Jalle horizon creatif
Instant Créatif, La Possession, La Réunion, i creatif
Katzelkraft, Ingwiller katzelkraft
Kerudoc Creation, St Yvi kerudoc creation
Le Grenier des filles, Pierre Benite
Page de scrap, Saint Pavace, page de scrap
Passion Scrap, Vieux-Conde, Passion Scrap
Scrap by Jo, Saint-Orens-de-Gameville, 31650 Scrap by Jo
Scrap Déco Home, Goutrens, www.scrap deco home
Toutencolle, Dun sur Auron toutencolle
Germany
Stempeloase Munich, Munich stempeloase
Stempelfee Shop, Hilden stempelfee shop
Stempellaedle, Stuttgart, stempellaedle
Tue Was Di Liebst, Bayern, Tue Was du Liebst
Italy
Immagine SAS di Rapaccini, Rome, immagine lab
Il Negozio Della Mamma Di Cle, Torino, il negozio della mamma di cle
Marte Savona, Savona, marte savona
Pezze E Colori, Lissone, pezze e colori
Piccole Passioni, Siena, piccole passioni
Piccole Passioni, Siena, piccole passioni
Japan
La Wadao, Odawara, Kanagawa, la wadao
Tiny Dots, Funabashi-shi, Chiba tiny dots
Netherlands
De Hobbystudio, Genemuiden, de hobby studio
Doe@ding,Spijkenisse doe @ ding
Hobbycompleet de Duif, Leeuwarden hobby compleet
Stampingcorner, Capelle Aan Den Ijssel stamping corner
Puerto Rico
Paper Boutique, Fajardi Paper Boutique
South Africa
Kcraft imports Ltd, Centurion 0014 kcraft
Spain
Cien por Cien Manualidades, Barcelona, 100 x 100 manualidades
Ideas 10 Manualidades Y Scrapbook, Bilbao ideas 10 manualidades/
Marakiscrap, Tarragona, maraki scrap
Scrap & Papers Experiences, Barcelona, scrap papers experiences
The Paradise Corner, Barcelona, the paradise corner
United Kingdom
Amelia's Creative Crafts, Studley, Warwickshire amelias creative crafts
Art from the Heart, Harrogate, Yorkshire art from the heart
Crafts at The Malthouse, Herstmonceux, East Sussex, crafts at the malthouse
Countryview Crafts, Potton, Bedfordshire countryview crafts
Loobi Crafts, Leighton Buzzard, Bedfordshire, loobi crafts
Procraftynation Ltd, King's Lynn, Norfolk Procraftynation
Sir Stampalot, Peterborough, Cambridgeshire sir stampalot
Stampers Grove, Springbank, Lilliesleaf, Melrose,Scotland stampers grove
The Artistic Stamper Craft Store, Faversham, Kent the artistic stamper
The Forget me not Kraft Kabin, Rochford, Essex, The Forget Me Not Kraft Kabin
USA
Artistic Artifacts, Alexandria, VA artistic artifacts
Artistic Studio Creations, Fayetteville, Georgia Artistic Studio Creations
Craftiness, Chatsworth, CA, craftiness
Everything Scrapbook & Stamps, Lake Worth, Florida Everything Scrapbook & Stamps
Frantic Stamper, Oregon frantic stamper
Free Heart LLC, Denver, Colarado, free heart llc
Joggles, Coventry, Rhode Island, joggles
Messy Papercrafts, Temecula CA Messy Papercrafts
PaperCraft Clubhouse, Westbrook, Connecticut, papercraft clubhouse
Roadtique Boutique, Hilton NY
Runaway, Art & Craft Studio, NE Salem, Oregon runaway
Scrap-A-Latte, West Babylon NY scrap a latte
Scrapbook-N-Memories, Harrisonville Missouri Scrapbook N Memories
Simon Says Stamp, Columbus, Ohio simon says stamp
Topflight Stamps, Irmo, South Carolina topflight stamps
If you are interested in becoming a PaperArtsy stockist contact Dounia@paperartsy.com for more information
PaperArtsy Links
Facebook Group PaperArtsy People
Facebook Page PaperArtsy
Twitter twitter.com/paperartsy
Instagram instagram.com/paperartsy
Pinterest uk.pinterest.com/paperartsyhq
YouTube youtube.com/user/PaperArtsy


6 comments:
Amazing release, love all the samples, but especially the cyanotype prints. The grasses set is just stunning.
Another stunning stamp release, Alison! I too, am in love with your cyanotypes.
Absolutely beautiful projects Alison, I really love the cyanotype effects especially, but all of the different approaches have really inspired me
Great new release Alison! I especially love the gilded tag samples but am really interested in the cyanotype process too! Stef
These are so incredibly wonderful Alison! From red rubber to your amazing creations, I am smitten! Huge congratulations my friend! xx, Autumn
Thank you all so much - I'm thrilled with the reception these stamps have had, and it's so lovely to read your comments here too.
Alison x
Post a Comment