


Hi everyone, it's Etsuko (My favorite things) with you today, and I'm here to share with you Eco-Print using a selection of stamps designed by Gwen Lafleur. My project this time was card and tags for the winter season, but I also made the shadowbox using the themes Paper, Seeds and Twigs.

I've been wanting to share some of my eco-printing work on the here for a while, and since the theme this time was Paper, Seeds and Twigs, I thought it would be a good opportunity. It's the season of fallen leaves, so I started by collecting various leaves and nuts that have fallen in the nearby park and our small garden.-I did Crafty Patti's eco-printing as a reference.


I started the project based on these materials.

Now let's take a quick look at the general eco-printing way. I have prepared these goods; this binder is not always necessary but I made a board and a bolt to sandwich papers and leaves and watercolour papers.


Next I have prepared 1/3 cup of Alum mixed with 1 cup hot water added cold water to fill the two each 1.5 litres bottles. And rust water which made with PaperArtsy Rusting Powder.


Brush each piece of paper with Alum water. (Alum is also used medicinally as an astringent so it can be drying to your hands.)


Continue to layer paper and the greenery and flowers. Then a cardboard paper layer on the top and bottom of the watercolour paper.

Then put it in the binder and tighten the screw and place it in the cooking tray on a wire rack. In this case, if you have a large pot, that's fine.

The brick has been placed on top of the binder as a weight. Add the rust water and onion skin to the remaining alum water before heating. Bring to a boil and simmer over low heat for 45 minutes, turn off heat and add 1/2 cup white vinegar to help set the colour, Let it sit overnight.

These were the result of this eco-printing. These were some that worked well and some that didn't, but each of them seemed to be useful for something. In addition to watercolour paper, I also used thin washi paper, but since it was placed at the top of the layer, the colour was dyed but I couldn't print it in a clear shape. I think it would be nice if I could print well on washi, so I'm thinking of trying it at another opportunity.


I made three tags, card and a shadowbox using the eco-prints. I will show you three tags first.


I made the first tag using geranium leaf paper as the background. Print Gwen Lafleur stamp set 32 (EGL32) motif on piece of the eco-printing paper with Tsukineko VersaFine Clair (Acorn) then it tore off and hung it behind. I also painted with PaperArtsy Fresco Finish Chalk Acrylic- Slate on the A4 white card, and the Cyrillic stamp of Gwen Lafleur stamp set 31 (EGL31) was embossed with white powder, cut and layered.


The second tag.


The tag is decorated with three small tags using Gwen Lafleur stamp sets (EGL30 and EGL31) against the fern eco-print paper background. The eco-printing paper had the colour of rust water and onion skin that was enough but I added PaperArtsy Fresco Finish Chalk Acrylic - Snowflake to make the motifs stand out. The quote 'Nature' is from Alison Bomber stamp set 21 (EAB21).

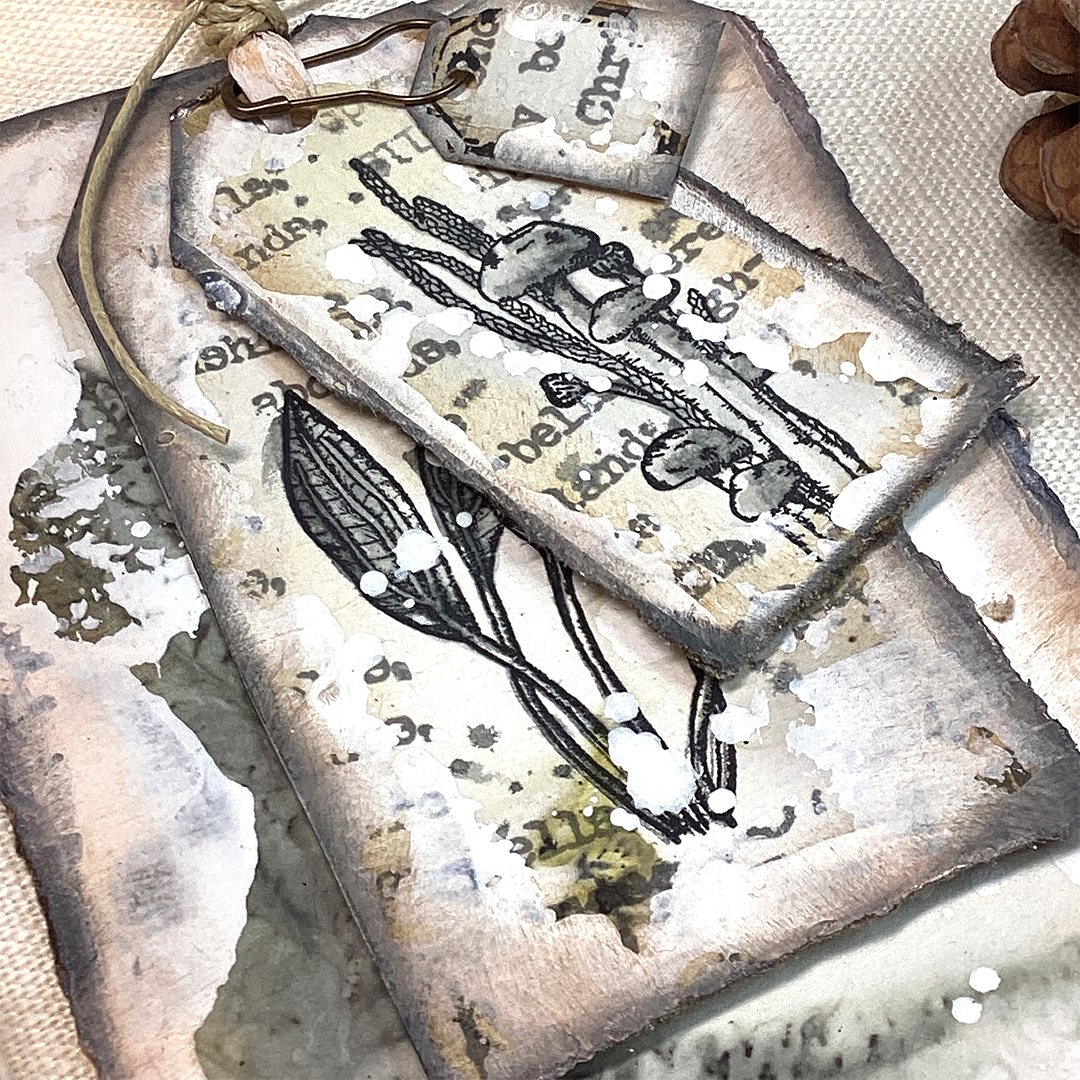


The third tag.

The background of this tag was a blurred eco-printing leaf shape, so I added PaperArtsy Fresco Finish Chalk Acrylic - Brown Shed and Toffee to create a natural colour. Also I used the EGL31 Islamic pattern with Tukineko VersaFine Clair (Acorn) and (Morning Mist) printed on it.

The small leaf part of eco-printing was made by cutting a circle for the focal point, and the EGL32 cell stamp was attached behind the circle.


I used this eco-printing paper for the card but still don't know what the leaf is. 😅 I decided on this because the flow of leaves little resembled a fir tree.


I wanted to add some variation on the card background, I painted Brown Shed, Toffee and Little Black Dress and used Snowflake around them to keep the colours down for the paper. On top of that, I wanted a little more variation, I added the Cyrillic stamp of EGL31 with mixed white and gold embossing powder, and randomly stamped the same stamp with Tsukineko-VersaFine Clair (Morning Mist). I cut the circles out of three small leaves eco-printing paper and used Ranger Distress Oxide- Vintage Photo and Distress Ink- Black Soot around them. As you can see in this picture, I originally planned to arrange the quote like this, but the relationship between the circles was unclear, so I abandoned this plan.

Some close up photos of part of the tags...


I painted the small circles with PaperArtsy Fresco Finish Chalk Acrylic- Caribbean Sea and Sea Glass on a A4 white card. Stamped EGL32 cell patterns using a stamp positioner, coloured it with a colour pencils and stamped again.

Cut out the cell patterns and drew highlights with a white gel pen.

After arranging the motifs, I found that colours and shapes were OK, so I glued them onto the black cardstock.

I measured the inside dimensions of the box, shaped the paper, cut it and pasted it inside the niche, scoring so the interior box walls also were covered.


For the outside of the box, I painted PaperArtsy Fresco Finish Chalk Acrylic- Caramel, Toffee and Brown Shed onto the A4 white card and stencilled PaperArtsy Stencil by Tracy Scott (PA234 and PA322) with Vintage Lace then I stamped EGL31 stamp with Tsukineko-VersaFine Clair (Acorn).

Once the paper was dry I embossed the EGL32 cell patterns with Ranger embossing powder Gold, Silver, white and Liquid Platinum and cut to the outside dimension and pasted it on.


Now I have created the world inside this using the materials of the theme Paper, Seeds and Twigs. For the rose leaves shape I cut and coloured it a little.

I then laid out collected materials leaves, acorn, rose hip, small pine cones and a twig in this box and splattered with Snow Flake.


The great thing about this project was that my husband and I enjoyed walking around a few parks looking for leaves and nuts and enjoying the wonderful autumn season. The second pleasure was the joy of opening the eco-printing, not knowing how the collected leaves would turn out, and the happiness of working on the organic base. This time I realized the way to create something is to go into nature and take in the smells of the air, the sounds and colours that change with the four seasons without thinking about anything. Thank you for giving me this opportunity of the Topic.
Thank you so much for visiting.
Etsuko xxx

Instagram: Pixienest
Pinterest: Etsuko N
5 comments:
A truly magnificent post full of inspiration and beauty, Etsuko. I shall be returning to this one again and again for tips and ideas. Your eco prints are stunning, and I adore both the frame and those wonderful layered tags, subtle and beautiful. Bravo!!
Alison x
WOW.. I for one struggle with earthy colors... this is stunning.. I love to do (boiled) ecodyeing as well... I see potential and inspiration!
Absolutely amazing :-O
and so inspiring. thank you :)
Oh Etsuko, your pieces are absolutely stunning. How you have combined the natural forms with some of the stamps is so clever and works so well.
These pieces of art are so inspiring and worthy of appearing in the Stampington Magazines.
Thankyou for an amazing presentation. Xx
Etsuko, I absolutely adore your tags and your shadow box, they are simply magnificent, wow!!!!
Thank you for this great post, useful, beautiful, so full of interest.
With love, Coco xxx
Post a Comment